@ranarehan
35I had 7 years experience in Wordpres,Linux,Web Hosting,and all about Handling and managing of the Server's Websites etc. Iam studying in 14th.I Love to work in
steemit.com/@ranarehanVOTING POWER100.00%
DOWNVOTE POWER100.00%
RESOURCE CREDITS100.00%
REPUTATION PROGRESS98.99%
Net Worth
0.351USD
STEEM
0.002STEEM
SBD
0.501SBD
Effective Power
5.007SP
├── Own SP
1.907SP
└── Incoming DelegationsDeleg
+3.101SP
Detailed Balance
| STEEM | ||
| balance | 0.002STEEM | STEEM |
| market_balance | 0.000STEEM | STEEM |
| savings_balance | 0.000STEEM | STEEM |
| reward_steem_balance | 0.000STEEM | STEEM |
| STEEM POWER | ||
| Own SP | 1.907SP | SP |
| Delegated Out | 0.000SP | SP |
| Delegation In | 3.101SP | SP |
| Effective Power | 5.007SP | SP |
| Reward SP (pending) | 0.000SP | SP |
| SBD | ||
| sbd_balance | 0.494SBD | SBD |
| sbd_conversions | 0.000SBD | SBD |
| sbd_market_balance | 0.000SBD | SBD |
| savings_sbd_balance | 0.007SBD | SBD |
| reward_sbd_balance | 0.000SBD | SBD |
{
  "balance": "0.002 STEEM",
  "savings_balance": "0.000 STEEM",
  "reward_steem_balance": "0.000 STEEM",
  "vesting_shares": "3101.205829 VESTS",
  "delegated_vesting_shares": "0.000000 VESTS",
  "received_vesting_shares": "5042.453977 VESTS",
  "sbd_balance": "0.494 SBD",
  "savings_sbd_balance": "0.007 SBD",
  "reward_sbd_balance": "0.000 SBD",
  "conversions": []
}
Account Info
| name | ranarehan |
| id | 695398 |
| rank | 253,888 |
| reputation | 12882297861 |
| created | 2018-01-30T04:46:12 |
| recovery_account | steem |
| proxy | None |
| post_count | 29 |
| comment_count | 0 |
| lifetime_vote_count | 0 |
| witnesses_voted_for | 0 |
| last_post | 2018-02-06T13:52:15 |
| last_root_post | 2018-02-06T13:52:15 |
| last_vote_time | 2018-02-02T06:13:36 |
| proxied_vsf_votes | 0, 0, 0, 0 |
| can_vote | 1 |
| voting_power | 0 |
| delayed_votes | 0 |
| balance | 0.002 STEEM |
| savings_balance | 0.000 STEEM |
| sbd_balance | 0.494 SBD |
| savings_sbd_balance | 0.007 SBD |
| vesting_shares | 3101.205829 VESTS |
| delegated_vesting_shares | 0.000000 VESTS |
| received_vesting_shares | 5042.453977 VESTS |
| reward_vesting_balance | 0.000000 VESTS |
| vesting_balance | 0.000 STEEM |
| vesting_withdraw_rate | 0.000000 VESTS |
| next_vesting_withdrawal | 1969-12-31T23:59:59 |
| withdrawn | 0 |
| to_withdraw | 0 |
| withdraw_routes | 0 |
| savings_withdraw_requests | 0 |
| last_account_recovery | 1970-01-01T00:00:00 |
| reset_account | null |
| last_owner_update | 1970-01-01T00:00:00 |
| last_account_update | 2018-01-30T13:18:51 |
| mined | No |
| sbd_seconds | 0 |
| sbd_last_interest_payment | 2018-03-19T06:50:30 |
| savings_sbd_last_interest_payment | 1970-01-01T00:00:00 |
{
  "id": 695398,
  "name": "ranarehan",
  "owner": {
    "weight_threshold": 1,
    "account_auths": [],
    "key_auths": [
      [
        "STM65TfX6A7Dtoqme4ziEPrEuT5y1oRiYiTr5Acz5HL62SpfmG2Sx",
        1
      ]
    ]
  },
  "active": {
    "weight_threshold": 1,
    "account_auths": [],
    "key_auths": [
      [
        "STM8Ydb1RuMYHmFGTF2Uh6W6jjFHHUoLS85CEwWYHv18nXEcAaN23",
        1
      ]
    ]
  },
  "posting": {
    "weight_threshold": 1,
    "account_auths": [
      [
        "dtube.app",
        1
      ]
    ],
    "key_auths": [
      [
        "STM6mvRshkTnKS2wWkujhUv9wHYCMSgHmufa2bmo7uNn7L4cDwmvG",
        1
      ]
    ]
  },
  "memo_key": "STM7c6pjTnUZob6zrFdtpFBFYGjoNBRzsNPmy83kZWdF5kVDShuDD",
  "json_metadata": "{\"profile\":{\"name\":\"Muhammad Rehan Aslam\",\"about\":\"I had 7 years experience in Wordpres,Linux,Web Hosting,and all about Handling and managing of the Server's Websites etc. Iam studying in 14th.I Love to work in \",\"location\":\"Shahzad Abad Colony ArifWala\",\"website\":\"https://www.letshostit.org/\",\"profile_image\":\"https://image.prntscr.com/image/xQPSNe5xR9m04eVyoORhNQ.jpeg\",\"cover_image\":\"https://image.prntscr.com/image/oO-OYg8kTWGrBdc7WJ7t8g.jpeg\"}}",
  "posting_json_metadata": "{\"profile\":{\"name\":\"Muhammad Rehan Aslam\",\"about\":\"I had 7 years experience in Wordpres,Linux,Web Hosting,and all about Handling and managing of the Server's Websites etc. Iam studying in 14th.I Love to work in \",\"location\":\"Shahzad Abad Colony ArifWala\",\"website\":\"https://www.letshostit.org/\",\"profile_image\":\"https://image.prntscr.com/image/xQPSNe5xR9m04eVyoORhNQ.jpeg\",\"cover_image\":\"https://image.prntscr.com/image/oO-OYg8kTWGrBdc7WJ7t8g.jpeg\"}}",
  "proxy": "",
  "last_owner_update": "1970-01-01T00:00:00",
  "last_account_update": "2018-01-30T13:18:51",
  "created": "2018-01-30T04:46:12",
  "mined": false,
  "recovery_account": "steem",
  "last_account_recovery": "1970-01-01T00:00:00",
  "reset_account": "null",
  "comment_count": 0,
  "lifetime_vote_count": 0,
  "post_count": 29,
  "can_vote": true,
  "voting_manabar": {
    "current_mana": "8143659806",
    "last_update_time": 1779082188
  },
  "downvote_manabar": {
    "current_mana": 2035914951,
    "last_update_time": 1779082188
  },
  "voting_power": 0,
  "balance": "0.002 STEEM",
  "savings_balance": "0.000 STEEM",
  "sbd_balance": "0.494 SBD",
  "sbd_seconds": "0",
  "sbd_seconds_last_update": "2018-03-19T06:50:30",
  "sbd_last_interest_payment": "2018-03-19T06:50:30",
  "savings_sbd_balance": "0.007 SBD",
  "savings_sbd_seconds": "0",
  "savings_sbd_seconds_last_update": "2018-02-07T05:16:18",
  "savings_sbd_last_interest_payment": "1970-01-01T00:00:00",
  "savings_withdraw_requests": 0,
  "reward_sbd_balance": "0.000 SBD",
  "reward_steem_balance": "0.000 STEEM",
  "reward_vesting_balance": "0.000000 VESTS",
  "reward_vesting_steem": "0.000 STEEM",
  "vesting_shares": "3101.205829 VESTS",
  "delegated_vesting_shares": "0.000000 VESTS",
  "received_vesting_shares": "5042.453977 VESTS",
  "vesting_withdraw_rate": "0.000000 VESTS",
  "next_vesting_withdrawal": "1969-12-31T23:59:59",
  "withdrawn": 0,
  "to_withdraw": 0,
  "withdraw_routes": 0,
  "curation_rewards": 0,
  "posting_rewards": 1272,
  "proxied_vsf_votes": [
    0,
    0,
    0,
    0
  ],
  "witnesses_voted_for": 0,
  "last_post": "2018-02-06T13:52:15",
  "last_root_post": "2018-02-06T13:52:15",
  "last_vote_time": "2018-02-02T06:13:36",
  "post_bandwidth": 0,
  "pending_claimed_accounts": 0,
  "vesting_balance": "0.000 STEEM",
  "reputation": "12882297861",
  "transfer_history": [],
  "market_history": [],
  "post_history": [],
  "vote_history": [],
  "other_history": [],
  "witness_votes": [],
  "tags_usage": [],
  "guest_bloggers": [],
  "rank": 253888
}
Withdraw Routes
| Incoming | Outgoing |
|---|---|
Empty | Empty |
{
  "incoming": [],
  "outgoing": []
}From Date
To Date
steemdelegated 3.101 SP to @ranarehan2026/05/18 05:29:48
steemdelegated 3.101 SP to @ranarehan
2026/05/18 05:29:48
| delegator | steem |
| delegatee | ranarehan |
| vesting shares | 5042.453977 VESTS |
| Transaction Info | Block #106149711/Trx af11ce7ae58af82ca97d665be088b4e6d052fbd8 |
View Raw JSON Data
{
  "trx_id": "af11ce7ae58af82ca97d665be088b4e6d052fbd8",
  "block": 106149711,
  "trx_in_block": 0,
  "op_in_trx": 0,
  "virtual_op": 0,
  "timestamp": "2026-05-18T05:29:48",
  "op": [
    "delegate_vesting_shares",
    {
      "delegator": "steem",
      "delegatee": "ranarehan",
      "vesting_shares": "5042.453977 VESTS"
    }
  ]
}steemdelegated 1.433 SP to @ranarehan2026/05/13 01:09:21
steemdelegated 1.433 SP to @ranarehan
2026/05/13 01:09:21
| delegator | steem |
| delegatee | ranarehan |
| vesting shares | 2330.243572 VESTS |
| Transaction Info | Block #106001232/Trx f5480506b8620a8908f0a95727b69944bd7d9082 |
View Raw JSON Data
{
  "trx_id": "f5480506b8620a8908f0a95727b69944bd7d9082",
  "block": 106001232,
  "trx_in_block": 1,
  "op_in_trx": 0,
  "virtual_op": 0,
  "timestamp": "2026-05-13T01:09:21",
  "op": [
    "delegate_vesting_shares",
    {
      "delegator": "steem",
      "delegatee": "ranarehan",
      "vesting_shares": "2330.243572 VESTS"
    }
  ]
}steemdelegated 3.108 SP to @ranarehan2026/04/26 04:42:42
steemdelegated 3.108 SP to @ranarehan
2026/04/26 04:42:42
| delegator | steem |
| delegatee | ranarehan |
| vesting shares | 5054.969733 VESTS |
| Transaction Info | Block #105517219/Trx 4c77cbe8b51628d21bf7aef020abbe468513a31b |
View Raw JSON Data
{
  "trx_id": "4c77cbe8b51628d21bf7aef020abbe468513a31b",
  "block": 105517219,
  "trx_in_block": 2,
  "op_in_trx": 0,
  "virtual_op": 0,
  "timestamp": "2026-04-26T04:42:42",
  "op": [
    "delegate_vesting_shares",
    {
      "delegator": "steem",
      "delegatee": "ranarehan",
      "vesting_shares": "5054.969733 VESTS"
    }
  ]
}steemdelegated 1.458 SP to @ranarehan2026/01/23 21:54:27
steemdelegated 1.458 SP to @ranarehan
2026/01/23 21:54:27
| delegator | steem |
| delegatee | ranarehan |
| vesting shares | 2371.790391 VESTS |
| Transaction Info | Block #102868711/Trx 770699ee7451a1c5a57de664b420dfb00ffaad06 |
View Raw JSON Data
{
  "trx_id": "770699ee7451a1c5a57de664b420dfb00ffaad06",
  "block": 102868711,
  "trx_in_block": 0,
  "op_in_trx": 0,
  "virtual_op": 0,
  "timestamp": "2026-01-23T21:54:27",
  "op": [
    "delegate_vesting_shares",
    {
      "delegator": "steem",
      "delegatee": "ranarehan",
      "vesting_shares": "2371.790391 VESTS"
    }
  ]
}steemdelegated 1.559 SP to @ranarehan2024/12/17 17:05:12
steemdelegated 1.559 SP to @ranarehan
2024/12/17 17:05:12
| delegator | steem |
| delegatee | ranarehan |
| vesting shares | 2536.009588 VESTS |
| Transaction Info | Block #91314939/Trx 584b57792a4732e808394e1ad2178914dbbf8c64 |
View Raw JSON Data
{
  "trx_id": "584b57792a4732e808394e1ad2178914dbbf8c64",
  "block": 91314939,
  "trx_in_block": 0,
  "op_in_trx": 0,
  "virtual_op": 0,
  "timestamp": "2024-12-17T17:05:12",
  "op": [
    "delegate_vesting_shares",
    {
      "delegator": "steem",
      "delegatee": "ranarehan",
      "vesting_shares": "2536.009588 VESTS"
    }
  ]
}steemdelegated 1.663 SP to @ranarehan2023/11/14 08:46:48
steemdelegated 1.663 SP to @ranarehan
2023/11/14 08:46:48
| delegator | steem |
| delegatee | ranarehan |
| vesting shares | 2705.143120 VESTS |
| Transaction Info | Block #79869098/Trx c79ed35026973bfdc68dffd3a70f0c8480d96ce8 |
View Raw JSON Data
{
  "trx_id": "c79ed35026973bfdc68dffd3a70f0c8480d96ce8",
  "block": 79869098,
  "trx_in_block": 8,
  "op_in_trx": 0,
  "virtual_op": 0,
  "timestamp": "2023-11-14T08:46:48",
  "op": [
    "delegate_vesting_shares",
    {
      "delegator": "steem",
      "delegatee": "ranarehan",
      "vesting_shares": "2705.143120 VESTS"
    }
  ]
}steemdelegated 3.469 SP to @ranarehan2023/09/22 09:27:21
steemdelegated 3.469 SP to @ranarehan
2023/09/22 09:27:21
| delegator | steem |
| delegatee | ranarehan |
| vesting shares | 5642.051906 VESTS |
| Transaction Info | Block #78361745/Trx f2bf09def5ff70ed467e758c1ef852274a371803 |
View Raw JSON Data
{
  "trx_id": "f2bf09def5ff70ed467e758c1ef852274a371803",
  "block": 78361745,
  "trx_in_block": 1,
  "op_in_trx": 0,
  "virtual_op": 0,
  "timestamp": "2023-09-22T09:27:21",
  "op": [
    "delegate_vesting_shares",
    {
      "delegator": "steem",
      "delegatee": "ranarehan",
      "vesting_shares": "5642.051906 VESTS"
    }
  ]
}steemdelegated 3.606 SP to @ranarehan2022/11/03 17:02:03
steemdelegated 3.606 SP to @ranarehan
2022/11/03 17:02:03
| delegator | steem |
| delegatee | ranarehan |
| vesting shares | 5864.103344 VESTS |
| Transaction Info | Block #69119627/Trx 485a6b411abb1048feb16e55a698ffedc1c80e43 |
View Raw JSON Data
{
  "trx_id": "485a6b411abb1048feb16e55a698ffedc1c80e43",
  "block": 69119627,
  "trx_in_block": 4,
  "op_in_trx": 0,
  "virtual_op": 0,
  "timestamp": "2022-11-03T17:02:03",
  "op": [
    "delegate_vesting_shares",
    {
      "delegator": "steem",
      "delegatee": "ranarehan",
      "vesting_shares": "5864.103344 VESTS"
    }
  ]
}steemdelegated 3.741 SP to @ranarehan2022/01/17 22:18:45
steemdelegated 3.741 SP to @ranarehan
2022/01/17 22:18:45
| delegator | steem |
| delegatee | ranarehan |
| vesting shares | 6084.210945 VESTS |
| Transaction Info | Block #60822970/Trx b2cac309f08f41aacebf19a74996349cb0f77a78 |
View Raw JSON Data
{
  "trx_id": "b2cac309f08f41aacebf19a74996349cb0f77a78",
  "block": 60822970,
  "trx_in_block": 15,
  "op_in_trx": 0,
  "virtual_op": 0,
  "timestamp": "2022-01-17T22:18:45",
  "op": [
    "delegate_vesting_shares",
    {
      "delegator": "steem",
      "delegatee": "ranarehan",
      "vesting_shares": "6084.210945 VESTS"
    }
  ]
}steemdelegated 3.854 SP to @ranarehan2021/06/14 05:31:42
steemdelegated 3.854 SP to @ranarehan
2021/06/14 05:31:42
| delegator | steem |
| delegatee | ranarehan |
| vesting shares | 6268.405233 VESTS |
| Transaction Info | Block #54613339/Trx 51a4eea6d8d8ceb488439896368883ea6c2be503 |
View Raw JSON Data
{
  "trx_id": "51a4eea6d8d8ceb488439896368883ea6c2be503",
  "block": 54613339,
  "trx_in_block": 1,
  "op_in_trx": 0,
  "virtual_op": 0,
  "timestamp": "2021-06-14T05:31:42",
  "op": [
    "delegate_vesting_shares",
    {
      "delegator": "steem",
      "delegatee": "ranarehan",
      "vesting_shares": "6268.405233 VESTS"
    }
  ]
}steemdelegated 3.970 SP to @ranarehan2020/12/11 15:44:36
steemdelegated 3.970 SP to @ranarehan
2020/12/11 15:44:36
| delegator | steem |
| delegatee | ranarehan |
| vesting shares | 6455.827207 VESTS |
| Transaction Info | Block #49360625/Trx e7e0b36b385078b60e460d4d51242fe7fcfbc667 |
View Raw JSON Data
{
  "trx_id": "e7e0b36b385078b60e460d4d51242fe7fcfbc667",
  "block": 49360625,
  "trx_in_block": 2,
  "op_in_trx": 0,
  "virtual_op": 0,
  "timestamp": "2020-12-11T15:44:36",
  "op": [
    "delegate_vesting_shares",
    {
      "delegator": "steem",
      "delegatee": "ranarehan",
      "vesting_shares": "6455.827207 VESTS"
    }
  ]
}steemdelegated 1.176 SP to @ranarehan2020/12/06 09:20:39
steemdelegated 1.176 SP to @ranarehan
2020/12/06 09:20:39
| delegator | steem |
| delegatee | ranarehan |
| vesting shares | 1912.543513 VESTS |
| Transaction Info | Block #49212155/Trx b4a1ad5594e21697b7fd7e2613e85548e467b209 |
View Raw JSON Data
{
  "trx_id": "b4a1ad5594e21697b7fd7e2613e85548e467b209",
  "block": 49212155,
  "trx_in_block": 1,
  "op_in_trx": 0,
  "virtual_op": 0,
  "timestamp": "2020-12-06T09:20:39",
  "op": [
    "delegate_vesting_shares",
    {
      "delegator": "steem",
      "delegatee": "ranarehan",
      "vesting_shares": "1912.543513 VESTS"
    }
  ]
}steemdelegated 3.973 SP to @ranarehan2020/12/05 19:22:33
steemdelegated 3.973 SP to @ranarehan
2020/12/05 19:22:33
| delegator | steem |
| delegatee | ranarehan |
| vesting shares | 6462.035061 VESTS |
| Transaction Info | Block #49195710/Trx e7e75154f92457aa9f3b2ef242fb901bb226ab03 |
View Raw JSON Data
{
  "trx_id": "e7e75154f92457aa9f3b2ef242fb901bb226ab03",
  "block": 49195710,
  "trx_in_block": 35,
  "op_in_trx": 0,
  "virtual_op": 0,
  "timestamp": "2020-12-05T19:22:33",
  "op": [
    "delegate_vesting_shares",
    {
      "delegator": "steem",
      "delegatee": "ranarehan",
      "vesting_shares": "6462.035061 VESTS"
    }
  ]
}steemdelegated 1.181 SP to @ranarehan2020/11/03 01:11:33
steemdelegated 1.181 SP to @ranarehan
2020/11/03 01:11:33
| delegator | steem |
| delegatee | ranarehan |
| vesting shares | 1920.017158 VESTS |
| Transaction Info | Block #48269052/Trx d3657f4050d17238bacd35d7b16ebe2feb9f4b2c |
View Raw JSON Data
{
  "trx_id": "d3657f4050d17238bacd35d7b16ebe2feb9f4b2c",
  "block": 48269052,
  "trx_in_block": 4,
  "op_in_trx": 0,
  "virtual_op": 0,
  "timestamp": "2020-11-03T01:11:33",
  "op": [
    "delegate_vesting_shares",
    {
      "delegator": "steem",
      "delegatee": "ranarehan",
      "vesting_shares": "1920.017158 VESTS"
    }
  ]
}steemdelegated 4.098 SP to @ranarehan2020/05/09 10:22:57
steemdelegated 4.098 SP to @ranarehan
2020/05/09 10:22:57
| delegator | steem |
| delegatee | ranarehan |
| vesting shares | 6664.840420 VESTS |
| Transaction Info | Block #43222471/Trx da68d64fda0faa371c0f47fdd53d8b3ddfaf6b65 |
View Raw JSON Data
{
  "trx_id": "da68d64fda0faa371c0f47fdd53d8b3ddfaf6b65",
  "block": 43222471,
  "trx_in_block": 9,
  "op_in_trx": 0,
  "virtual_op": 0,
  "timestamp": "2020-05-09T10:22:57",
  "op": [
    "delegate_vesting_shares",
    {
      "delegator": "steem",
      "delegatee": "ranarehan",
      "vesting_shares": "6664.840420 VESTS"
    }
  ]
}steemdelegated 1.201 SP to @ranarehan2020/05/08 14:40:48
steemdelegated 1.201 SP to @ranarehan
2020/05/08 14:40:48
| delegator | steem |
| delegatee | ranarehan |
| vesting shares | 1953.311140 VESTS |
| Transaction Info | Block #43199392/Trx 3cca2bd04978bcc585f6cabae79e3016219d3144 |
View Raw JSON Data
{
  "trx_id": "3cca2bd04978bcc585f6cabae79e3016219d3144",
  "block": 43199392,
  "trx_in_block": 9,
  "op_in_trx": 0,
  "virtual_op": 0,
  "timestamp": "2020-05-08T14:40:48",
  "op": [
    "delegate_vesting_shares",
    {
      "delegator": "steem",
      "delegatee": "ranarehan",
      "vesting_shares": "1953.311140 VESTS"
    }
  ]
}2020/01/30 09:13:45
2020/01/30 09:13:45
| parent author | ranarehan |
| parent permlink | free-rdp-without-credit-card-free-nvidia-rdp |
| author | steemitboard |
| permlink | steemitboard-notify-ranarehan-20200130t091344000z |
| title | |
| body | Congratulations @ranarehan! You received a personal award! <table><tr><td>https://steemitimages.com/70x70/http://steemitboard.com/@ranarehan/birthday2.png</td><td>Happy Birthday! - You are on the Steem blockchain for 2 years!</td></tr></table> <sub>_You can view [your badges on your Steem Board](https://steemitboard.com/@ranarehan) and compare to others on the [Steem Ranking](https://steemitboard.com/ranking/index.php?name=ranarehan)_</sub> ###### [Vote for @Steemitboard as a witness](https://v2.steemconnect.com/sign/account-witness-vote?witness=steemitboard&approve=1) to get one more award and increased upvotes! |
| json metadata | {"image":["https://steemitboard.com/img/notify.png"]} |
| Transaction Info | Block #40376950/Trx bc1241754284e79a2e35abfbd70cb32c99be3274 |
View Raw JSON Data
{
  "trx_id": "bc1241754284e79a2e35abfbd70cb32c99be3274",
  "block": 40376950,
  "trx_in_block": 5,
  "op_in_trx": 0,
  "virtual_op": 0,
  "timestamp": "2020-01-30T09:13:45",
  "op": [
    "comment",
    {
      "parent_author": "ranarehan",
      "parent_permlink": "free-rdp-without-credit-card-free-nvidia-rdp",
      "author": "steemitboard",
      "permlink": "steemitboard-notify-ranarehan-20200130t091344000z",
      "title": "",
      "body": "Congratulations @ranarehan! You received a personal award!\n\n<table><tr><td>https://steemitimages.com/70x70/http://steemitboard.com/@ranarehan/birthday2.png</td><td>Happy Birthday! - You are on the Steem blockchain for 2 years!</td></tr></table>\n\n<sub>_You can view [your badges on your Steem Board](https://steemitboard.com/@ranarehan) and compare to others on the [Steem Ranking](https://steemitboard.com/ranking/index.php?name=ranarehan)_</sub>\n\n\n###### [Vote for @Steemitboard as a witness](https://v2.steemconnect.com/sign/account-witness-vote?witness=steemitboard&approve=1) to get one more award and increased upvotes!",
      "json_metadata": "{\"image\":[\"https://steemitboard.com/img/notify.png\"]}"
    }
  ]
}steemdelegated 4.216 SP to @ranarehan2019/06/10 12:56:24
steemdelegated 4.216 SP to @ranarehan
2019/06/10 12:56:24
| delegator | steem |
| delegatee | ranarehan |
| vesting shares | 6856.598640 VESTS |
| Transaction Info | Block #33677562/Trx f7aa1e94e9904090d9720e438616eed84ed8fac9 |
View Raw JSON Data
{
  "trx_id": "f7aa1e94e9904090d9720e438616eed84ed8fac9",
  "block": 33677562,
  "trx_in_block": 4,
  "op_in_trx": 0,
  "virtual_op": 0,
  "timestamp": "2019-06-10T12:56:24",
  "op": [
    "delegate_vesting_shares",
    {
      "delegator": "steem",
      "delegatee": "ranarehan",
      "vesting_shares": "6856.598640 VESTS"
    }
  ]
}2019/01/30 10:45:12
2019/01/30 10:45:12
| parent author | ranarehan |
| parent permlink | free-rdp-without-credit-card-free-nvidia-rdp |
| author | steemitboard |
| permlink | steemitboard-notify-ranarehan-20190130t104512000z |
| title | |
| body | Congratulations @ranarehan! You received a personal award! <table><tr><td>https://steemitimages.com/70x70/http://steemitboard.com/@ranarehan/birthday1.png</td><td>Happy Birthday! - You are on the Steem blockchain for 1 year!</td></tr></table> <sub>_[Click here to view your Board](https://steemitboard.com/@ranarehan)_</sub> > Support [SteemitBoard's project](https://steemit.com/@steemitboard)! **[Vote for its witness](https://v2.steemconnect.com/sign/account-witness-vote?witness=steemitboard&approve=1)** and **get one more award**! |
| json metadata | {"image":["https://steemitboard.com/img/notify.png"]} |
| Transaction Info | Block #29906442/Trx 51962eaaf1a6b01c37188de466655d8e59f30a6b |
View Raw JSON Data
{
  "trx_id": "51962eaaf1a6b01c37188de466655d8e59f30a6b",
  "block": 29906442,
  "trx_in_block": 10,
  "op_in_trx": 0,
  "virtual_op": 0,
  "timestamp": "2019-01-30T10:45:12",
  "op": [
    "comment",
    {
      "parent_author": "ranarehan",
      "parent_permlink": "free-rdp-without-credit-card-free-nvidia-rdp",
      "author": "steemitboard",
      "permlink": "steemitboard-notify-ranarehan-20190130t104512000z",
      "title": "",
      "body": "Congratulations @ranarehan! You received a personal award!\n\n<table><tr><td>https://steemitimages.com/70x70/http://steemitboard.com/@ranarehan/birthday1.png</td><td>Happy Birthday! - You are on the Steem blockchain for 1 year!</td></tr></table>\n\n<sub>_[Click here to view your Board](https://steemitboard.com/@ranarehan)_</sub>\n\n\n> Support [SteemitBoard's project](https://steemit.com/@steemitboard)! **[Vote for its witness](https://v2.steemconnect.com/sign/account-witness-vote?witness=steemitboard&approve=1)** and **get one more award**!",
      "json_metadata": "{\"image\":[\"https://steemitboard.com/img/notify.png\"]}"
    }
  ]
}steemdelegated 4.338 SP to @ranarehan2018/06/18 07:19:48
steemdelegated 4.338 SP to @ranarehan
2018/06/18 07:19:48
| delegator | steem |
| delegatee | ranarehan |
| vesting shares | 7055.756801 VESTS |
| Transaction Info | Block #23423545/Trx 8b76b7774335f4b36c0b66c082199a0db3bc077d |
View Raw JSON Data
{
  "trx_id": "8b76b7774335f4b36c0b66c082199a0db3bc077d",
  "block": 23423545,
  "trx_in_block": 23,
  "op_in_trx": 0,
  "virtual_op": 0,
  "timestamp": "2018-06-18T07:19:48",
  "op": [
    "delegate_vesting_shares",
    {
      "delegator": "steem",
      "delegatee": "ranarehan",
      "vesting_shares": "7055.756801 VESTS"
    }
  ]
}steemdelegated 16.918 SP to @ranarehan2018/03/19 11:07:54
steemdelegated 16.918 SP to @ranarehan
2018/03/19 11:07:54
| delegator | steem |
| delegatee | ranarehan |
| vesting shares | 27514.650993 VESTS |
| Transaction Info | Block #20810245/Trx 83fe25ed241de745f43956ee1d41765d3fed98d0 |
View Raw JSON Data
{
  "trx_id": "83fe25ed241de745f43956ee1d41765d3fed98d0",
  "block": 20810245,
  "trx_in_block": 49,
  "op_in_trx": 0,
  "virtual_op": 0,
  "timestamp": "2018-03-19T11:07:54",
  "op": [
    "delegate_vesting_shares",
    {
      "delegator": "steem",
      "delegatee": "ranarehan",
      "vesting_shares": "27514.650993 VESTS"
    }
  ]
}ranarehanclaimed reward balance: 0.494 SBD, 0.160 SP2018/03/19 06:50:30
ranarehanclaimed reward balance: 0.494 SBD, 0.160 SP
2018/03/19 06:50:30
| account | ranarehan |
| reward steem | 0.000 STEEM |
| reward sbd | 0.494 SBD |
| reward vests | 259.687515 VESTS |
| Transaction Info | Block #20805097/Trx fd1566f93bbb794da57c361a4c76dbe00df8446f |
View Raw JSON Data
{
  "trx_id": "fd1566f93bbb794da57c361a4c76dbe00df8446f",
  "block": 20805097,
  "trx_in_block": 7,
  "op_in_trx": 0,
  "virtual_op": 0,
  "timestamp": "2018-03-19T06:50:30",
  "op": [
    "claim_reward_balance",
    {
      "account": "ranarehan",
      "reward_steem": "0.000 STEEM",
      "reward_sbd": "0.494 SBD",
      "reward_vests": "259.687515 VESTS"
    }
  ]
}ranarehanreceived 0.450 SBD, 0.145 SP author reward for @ranarehan / free-rdp-without-credit-card-free-nvidia-rdp2018/02/13 13:52:15
ranarehanreceived 0.450 SBD, 0.145 SP author reward for @ranarehan / free-rdp-without-credit-card-free-nvidia-rdp
2018/02/13 13:52:15
| author | ranarehan |
| permlink | free-rdp-without-credit-card-free-nvidia-rdp |
| sbd payout | 0.450 SBD |
| steem payout | 0.000 STEEM |
| vesting payout | 235.142471 VESTS |
| Transaction Info | Block #19835224/Virtual Operation #10 |
View Raw JSON Data
{
  "trx_id": "0000000000000000000000000000000000000000",
  "block": 19835224,
  "trx_in_block": 4294967295,
  "op_in_trx": 0,
  "virtual_op": 10,
  "timestamp": "2018-02-13T13:52:15",
  "op": [
    "author_reward",
    {
      "author": "ranarehan",
      "permlink": "free-rdp-without-credit-card-free-nvidia-rdp",
      "sbd_payout": "0.450 SBD",
      "steem_payout": "0.000 STEEM",
      "vesting_payout": "235.142471 VESTS"
    }
  ]
}ranarehanreceived 0.010 SBD, 0.004 SP author reward for @ranarehan / re-techmojo-building-a-very-compact-gaming-pc-part-3-review-and-benchmark-results-are-in-20180131t090512603z2018/02/07 09:05:15
ranarehanreceived 0.010 SBD, 0.004 SP author reward for @ranarehan / re-techmojo-building-a-very-compact-gaming-pc-part-3-review-and-benchmark-results-are-in-20180131t090512603z
2018/02/07 09:05:15
| author | ranarehan |
| permlink | re-techmojo-building-a-very-compact-gaming-pc-part-3-review-and-benchmark-results-are-in-20180131t090512603z |
| sbd payout | 0.010 SBD |
| steem payout | 0.000 STEEM |
| vesting payout | 6.136109 VESTS |
| Transaction Info | Block #19657019/Virtual Operation #26 |
View Raw JSON Data
{
  "trx_id": "0000000000000000000000000000000000000000",
  "block": 19657019,
  "trx_in_block": 4294967295,
  "op_in_trx": 0,
  "virtual_op": 26,
  "timestamp": "2018-02-07T09:05:15",
  "op": [
    "author_reward",
    {
      "author": "ranarehan",
      "permlink": "re-techmojo-building-a-very-compact-gaming-pc-part-3-review-and-benchmark-results-are-in-20180131t090512603z",
      "sbd_payout": "0.010 SBD",
      "steem_payout": "0.000 STEEM",
      "vesting_payout": "6.136109 VESTS"
    }
  ]
}ranarehanblockchain operation: transfer to savings2018/02/07 05:16:18
ranarehanblockchain operation: transfer to savings
2018/02/07 05:16:18
| from | ranarehan |
| to | ranarehan |
| amount | 0.007 SBD |
| memo | |
| Transaction Info | Block #19652447/Trx 4591056b985e4f11a0cbcb7bde3e552223d9dd4e |
View Raw JSON Data
{
  "trx_id": "4591056b985e4f11a0cbcb7bde3e552223d9dd4e",
  "block": 19652447,
  "trx_in_block": 3,
  "op_in_trx": 0,
  "virtual_op": 0,
  "timestamp": "2018-02-07T05:16:18",
  "op": [
    "transfer_to_savings",
    {
      "from": "ranarehan",
      "to": "ranarehan",
      "amount": "0.007 SBD",
      "memo": ""
    }
  ]
}hottopicsent 0.001 STEEM to @ranarehan- "Resteem to 13.000+ Follower . Send 1 SBD or 3 STEEM to @hottopic ( URL as memo ) Service Active"2018/02/06 18:33:03
hottopicsent 0.001 STEEM to @ranarehan- "Resteem to 13.000+ Follower . Send 1 SBD or 3 STEEM to @hottopic ( URL as memo ) Service Active"
2018/02/06 18:33:03
| from | hottopic |
| to | ranarehan |
| amount | 0.001 STEEM |
| memo | Resteem to 13.000+ Follower . Send 1 SBD or 3 STEEM to @hottopic ( URL as memo ) Service Active |
| Transaction Info | Block #19639597/Trx 292a7d750316713e5e51fd875a7c986073c8d34d |
View Raw JSON Data
{
  "trx_id": "292a7d750316713e5e51fd875a7c986073c8d34d",
  "block": 19639597,
  "trx_in_block": 38,
  "op_in_trx": 0,
  "virtual_op": 0,
  "timestamp": "2018-02-06T18:33:03",
  "op": [
    "transfer",
    {
      "from": "hottopic",
      "to": "ranarehan",
      "amount": "0.001 STEEM",
      "memo": "Resteem to 13.000+ Follower . Send 1 SBD or 3 STEEM to @hottopic ( URL as memo ) Service Active"
    }
  ]
}hottopicsent 0.001 STEEM to @ranarehan- "Resteem to 13.000+ Follower . Send 1 SBD or 3 STEEM to @hottopic ( URL as memo ) Service Active"2018/02/06 18:09:24
hottopicsent 0.001 STEEM to @ranarehan- "Resteem to 13.000+ Follower . Send 1 SBD or 3 STEEM to @hottopic ( URL as memo ) Service Active"
2018/02/06 18:09:24
| from | hottopic |
| to | ranarehan |
| amount | 0.001 STEEM |
| memo | Resteem to 13.000+ Follower . Send 1 SBD or 3 STEEM to @hottopic ( URL as memo ) Service Active |
| Transaction Info | Block #19639126/Trx f9f458fbec7677c399bf71b7544e5ed2b04cbbd7 |
View Raw JSON Data
{
  "trx_id": "f9f458fbec7677c399bf71b7544e5ed2b04cbbd7",
  "block": 19639126,
  "trx_in_block": 38,
  "op_in_trx": 0,
  "virtual_op": 0,
  "timestamp": "2018-02-06T18:09:24",
  "op": [
    "transfer",
    {
      "from": "hottopic",
      "to": "ranarehan",
      "amount": "0.001 STEEM",
      "memo": "Resteem to 13.000+ Follower . Send 1 SBD or 3 STEEM to @hottopic ( URL as memo ) Service Active"
    }
  ]
}ranarehanreceived 0.034 SBD, 0.011 SP author reward for @ranarehan / sony-vegas-pro-13-crack-serial-key-keygen-crack-full2018/02/06 17:43:57
ranarehanreceived 0.034 SBD, 0.011 SP author reward for @ranarehan / sony-vegas-pro-13-crack-serial-key-keygen-crack-full
2018/02/06 17:43:57
| author | ranarehan |
| permlink | sony-vegas-pro-13-crack-serial-key-keygen-crack-full |
| sbd payout | 0.034 SBD |
| steem payout | 0.000 STEEM |
| vesting payout | 18.408935 VESTS |
| Transaction Info | Block #19638616/Virtual Operation #3 |
View Raw JSON Data
{
  "trx_id": "0000000000000000000000000000000000000000",
  "block": 19638616,
  "trx_in_block": 4294967295,
  "op_in_trx": 0,
  "virtual_op": 3,
  "timestamp": "2018-02-06T17:43:57",
  "op": [
    "author_reward",
    {
      "author": "ranarehan",
      "permlink": "sony-vegas-pro-13-crack-serial-key-keygen-crack-full",
      "sbd_payout": "0.034 SBD",
      "steem_payout": "0.000 STEEM",
      "vesting_payout": "18.408935 VESTS"
    }
  ]
}steemdelegated 17.118 SP to @ranarehan2018/02/06 15:38:27
steemdelegated 17.118 SP to @ranarehan
2018/02/06 15:38:27
| delegator | steem |
| delegatee | ranarehan |
| vesting shares | 27840.056425 VESTS |
| Transaction Info | Block #19636107/Trx d43e1bb7e9afd27bd75286de1695ac164d855cbb |
View Raw JSON Data
{
  "trx_id": "d43e1bb7e9afd27bd75286de1695ac164d855cbb",
  "block": 19636107,
  "trx_in_block": 19,
  "op_in_trx": 0,
  "virtual_op": 0,
  "timestamp": "2018-02-06T15:38:27",
  "op": [
    "delegate_vesting_shares",
    {
      "delegator": "steem",
      "delegatee": "ranarehan",
      "vesting_shares": "27840.056425 VESTS"
    }
  ]
}smartsteemupvoted (2.66%) @ranarehan / free-rdp-without-credit-card-free-nvidia-rdp2018/02/06 14:30:00
smartsteemupvoted (2.66%) @ranarehan / free-rdp-without-credit-card-free-nvidia-rdp
2018/02/06 14:30:00
| voter | smartsteem |
| author | ranarehan |
| permlink | free-rdp-without-credit-card-free-nvidia-rdp |
| weight | 266 (2.66%) |
| Transaction Info | Block #19634738/Trx b47af2582302344b8f8a2d1e9ee2aa49f8792be5 |
View Raw JSON Data
{
  "trx_id": "b47af2582302344b8f8a2d1e9ee2aa49f8792be5",
  "block": 19634738,
  "trx_in_block": 45,
  "op_in_trx": 0,
  "virtual_op": 0,
  "timestamp": "2018-02-06T14:30:00",
  "op": [
    "vote",
    {
      "voter": "smartsteem",
      "author": "ranarehan",
      "permlink": "free-rdp-without-credit-card-free-nvidia-rdp",
      "weight": 266
    }
  ]
}steillerupvoted (100.00%) @ranarehan / free-rdp-without-credit-card-free-nvidia-rdp2018/02/06 14:21:00
steillerupvoted (100.00%) @ranarehan / free-rdp-without-credit-card-free-nvidia-rdp
2018/02/06 14:21:00
| voter | steiller |
| author | ranarehan |
| permlink | free-rdp-without-credit-card-free-nvidia-rdp |
| weight | 10000 (100.00%) |
| Transaction Info | Block #19634558/Trx a15734844b354a90b607814f78f2581039ff9abc |
View Raw JSON Data
{
  "trx_id": "a15734844b354a90b607814f78f2581039ff9abc",
  "block": 19634558,
  "trx_in_block": 10,
  "op_in_trx": 0,
  "virtual_op": 0,
  "timestamp": "2018-02-06T14:21:00",
  "op": [
    "vote",
    {
      "voter": "steiller",
      "author": "ranarehan",
      "permlink": "free-rdp-without-credit-card-free-nvidia-rdp",
      "weight": 10000
    }
  ]
}ranarehansent 0.500 SBD to @smartsteem- "https://steemit.com/free/@ranarehan/free-rdp-without-credit-card-free-nvidia-rdp"2018/02/06 13:53:39
ranarehansent 0.500 SBD to @smartsteem- "https://steemit.com/free/@ranarehan/free-rdp-without-credit-card-free-nvidia-rdp"
2018/02/06 13:53:39
| from | ranarehan |
| to | smartsteem |
| amount | 0.500 SBD |
| memo | https://steemit.com/free/@ranarehan/free-rdp-without-credit-card-free-nvidia-rdp |
| Transaction Info | Block #19634011/Trx 9c9175ca5378ac01be95fad97c56968ffa3c63cf |
View Raw JSON Data
{
  "trx_id": "9c9175ca5378ac01be95fad97c56968ffa3c63cf",
  "block": 19634011,
  "trx_in_block": 34,
  "op_in_trx": 0,
  "virtual_op": 0,
  "timestamp": "2018-02-06T13:53:39",
  "op": [
    "transfer",
    {
      "from": "ranarehan",
      "to": "smartsteem",
      "amount": "0.500 SBD",
      "memo": "https://steemit.com/free/@ranarehan/free-rdp-without-credit-card-free-nvidia-rdp"
    }
  ]
}mikhaylaupvoted (100.00%) @ranarehan / free-rdp-without-credit-card-free-nvidia-rdp2018/02/06 13:53:12
mikhaylaupvoted (100.00%) @ranarehan / free-rdp-without-credit-card-free-nvidia-rdp
2018/02/06 13:53:12
| voter | mikhayla |
| author | ranarehan |
| permlink | free-rdp-without-credit-card-free-nvidia-rdp |
| weight | 10000 (100.00%) |
| Transaction Info | Block #19634002/Trx 364f4adfb0c9b425d7b9aa8c13617ddbcf04bbd1 |
View Raw JSON Data
{
  "trx_id": "364f4adfb0c9b425d7b9aa8c13617ddbcf04bbd1",
  "block": 19634002,
  "trx_in_block": 14,
  "op_in_trx": 0,
  "virtual_op": 0,
  "timestamp": "2018-02-06T13:53:12",
  "op": [
    "vote",
    {
      "voter": "mikhayla",
      "author": "ranarehan",
      "permlink": "free-rdp-without-credit-card-free-nvidia-rdp",
      "weight": 10000
    }
  ]
}ranarehanpublished a new post: free-rdp-without-credit-card-free-nvidia-rdp2018/02/06 13:52:15
ranarehanpublished a new post: free-rdp-without-credit-card-free-nvidia-rdp
2018/02/06 13:52:15
| parent author | |
| parent permlink | free |
| author | ranarehan |
| permlink | free-rdp-without-credit-card-free-nvidia-rdp |
| title | Free RDP Without Credit Card Free NVIDIA RDP |
| body | <h1 style="text-align: center;">FreeRDPFrom NVIDIA 24 Hours</h1> This is A Tutorial To Get Free <strong>Nvidia RDP</strong>. With high Speed <strong>1GBP/s</strong> internet <strong>8GB</strong> Solid RAM And<strong> 2GB</strong> Dedicated <strong>Graphic Card</strong>. Free <strong>RDP NAVIDA</strong> GRID <strong>Valid For 24 Hours Only.</strong> Just Try These Simple Trick to Get This Free RDP From NVIDIA. Please keep in mind this RDP is valid for only 24 Hours If You Want Another RDP Just Try The Link Given Below.Subscribe Us Support Us Keep Sharing ;) <h3>Toady I Will teach you how you can get <strong>Free NVIDIA RDP </strong></h3> <strong>Business Email</strong>: <a href="https://www.letshostit.org/wp-content/uploads/2017/07/en">https://temp-mail.org/en/</a> <strong>Phone Number</strong>: <a href="https://www.letshostit.org/wp-content/uploads/2017/07/www.textnow.com">https://www.textnow.com/ </a>(Area Code 902) <strong>Phone Number</strong>: <a href="https://www.letshostit.org/wp-content/uploads/2017/07/21ws">http://tinyical.com/21ws</a> https://www.youtube.com/embed/8KMxuHJAPsk <h4 style="text-align: center;"><strong>Another Links For Getting FREE .. RDP</strong></h4> <h4 style="text-align: center;"><strong>Link1: <a href="https://www.letshostit.org/full-instructions-detailed-amazon-rdp-how-to-get-a-free-windows-vps-for-a-year/">https://www.letshostit.org/full-instructions-detailed-amazon-rdp-how-to-get-a-free-windows-vps-for-a-year/</a></strong> <strong>Link2: <a href="https://www.letshostit.org/how-to-get-free-rdp-without-credit-card/">https://www.letshostit.org/how-to-get-free-rdp-without-credit-card/</a></strong></h4> <strong>=-=-=-=-=-=-=-=-=-=-=-=-=-=-=-=-=-=-=-=-=-=-=-==-=-==-=</strong> ►<strong>For More Videos & Information Check Out Channel</strong> <a href="https://www.letshostit.org/wp-content/uploads/2017/07/FUNINSUN">https://www.youtube.com/c/FUNINSUN</a> <strong>=-=-=-=-=-=-=-=-=-=-=-=-=-=-=-=-=-=-=-=-=-=-=-==-=-==-=</strong> <strong> =-=-=-=-=-=-=-=-=-=-=-=-=-=-=-=-=-=-=-=-=-=-=-==-=-==-=</strong> 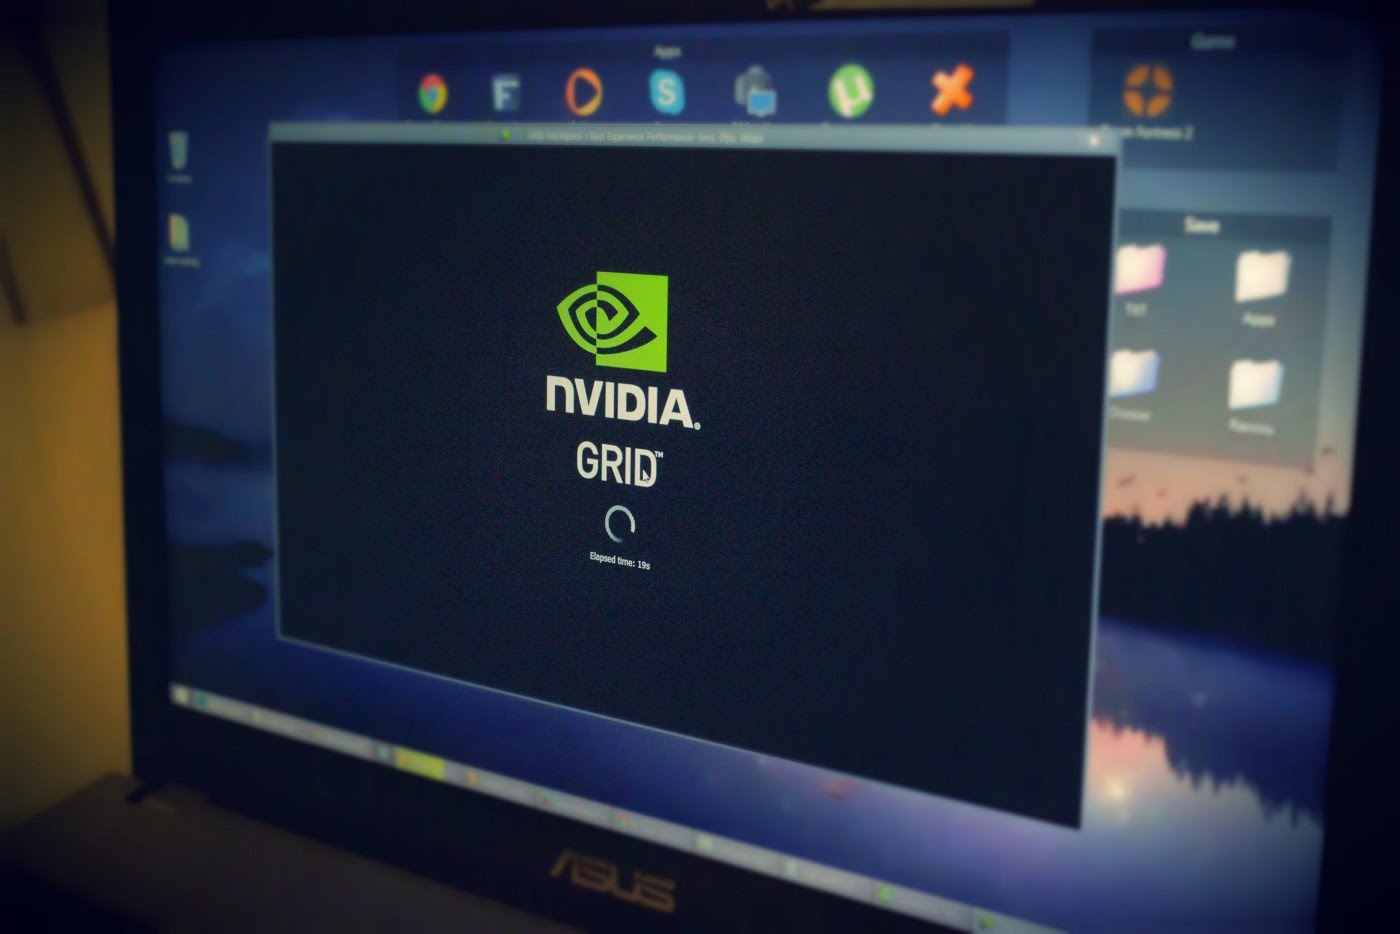.jpg) ►<strong>For More Like Our Facebook FanPage</strong> <a href="https://www.letshostit.org/wp-content/uploads/2017/07/rjfuninsun">https://www.facebook.com/rjfuninsun/</a> <strong>=-=-=-=-=-=-=-=-=-=-=-=-=-=-=-=-=-=-=-=-=-=-=-==-=-==-=</strong> <strong> =-=-=-=-=-=-=-=-=-=-=-=-=-=-=-=-=-=-=-=-=-=-=-==-=-==-=</strong> ►<strong>For More Visit Our Website</strong> <a href="https://www.letshostit.org/">https://www.letshostit.org/</a> <strong>=-=-=-=-=-=-=-=-=-=-=-=-=-=-=-=-=-=-=-=-=-=-=-==-=-==-=</strong> ►<strong>Thanks For Watching Have a Great Day!</strong> |
| json metadata | {"tags":["free","rdp","without","credit","card"],"image":["https://img.youtube.com/vi/8KMxuHJAPsk/0.jpg","https://steemitimages.com/DQmZ2MiuVun5sAWKqZ82mvNsgzFiLCUQeq7T7ikWXXMwWN7/maxresdefault%20(2).jpg"],"links":["https://www.letshostit.org/wp-content/uploads/2017/07/en","https://www.letshostit.org/wp-content/uploads/2017/07/www.textnow.com","https://www.letshostit.org/wp-content/uploads/2017/07/21ws","https://www.youtube.com/embed/8KMxuHJAPsk","https://www.letshostit.org/full-instructions-detailed-amazon-rdp-how-to-get-a-free-windows-vps-for-a-year/","https://www.letshostit.org/how-to-get-free-rdp-without-credit-card/","https://www.letshostit.org/wp-content/uploads/2017/07/FUNINSUN","https://www.letshostit.org/wp-content/uploads/2017/07/rjfuninsun","https://www.letshostit.org/"],"app":"steemit/0.1","format":"markdown"} |
| Transaction Info | Block #19633983/Trx 9c6ead0c19129057d92c63aa10bb5cec00ede02c |
View Raw JSON Data
{
"trx_id": "9c6ead0c19129057d92c63aa10bb5cec00ede02c",
"block": 19633983,
"trx_in_block": 33,
"op_in_trx": 0,
"virtual_op": 0,
"timestamp": "2018-02-06T13:52:15",
"op": [
"comment",
{
"parent_author": "",
"parent_permlink": "free",
"author": "ranarehan",
"permlink": "free-rdp-without-credit-card-free-nvidia-rdp",
"title": "Free RDP Without Credit Card Free NVIDIA RDP",
"body": "<h1 style=\"text-align: center;\">FreeRDPFrom NVIDIA 24 Hours</h1>\nThis is A Tutorial To Get Free <strong>Nvidia RDP</strong>. With high Speed <strong>1GBP/s</strong> internet <strong>8GB</strong> Solid RAM And<strong> 2GB</strong> Dedicated <strong>Graphic Card</strong>. Free <strong>RDP NAVIDA</strong> GRID <strong>Valid For 24 Hours Only.</strong> Just Try These Simple Trick to Get This Free RDP From NVIDIA. Please keep in mind this RDP is valid for only 24 Hours If You Want Another RDP Just Try The Link Given Below.Subscribe Us Support Us Keep Sharing ;)\n<h3>Toady I Will teach you how you can get <strong>Free NVIDIA RDP </strong></h3>\n<strong>Business Email</strong>: <a href=\"https://www.letshostit.org/wp-content/uploads/2017/07/en\">https://temp-mail.org/en/</a>\n<strong>Phone Number</strong>: <a href=\"https://www.letshostit.org/wp-content/uploads/2017/07/www.textnow.com\">https://www.textnow.com/ </a>(Area Code 902)\n\n<strong>Phone Number</strong>: <a href=\"https://www.letshostit.org/wp-content/uploads/2017/07/21ws\">http://tinyical.com/21ws</a>\n\nhttps://www.youtube.com/embed/8KMxuHJAPsk\n<h4 style=\"text-align: center;\"><strong>Another Links For Getting FREE .. RDP</strong></h4>\n<h4 style=\"text-align: center;\"><strong>Link1: <a href=\"https://www.letshostit.org/full-instructions-detailed-amazon-rdp-how-to-get-a-free-windows-vps-for-a-year/\">https://www.letshostit.org/full-instructions-detailed-amazon-rdp-how-to-get-a-free-windows-vps-for-a-year/</a></strong>\n<strong>Link2: <a href=\"https://www.letshostit.org/how-to-get-free-rdp-without-credit-card/\">https://www.letshostit.org/how-to-get-free-rdp-without-credit-card/</a></strong></h4>\n<strong>=-=-=-=-=-=-=-=-=-=-=-=-=-=-=-=-=-=-=-=-=-=-=-==-=-==-=</strong>\n►<strong>For More Videos & Information Check Out Channel</strong>\n<a href=\"https://www.letshostit.org/wp-content/uploads/2017/07/FUNINSUN\">https://www.youtube.com/c/FUNINSUN</a>\n<strong>=-=-=-=-=-=-=-=-=-=-=-=-=-=-=-=-=-=-=-=-=-=-=-==-=-==-=</strong>\n<strong> =-=-=-=-=-=-=-=-=-=-=-=-=-=-=-=-=-=-=-=-=-=-=-==-=-==-=</strong>\n.jpg)\n►<strong>For More Like Our Facebook FanPage</strong>\n<a href=\"https://www.letshostit.org/wp-content/uploads/2017/07/rjfuninsun\">https://www.facebook.com/rjfuninsun/</a>\n<strong>=-=-=-=-=-=-=-=-=-=-=-=-=-=-=-=-=-=-=-=-=-=-=-==-=-==-=</strong>\n<strong> =-=-=-=-=-=-=-=-=-=-=-=-=-=-=-=-=-=-=-=-=-=-=-==-=-==-=</strong>\n►<strong>For More Visit Our Website</strong>\n<a href=\"https://www.letshostit.org/\">https://www.letshostit.org/</a>\n<strong>=-=-=-=-=-=-=-=-=-=-=-=-=-=-=-=-=-=-=-=-=-=-=-==-=-==-=</strong>\n►<strong>Thanks For Watching Have a Great Day!</strong>",
"json_metadata": "{\"tags\":[\"free\",\"rdp\",\"without\",\"credit\",\"card\"],\"image\":[\"https://img.youtube.com/vi/8KMxuHJAPsk/0.jpg\",\"https://steemitimages.com/DQmZ2MiuVun5sAWKqZ82mvNsgzFiLCUQeq7T7ikWXXMwWN7/maxresdefault%20(2).jpg\"],\"links\":[\"https://www.letshostit.org/wp-content/uploads/2017/07/en\",\"https://www.letshostit.org/wp-content/uploads/2017/07/www.textnow.com\",\"https://www.letshostit.org/wp-content/uploads/2017/07/21ws\",\"https://www.youtube.com/embed/8KMxuHJAPsk\",\"https://www.letshostit.org/full-instructions-detailed-amazon-rdp-how-to-get-a-free-windows-vps-for-a-year/\",\"https://www.letshostit.org/how-to-get-free-rdp-without-credit-card/\",\"https://www.letshostit.org/wp-content/uploads/2017/07/FUNINSUN\",\"https://www.letshostit.org/wp-content/uploads/2017/07/rjfuninsun\",\"https://www.letshostit.org/\"],\"app\":\"steemit/0.1\",\"format\":\"markdown\"}"
}
]
}minnowvotessent 0.100 SBD to @ranarehan- "Refund for invalid bid: 0.100 SBD - Posts cannot be older than 6 Day(s)."2018/02/06 13:40:42
minnowvotessent 0.100 SBD to @ranarehan- "Refund for invalid bid: 0.100 SBD - Posts cannot be older than 6 Day(s)."
2018/02/06 13:40:42
| from | minnowvotes |
| to | ranarehan |
| amount | 0.100 SBD |
| memo | Refund for invalid bid: 0.100 SBD - Posts cannot be older than 6 Day(s). |
| Transaction Info | Block #19633752/Trx 1ca2d5963a7e68a6dae6f1f616cf91e7fd5951ae |
View Raw JSON Data
{
  "trx_id": "1ca2d5963a7e68a6dae6f1f616cf91e7fd5951ae",
  "block": 19633752,
  "trx_in_block": 25,
  "op_in_trx": 0,
  "virtual_op": 0,
  "timestamp": "2018-02-06T13:40:42",
  "op": [
    "transfer",
    {
      "from": "minnowvotes",
      "to": "ranarehan",
      "amount": "0.100 SBD",
      "memo": "Refund for invalid bid: 0.100 SBD - Posts cannot be older than 6 Day(s)."
    }
  ]
}ranarehansent 0.100 SBD to @minnowvotes- "https://steemit.com/best/@ranarehan/the-uncle-that-make-mahool-on-every-wedding"2018/02/06 13:40:27
ranarehansent 0.100 SBD to @minnowvotes- "https://steemit.com/best/@ranarehan/the-uncle-that-make-mahool-on-every-wedding"
2018/02/06 13:40:27
| from | ranarehan |
| to | minnowvotes |
| amount | 0.100 SBD |
| memo | https://steemit.com/best/@ranarehan/the-uncle-that-make-mahool-on-every-wedding |
| Transaction Info | Block #19633747/Trx 82116bd22e61290da02d6a8b14ac23705f33da9c |
View Raw JSON Data
{
  "trx_id": "82116bd22e61290da02d6a8b14ac23705f33da9c",
  "block": 19633747,
  "trx_in_block": 34,
  "op_in_trx": 0,
  "virtual_op": 0,
  "timestamp": "2018-02-06T13:40:27",
  "op": [
    "transfer",
    {
      "from": "ranarehan",
      "to": "minnowvotes",
      "amount": "0.100 SBD",
      "memo": "https://steemit.com/best/@ranarehan/the-uncle-that-make-mahool-on-every-wedding"
    }
  ]
}ranarehanclaimed reward balance: 0.507 SBD, 0.164 SP2018/02/06 13:29:03
ranarehanclaimed reward balance: 0.507 SBD, 0.164 SP
2018/02/06 13:29:03
| account | ranarehan |
| reward steem | 0.000 STEEM |
| reward sbd | 0.507 SBD |
| reward vests | 265.909413 VESTS |
| Transaction Info | Block #19633519/Trx 7b5a9835fad0a8b60fdb4128061c30161428fdf5 |
View Raw JSON Data
{
  "trx_id": "7b5a9835fad0a8b60fdb4128061c30161428fdf5",
  "block": 19633519,
  "trx_in_block": 9,
  "op_in_trx": 0,
  "virtual_op": 0,
  "timestamp": "2018-02-06T13:29:03",
  "op": [
    "claim_reward_balance",
    {
      "account": "ranarehan",
      "reward_steem": "0.000 STEEM",
      "reward_sbd": "0.507 SBD",
      "reward_vests": "265.909413 VESTS"
    }
  ]
}ranarehanreceived 0.035 SBD, 0.011 SP author reward for @ranarehan / 51qy5jb52018/02/06 13:27:51
ranarehanreceived 0.035 SBD, 0.011 SP author reward for @ranarehan / 51qy5jb5
2018/02/06 13:27:51
| author | ranarehan |
| permlink | 51qy5jb5 |
| sbd payout | 0.035 SBD |
| steem payout | 0.000 STEEM |
| vesting payout | 18.409104 VESTS |
| Transaction Info | Block #19633494/Virtual Operation #8 |
View Raw JSON Data
{
  "trx_id": "0000000000000000000000000000000000000000",
  "block": 19633494,
  "trx_in_block": 4294967295,
  "op_in_trx": 0,
  "virtual_op": 8,
  "timestamp": "2018-02-06T13:27:51",
  "op": [
    "author_reward",
    {
      "author": "ranarehan",
      "permlink": "51qy5jb5",
      "sbd_payout": "0.035 SBD",
      "steem_payout": "0.000 STEEM",
      "vesting_payout": "18.409104 VESTS"
    }
  ]
}dtubereceived 0.006 SP benefactor reward from @ranarehan2018/02/06 13:27:51
dtubereceived 0.006 SP benefactor reward from @ranarehan
2018/02/06 13:27:51
| benefactor | dtube |
| author | ranarehan |
| permlink | 51qy5jb5 |
| sbd payout | 0.000 SBD |
| steem payout | 0.000 STEEM |
| vesting payout | 10.227280 VESTS |
| Transaction Info | Block #19633494/Virtual Operation #7 |
View Raw JSON Data
{
  "trx_id": "0000000000000000000000000000000000000000",
  "block": 19633494,
  "trx_in_block": 4294967295,
  "op_in_trx": 0,
  "virtual_op": 7,
  "timestamp": "2018-02-06T13:27:51",
  "op": [
    "comment_benefactor_reward",
    {
      "benefactor": "dtube",
      "author": "ranarehan",
      "permlink": "51qy5jb5",
      "sbd_payout": "0.000 SBD",
      "steem_payout": "0.000 STEEM",
      "vesting_payout": "10.227280 VESTS"
    }
  ]
}steemdelegated 17.282 SP to @ranarehan2018/02/06 13:25:54
steemdelegated 17.282 SP to @ranarehan
2018/02/06 13:25:54
| delegator | steem |
| delegatee | ranarehan |
| vesting shares | 28106.110940 VESTS |
| Transaction Info | Block #19633456/Trx 254e2db15adc3cd77c85fa5c4e21dafa206c37ea |
View Raw JSON Data
{
  "trx_id": "254e2db15adc3cd77c85fa5c4e21dafa206c37ea",
  "block": 19633456,
  "trx_in_block": 20,
  "op_in_trx": 0,
  "virtual_op": 0,
  "timestamp": "2018-02-06T13:25:54",
  "op": [
    "delegate_vesting_shares",
    {
      "delegator": "steem",
      "delegatee": "ranarehan",
      "vesting_shares": "28106.110940 VESTS"
    }
  ]
}ranarehanreceived 0.035 SBD, 0.011 SP author reward for @ranarehan / 5-ridiculous-new-year-predictions-that-absolutely-won-t-come-true2018/02/06 13:20:57
ranarehanreceived 0.035 SBD, 0.011 SP author reward for @ranarehan / 5-ridiculous-new-year-predictions-that-absolutely-won-t-come-true
2018/02/06 13:20:57
| author | ranarehan |
| permlink | 5-ridiculous-new-year-predictions-that-absolutely-won-t-come-true |
| sbd payout | 0.035 SBD |
| steem payout | 0.000 STEEM |
| vesting payout | 18.409109 VESTS |
| Transaction Info | Block #19633356/Virtual Operation #27 |
View Raw JSON Data
{
  "trx_id": "0000000000000000000000000000000000000000",
  "block": 19633356,
  "trx_in_block": 4294967295,
  "op_in_trx": 0,
  "virtual_op": 27,
  "timestamp": "2018-02-06T13:20:57",
  "op": [
    "author_reward",
    {
      "author": "ranarehan",
      "permlink": "5-ridiculous-new-year-predictions-that-absolutely-won-t-come-true",
      "sbd_payout": "0.035 SBD",
      "steem_payout": "0.000 STEEM",
      "vesting_payout": "18.409109 VESTS"
    }
  ]
}ranarehanclaimed reward balance: 0.955 SP2018/02/06 13:15:51
ranarehanclaimed reward balance: 0.955 SP
2018/02/06 13:15:51
| account | ranarehan |
| reward steem | 0.000 STEEM |
| reward sbd | 0.000 SBD |
| reward vests | 1552.502454 VESTS |
| Transaction Info | Block #19633256/Trx b1c1e2e35ebc38a2594b1fc3620213de2746912c |
View Raw JSON Data
{
  "trx_id": "b1c1e2e35ebc38a2594b1fc3620213de2746912c",
  "block": 19633256,
  "trx_in_block": 3,
  "op_in_trx": 0,
  "virtual_op": 0,
  "timestamp": "2018-02-06T13:15:51",
  "op": [
    "claim_reward_balance",
    {
      "account": "ranarehan",
      "reward_steem": "0.000 STEEM",
      "reward_sbd": "0.000 SBD",
      "reward_vests": "1552.502454 VESTS"
    }
  ]
}ranarehanreceived 0.437 SBD, 0.141 SP author reward for @ranarehan / nobody-stealing-your-jobs-you-spend-too-much-on-wars-alibaba-founder-tells-us2018/02/06 13:12:54
ranarehanreceived 0.437 SBD, 0.141 SP author reward for @ranarehan / nobody-stealing-your-jobs-you-spend-too-much-on-wars-alibaba-founder-tells-us
2018/02/06 13:12:54
| author | ranarehan |
| permlink | nobody-stealing-your-jobs-you-spend-too-much-on-wars-alibaba-founder-tells-us |
| sbd payout | 0.437 SBD |
| steem payout | 0.000 STEEM |
| vesting payout | 229.091200 VESTS |
| Transaction Info | Block #19633196/Virtual Operation #17 |
View Raw JSON Data
{
  "trx_id": "0000000000000000000000000000000000000000",
  "block": 19633196,
  "trx_in_block": 4294967295,
  "op_in_trx": 0,
  "virtual_op": 17,
  "timestamp": "2018-02-06T13:12:54",
  "op": [
    "author_reward",
    {
      "author": "ranarehan",
      "permlink": "nobody-stealing-your-jobs-you-spend-too-much-on-wars-alibaba-founder-tells-us",
      "sbd_payout": "0.437 SBD",
      "steem_payout": "0.000 STEEM",
      "vesting_payout": "229.091200 VESTS"
    }
  ]
}ranarehanreceived 0.955 SP author reward for @ranarehan / the-uncle-that-make-mahool-on-every-wedding2018/02/06 13:04:15
ranarehanreceived 0.955 SP author reward for @ranarehan / the-uncle-that-make-mahool-on-every-wedding
2018/02/06 13:04:15
| author | ranarehan |
| permlink | the-uncle-that-make-mahool-on-every-wedding |
| sbd payout | 0.000 SBD |
| steem payout | 0.000 STEEM |
| vesting payout | 1552.502454 VESTS |
| Transaction Info | Block #19633023/Virtual Operation #4 |
View Raw JSON Data
{
  "trx_id": "0000000000000000000000000000000000000000",
  "block": 19633023,
  "trx_in_block": 4294967295,
  "op_in_trx": 0,
  "virtual_op": 4,
  "timestamp": "2018-02-06T13:04:15",
  "op": [
    "author_reward",
    {
      "author": "ranarehan",
      "permlink": "the-uncle-that-make-mahool-on-every-wedding",
      "sbd_payout": "0.000 SBD",
      "steem_payout": "0.000 STEEM",
      "vesting_payout": "1552.502454 VESTS"
    }
  ]
}2018/02/05 05:40:54
2018/02/05 05:40:54
| parent author | ranarehan |
| parent permlink | re-fatkat-saul-alinsky-big-community-organizer-was-born-109-year-ago-20180131t075555198z |
| author | fatkat |
| permlink | re-ranarehan-re-fatkat-saul-alinsky-big-community-organizer-was-born-109-year-ago-20180205t054050627z |
| title | |
| body | thanks that's part of my brand use any content I own that is posted unlicensed however you want. |
| json metadata | {"tags":["history"],"app":"steemit/0.1"} |
| Transaction Info | Block #19595369/Trx 64c3918fe5f269286c7d79b99f82efc13e24b5d7 |
View Raw JSON Data
{
  "trx_id": "64c3918fe5f269286c7d79b99f82efc13e24b5d7",
  "block": 19595369,
  "trx_in_block": 14,
  "op_in_trx": 0,
  "virtual_op": 0,
  "timestamp": "2018-02-05T05:40:54",
  "op": [
    "comment",
    {
      "parent_author": "ranarehan",
      "parent_permlink": "re-fatkat-saul-alinsky-big-community-organizer-was-born-109-year-ago-20180131t075555198z",
      "author": "fatkat",
      "permlink": "re-ranarehan-re-fatkat-saul-alinsky-big-community-organizer-was-born-109-year-ago-20180205t054050627z",
      "title": "",
      "body": "thanks that's part of my brand use any content I own  that is posted unlicensed however you want.",
      "json_metadata": "{\"tags\":[\"history\"],\"app\":\"steemit/0.1\"}"
    }
  ]
}vityamelikupvoted (100.00%) @ranarehan / m90it9uu2018/02/02 15:52:00
vityamelikupvoted (100.00%) @ranarehan / m90it9uu
2018/02/02 15:52:00
| voter | vityamelik |
| author | ranarehan |
| permlink | m90it9uu |
| weight | 10000 (100.00%) |
| Transaction Info | Block #19521344/Trx ac350131d10e09a0e07adfb5a332da32cde1817c |
View Raw JSON Data
{
  "trx_id": "ac350131d10e09a0e07adfb5a332da32cde1817c",
  "block": 19521344,
  "trx_in_block": 13,
  "op_in_trx": 0,
  "virtual_op": 0,
  "timestamp": "2018-02-02T15:52:00",
  "op": [
    "vote",
    {
      "voter": "vityamelik",
      "author": "ranarehan",
      "permlink": "m90it9uu",
      "weight": 10000
    }
  ]
}partiiupvoted (100.00%) @ranarehan / m90it9uu2018/02/02 15:51:27
partiiupvoted (100.00%) @ranarehan / m90it9uu
2018/02/02 15:51:27
| voter | partii |
| author | ranarehan |
| permlink | m90it9uu |
| weight | 10000 (100.00%) |
| Transaction Info | Block #19521333/Trx 634ec658a0207b77812b8430bf8707526f6a2ac9 |
View Raw JSON Data
{
  "trx_id": "634ec658a0207b77812b8430bf8707526f6a2ac9",
  "block": 19521333,
  "trx_in_block": 35,
  "op_in_trx": 0,
  "virtual_op": 0,
  "timestamp": "2018-02-02T15:51:27",
  "op": [
    "vote",
    {
      "voter": "partii",
      "author": "ranarehan",
      "permlink": "m90it9uu",
      "weight": 10000
    }
  ]
}zhdanovnikolayysupvoted (100.00%) @ranarehan / m90it9uu2018/02/02 15:51:24
zhdanovnikolayysupvoted (100.00%) @ranarehan / m90it9uu
2018/02/02 15:51:24
| voter | zhdanovnikolayys |
| author | ranarehan |
| permlink | m90it9uu |
| weight | 10000 (100.00%) |
| Transaction Info | Block #19521332/Trx 340f92841e81ea89dc4c978ffcf89cfa4f6bf920 |
View Raw JSON Data
{
  "trx_id": "340f92841e81ea89dc4c978ffcf89cfa4f6bf920",
  "block": 19521332,
  "trx_in_block": 38,
  "op_in_trx": 0,
  "virtual_op": 0,
  "timestamp": "2018-02-02T15:51:24",
  "op": [
    "vote",
    {
      "voter": "zhdanovnikolayys",
      "author": "ranarehan",
      "permlink": "m90it9uu",
      "weight": 10000
    }
  ]
}ranarehanpublished a new post: windows-8-1-official-iso-windows-8-1-download2018/02/02 06:38:24
ranarehanpublished a new post: windows-8-1-official-iso-windows-8-1-download
2018/02/02 06:38:24
| parent author | |
| parent permlink | windows |
| author | ranarehan |
| permlink | windows-8-1-official-iso-windows-8-1-download |
| title | Windows 8.1 Official Iso - Windows 8.1 download |
| body | @@ -2391,24 +2391,138 @@ aster.%3C/li%3E%0A +!%5Bmaxresdefault.jpg%5D(https://steemitimages.com/DQmU5HgDhPV3PGJmxSVEXnNNP5chGt1kJJdA67C4gnGDjKL/maxresdefault.jpg)%0A %3C/ol%3E%0A%3Ch4%3EHo |
| json metadata | {"tags":["windows","eight","official","iso","microsoft"],"links":["http://www.mediafire.com/file/5jvg2y8m5c1lsxl/W81.ProVL.X86.MULTI6.Jan2014.iso","https://www.letshostit.org/wp-content/uploads/2017/01/xnqipl20hm3c"],"app":"steemit/0.1","format":"markdown","image":["https://steemitimages.com/DQmU5HgDhPV3PGJmxSVEXnNNP5chGt1kJJdA67C4gnGDjKL/maxresdefault.jpg"]} |
| Transaction Info | Block #19510287/Trx 611c97f36c90397da602d3b2bae1187f81c0723e |
View Raw JSON Data
{
  "trx_id": "611c97f36c90397da602d3b2bae1187f81c0723e",
  "block": 19510287,
  "trx_in_block": 3,
  "op_in_trx": 0,
  "virtual_op": 0,
  "timestamp": "2018-02-02T06:38:24",
  "op": [
    "comment",
    {
      "parent_author": "",
      "parent_permlink": "windows",
      "author": "ranarehan",
      "permlink": "windows-8-1-official-iso-windows-8-1-download",
      "title": "Windows 8.1 Official Iso - Windows 8.1 download",
      "body": "@@ -2391,24 +2391,138 @@\n aster.%3C/li%3E%0A\n+!%5Bmaxresdefault.jpg%5D(https://steemitimages.com/DQmU5HgDhPV3PGJmxSVEXnNNP5chGt1kJJdA67C4gnGDjKL/maxresdefault.jpg)%0A\n %3C/ol%3E%0A%3Ch4%3EHo\n",
      "json_metadata": "{\"tags\":[\"windows\",\"eight\",\"official\",\"iso\",\"microsoft\"],\"links\":[\"http://www.mediafire.com/file/5jvg2y8m5c1lsxl/W81.ProVL.X86.MULTI6.Jan2014.iso\",\"https://www.letshostit.org/wp-content/uploads/2017/01/xnqipl20hm3c\"],\"app\":\"steemit/0.1\",\"format\":\"markdown\",\"image\":[\"https://steemitimages.com/DQmU5HgDhPV3PGJmxSVEXnNNP5chGt1kJJdA67C4gnGDjKL/maxresdefault.jpg\"]}"
    }
  ]
}ranarehanpublished a new post: windows-8-1-official-iso-windows-8-1-download2018/02/02 06:36:06
ranarehanpublished a new post: windows-8-1-official-iso-windows-8-1-download
2018/02/02 06:36:06
| parent author | |
| parent permlink | windows |
| author | ranarehan |
| permlink | windows-8-1-official-iso-windows-8-1-download |
| title | Windows 8.1 Official Iso - Windows 8.1 download |
| body | @@ -1047,1608 +1047,8 @@ ed%0A%0A -%3Cb%3EScreenshots:%3C/b%3E%0A%3Cdiv style=%22text-align: center;%22%3E%3C/div%3E%0A%3Cdiv style=%22text-align: center;%22%3E%3Cimg class=%22alignnone%22 src=%22https://www.letshostit.org/wp-content/uploads/2017/01/Windows%252B8.1%252Bx64%252B6in1%252BESD%252Ben-US%252BJan%252B2016.png?resize=640%252C480%22 alt=%22Windows 8.1 Core 2016%22 data-recalc-dims=%221%22 /%3E%3C/div%3E%0A%3Cdiv style=%22text-align: center;%22%3E%3Cimg class=%22alignnone%22 src=%22https://www.letshostit.org/wp-content/uploads/2017/01/Windows%252B8.1%252Bx64%252B6in1%252BESD%252Ben-US%252BJan%252B2016%252B2.png?resize=640%252C480%22 alt=%22Windows 8.1 Core Activated%22 data-recalc-dims=%221%22 /%3E%3C/div%3E%0A%3Cdiv style=%22text-align: center;%22%3E%3Cimg class=%22alignnone%22 src=%22https://www.letshostit.org/wp-content/uploads/2017/01/Windows%252B8.1%252Bx64%252B6in1%252BESD%252Ben-US%252BJan%252B2016%252B3.png?resize=640%252C480%22 alt=%22Windows 8.1 Pro 2016%22 data-recalc-dims=%221%22 /%3E%3C/div%3E%0A%3Cdiv style=%22text-align: center;%22%3E%3Cimg class=%22alignnone%22 src=%22https://www.letshostit.org/wp-content/uploads/2017/01/Windows%252B8.1%252Bx64%252B6in1%252BESD%252Ben-US%252BJan%252B2016%252B4.png?resize=640%252C480%22 alt=%22Windows 8.1 Pro Activated%22 data-recalc-dims=%221%22 /%3E%3C/div%3E%0A%3Cdiv style=%22text-align: center;%22%3E%3Cimg class=%22aligncenter%22 src=%22https://www.letshostit.org/wp-content/uploads/2017/01/Windows%252B8.1%252Bx64%252B6in1%252BESD%252Ben-US%252BJan%252B2016%252B5.png?resize=640%252C480%22 alt=%22Windows 8.1 Enterprise Activated%22 data-recalc-dims=%221%22 /%3E%3C/div%3E%0A%3Cdiv style=%22text-align: center;%22%3E%3Cimg class=%22alignnone%22 src=%22https://www.letshostit.org/wp-content/uploads/2017/01/Windows%252B8.1%252Bx64%252B6in1%252BESD%252Ben-US%252BJan%252B2016%252B6.png?resize=640%252C480%22 alt=%22Windows 8.1 Enterprise 2016%22 data-recalc-dims=%221%22 /%3E%3C/div%3E %0A%3Cb%3E |
| json metadata | {"tags":["windows","eight","official","iso","microsoft"],"links":["http://www.mediafire.com/file/5jvg2y8m5c1lsxl/W81.ProVL.X86.MULTI6.Jan2014.iso","https://www.letshostit.org/wp-content/uploads/2017/01/xnqipl20hm3c"],"app":"steemit/0.1","format":"markdown"} |
| Transaction Info | Block #19510241/Trx 384ec38e64ac3295191b81f8d46738d01eb69f2a |
View Raw JSON Data
{
  "trx_id": "384ec38e64ac3295191b81f8d46738d01eb69f2a",
  "block": 19510241,
  "trx_in_block": 31,
  "op_in_trx": 0,
  "virtual_op": 0,
  "timestamp": "2018-02-02T06:36:06",
  "op": [
    "comment",
    {
      "parent_author": "",
      "parent_permlink": "windows",
      "author": "ranarehan",
      "permlink": "windows-8-1-official-iso-windows-8-1-download",
      "title": "Windows 8.1 Official Iso - Windows 8.1 download",
      "body": "@@ -1047,1608 +1047,8 @@\n ed%0A%0A\n-%3Cb%3EScreenshots:%3C/b%3E%0A%3Cdiv style=%22text-align: center;%22%3E%3C/div%3E%0A%3Cdiv style=%22text-align: center;%22%3E%3Cimg class=%22alignnone%22 src=%22https://www.letshostit.org/wp-content/uploads/2017/01/Windows%252B8.1%252Bx64%252B6in1%252BESD%252Ben-US%252BJan%252B2016.png?resize=640%252C480%22 alt=%22Windows 8.1 Core 2016%22 data-recalc-dims=%221%22 /%3E%3C/div%3E%0A%3Cdiv style=%22text-align: center;%22%3E%3Cimg class=%22alignnone%22 src=%22https://www.letshostit.org/wp-content/uploads/2017/01/Windows%252B8.1%252Bx64%252B6in1%252BESD%252Ben-US%252BJan%252B2016%252B2.png?resize=640%252C480%22 alt=%22Windows 8.1 Core Activated%22 data-recalc-dims=%221%22 /%3E%3C/div%3E%0A%3Cdiv style=%22text-align: center;%22%3E%3Cimg class=%22alignnone%22 src=%22https://www.letshostit.org/wp-content/uploads/2017/01/Windows%252B8.1%252Bx64%252B6in1%252BESD%252Ben-US%252BJan%252B2016%252B3.png?resize=640%252C480%22 alt=%22Windows 8.1 Pro 2016%22 data-recalc-dims=%221%22 /%3E%3C/div%3E%0A%3Cdiv style=%22text-align: center;%22%3E%3Cimg class=%22alignnone%22 src=%22https://www.letshostit.org/wp-content/uploads/2017/01/Windows%252B8.1%252Bx64%252B6in1%252BESD%252Ben-US%252BJan%252B2016%252B4.png?resize=640%252C480%22 alt=%22Windows 8.1 Pro Activated%22 data-recalc-dims=%221%22 /%3E%3C/div%3E%0A%3Cdiv style=%22text-align: center;%22%3E%3Cimg class=%22aligncenter%22 src=%22https://www.letshostit.org/wp-content/uploads/2017/01/Windows%252B8.1%252Bx64%252B6in1%252BESD%252Ben-US%252BJan%252B2016%252B5.png?resize=640%252C480%22 alt=%22Windows 8.1 Enterprise Activated%22 data-recalc-dims=%221%22 /%3E%3C/div%3E%0A%3Cdiv style=%22text-align: center;%22%3E%3Cimg class=%22alignnone%22 src=%22https://www.letshostit.org/wp-content/uploads/2017/01/Windows%252B8.1%252Bx64%252B6in1%252BESD%252Ben-US%252BJan%252B2016%252B6.png?resize=640%252C480%22 alt=%22Windows 8.1 Enterprise 2016%22 data-recalc-dims=%221%22 /%3E%3C/div%3E\n %0A%3Cb%3E\n",
      "json_metadata": "{\"tags\":[\"windows\",\"eight\",\"official\",\"iso\",\"microsoft\"],\"links\":[\"http://www.mediafire.com/file/5jvg2y8m5c1lsxl/W81.ProVL.X86.MULTI6.Jan2014.iso\",\"https://www.letshostit.org/wp-content/uploads/2017/01/xnqipl20hm3c\"],\"app\":\"steemit/0.1\",\"format\":\"markdown\"}"
    }
  ]
}ranarehanpublished a new post: windows-8-1-official-iso-windows-8-1-download2018/02/02 06:34:03
ranarehanpublished a new post: windows-8-1-official-iso-windows-8-1-download
2018/02/02 06:34:03
| parent author | |
| parent permlink | windows |
| author | ranarehan |
| permlink | windows-8-1-official-iso-windows-8-1-download |
| title | Windows 8.1 Official Iso - Windows 8.1 download |
| body | <strong>Windows 8.1 X64 6in1 ESD en-US Jan 2016 Pre-Activated Windows 8.1 download<a class="spGb-f"> </a></strong> <b>RELEASE INFO:</b> * File: WIN81.X64.ESD.en-US.Jan2016.iso * Sources: dvd-6051480 & 6054382 Windows 8.1 download * Size: 4,16GB * Format: Bootable ISO * CRC32: cec84720 * MD5: 31e6ddbdabc03b0e4ba6afb781d2cb41 * SHA-1: 81972fec6a4216e18c4c262d0147f302e1c31dd1 * Language: en-US [ English – USA ] <b>CONTENTS:</b> * Integrated / Pre-installed in Audit Mode: * .NET Framework 2.0, 3.0 & 3.5 * .NET Framework 4.6 (KB3045557) * Important & Security Updates – 2016-01-12 * Defender Updates * Setupcomplete / Post-install: * KB890830 <Windows 8.1 download</a> <b>FEATURES:</b> * Diagnostics and Recovery Toolset 10 (Microsoft DaRT) * install.wim compressed to recovery format (install.esd) <b>EDITIONS INCLUDED:</b> * Windows 8.1 Core * Windows 8.1 Core – – – – – – -Pre-Activated * Windows 8.1 Pro * Windows 8.1 Pro – – – – – – – -Pre-Activated * Windows 8.1 Enterprise * Windows 8.1 Enterprise – – – Pre-Activated <b>Screenshots:</b> <div style="text-align: center;"></div> <div style="text-align: center;"><img class="alignnone" src="https://www.letshostit.org/wp-content/uploads/2017/01/Windows%2B8.1%2Bx64%2B6in1%2BESD%2Ben-US%2BJan%2B2016.png?resize=640%2C480" alt="Windows 8.1 Core 2016" data-recalc-dims="1" /></div> <div style="text-align: center;"><img class="alignnone" src="https://www.letshostit.org/wp-content/uploads/2017/01/Windows%2B8.1%2Bx64%2B6in1%2BESD%2Ben-US%2BJan%2B2016%2B2.png?resize=640%2C480" alt="Windows 8.1 Core Activated" data-recalc-dims="1" /></div> <div style="text-align: center;"><img class="alignnone" src="https://www.letshostit.org/wp-content/uploads/2017/01/Windows%2B8.1%2Bx64%2B6in1%2BESD%2Ben-US%2BJan%2B2016%2B3.png?resize=640%2C480" alt="Windows 8.1 Pro 2016" data-recalc-dims="1" /></div> <div style="text-align: center;"><img class="alignnone" src="https://www.letshostit.org/wp-content/uploads/2017/01/Windows%2B8.1%2Bx64%2B6in1%2BESD%2Ben-US%2BJan%2B2016%2B4.png?resize=640%2C480" alt="Windows 8.1 Pro Activated" data-recalc-dims="1" /></div> <div style="text-align: center;"><img class="aligncenter" src="https://www.letshostit.org/wp-content/uploads/2017/01/Windows%2B8.1%2Bx64%2B6in1%2BESD%2Ben-US%2BJan%2B2016%2B5.png?resize=640%2C480" alt="Windows 8.1 Enterprise Activated" data-recalc-dims="1" /></div> <div style="text-align: center;"><img class="alignnone" src="https://www.letshostit.org/wp-content/uploads/2017/01/Windows%2B8.1%2Bx64%2B6in1%2BESD%2Ben-US%2BJan%2B2016%2B6.png?resize=640%2C480" alt="Windows 8.1 Enterprise 2016" data-recalc-dims="1" /></div> <b>FEATURES:</b> * UEFI-ready * (Use attached Rufus USB-tool to make UEFI-bootable). * install.wim compressed to recovery format (install.esd) * Diagnostics and Recovery Toolset 10.0 (Microsoft DaRT) <b>INSTALLATION & INFORMATION:</b> * Create bootable USB (highly recommended) with Rufus, * (attached) or burn to DVD-DL at slow speed. <b><Download Links:</b> <h1 style="text-align: center;"><strong>32 Bit / <a href="http://www.mediafire.com/file/5jvg2y8m5c1lsxl/W81.ProVL.X86.MULTI6.Jan2014.iso">Download Link</a></strong></h1> <h1 style="text-align: center;">64 Bit / <a href="https://www.letshostit.org/wp-content/uploads/2017/01/xnqipl20hm3c">Download Link</a></h1> <h2 style="text-align: center;">Windows 8.1 Download</h2> <h3>Features of Windows 8.1 All in One Single file:</h3> <ol> <li>It contains totally latest features.</li> <li>It is very simple windows program that easy to install.</li> <li>It is much fastest than previous booting programs.</li> <li>Its data transfer system makes your windows eight faster.</li> <li>It contains lots of features as compared to the previous version.</li> </ol> <h3>System Requirements for Windows 8.1 Multi iso installation:</h3> <ol> <li>Memory (RAM): 1GB of RAM required.</li> <li>Hard Disk Space: 16GB of free space required.</li> <li>Processor: 1GHz processor or faster.</li> </ol> <h4>How to Activate Windows 8.1 All in One ISO Pre-Activated?</h4> <ol> <li>Download Windows 8.1 setup iso file with the torrent link by given below method.</li> <li>Disconnect the internet and go to the download folder.</li> <li>Now create a bootable USB Drive with Rufus with Windows 8.1 all iso file.</li> <li>Now insert your Bootable USB where you want to be installing Windows.</li> <li>Now you are ready to installing windows into PC with USB.</li> <li>And complete the installation process.</li> <li>Now Your Windows 8.1 Activation Process has been completed.</li> </ol> So friends if you like to download Windows 8.1 All In One ISO X64-X86 Bit Pre Activated Free Download it from the link given below. <b>Download Links:</b> <h1 style="text-align: center;"><strong>32 Bit / <a href="http://www.mediafire.com/file/5jvg2y8m5c1lsxl/W81.ProVL.X86.MULTI6.Jan2014.iso">Download Link</a></strong></h1> <h1 style="text-align: center;">64 Bit / <a href="https://www.letshostit.org/wp-content/uploads/2017/01/xnqipl20hm3c">Download Link</a></h1> |
| json metadata | {"tags":["windows","eight","official","iso","microsoft"],"image":["https://www.letshostit.org/wp-content/uploads/2017/01/Windows%2B8.1%2Bx64%2B6in1%2BESD%2Ben-US%2BJan%2B2016.png?resize=640%2C480","https://www.letshostit.org/wp-content/uploads/2017/01/Windows%2B8.1%2Bx64%2B6in1%2BESD%2Ben-US%2BJan%2B2016%2B2.png?resize=640%2C480","https://www.letshostit.org/wp-content/uploads/2017/01/Windows%2B8.1%2Bx64%2B6in1%2BESD%2Ben-US%2BJan%2B2016%2B3.png?resize=640%2C480","https://www.letshostit.org/wp-content/uploads/2017/01/Windows%2B8.1%2Bx64%2B6in1%2BESD%2Ben-US%2BJan%2B2016%2B4.png?resize=640%2C480","https://www.letshostit.org/wp-content/uploads/2017/01/Windows%2B8.1%2Bx64%2B6in1%2BESD%2Ben-US%2BJan%2B2016%2B5.png?resize=640%2C480","https://www.letshostit.org/wp-content/uploads/2017/01/Windows%2B8.1%2Bx64%2B6in1%2BESD%2Ben-US%2BJan%2B2016%2B6.png?resize=640%2C480"],"links":["http://www.mediafire.com/file/5jvg2y8m5c1lsxl/W81.ProVL.X86.MULTI6.Jan2014.iso","https://www.letshostit.org/wp-content/uploads/2017/01/xnqipl20hm3c"],"app":"steemit/0.1","format":"markdown"} |
| Transaction Info | Block #19510200/Trx 6ace874f8fd8d484886ad9c53d241215e3a3df24 |
View Raw JSON Data
{
"trx_id": "6ace874f8fd8d484886ad9c53d241215e3a3df24",
"block": 19510200,
"trx_in_block": 42,
"op_in_trx": 0,
"virtual_op": 0,
"timestamp": "2018-02-02T06:34:03",
"op": [
"comment",
{
"parent_author": "",
"parent_permlink": "windows",
"author": "ranarehan",
"permlink": "windows-8-1-official-iso-windows-8-1-download",
"title": "Windows 8.1 Official Iso - Windows 8.1 download",
"body": "<strong>Windows 8.1 X64 6in1 ESD en-US Jan 2016 Pre-Activated Windows 8.1 download<a class=\"spGb-f\"> </a></strong>\n\n<b>RELEASE INFO:</b>\n* File: WIN81.X64.ESD.en-US.Jan2016.iso\n* Sources: dvd-6051480 & 6054382\n\nWindows 8.1 download\n\n* Size: 4,16GB\n* Format: Bootable ISO\n\n* CRC32: cec84720\n* MD5: 31e6ddbdabc03b0e4ba6afb781d2cb41\n* SHA-1: 81972fec6a4216e18c4c262d0147f302e1c31dd1\n\n* Language: en-US [ English – USA ]\n\n<b>CONTENTS:</b>\n* Integrated / Pre-installed in Audit Mode:\n* .NET Framework 2.0, 3.0 & 3.5\n* .NET Framework 4.6 (KB3045557)\n* Important & Security Updates – 2016-01-12\n* Defender Updates\n* Setupcomplete / Post-install:\n* KB890830\n\n<Windows 8.1 download</a>\n\n<b>FEATURES:</b>\n* Diagnostics and Recovery Toolset 10 (Microsoft DaRT)\n* install.wim compressed to recovery format (install.esd)\n\n<b>EDITIONS INCLUDED:</b>\n* Windows 8.1 Core\n* Windows 8.1 Core – – – – – – -Pre-Activated\n\n* Windows 8.1 Pro\n* Windows 8.1 Pro – – – – – – – -Pre-Activated\n\n* Windows 8.1 Enterprise\n* Windows 8.1 Enterprise – – – Pre-Activated\n\n<b>Screenshots:</b>\n<div style=\"text-align: center;\"></div>\n<div style=\"text-align: center;\"><img class=\"alignnone\" src=\"https://www.letshostit.org/wp-content/uploads/2017/01/Windows%2B8.1%2Bx64%2B6in1%2BESD%2Ben-US%2BJan%2B2016.png?resize=640%2C480\" alt=\"Windows 8.1 Core 2016\" data-recalc-dims=\"1\" /></div>\n<div style=\"text-align: center;\"><img class=\"alignnone\" src=\"https://www.letshostit.org/wp-content/uploads/2017/01/Windows%2B8.1%2Bx64%2B6in1%2BESD%2Ben-US%2BJan%2B2016%2B2.png?resize=640%2C480\" alt=\"Windows 8.1 Core Activated\" data-recalc-dims=\"1\" /></div>\n<div style=\"text-align: center;\"><img class=\"alignnone\" src=\"https://www.letshostit.org/wp-content/uploads/2017/01/Windows%2B8.1%2Bx64%2B6in1%2BESD%2Ben-US%2BJan%2B2016%2B3.png?resize=640%2C480\" alt=\"Windows 8.1 Pro 2016\" data-recalc-dims=\"1\" /></div>\n<div style=\"text-align: center;\"><img class=\"alignnone\" src=\"https://www.letshostit.org/wp-content/uploads/2017/01/Windows%2B8.1%2Bx64%2B6in1%2BESD%2Ben-US%2BJan%2B2016%2B4.png?resize=640%2C480\" alt=\"Windows 8.1 Pro Activated\" data-recalc-dims=\"1\" /></div>\n<div style=\"text-align: center;\"><img class=\"aligncenter\" src=\"https://www.letshostit.org/wp-content/uploads/2017/01/Windows%2B8.1%2Bx64%2B6in1%2BESD%2Ben-US%2BJan%2B2016%2B5.png?resize=640%2C480\" alt=\"Windows 8.1 Enterprise Activated\" data-recalc-dims=\"1\" /></div>\n<div style=\"text-align: center;\"><img class=\"alignnone\" src=\"https://www.letshostit.org/wp-content/uploads/2017/01/Windows%2B8.1%2Bx64%2B6in1%2BESD%2Ben-US%2BJan%2B2016%2B6.png?resize=640%2C480\" alt=\"Windows 8.1 Enterprise 2016\" data-recalc-dims=\"1\" /></div>\n<b>FEATURES:</b>\n* UEFI-ready\n* (Use attached Rufus USB-tool to make UEFI-bootable).\n* install.wim compressed to recovery format (install.esd)\n* Diagnostics and Recovery Toolset 10.0 (Microsoft DaRT)\n\n<b>INSTALLATION & INFORMATION:</b>\n* Create bootable USB (highly recommended) with Rufus,\n* (attached) or burn to DVD-DL at slow speed.\n\n<b><Download Links:</b>\n<h1 style=\"text-align: center;\"><strong>32 Bit / <a href=\"http://www.mediafire.com/file/5jvg2y8m5c1lsxl/W81.ProVL.X86.MULTI6.Jan2014.iso\">Download Link</a></strong></h1>\n<h1 style=\"text-align: center;\">64 Bit / <a href=\"https://www.letshostit.org/wp-content/uploads/2017/01/xnqipl20hm3c\">Download Link</a></h1>\n<h2 style=\"text-align: center;\">Windows 8.1 Download</h2>\n<h3>Features of Windows 8.1 All in One Single file:</h3>\n<ol>\n \t<li>It contains totally latest features.</li>\n \t<li>It is very simple windows program that easy to install.</li>\n \t<li>It is much fastest than previous booting programs.</li>\n \t<li>Its data transfer system makes your windows eight faster.</li>\n \t<li>It contains lots of features as compared to the previous version.</li>\n</ol>\n<h3>System Requirements for Windows 8.1 Multi iso installation:</h3>\n<ol>\n \t<li>Memory (RAM): 1GB of RAM required.</li>\n \t<li>Hard Disk Space: 16GB of free space required.</li>\n \t<li>Processor: 1GHz processor or faster.</li>\n</ol>\n<h4>How to Activate Windows 8.1 All in One ISO Pre-Activated?</h4>\n<ol>\n \t<li>Download Windows 8.1 setup iso file with the torrent link by given below method.</li>\n \t<li>Disconnect the internet and go to the download folder.</li>\n \t<li>Now create a bootable USB Drive with Rufus with Windows 8.1 all iso file.</li>\n \t<li>Now insert your Bootable USB where you want to be installing Windows.</li>\n \t<li>Now you are ready to installing windows into PC with USB.</li>\n \t<li>And complete the installation process.</li>\n \t<li>Now Your Windows 8.1 Activation Process has been completed.</li>\n</ol>\nSo friends if you like to download Windows 8.1 All In One ISO X64-X86 Bit Pre Activated Free Download it from the link given below.\n<b>Download Links:</b>\n<h1 style=\"text-align: center;\"><strong>32 Bit / <a href=\"http://www.mediafire.com/file/5jvg2y8m5c1lsxl/W81.ProVL.X86.MULTI6.Jan2014.iso\">Download Link</a></strong></h1>\n<h1 style=\"text-align: center;\">64 Bit / <a href=\"https://www.letshostit.org/wp-content/uploads/2017/01/xnqipl20hm3c\">Download Link</a></h1>\n ",
"json_metadata": "{\"tags\":[\"windows\",\"eight\",\"official\",\"iso\",\"microsoft\"],\"image\":[\"https://www.letshostit.org/wp-content/uploads/2017/01/Windows%2B8.1%2Bx64%2B6in1%2BESD%2Ben-US%2BJan%2B2016.png?resize=640%2C480\",\"https://www.letshostit.org/wp-content/uploads/2017/01/Windows%2B8.1%2Bx64%2B6in1%2BESD%2Ben-US%2BJan%2B2016%2B2.png?resize=640%2C480\",\"https://www.letshostit.org/wp-content/uploads/2017/01/Windows%2B8.1%2Bx64%2B6in1%2BESD%2Ben-US%2BJan%2B2016%2B3.png?resize=640%2C480\",\"https://www.letshostit.org/wp-content/uploads/2017/01/Windows%2B8.1%2Bx64%2B6in1%2BESD%2Ben-US%2BJan%2B2016%2B4.png?resize=640%2C480\",\"https://www.letshostit.org/wp-content/uploads/2017/01/Windows%2B8.1%2Bx64%2B6in1%2BESD%2Ben-US%2BJan%2B2016%2B5.png?resize=640%2C480\",\"https://www.letshostit.org/wp-content/uploads/2017/01/Windows%2B8.1%2Bx64%2B6in1%2BESD%2Ben-US%2BJan%2B2016%2B6.png?resize=640%2C480\"],\"links\":[\"http://www.mediafire.com/file/5jvg2y8m5c1lsxl/W81.ProVL.X86.MULTI6.Jan2014.iso\",\"https://www.letshostit.org/wp-content/uploads/2017/01/xnqipl20hm3c\"],\"app\":\"steemit/0.1\",\"format\":\"markdown\"}"
}
]
}cheetahreplied to @ranarehan / cheetah-re-ranarehanm90it9uu2018/02/02 06:14:48
cheetahreplied to @ranarehan / cheetah-re-ranarehanm90it9uu
2018/02/02 06:14:48
| parent author | ranarehan |
| parent permlink | m90it9uu |
| author | cheetah |
| permlink | cheetah-re-ranarehanm90it9uu |
| title | |
| body | Hi! I am a robot. I just upvoted you! I found similar content that readers might be interested in: https://whatismyipaddress.com/blacklist-removal |
| json metadata | |
| Transaction Info | Block #19509816/Trx 31f031e134ef46a00670bad41753bb67dda5e303 |
View Raw JSON Data
{
  "trx_id": "31f031e134ef46a00670bad41753bb67dda5e303",
  "block": 19509816,
  "trx_in_block": 24,
  "op_in_trx": 0,
  "virtual_op": 0,
  "timestamp": "2018-02-02T06:14:48",
  "op": [
    "comment",
    {
      "parent_author": "ranarehan",
      "parent_permlink": "m90it9uu",
      "author": "cheetah",
      "permlink": "cheetah-re-ranarehanm90it9uu",
      "title": "",
      "body": "Hi! I am a robot. I just upvoted you! I found similar content that readers might be interested in:\nhttps://whatismyipaddress.com/blacklist-removal",
      "json_metadata": ""
    }
  ]
}cheetahupvoted (0.08%) @ranarehan / m90it9uu2018/02/02 06:14:45
cheetahupvoted (0.08%) @ranarehan / m90it9uu
2018/02/02 06:14:45
| voter | cheetah |
| author | ranarehan |
| permlink | m90it9uu |
| weight | 8 (0.08%) |
| Transaction Info | Block #19509815/Trx 46ed63110e1e51e49f4689f5e1c25dd98943e98d |
View Raw JSON Data
{
  "trx_id": "46ed63110e1e51e49f4689f5e1c25dd98943e98d",
  "block": 19509815,
  "trx_in_block": 3,
  "op_in_trx": 0,
  "virtual_op": 0,
  "timestamp": "2018-02-02T06:14:45",
  "op": [
    "vote",
    {
      "voter": "cheetah",
      "author": "ranarehan",
      "permlink": "m90it9uu",
      "weight": 8
    }
  ]
}2018/02/02 06:14:15
2018/02/02 06:14:15
| author | ranarehan |
| permlink | m90it9uu |
| max accepted payout | 1000000.000 SBD |
| percent steem dollars | 0 |
| allow votes | true |
| allow curation rewards | true |
| extensions | [[0,{"beneficiaries":[{"account":"dtube","weight":2500}]}]] |
| Transaction Info | Block #19509805/Trx 4eaf0618f477ef873a118253f9f4e3aee65e15a9 |
View Raw JSON Data
{
  "trx_id": "4eaf0618f477ef873a118253f9f4e3aee65e15a9",
  "block": 19509805,
  "trx_in_block": 2,
  "op_in_trx": 0,
  "virtual_op": 0,
  "timestamp": "2018-02-02T06:14:15",
  "op": [
    "comment_options",
    {
      "author": "ranarehan",
      "permlink": "m90it9uu",
      "max_accepted_payout": "1000000.000 SBD",
      "percent_steem_dollars": 0,
      "allow_votes": true,
      "allow_curation_rewards": true,
      "extensions": [
        [
          0,
          {
            "beneficiaries": [
              {
                "account": "dtube",
                "weight": 2500
              }
            ]
          }
        ]
      ]
    }
  ]
}2018/02/02 06:14:15
2018/02/02 06:14:15
| parent author | |
| parent permlink | ip |
| author | ranarehan |
| permlink | m90it9uu |
| title | When your Ip Address Is Blacklisted - Find my Internet Ip - Tracing ip Addresses - Find Your Ip - you are fired don't get your ip to be blacklsited |
| body | <center><a href='https://d.tube/#!/v/ranarehan/m90it9uu'><img src='https://ipfs.io/ipfs/QmTixTsbjCT4ijExhy8BuAnQaZVXe9kSzKj4xGb2LG1dHr'></a></center><hr> Please watch: "NVIDIA Free RDP |8 GB RAM|100 GB HDD|1 Gb/s | Free RDP NAVIDA GRID Get Free RDP" https://www.youtube.com/watch?v=8KMxuHJAPsk -~-~~-~~~-~~-~- ========================= ►LIKE COMMENT SUBSCRIBE ========================= Each blacklist database has its own criteria for flagging IP addresses and compiling its own list of online offenders. Those criteria could include a variety of "listings": technical, policy, and evidence-based. Technical listings occur mostly from mail-server configuration issues, such as missing or incorrect reverse DNS records, missing or incorrect banner greetings, and mail servers operating within a suspicious range of IP addresses. Policy listings are based on an operator that does not wish to receive email from certain countries, or ISPs, that have a history of not honoring "unsubscribe" requests. Evidence-based listings are those where the operator has received direct (or indirect) evidence that an IP address has been involved in sending unsolicited emails. If your IP address has been blacklisted and you want to investigate, you'll need to visit the blacklist's website and do a lookup on your IP address. Most blacklist databases will provide general listing reasons, but don't list specific email addresses tied to blacklisted IP addresses. Find my Internet Ip =-=-=-=-=-=-=-=-=-=-=-=-=-=-=-=-=-=-=-=-=-=-=-==-=-==-= ►For More Videos & Information Check Out Channel https://www.youtube.com/channel/UCCVT7U8cx3TbPuzzsztUjpg =-=-=-=-=-=-=-=-=-=-=-=-=-=-=-=-=-=-=-=-=-=-=-==-=-==-= =-=-=-=-=-=-=-=-=-=-=-=-=-=-=-=-=-=-=-=-=-=-=-==-=-==-= ►For More Like Our Facebook FanPage https://www.facebook.com/rjfuninsun/ =-=-=-=-=-=-=-=-=-=-=-=-=-=-=-=-=-=-=-=-=-=-=-==-=-==-= =-=-=-=-=-=-=-=-=-=-=-=-=-=-=-=-=-=-=-=-=-=-=-==-=-==-= ►For More Visit Our Website http://www.letshostit.org/ =-=-=-=-=-=-=-=-=-=-=-=-=-=-=-=-=-=-=-=-=-=-=-==-=-==-= ►Thanks For Watching Have a Great Day! <hr><a href='https://d.tube/#!/v/ranarehan/m90it9uu'> ▶️ DTube</a><br /><a href='https://ipfs.io/ipfs/QmVXLwy6mHt3uUyTUbbTgm78GYtnkhV6ap2nLKEQ8mxjbM'> ▶️ IPFS</a> |
| json metadata | {"video":{"info":{"title":"When your Ip Address Is Blacklisted - Find my Internet Ip - Tracing ip Addresses - Find Your Ip - you are fired don't get your ip to be blacklsited","snaphash":"QmerJEsUYdhwLvwLjwyBCyEYVZE8DGSZ1oNyxPF1Akw5g1","author":"ranarehan","permlink":"m90it9uu","duration":62.787,"filesize":8861462,"spritehash":"Qme8PqC5QpH5PBnAtqKpiNoh2bDbEunStiYCVdjR95ow7N"},"content":{"videohash":"QmVXLwy6mHt3uUyTUbbTgm78GYtnkhV6ap2nLKEQ8mxjbM","video480hash":"QmVM2esRy9YSqavTSXFdMF3A3rQQxmi52oJ8BBjAnpsrc4","magnet":"","description":"Please watch: \"NVIDIA Free RDP |8 GB RAM|100 GB HDD|1 Gb/s | Free RDP NAVIDA GRID Get Free RDP\" \nhttps://www.youtube.com/watch?v=8KMxuHJAPsk\n-~-~~-~~~-~~-~-\n\n=========================\n►LIKE COMMENT SUBSCRIBE\n=========================\nEach blacklist database has its own criteria for flagging IP addresses and compiling its own list of online offenders. Those criteria could include a variety of \"listings\": technical, policy, and evidence-based.\n\nTechnical listings occur mostly from mail-server configuration issues, such as missing or incorrect reverse DNS records, missing or incorrect banner greetings, and mail servers operating within a suspicious range of IP addresses.\nPolicy listings are based on an operator that does not wish to receive email from certain countries, or ISPs, that have a history of not honoring \"unsubscribe\" requests.\nEvidence-based listings are those where the operator has received direct (or indirect) evidence that an IP address has been involved in sending unsolicited emails.\nIf your IP address has been blacklisted and you want to investigate, you'll need to visit the blacklist's website and do a lookup on your IP address. Most blacklist databases will provide general listing reasons, but don't list specific email addresses tied to blacklisted IP addresses. Find my Internet Ip \n\n\n\n=-=-=-=-=-=-=-=-=-=-=-=-=-=-=-=-=-=-=-=-=-=-=-==-=-==-=\n►For More Videos & Information Check Out Channel\nhttps://www.youtube.com/channel/UCCVT7U8cx3TbPuzzsztUjpg\n=-=-=-=-=-=-=-=-=-=-=-=-=-=-=-=-=-=-=-=-=-=-=-==-=-==-=\n\n=-=-=-=-=-=-=-=-=-=-=-=-=-=-=-=-=-=-=-=-=-=-=-==-=-==-=\n►For More Like Our Facebook FanPage\nhttps://www.facebook.com/rjfuninsun/\n=-=-=-=-=-=-=-=-=-=-=-=-=-=-=-=-=-=-=-=-=-=-=-==-=-==-=\n=-=-=-=-=-=-=-=-=-=-=-=-=-=-=-=-=-=-=-=-=-=-=-==-=-==-=\n►For More Visit Our Website\nhttp://www.letshostit.org/\n=-=-=-=-=-=-=-=-=-=-=-=-=-=-=-=-=-=-=-=-=-=-=-==-=-==-=\n\n►Thanks For Watching Have a Great Day!","tags":["ip","got","blacklisted","you"]},"_id":"7667df2ef88cc5640d4f40d88424be6c"},"tags":["ip","got","blacklisted","you","dtube"],"app":"dtube/0.6"} |
| Transaction Info | Block #19509805/Trx 4eaf0618f477ef873a118253f9f4e3aee65e15a9 |
View Raw JSON Data
{
  "trx_id": "4eaf0618f477ef873a118253f9f4e3aee65e15a9",
  "block": 19509805,
  "trx_in_block": 2,
  "op_in_trx": 0,
  "virtual_op": 0,
  "timestamp": "2018-02-02T06:14:15",
  "op": [
    "comment",
    {
      "parent_author": "",
      "parent_permlink": "ip",
      "author": "ranarehan",
      "permlink": "m90it9uu",
      "title": "When your Ip Address Is Blacklisted - Find my Internet Ip - Tracing ip Addresses - Find Your Ip - you are fired don't get your ip to be blacklsited",
      "body": "<center><a href='https://d.tube/#!/v/ranarehan/m90it9uu'><img src='https://ipfs.io/ipfs/QmTixTsbjCT4ijExhy8BuAnQaZVXe9kSzKj4xGb2LG1dHr'></a></center><hr>\n\nPlease watch: \"NVIDIA Free RDP |8 GB RAM|100 GB HDD|1 Gb/s | Free RDP NAVIDA GRID Get Free RDP\" \nhttps://www.youtube.com/watch?v=8KMxuHJAPsk\n-~-~~-~~~-~~-~-\n\n=========================\n►LIKE COMMENT SUBSCRIBE\n=========================\nEach blacklist database has its own criteria for flagging IP addresses and compiling its own list of online offenders. Those criteria could include a variety of \"listings\": technical, policy, and evidence-based.\n\nTechnical listings occur mostly from mail-server configuration issues, such as missing or incorrect reverse DNS records, missing or incorrect banner greetings, and mail servers operating within a suspicious range of IP addresses.\nPolicy listings are based on an operator that does not wish to receive email from certain countries, or ISPs, that have a history of not honoring \"unsubscribe\" requests.\nEvidence-based listings are those where the operator has received direct (or indirect) evidence that an IP address has been involved in sending unsolicited emails.\nIf your IP address has been blacklisted and you want to investigate, you'll need to visit the blacklist's website and do a lookup on your IP address. Most blacklist databases will provide general listing reasons, but don't list specific email addresses tied to blacklisted IP addresses. Find my Internet Ip \n\n\n\n=-=-=-=-=-=-=-=-=-=-=-=-=-=-=-=-=-=-=-=-=-=-=-==-=-==-=\n►For More Videos & Information Check Out Channel\nhttps://www.youtube.com/channel/UCCVT7U8cx3TbPuzzsztUjpg\n=-=-=-=-=-=-=-=-=-=-=-=-=-=-=-=-=-=-=-=-=-=-=-==-=-==-=\n\n=-=-=-=-=-=-=-=-=-=-=-=-=-=-=-=-=-=-=-=-=-=-=-==-=-==-=\n►For More Like Our Facebook FanPage\nhttps://www.facebook.com/rjfuninsun/\n=-=-=-=-=-=-=-=-=-=-=-=-=-=-=-=-=-=-=-=-=-=-=-==-=-==-=\n=-=-=-=-=-=-=-=-=-=-=-=-=-=-=-=-=-=-=-=-=-=-=-==-=-==-=\n►For More Visit Our Website\nhttp://www.letshostit.org/\n=-=-=-=-=-=-=-=-=-=-=-=-=-=-=-=-=-=-=-=-=-=-=-==-=-==-=\n\n►Thanks For Watching Have a Great Day!\n\n<hr><a href='https://d.tube/#!/v/ranarehan/m90it9uu'> ▶️ DTube</a><br /><a href='https://ipfs.io/ipfs/QmVXLwy6mHt3uUyTUbbTgm78GYtnkhV6ap2nLKEQ8mxjbM'> ▶️ IPFS</a>",
      "json_metadata": "{\"video\":{\"info\":{\"title\":\"When your Ip Address Is Blacklisted - Find my Internet Ip - Tracing ip Addresses - Find Your Ip - you are fired don't get your ip to be blacklsited\",\"snaphash\":\"QmerJEsUYdhwLvwLjwyBCyEYVZE8DGSZ1oNyxPF1Akw5g1\",\"author\":\"ranarehan\",\"permlink\":\"m90it9uu\",\"duration\":62.787,\"filesize\":8861462,\"spritehash\":\"Qme8PqC5QpH5PBnAtqKpiNoh2bDbEunStiYCVdjR95ow7N\"},\"content\":{\"videohash\":\"QmVXLwy6mHt3uUyTUbbTgm78GYtnkhV6ap2nLKEQ8mxjbM\",\"video480hash\":\"QmVM2esRy9YSqavTSXFdMF3A3rQQxmi52oJ8BBjAnpsrc4\",\"magnet\":\"\",\"description\":\"Please watch: \\\"NVIDIA Free RDP |8 GB RAM|100 GB HDD|1 Gb/s | Free RDP NAVIDA GRID Get Free RDP\\\" \\nhttps://www.youtube.com/watch?v=8KMxuHJAPsk\\n-~-~~-~~~-~~-~-\\n\\n=========================\\n►LIKE COMMENT SUBSCRIBE\\n=========================\\nEach blacklist database has its own criteria for flagging IP addresses and compiling its own list of online offenders. Those criteria could include a variety of \\\"listings\\\": technical, policy, and evidence-based.\\n\\nTechnical listings occur mostly from mail-server configuration issues, such as missing or incorrect reverse DNS records, missing or incorrect banner greetings, and mail servers operating within a suspicious range of IP addresses.\\nPolicy listings are based on an operator that does not wish to receive email from certain countries, or ISPs, that have a history of not honoring \\\"unsubscribe\\\" requests.\\nEvidence-based listings are those where the operator has received direct (or indirect) evidence that an IP address has been involved in sending unsolicited emails.\\nIf your IP address has been blacklisted and you want to investigate, you'll need to visit the blacklist's website and do a lookup on your IP address. Most blacklist databases will provide general listing reasons, but don't list specific email addresses tied to blacklisted IP addresses. Find my Internet Ip \\n\\n\\n\\n=-=-=-=-=-=-=-=-=-=-=-=-=-=-=-=-=-=-=-=-=-=-=-==-=-==-=\\n►For More Videos & Information Check Out Channel\\nhttps://www.youtube.com/channel/UCCVT7U8cx3TbPuzzsztUjpg\\n=-=-=-=-=-=-=-=-=-=-=-=-=-=-=-=-=-=-=-=-=-=-=-==-=-==-=\\n\\n=-=-=-=-=-=-=-=-=-=-=-=-=-=-=-=-=-=-=-=-=-=-=-==-=-==-=\\n►For More Like Our Facebook FanPage\\nhttps://www.facebook.com/rjfuninsun/\\n=-=-=-=-=-=-=-=-=-=-=-=-=-=-=-=-=-=-=-=-=-=-=-==-=-==-=\\n=-=-=-=-=-=-=-=-=-=-=-=-=-=-=-=-=-=-=-=-=-=-=-==-=-==-=\\n►For More Visit Our Website\\nhttp://www.letshostit.org/\\n=-=-=-=-=-=-=-=-=-=-=-=-=-=-=-=-=-=-=-=-=-=-=-==-=-==-=\\n\\n►Thanks For Watching Have a Great Day!\",\"tags\":[\"ip\",\"got\",\"blacklisted\",\"you\"]},\"_id\":\"7667df2ef88cc5640d4f40d88424be6c\"},\"tags\":[\"ip\",\"got\",\"blacklisted\",\"you\",\"dtube\"],\"app\":\"dtube/0.6\"}"
    }
  ]
}ranarehanupvoted (100.00%) @ranarehan / 25k7upc92018/02/02 06:13:36
ranarehanupvoted (100.00%) @ranarehan / 25k7upc9
2018/02/02 06:13:36
| voter | ranarehan |
| author | ranarehan |
| permlink | 25k7upc9 |
| weight | 10000 (100.00%) |
| Transaction Info | Block #19509792/Trx 0eb412d4fed15087bedb23bb333823352faf0063 |
View Raw JSON Data
{
  "trx_id": "0eb412d4fed15087bedb23bb333823352faf0063",
  "block": 19509792,
  "trx_in_block": 15,
  "op_in_trx": 0,
  "virtual_op": 0,
  "timestamp": "2018-02-02T06:13:36",
  "op": [
    "vote",
    {
      "voter": "ranarehan",
      "author": "ranarehan",
      "permlink": "25k7upc9",
      "weight": 10000
    }
  ]
}2018/02/02 06:08:36
2018/02/02 06:08:36
| author | ranarehan |
| permlink | 25k7upc9 |
| max accepted payout | 1000000.000 SBD |
| percent steem dollars | 10000 |
| allow votes | true |
| allow curation rewards | true |
| extensions | [[0,{"beneficiaries":[{"account":"dtube","weight":2500}]}]] |
| Transaction Info | Block #19509692/Trx d013a7c04836c5009cc49a9e5ccf776546f742a5 |
View Raw JSON Data
{
  "trx_id": "d013a7c04836c5009cc49a9e5ccf776546f742a5",
  "block": 19509692,
  "trx_in_block": 25,
  "op_in_trx": 0,
  "virtual_op": 0,
  "timestamp": "2018-02-02T06:08:36",
  "op": [
    "comment_options",
    {
      "author": "ranarehan",
      "permlink": "25k7upc9",
      "max_accepted_payout": "1000000.000 SBD",
      "percent_steem_dollars": 10000,
      "allow_votes": true,
      "allow_curation_rewards": true,
      "extensions": [
        [
          0,
          {
            "beneficiaries": [
              {
                "account": "dtube",
                "weight": 2500
              }
            ]
          }
        ]
      ]
    }
  ]
}2018/02/02 06:08:36
2018/02/02 06:08:36
| parent author | |
| parent permlink | hack |
| author | ranarehan |
| permlink | 25k7upc9 |
| title | Secure your WordPress Recover Hacked WordPress Website Daily a Lot of WordPress website got hacked |
| body | <center><a href='https://d.tube/#!/v/ranarehan/25k7upc9'><img src='https://ipfs.io/ipfs/QmdDhdRrjYRcyG4VtGVy6PwmER8tHm9AvLWykfcqtvnwQu'></a></center><hr> there are a lot of daily website got hacked on internet most of them are insecure WordPress websites you should make your wordpress secure or hire someone to do that https://www.fiverr.com/rajreehan <hr><a href='https://d.tube/#!/v/ranarehan/25k7upc9'> ▶️ DTube</a><br /><a href='https://ipfs.io/ipfs/QmWLGF4TcxLQoXFsqFvFpg4RS5shmvrnSDs5wMtqRhUiSW'> ▶️ IPFS</a> |
| json metadata | {"video":{"info":{"title":"Secure your WordPress Recover Hacked WordPress Website Daily a Lot of WordPress website got hacked ","snaphash":"QmR3raT37c5NAVtDRh3hY4faBVVVQXTPYhkJpo9L3AguuZ","author":"ranarehan","permlink":"25k7upc9","duration":58.978685,"filesize":3733473,"spritehash":"QmXVTtBC9UzDBoxiYAKR4tWi1QT2PaKBeKWAsYZLKAwrx4"},"content":{"videohash":"QmWLGF4TcxLQoXFsqFvFpg4RS5shmvrnSDs5wMtqRhUiSW","video480hash":"Qmcer8L89Kk9E9s3quAVLczA8EPSnS9n8JM5ivrhaw5wr8","magnet":"","description":"there are a lot of daily website got hacked on internet most of them are insecure WordPress websites \nyou should make your wordpress secure or hire someone to do that\nhttps://www.fiverr.com/rajreehan","tags":["hack","wordpress","audiecne","secure"]},"_id":"26e8265faa7291b866e0540c7909f0f5"},"tags":["hack","wordpress","audiecne","secure","dtube"],"app":"dtube/0.6"} |
| Transaction Info | Block #19509692/Trx d013a7c04836c5009cc49a9e5ccf776546f742a5 |
View Raw JSON Data
{
  "trx_id": "d013a7c04836c5009cc49a9e5ccf776546f742a5",
  "block": 19509692,
  "trx_in_block": 25,
  "op_in_trx": 0,
  "virtual_op": 0,
  "timestamp": "2018-02-02T06:08:36",
  "op": [
    "comment",
    {
      "parent_author": "",
      "parent_permlink": "hack",
      "author": "ranarehan",
      "permlink": "25k7upc9",
      "title": "Secure your WordPress Recover Hacked WordPress Website Daily a Lot of WordPress website got hacked ",
      "body": "<center><a href='https://d.tube/#!/v/ranarehan/25k7upc9'><img src='https://ipfs.io/ipfs/QmdDhdRrjYRcyG4VtGVy6PwmER8tHm9AvLWykfcqtvnwQu'></a></center><hr>\n\nthere are a lot of daily website got hacked on internet most of them are insecure WordPress websites \nyou should make your wordpress secure or hire someone to do that\nhttps://www.fiverr.com/rajreehan\n\n<hr><a href='https://d.tube/#!/v/ranarehan/25k7upc9'> ▶️ DTube</a><br /><a href='https://ipfs.io/ipfs/QmWLGF4TcxLQoXFsqFvFpg4RS5shmvrnSDs5wMtqRhUiSW'> ▶️ IPFS</a>",
      "json_metadata": "{\"video\":{\"info\":{\"title\":\"Secure your WordPress Recover Hacked WordPress Website Daily a Lot of WordPress website got hacked \",\"snaphash\":\"QmR3raT37c5NAVtDRh3hY4faBVVVQXTPYhkJpo9L3AguuZ\",\"author\":\"ranarehan\",\"permlink\":\"25k7upc9\",\"duration\":58.978685,\"filesize\":3733473,\"spritehash\":\"QmXVTtBC9UzDBoxiYAKR4tWi1QT2PaKBeKWAsYZLKAwrx4\"},\"content\":{\"videohash\":\"QmWLGF4TcxLQoXFsqFvFpg4RS5shmvrnSDs5wMtqRhUiSW\",\"video480hash\":\"Qmcer8L89Kk9E9s3quAVLczA8EPSnS9n8JM5ivrhaw5wr8\",\"magnet\":\"\",\"description\":\"there are a lot of daily website got hacked on internet most of them are insecure WordPress websites \\nyou should make your wordpress secure or hire someone to do that\\nhttps://www.fiverr.com/rajreehan\",\"tags\":[\"hack\",\"wordpress\",\"audiecne\",\"secure\"]},\"_id\":\"26e8265faa7291b866e0540c7909f0f5\"},\"tags\":[\"hack\",\"wordpress\",\"audiecne\",\"secure\",\"dtube\"],\"app\":\"dtube/0.6\"}"
    }
  ]
}ranarehanupvoted (100.00%) @ranarehan / r1s40hnq2018/02/02 06:02:54
ranarehanupvoted (100.00%) @ranarehan / r1s40hnq
2018/02/02 06:02:54
| voter | ranarehan |
| author | ranarehan |
| permlink | r1s40hnq |
| weight | 10000 (100.00%) |
| Transaction Info | Block #19509578/Trx e99e59512c528f7d46fd9883c2f20b6203f0b887 |
View Raw JSON Data
{
  "trx_id": "e99e59512c528f7d46fd9883c2f20b6203f0b887",
  "block": 19509578,
  "trx_in_block": 34,
  "op_in_trx": 0,
  "virtual_op": 0,
  "timestamp": "2018-02-02T06:02:54",
  "op": [
    "vote",
    {
      "voter": "ranarehan",
      "author": "ranarehan",
      "permlink": "r1s40hnq",
      "weight": 10000
    }
  ]
}ranarehancustom json: follow2018/02/02 06:01:33
ranarehancustom json: follow
2018/02/02 06:01:33
| required auths | [] |
| required posting auths | ["ranarehan"] |
| id | follow |
| json | ["reblog",{"account":"ranarehan","author":"chainsquad","permlink":"negotiations-succession-of-streemian-com-reactivation"}] |
| Transaction Info | Block #19509551/Trx 6bdcfd42524a86283fd10e0aa01fd5aef040af75 |
View Raw JSON Data
{
  "trx_id": "6bdcfd42524a86283fd10e0aa01fd5aef040af75",
  "block": 19509551,
  "trx_in_block": 13,
  "op_in_trx": 0,
  "virtual_op": 0,
  "timestamp": "2018-02-02T06:01:33",
  "op": [
    "custom_json",
    {
      "required_auths": [],
      "required_posting_auths": [
        "ranarehan"
      ],
      "id": "follow",
      "json": "[\"reblog\",{\"account\":\"ranarehan\",\"author\":\"chainsquad\",\"permlink\":\"negotiations-succession-of-streemian-com-reactivation\"}]"
    }
  ]
}2018/02/01 04:51:21
2018/02/01 04:51:21
| voter | zapper |
| author | ranarehan |
| permlink | full-instructions-detailed-amazon-rdp-how-to-get-a-free-windows-vps-for-a-year |
| weight | 100 (1.00%) |
| Transaction Info | Block #19479403/Trx dbde2eba506a6d3a1b84a2cbaf3897b67e154dda |
View Raw JSON Data
{
  "trx_id": "dbde2eba506a6d3a1b84a2cbaf3897b67e154dda",
  "block": 19479403,
  "trx_in_block": 0,
  "op_in_trx": 0,
  "virtual_op": 0,
  "timestamp": "2018-02-01T04:51:21",
  "op": [
    "vote",
    {
      "voter": "zapper",
      "author": "ranarehan",
      "permlink": "full-instructions-detailed-amazon-rdp-how-to-get-a-free-windows-vps-for-a-year",
      "weight": 100
    }
  ]
}ranarehanpublished a new post: full-instructions-detailed-amazon-rdp-how-to-get-a-free-windows-vps-for-a-year2018/02/01 04:33:18
ranarehanpublished a new post: full-instructions-detailed-amazon-rdp-how-to-get-a-free-windows-vps-for-a-year
2018/02/01 04:33:18
| parent author | |
| parent permlink | amazon |
| author | ranarehan |
| permlink | full-instructions-detailed-amazon-rdp-how-to-get-a-free-windows-vps-for-a-year |
| title | Full instructions Detailed AMAZON RDP – How to get a free Windows VPS for a YEAR |
| body | <h4 style="text-align: center;"><strong>Full instructions Detailed AMAZON RDP – How to get a free Windows VPS for a YEAR</strong> A lot of people ask us for a good VPS that they can use for their copy of Mass Planner, if you want to keep your account posting 24/7 but don’t want to keep your computer on all day long the easy solution is to use a Windows VPS and move Mass Planner on that server.</h4> Most of you are asking for a cheap VPS and most of you use Mass Planner with one or two accounts so this will be the best solution for you – a free Windows VPS that you can use for a year at 0 costs. It’s not very powerful but it’s decent enough and Mass Planner will run on it with a couple of accounts quite well. <a href="https://www.letshostit.org/wp-content/uploads/2016/10/free-Windows-Server-2012.jpg"><img class="aligncenter size-full wp-image-1683" src="https://www.letshostit.org/wp-content/uploads/2016/10/free-Windows-Server-2012.jpg" alt="free Windows-Server-2012" width="455" height="273" /></a> This is not for people that need a powerful machine and use a lot of accounts, for that you will need a better server and there are a lot of places where you can get that online, you should know better if you’re at that level so we’re not going to get into that. In this article we’re going to cover the following: <ol> <li><a href="#01">How to get a free windows VPS for 1 year</a></li> <li><a href="#02">How to connect to your VPS using remote desktop on Windows</a></li> <li><a href="#03">How to connect to your VPS using remote desktop on Mac OS X</a></li> <li><a href="#04">How to use your local drive in remote connections(or how to copy data from your PC to the VPS)</a></li> <li><a href="#05">How to use your local drives in remote connections(or how to copy data from your Mac OS X to the VPS)</a></li> <li><a href="#06">How to install and start using Mass Planner on your new VPS</a></li> <li><a href="#07">How to disable IE Enhanced Security in Windows Server 2012</a></li> <li><a href="#08">Final notes</a></li> </ol> So let’s get started: <h3><a name="01"></a>1. How to get a free windows vps for 1 year</h3> Some of you might know but most of you probably don’t – Amazon offers everybody that wants to test their services a free vps for a year. They make it a little hard to navigate through all their settings and signup pages so here’s a short tutorial on how to do it fast and easy. <strong>Here is what you will need:</strong> <ul> <li>a credit card, it will not be billed and the vps is free but they require you to enter one</li> <li>a telephone number – they will call to verify your identity(call is automated not human)</li> <li>5-15 minutes of your time depending on how fast you are filling up forms and following instructions.</li> </ul> <strong>Here is what you will get:</strong> <ul> <li>1Gb of RAM</li> <li>30Gb Hdd ( you’ll have around 11Gb free after the OS is installed)</li> <li>1 virtual processor at 2.49Ghz</li> <li>OS: Microsoft Windows Server 2012 R2 Standard.</li> <li>1GB monthly free traffic ( if you go over they will charge you $0.12 per 1Gb which is almost free as well ? )</li> </ul> As you can see, it’s not much but it’s pretty decent, it’s a lot better than my first computer ( though that was a while back). What’s most important is that it’s free for a year and it will suffice for any day-to-day post scheduling. If you want to go ahead and get your own server like the one above, just go over to Amazon at : <a href="https://www.letshostit.org/wp-content/uploads/2016/10/free" target="_blank" rel="noopener">http://aws.amazon.com/free/</a>. You will see this server being referred to as AWS account( it means Amazon Web Services account). You can read a lot more information on their page about the free plan, you can go ahead and read that or if you just simply want to continue, click the yellow “Get started today” button that looks like this : <a href="https://www.letshostit.org/wp-content/uploads/2016/10/get-your-free-vps-from-amazon.png"><img class="aligncenter size-full wp-image-1646" src="https://www.letshostit.org/wp-content/uploads/2016/10/get-your-free-vps-from-amazon.png" alt="get your free vps from amazon" width="246" height="127" /></a> Now you will be taken to the signup page for the AWS service, go ahead and create a new account by selecting “I am a new user” and entering your email like this: <a href="https://www.letshostit.org/wp-content/uploads/2016/10/signing-up-for-amazon-aws.png"><img class="aligncenter size-full wp-image-1647" src="https://www.letshostit.org/wp-content/uploads/2016/10/signing-up-for-amazon-aws.png" alt="signing up for amazon aws" width="483" height="417" /></a> After filing in the above click the yellow “Sign in using our secure server” button and you will be taken to another form to complete the signup process. <a href="https://www.letshostit.org/wp-content/uploads/2016/10/Amazon-AWS-login-credentials.png"><img class="aligncenter size-full wp-image-1648" src="https://www.letshostit.org/wp-content/uploads/2016/10/Amazon-AWS-login-credentials.png" alt="Amazon AWS login credentials" width="704" height="340" /></a> Go ahead and fill these too with your name, email as before and select a new password. After you’re done click the “Create account” button. You will then be redirected to another page that will require you to actually sign up to AWS after creating your account: <a href="https://www.letshostit.org/wp-content/uploads/2016/10/signup-for-AWS.png"><img class="aligncenter size-full wp-image-1649" src="https://www.letshostit.org/wp-content/uploads/2016/10/signup-for-AWS.png" alt="signup for AWS" width="753" height="205" /></a> Click the “sign up for AWS” link and you will be redirected to a page that will ask for your details( the AWS console signup page). You will need to fill this up in order to proceed to the next step. <a href="https://www.letshostit.org/wp-content/uploads/2016/10/the-aws-signup-console-page.png"><img class="aligncenter size-full wp-image-1650" src="https://www.letshostit.org/wp-content/uploads/2016/10/the-aws-signup-console-page.png" alt="the aws signup console page" width="437" height="577" /></a> Fill everything up correctly, don’t make stuff up but fill in your real name and address as you will also have to enter your credit card information later and if they don’t match you might get denied and done all this for nothing. So fill in your Full name, company( if any), select your country, enter address, city, state, postal code, phone number, the security code and finally check the AWS customer agreement. After everything is filled in nicely click the Create Account and Continue button. You will be redirected to the page where you need to enter your credit card details: <a href="https://www.letshostit.org/wp-content/uploads/2016/10/aws-payment-filling-step.png"><img class="aligncenter size-full wp-image-1651" src="https://www.letshostit.org/wp-content/uploads/2016/10/aws-payment-filling-step.png" alt="aws payment filling step" width="504" height="479" /></a> Fill in your credit card number and select the expiration date. Enter you name as before, either leave the address that you already entered(as I did) or select a new one, after that press “Continue”. You will be redirected to the Identity verification step: <a href="https://www.letshostit.org/wp-content/uploads/2016/10/aws-identity-verification-step.png"><img class="aligncenter size-full wp-image-1652" src="https://www.letshostit.org/wp-content/uploads/2016/10/aws-identity-verification-step.png" alt="aws identity verification step" width="496" height="362" /></a>Now they want to verify that you are who you say you are so you are going to get an automated call from Amazon and will need to enter the provided PIN number in order to proceed. Make sure again that you entered your phone number correctly, have your telephone close by and click the “Call me now” yellow button. You should immediately receive a call from Amazon, they will also display a PIN number on your computer screen you will need to enter that PIN number on your telephone keypad or just say it loud one digit at a time. If/When successful you will receive a message on your screen stating that your identity verification is complete: <a href="https://www.letshostit.org/wp-content/uploads/2016/10/aws-identity-verification-complete.png"><img class="aligncenter size-full wp-image-1653" src="https://www.letshostit.org/wp-content/uploads/2016/10/aws-identity-verification-complete.png" alt="aws identity verification complete" width="463" height="307" /></a>Now just click the “Continue to select your Support Plan” button. You will need to select the support plan for your VPS: <a href="https://www.letshostit.org/wp-content/uploads/2016/10/choose-aws-support-plan.png"><img class="aligncenter size-full wp-image-1654" src="https://www.letshostit.org/wp-content/uploads/2016/10/choose-aws-support-plan.png" alt="choose aws support plan" width="497" height="457" /></a> This one should be quite simple, if Basic(Free) is already selected leave it like this, if something else is selected just select Basic(Free) and click Continue and you finally have your Amazon Web Services account: <a href="https://www.letshostit.org/wp-content/uploads/2016/10/welcome-to-amazon-web-services.png"><img class="aligncenter size-full wp-image-1655" src="https://www.letshostit.org/wp-content/uploads/2016/10/welcome-to-amazon-web-services.png" alt="welcome to amazon web services" width="536" height="103" /></a> Congratulations, you have you AWS account, now all you need to do is set up your Windows VPS. In order to do that just click on the yellow “Launch Management Console” <a href="https://www.letshostit.org/wp-content/uploads/2016/10/launch-aws-management-console.png"><img class="aligncenter size-full wp-image-1656" src="https://www.letshostit.org/wp-content/uploads/2016/10/launch-aws-management-console.png" alt="launch aws management console" width="396" height="61" /></a>At this point you might be prompted to enter your AWS password again, the one that we created a few steps above when we started. Go ahead and enter that and login again to the AWS management console. Don’t mind all the services amazon is providing here, there are a lot of them and someone that is new to this might feel a little lost, here’s how the management console looks like: <a href="https://www.letshostit.org/wp-content/uploads/2016/10/all-the-amazon-web-services.png"><img class="aligncenter size-full wp-image-1657" src="https://www.letshostit.org/wp-content/uploads/2016/10/all-the-amazon-web-services.png" alt="all the amazon web services" width="500" height="241" /></a> Again, don’t mind them all, just click on EC2(Virtual Servers in the Cloud), should be the second from top to bottom in the left column. You will be taken to another screen that again is full with a lot of information that might be overwhelming ( Amazon did not make this easy at all for beginners ? ). <a href="https://www.letshostit.org/wp-content/uploads/2016/10/create-your-amazon-vps.png"><img class="aligncenter size-full wp-image-1658" src="https://www.letshostit.org/wp-content/uploads/2016/10/create-your-amazon-vps.png" alt="create your amazon vps" width="544" height="472" /></a> Just click the blue “Launch Instance” button and you will be redirected to a page where you will need to choose what operating system to install on your VPS: <a href="https://www.letshostit.org/wp-content/uploads/2016/10/virtual-servers-available-for-free-from-amazon.png"><img class="aligncenter size-full wp-image-1659" src="https://www.letshostit.org/wp-content/uploads/2016/10/virtual-servers-available-for-free-from-amazon.png" alt="virtual servers available for free from amazon" width="473" height="404" /></a> As you can see there are several choices of operating systems, if you are doing this in order to use it with other software at this point you can choose either linux or windows. As we have created this tutorial to use a Windows VPS with Mass Planner ( as it does not currently work on linux) we’ll be continuing by choosing the last item in this list “Microsoft Windows Server 2012 R2 Base”. In order to proceed click the blue “Select” button to the right of the Windows items: <a href="https://www.letshostit.org/wp-content/uploads/2016/10/select-a-windows-vps-installation.png"><img class="aligncenter size-full wp-image-1660" src="https://www.letshostit.org/wp-content/uploads/2016/10/select-a-windows-vps-installation.png" alt="select a windows vps installation" width="136" height="77" /></a>Now you will be taken through a couple of steps in order to select the specs of your new VPS. In order to keep it free, always select the one that has the green “Free tire eligible” text : <a href="https://www.letshostit.org/wp-content/uploads/2016/10/select-the-general-purpose-t2-micro-vps.png"><img class="aligncenter size-full wp-image-1661" src="https://www.letshostit.org/wp-content/uploads/2016/10/select-the-general-purpose-t2-micro-vps.png" alt="select the general purpose t2 micro vps" width="504" height="201" /></a> It should already be selected, if not select the first item, General purpose t2 micro which is the only one that is free. Now, you can either go through the rest of the steps and see what each offers you, or just simply click the blue “Review and Launch” and jump to the end: <a href="https://www.letshostit.org/wp-content/uploads/2016/10/click-the-review-and-launch-button.png"><img class="aligncenter size-full wp-image-1662" src="https://www.letshostit.org/wp-content/uploads/2016/10/click-the-review-and-launch-button.png" alt="click the review and launch button" width="593" height="50" /></a> If you’ve pressed the Review and Launch button you should be at step 7, Review instance launch, they’re just giving you a lot more information about the server, you can skip everything and click the blue “Launch” button in the bottom right corner. <a href="https://www.letshostit.org/wp-content/uploads/2016/10/aws-review-instance-launch.png"><img class="aligncenter size-full wp-image-1663" src="https://www.letshostit.org/wp-content/uploads/2016/10/aws-review-instance-launch.png" alt="aws review instance launch" width="473" height="430" /></a>You will be prompted to select a new key pair or create one. This will be useful in case you loose your password and need to login to your VPS, as you have just created a new account you won’t have one already, so select to create a new key pair and enter a name for it. <a href="https://www.letshostit.org/wp-content/uploads/2016/10/creating-a-new-key-pair-fo-aws-vps.png"><img class="aligncenter size-full wp-image-1665" src="https://www.letshostit.org/wp-content/uploads/2016/10/creating-a-new-key-pair-fo-aws-vps.png" alt="creating a new key pair fo aws vps" width="459" height="338" /></a> After entering the name for your key pair click on “download key pair” and your browser should prompt you to download a new file to your computer, it will be named as the name you gave it above, without spaces and with a .pem extension. Save it somewhere on your computer and keep it safe just in case. Now the blue “Launch instances” button should be usable, so click it and after a little setup wait time you should receive a message that your new instance is launching: <a href="https://www.letshostit.org/wp-content/uploads/2016/10/aws-vps-instance-launched.png"><img class="aligncenter size-full wp-image-1666" src="https://www.letshostit.org/wp-content/uploads/2016/10/aws-vps-instance-launched.png" alt="aws vps instance launched" width="575" height="338" /></a>Click on the blue button and you will be taken back to the AWS console where your newly created VPS instance will be listed, it should look something like this : <a href="https://www.letshostit.org/wp-content/uploads/2016/10/lists-of-your-vps-instances.png"><img class="aligncenter size-full wp-image-1667" src="https://www.letshostit.org/wp-content/uploads/2016/10/lists-of-your-vps-instances.png" alt="lists of your vps instances" width="581" height="165" /></a> You will see your VPS with the status of running. Notice the Connect button above it, click that and another window should appear with instructions on how to connect to your VPS. It looks like this: <a href="https://www.letshostit.org/wp-content/uploads/2016/10/connect-to-your-amazon-VPS.png"><img class="aligncenter size-full wp-image-1668" src="https://www.letshostit.org/wp-content/uploads/2016/10/connect-to-your-amazon-VPS.png" alt="connect to your amazon VPS" width="524" height="304" /></a>I know it’s been a long signup but we’re almost there and the good news is you only have to do this once for a whole year of free VPS. First, click on “Download Remote Desktop File” and save that file somewhere on your computer, it’s what you will use to connect to your VPS. Next, you will need a password so click the Get Password button. You will now need to provide the Key Pair that you created earlier in order to get your password: <a href="https://www.letshostit.org/wp-content/uploads/2016/10/get-your-amazon-vps-password.png"><img class="aligncenter size-full wp-image-1669" src="https://www.letshostit.org/wp-content/uploads/2016/10/get-your-amazon-vps-password.png" alt="get your amazon vps password" width="461" height="347" /></a> Either upload your .pem file or copy its content in the provided field and click decrypt password. As soon as you do you should see your VPS password, write it down somwhere as that’s what you’ll use every time you connect to your VPS. I can’t believe I’m going to say this and I think you were all waiting for this: <strong>You’re done</strong>. <strong>Now you have your free Windows VPS up and running for a whole year</strong>, you have your .rdp file which you will be using to connect to it and you have your password. In case you used a VPS before you should now know how to proceed. In case this is your first time, just read on. Also I just want to re-iterate, this was a one time setup process, from now on, you have your VPS ready and running at all times, all you need to do is connect to it. <h3><a name="02"></a>2. How to connect to your VPS using remote desktop</h3> <p style="text-align: left;">Connecting to your newly created VPS through remote desktop is quite simple, if you did not have the .rdp file that you downloaded earlier you would have had to create your connection manually and enter the ip of your vps. This is not the case though, just double click the .rdp file, the name should be something like the-ip-of-the-vps.rdp ( something like 192.168.1.1.rdp …just an example). When you double click it for the first time something like this will appear:</p> <p style="text-align: left;"><a href="https://www.letshostit.org/wp-content/uploads/2016/10/connecting-to-your-amazon-vps.png"><img class="aligncenter size-full wp-image-1671" src="https://www.letshostit.org/wp-content/uploads/2016/10/connecting-to-your-amazon-vps.png" alt="connecting to your amazon vps" width="491" height="280" /></a></p> <p style="text-align: left;">Make sure to check the “Don’t ask me again for connections to this computer” checkbox so you don’t need to do this every time and skip an extra step and click “Connect”. Now you will be presented with the login screen where you need to enter your password:</p> <p style="text-align: left;"><a href="https://www.letshostit.org/wp-content/uploads/2016/10/enter-your-amazon-vps-credentials-2.png"><img class="aligncenter size-full wp-image-1673" src="https://www.letshostit.org/wp-content/uploads/2016/10/enter-your-amazon-vps-credentials-2.png" alt="enter your amazon vps credentials 2" width="377" height="279" /></a></p> <p style="text-align: left;">Enter you password under Administrator and click ok. Also check the “Remember my credentials” checkbox underneath so you don’t need to enter your password every time. After that click OK. Again, the first time you will do this you will have an extra window appear :</p> <p style="text-align: left;"><a href="https://www.letshostit.org/wp-content/uploads/2016/10/accept-the-certificate-from-amazon-vps-connection.png"><img class="aligncenter size-full wp-image-1674" src="https://www.letshostit.org/wp-content/uploads/2016/10/accept-the-certificate-from-amazon-vps-connection.png" sizes="(max-width: 389px) 100vw, 389px" srcset="http://www.massplanner.com/wp-flksdentisuz/uploads/2014/10/accept-the-certificate-from-amazon-vps-connection.png 389w, http://www.massplanner.com/wp-flksdentisuz/uploads/2014/10/accept-the-certificate-from-amazon-vps-connection-150x150.png 150w, http://www.massplanner.com/wp-flksdentisuz/uploads/2014/10/accept-the-certificate-from-amazon-vps-connection-300x300.png 300w, http://www.massplanner.com/wp-flksdentisuz/uploads/2014/10/accept-the-certificate-from-amazon-vps-connection-1024x1024.png 1024w" alt="accept the certificate from amazon vps connection" width="389" height="388" /></a></p> <p style="text-align: left;">Just check the “Don’t ask me again for connections to this computer” checkbox and click Yes and this will never show up again. Once you click Yes, you will enter you VPS. You are now connected to your new Windows VPS machine and can do anything you want with it. Just use it as you would use any other computer, install programs on it. It will run 24/7 and you don’t need to worry about anything. By the way, congratulations for getting your very own free windows vps, you deserver it after all this work!</p> <p style="text-align: left;">Again, you will have to do all these steps only once when you first set everything up, after that you will only need to double click your .rdp file and you will be automatically logged in to your VPS, so just place that file somewhere where you can easily access it like your desktop.</p> <h3><a name="03"></a>3.How to connect to your VPS using remote desktop on Mac OS X</h3> If you followed the above tutorial, you now have your .rdp file which you will be using to connect to the windows VPS. However you are on Mac and things will be a little different, though not so much. First of all you will need to install a remote desktop connection client, I installed Microsoft Remote Desktop which is easy to use and it’s free (you can find it in the App Store), here’s now it should look like : <a href="https://www.letshostit.org/wp-content/uploads/2016/10/microsoft-remote-desktop-app-for-max-os-x.jpg"><img class="aligncenter size-full wp-image-1720" src="https://www.letshostit.org/wp-content/uploads/2016/10/microsoft-remote-desktop-app-for-max-os-x.jpg" alt="microsoft remote desktop app for max os x" width="559" height="164" /></a> After you install the application you need to create your connection. If you have the .rdp file at hand and so you don’t waste time setting everything up manually, just import it using the “Import” option in the menu bar: <a href="https://www.letshostit.org/wp-content/uploads/2016/10/importing-the-rdp-file-in-remote-desktop-in-mac-os-x.jpg"><img class="aligncenter size-full wp-image-1721" src="https://www.letshostit.org/wp-content/uploads/2016/10/importing-the-rdp-file-in-remote-desktop-in-mac-os-x.jpg" alt="importing the rdp file in remote desktop in mac os x" width="480" height="247" /></a> In case you did not have the .rdp file, you had to manually create your connection, by entering the ip of your VPS, the user name and password as show below: <a href="https://www.letshostit.org/wp-content/uploads/2016/10/creating-a-remote-desktop-connection-in-mac-os-x.png"><img class="aligncenter size-full wp-image-1722" src="https://www.letshostit.org/wp-content/uploads/2016/10/creating-a-remote-desktop-connection-in-mac-os-x.png" alt="creating a remote desktop connection in mac os x" width="408" height="469" /></a> As long as we’re on this screen let’s make a few more tweaks too. If you imported the .rdp file, edit the imported connection and make sure you add the password (so you don’t have to enter it every time you connect) and choose the optimal resolution depending on your screen. Make sure to save everything and you are done setting everything up. Once the configuration is done, you just have to double click on your newly created connection and you can start massplanning. <a href="https://www.letshostit.org/wp-content/uploads/2016/10/double-click-the-remote-desktop-connection.png"><img class="aligncenter size-full wp-image-1725" src="https://www.letshostit.org/wp-content/uploads/2016/10/double-click-the-remote-desktop-connection.png" alt="double click the remote desktop connection" width="511" height="205" /></a> <h3><a name="04"></a>4. How to use your local drives in remote connections(or how to copy data from your PC to the VPS)</h3> <p style="text-align: left;">Depending on what you want to setup on your VPS you might find the need of using one of your local drives in remote desktop connections. This will help move data from your computer to the VPS like installers, folders with posts or the whole massplanner folder if you already had that running on your computer. It’s not a hard task although it’s a little hidden and not everybody know that this can be done.</p> <p style="text-align: left;">Ok, so let’s get started, right click on your amazon vps .rdp file and select edit, the remote connection options should show up like this :</p> <p style="text-align: left;"><a href="https://www.letshostit.org/wp-content/uploads/2016/10/remote-connections-options.png"><img class="aligncenter size-full wp-image-1675" src="https://www.letshostit.org/wp-content/uploads/2016/10/remote-connections-options.png" alt="remote connections options" width="409" height="463" /></a></p> <p style="text-align: left;">Here click on Local Resources, and on that tab, at the bottom under Local Devices and resources click More..</p> <p style="text-align: left;"><a href="https://www.letshostit.org/wp-content/uploads/2016/10/remote-connections-options-local-resources.png"><img class="aligncenter size-full wp-image-1676" src="https://www.letshostit.org/wp-content/uploads/2016/10/remote-connections-options-local-resources.png" alt="remote connections options local resources" width="404" height="467" /></a></p> <p style="text-align: left;">Now click on the + sign besides Drives and all your local drives will show up. Either select a few of them that you want to make available when you connect to the VPS or just select them all. Your drives are available on the VPS only when you are connected and only one person can connect at a time so your data is completely safe. After selecting one or more drives, click on OK. will you get back to the Local resources tab, now you need to save the changes that you made to the remote connection so go back to the General tab and click Save.</p> <p style="text-align: left;"><a href="https://www.letshostit.org/wp-content/uploads/2016/10/select-all-drives-within-remote-desktop-connection.png"><img class="aligncenter size-full wp-image-1677" src="https://www.letshostit.org/wp-content/uploads/2016/10/select-all-drives-within-remote-desktop-connection.png" alt="select all drives within remote desktop connection" width="397" height="366" /></a></p> <p style="text-align: left;">After this you can connect as you would normally do and you will notice in My computer that you also have access to your local drive when you’re inside your VPS.</p> <p style="text-align: left;">If you want to move Mass Planner to your VPS you will find the files in : c:Users<strong>youruser</strong>AppDataRoamingMassPlanner – change youruser with the user you are using on your computer. Here are the <a href="http://www.massplanner.com/mass-planner-stores-files/">full instructions about that</a>.</p> <h3><a name="05"></a>5. How to use your local drives in remote connections(or how to copy data from your Mac OS X to the VPS)</h3> If you want to share folders with files between your Mac and your new VPS machine, you just have to follow these simple steps: <strong>1. First, open the Microsoft Remote Desktop application that you installed in the previous step.</strong> You will see your previously created connection, like in the picture below: <a href="https://www.letshostit.org/wp-content/uploads/2016/10/microsoft-remote-desktop-connection.png"><img class="aligncenter size-full wp-image-3862" src="https://www.letshostit.org/wp-content/uploads/2016/10/microsoft-remote-desktop-connection.png" sizes="(max-width: 510px) 100vw, 510px" srcset="http://www.massplanner.com/wp-flksdentisuz/uploads/2014/10/microsoft-remote-desktop-connection.png 510w, http://www.massplanner.com/wp-flksdentisuz/uploads/2014/10/microsoft-remote-desktop-connection-300x191.png 300w" alt="microsoft remote desktop connection" width="510" height="325" /></a> <strong>2. Right-click on your connection and choose Edit</strong> Or you can select your VPS connection and click on the Edit button in the menu. The Edit window will appear with the 3 tabs: General, Session and Redirection. <a href="https://www.letshostit.org/wp-content/uploads/2016/10/Mac-OS-add-local-folder-to-VPS.png"><img class="aligncenter size-full wp-image-3863" src="https://www.letshostit.org/wp-content/uploads/2016/10/Mac-OS-add-local-folder-to-VPS.png" sizes="(max-width: 486px) 100vw, 486px" srcset="http://www.massplanner.com/wp-flksdentisuz/uploads/2014/10/Mac-OS-add-local-folder-to-VPS.png 486w, http://www.massplanner.com/wp-flksdentisuz/uploads/2014/10/Mac-OS-add-local-folder-to-VPS-230x300.png 230w" alt="Mac OS add local folder to VPS" width="486" height="634" /></a> <strong>3. Click on the Redirection tab and add a local folder</strong> From the Redirection tab, click on the “+” button, and you will be able to add a new local folder to your VPS. You just have to give it a name and select the target folder by entering the Path in the corresponding field (or simply choose Browse and select the wanted folder). <strong>4. See your shared folder in the VPS machine</strong> Now you can close the Edit window, and go ahead and double-click on the VPS connection to connect. Here, open the File Explorer and, in the Devices and Drivers section, you will see the selected folder form your Mac machine. <a href="https://www.letshostit.org/wp-content/uploads/2016/10/See-local-Mac-folder-on-VPS.png"><img class="aligncenter size-full wp-image-3864" src="https://www.letshostit.org/wp-content/uploads/2016/10/See-local-Mac-folder-on-VPS.png" sizes="(max-width: 843px) 100vw, 843px" srcset="http://www.massplanner.com/wp-flksdentisuz/uploads/2014/10/See-local-Mac-folder-on-VPS.png 843w, http://www.massplanner.com/wp-flksdentisuz/uploads/2014/10/See-local-Mac-folder-on-VPS-300x148.png 300w, http://www.massplanner.com/wp-flksdentisuz/uploads/2014/10/See-local-Mac-folder-on-VPS-600x296.png 600w" alt="See local Mac folder on VPS" width="843" height="416" /></a> Now you just have to repeat these steps for all the folders you need for your work and you’re all set. <h3><a name="06"></a>6. How to install and start using Mass Planner on your new VPS.</h3> <p style="text-align: left;">Installing Mass Planner or the vps is the same as installing it on any Windows based computer, all you need to do is double click the installer and you will be guided through the steps that you need to take before installing it. In order to get the installer on your VPS either use your local drives on your VPS as explained in the previous step or just download the installer directly on your server. In case you don’t have the instructions email that you received when subscribing to Mass Planner at hand, here’s a <a href="http://www.massplanner.com/knowledge-base/downloading-installing-mass-planner/" target="_blank" rel="noopener">quick link to the installer.</a></p> <p style="text-align: left;"><a href="https://www.letshostit.org/wp-content/uploads/2016/10/installing-mass-planner-on-your-vps.png"><img class="aligncenter size-full wp-image-1678" src="https://www.letshostit.org/wp-content/uploads/2016/10/installing-mass-planner-on-your-vps.png" alt="installing mass planner on your vps" width="363" height="306" /></a></p> <p style="text-align: left;">After downloading the installed on your VPS double click it and start the installation process, click next, next a couple of time and it should be installed, after that all is left for you to do is enter your credentials and start using it as you would use it on your own computer. It will be always running, 24/7 so you can set it up and let it post for you. Just use the remote desktop connection to check up on it from time to time to see everything is in order.</p> <p style="text-align: left;">You should already know how to use Mass Planner if you reached this point, however if you’re just starting, the best way to learn to use it is by watching our <a title="massplanner video tutorials" href="https://www.letshostit.org/wp-content/uploads/2016/10/video-tutorials" target="_blank" rel="noopener">video tutorials</a>.</p> <h3><a name="07"></a>7. How to disable IE Enhanced Security in Windows Server 2012</h3> <p style="text-align: left;">This might not seem very important to you, until you open up the only browser available on your new VPS – Internet Explorer in order to browse the web, access and download stuff and see that it’s not working. For some reason Microsoft thought it would be a smart idea to create the “IE Enhanced Security” which basically blocks you from browsing any website, not even Google is accessible unless you do 5-7 clicks first and add it to the safe list. If you do a search on google then it’s a new website/page and you need to add that as well and so on. Crazy fun, you might decide you can do this for a little while until you download Firefox or a better browser but it’s easier to disable this feature as it’s not really hard but it requires you to know exactly where to look for it.</p> <p style="text-align: left;">So let’s get started, first you will need to click on the start menu in the bottom left corner:</p> <p style="text-align: left;"><a href="https://www.letshostit.org/wp-content/uploads/2016/10/click-on-the-start-menu-on-your-server.png"><img class="aligncenter size-full wp-image-1713" src="https://www.letshostit.org/wp-content/uploads/2016/10/click-on-the-start-menu-on-your-server.png" alt="click on the start menu on your server" width="290" height="132" /></a></p> <p style="text-align: left;">From the popup menu that shows up select Server Manager, should be the first one in the top left corner. After the Server Manager is loaded click on Local Server:</p> <p style="text-align: left;"><a href="https://www.letshostit.org/wp-content/uploads/2016/10/click-on-local-server.png"><img class="aligncenter size-full wp-image-1714" src="https://www.letshostit.org/wp-content/uploads/2016/10/click-on-local-server.png" alt="click on local server" width="312" height="198" /></a></p> <p style="text-align: left;">After you have clicked on Local server look on the right side now and notice the IE Enhanced security configuration area and that is is turned on:</p> <p style="text-align: left;"><a href="https://www.letshostit.org/wp-content/uploads/2016/10/see-the-ie-enhanced-security-configuration-is-on.png"><img class="aligncenter size-full wp-image-1715" src="https://www.letshostit.org/wp-content/uploads/2016/10/see-the-ie-enhanced-security-configuration-is-on.png" alt="see the ie enhanced security configuration is on" width="373" height="110" /></a></p> <p style="text-align: left;">Click on “On” and more setting will appear where you can actually disable that setting. Here’s what it will look like:</p> <p style="text-align: left;"><a href="https://www.letshostit.org/wp-content/uploads/2016/10/switch-off-ie-enhanced-security.png"><img class="aligncenter size-full wp-image-1716" src="https://www.letshostit.org/wp-content/uploads/2016/10/switch-off-ie-enhanced-security.png" alt="switch off ie enhanced security" width="324" height="442" /></a></p> <p style="text-align: left;">As you can see I have already selected Off for Administrators – that’s what you should do too. If you want you can do the same for Users, though if you’re the only one that you’ll be using the VPS that is really not necessary. After selecting Off click on OK. Now you’re back in Server Manager and you will notice that it still says On for the IE security, just press F5 now to refresh the window and it will correctly say Off:</p> <p style="text-align: left;"><a href="https://www.letshostit.org/wp-content/uploads/2016/10/finally-ie-enhanced-security-is-off.png"><img class="aligncenter size-full wp-image-1717" src="https://www.letshostit.org/wp-content/uploads/2016/10/finally-ie-enhanced-security-is-off.png" alt="finally ie enhanced security is off" width="370" height="77" /></a></p> <p style="text-align: left;">And you’re done. You can close the Server Manager and open IE and see that it works normally now, no more crazy prompts. use it to do your bidding or just download your favorite browser and use that ?</p> <h3><a name="07"></a>8. Final notes.</h3> <p style="text-align: left;">It took a few steps but now you have a fully functional windows vps that you can use however you want for one whole year. We have tested it with Mass Planner with 2 accounts for Facebook, 2 for Twitter and 2 for Pinterest with a posting rate of 10-30 posts for each account per day and 1-3 tools enabled for each account and it worked without any problems for over a month(it’s still working, we just waited for a month to see everything is in order before making this tutorial).</p> <p style="text-align: left;">Depending on how much you use it it should also work for you if you use it moderately without any problems. If you’re looking to post hundreds and hundreds of posts per day with several accounts it might be slower but might still work. If you are looking for even more posting power you should change to a paid vps that provides more resources. We think however that this setup is decent enough for most of our moderate users.</p> <p style="text-align: left;">You can also use this server for anything else, if you have other sofware that doesn’t require a lot of resources and that you want to keep online 24/7 this will work. Keep in mind though that there are a few limitation to the server and you have your Credit Card entered, the way Amazon works is that if you go over the traffic limit or any other limit it charges you for the extra usage. Although the rates are really affordable I just wanted to make sure you know about this and don’t over-do use your VPS ( like installing a software that crawls and downloads a lot of big images and that will create a lot of traffic….just an example)</p> <p style="text-align: left;">Let us know what you think, is this free server working good for you, do you have another way of getting a good reliable free vps? Did you encounter any problem with the signup process or everything was a breeze and you just want to say thanks for sharing this with you? <strong>You can also share this with your friends using the below buttons</strong> ?</p> <div class="yarpp-related yarpp-related-none"> No related posts. </div> |
| json metadata | {"tags":["amazon","rdp","free"],"image":["https://www.letshostit.org/wp-content/uploads/2016/10/free-Windows-Server-2012.jpg","https://www.letshostit.org/wp-content/uploads/2016/10/get-your-free-vps-from-amazon.png","https://www.letshostit.org/wp-content/uploads/2016/10/signing-up-for-amazon-aws.png","https://www.letshostit.org/wp-content/uploads/2016/10/Amazon-AWS-login-credentials.png","https://www.letshostit.org/wp-content/uploads/2016/10/signup-for-AWS.png","https://www.letshostit.org/wp-content/uploads/2016/10/the-aws-signup-console-page.png","https://www.letshostit.org/wp-content/uploads/2016/10/aws-payment-filling-step.png","https://www.letshostit.org/wp-content/uploads/2016/10/aws-identity-verification-step.png","https://www.letshostit.org/wp-content/uploads/2016/10/aws-identity-verification-complete.png","https://www.letshostit.org/wp-content/uploads/2016/10/choose-aws-support-plan.png","https://www.letshostit.org/wp-content/uploads/2016/10/welcome-to-amazon-web-services.png","https://www.letshostit.org/wp-content/uploads/2016/10/launch-aws-management-console.png","https://www.letshostit.org/wp-content/uploads/2016/10/all-the-amazon-web-services.png","https://www.letshostit.org/wp-content/uploads/2016/10/create-your-amazon-vps.png","https://www.letshostit.org/wp-content/uploads/2016/10/virtual-servers-available-for-free-from-amazon.png","https://www.letshostit.org/wp-content/uploads/2016/10/select-a-windows-vps-installation.png","https://www.letshostit.org/wp-content/uploads/2016/10/select-the-general-purpose-t2-micro-vps.png","https://www.letshostit.org/wp-content/uploads/2016/10/click-the-review-and-launch-button.png","https://www.letshostit.org/wp-content/uploads/2016/10/aws-review-instance-launch.png","https://www.letshostit.org/wp-content/uploads/2016/10/creating-a-new-key-pair-fo-aws-vps.png","https://www.letshostit.org/wp-content/uploads/2016/10/aws-vps-instance-launched.png","https://www.letshostit.org/wp-content/uploads/2016/10/lists-of-your-vps-instances.png","https://www.letshostit.org/wp-content/uploads/2016/10/connect-to-your-amazon-VPS.png","https://www.letshostit.org/wp-content/uploads/2016/10/get-your-amazon-vps-password.png","https://www.letshostit.org/wp-content/uploads/2016/10/connecting-to-your-amazon-vps.png","https://www.letshostit.org/wp-content/uploads/2016/10/enter-your-amazon-vps-credentials-2.png","https://www.letshostit.org/wp-content/uploads/2016/10/accept-the-certificate-from-amazon-vps-connection.png","https://www.letshostit.org/wp-content/uploads/2016/10/microsoft-remote-desktop-app-for-max-os-x.jpg","https://www.letshostit.org/wp-content/uploads/2016/10/importing-the-rdp-file-in-remote-desktop-in-mac-os-x.jpg","https://www.letshostit.org/wp-content/uploads/2016/10/creating-a-remote-desktop-connection-in-mac-os-x.png","https://www.letshostit.org/wp-content/uploads/2016/10/double-click-the-remote-desktop-connection.png","https://www.letshostit.org/wp-content/uploads/2016/10/remote-connections-options.png","https://www.letshostit.org/wp-content/uploads/2016/10/remote-connections-options-local-resources.png","https://www.letshostit.org/wp-content/uploads/2016/10/select-all-drives-within-remote-desktop-connection.png","https://www.letshostit.org/wp-content/uploads/2016/10/microsoft-remote-desktop-connection.png","https://www.letshostit.org/wp-content/uploads/2016/10/Mac-OS-add-local-folder-to-VPS.png","https://www.letshostit.org/wp-content/uploads/2016/10/See-local-Mac-folder-on-VPS.png","https://www.letshostit.org/wp-content/uploads/2016/10/installing-mass-planner-on-your-vps.png","https://www.letshostit.org/wp-content/uploads/2016/10/click-on-the-start-menu-on-your-server.png","https://www.letshostit.org/wp-content/uploads/2016/10/click-on-local-server.png","https://www.letshostit.org/wp-content/uploads/2016/10/see-the-ie-enhanced-security-configuration-is-on.png","https://www.letshostit.org/wp-content/uploads/2016/10/switch-off-ie-enhanced-security.png","https://www.letshostit.org/wp-content/uploads/2016/10/finally-ie-enhanced-security-is-off.png"],"links":["https://www.letshostit.org/wp-content/uploads/2016/10/free-Windows-Server-2012.jpg","#01","#02","#03","#04","#05","#06","#07","#08","https://www.letshostit.org/wp-content/uploads/2016/10/free","https://www.letshostit.org/wp-content/uploads/2016/10/get-your-free-vps-from-amazon.png","https://www.letshostit.org/wp-content/uploads/2016/10/signing-up-for-amazon-aws.png","https://www.letshostit.org/wp-content/uploads/2016/10/Amazon-AWS-login-credentials.png","https://www.letshostit.org/wp-content/uploads/2016/10/signup-for-AWS.png","https://www.letshostit.org/wp-content/uploads/2016/10/the-aws-signup-console-page.png","https://www.letshostit.org/wp-content/uploads/2016/10/aws-payment-filling-step.png","https://www.letshostit.org/wp-content/uploads/2016/10/aws-identity-verification-step.png","https://www.letshostit.org/wp-content/uploads/2016/10/aws-identity-verification-complete.png","https://www.letshostit.org/wp-content/uploads/2016/10/choose-aws-support-plan.png","https://www.letshostit.org/wp-content/uploads/2016/10/welcome-to-amazon-web-services.png","https://www.letshostit.org/wp-content/uploads/2016/10/launch-aws-management-console.png","https://www.letshostit.org/wp-content/uploads/2016/10/all-the-amazon-web-services.png","https://www.letshostit.org/wp-content/uploads/2016/10/create-your-amazon-vps.png","https://www.letshostit.org/wp-content/uploads/2016/10/virtual-servers-available-for-free-from-amazon.png","https://www.letshostit.org/wp-content/uploads/2016/10/select-a-windows-vps-installation.png","https://www.letshostit.org/wp-content/uploads/2016/10/select-the-general-purpose-t2-micro-vps.png","https://www.letshostit.org/wp-content/uploads/2016/10/click-the-review-and-launch-button.png","https://www.letshostit.org/wp-content/uploads/2016/10/aws-review-instance-launch.png","https://www.letshostit.org/wp-content/uploads/2016/10/creating-a-new-key-pair-fo-aws-vps.png","https://www.letshostit.org/wp-content/uploads/2016/10/aws-vps-instance-launched.png","https://www.letshostit.org/wp-content/uploads/2016/10/lists-of-your-vps-instances.png","https://www.letshostit.org/wp-content/uploads/2016/10/connect-to-your-amazon-VPS.png","https://www.letshostit.org/wp-content/uploads/2016/10/get-your-amazon-vps-password.png","https://www.letshostit.org/wp-content/uploads/2016/10/connecting-to-your-amazon-vps.png","https://www.letshostit.org/wp-content/uploads/2016/10/enter-your-amazon-vps-credentials-2.png","https://www.letshostit.org/wp-content/uploads/2016/10/accept-the-certificate-from-amazon-vps-connection.png","https://www.letshostit.org/wp-content/uploads/2016/10/microsoft-remote-desktop-app-for-max-os-x.jpg","https://www.letshostit.org/wp-content/uploads/2016/10/importing-the-rdp-file-in-remote-desktop-in-mac-os-x.jpg","https://www.letshostit.org/wp-content/uploads/2016/10/creating-a-remote-desktop-connection-in-mac-os-x.png","https://www.letshostit.org/wp-content/uploads/2016/10/double-click-the-remote-desktop-connection.png","https://www.letshostit.org/wp-content/uploads/2016/10/remote-connections-options.png","https://www.letshostit.org/wp-content/uploads/2016/10/remote-connections-options-local-resources.png","https://www.letshostit.org/wp-content/uploads/2016/10/select-all-drives-within-remote-desktop-connection.png","http://www.massplanner.com/mass-planner-stores-files/","https://www.letshostit.org/wp-content/uploads/2016/10/microsoft-remote-desktop-connection.png","https://www.letshostit.org/wp-content/uploads/2016/10/Mac-OS-add-local-folder-to-VPS.png","https://www.letshostit.org/wp-content/uploads/2016/10/See-local-Mac-folder-on-VPS.png","http://www.massplanner.com/knowledge-base/downloading-installing-mass-planner/","https://www.letshostit.org/wp-content/uploads/2016/10/installing-mass-planner-on-your-vps.png","https://www.letshostit.org/wp-content/uploads/2016/10/video-tutorials","https://www.letshostit.org/wp-content/uploads/2016/10/click-on-the-start-menu-on-your-server.png","https://www.letshostit.org/wp-content/uploads/2016/10/click-on-local-server.png","https://www.letshostit.org/wp-content/uploads/2016/10/see-the-ie-enhanced-security-configuration-is-on.png","https://www.letshostit.org/wp-content/uploads/2016/10/switch-off-ie-enhanced-security.png","https://www.letshostit.org/wp-content/uploads/2016/10/finally-ie-enhanced-security-is-off.png"],"app":"steemit/0.1","format":"markdown"} |
| Transaction Info | Block #19479043/Trx a6003e436a193af19a6a3c8016ea521ed61c4144 |
View Raw JSON Data
{
"trx_id": "a6003e436a193af19a6a3c8016ea521ed61c4144",
"block": 19479043,
"trx_in_block": 0,
"op_in_trx": 0,
"virtual_op": 0,
"timestamp": "2018-02-01T04:33:18",
"op": [
"comment",
{
"parent_author": "",
"parent_permlink": "amazon",
"author": "ranarehan",
"permlink": "full-instructions-detailed-amazon-rdp-how-to-get-a-free-windows-vps-for-a-year",
"title": "Full instructions Detailed AMAZON RDP – How to get a free Windows VPS for a YEAR",
"body": "<h4 style=\"text-align: center;\"><strong>Full instructions Detailed AMAZON RDP – How to get a free Windows VPS for a YEAR</strong>\nA lot of people ask us for a good VPS that they can use for their copy of Mass Planner, if you want to keep your account posting 24/7 but don’t want to keep your computer on all day long the easy solution is to use a Windows VPS and move Mass Planner on that server.</h4>\nMost of you are asking for a cheap VPS and most of you use Mass Planner with one or two accounts so this will be the best solution for you – a free Windows VPS that you can use for a year at 0 costs. It’s not very powerful but it’s decent enough and Mass Planner will run on it with a couple of accounts quite well.\n\n<a href=\"https://www.letshostit.org/wp-content/uploads/2016/10/free-Windows-Server-2012.jpg\"><img class=\"aligncenter size-full wp-image-1683\" src=\"https://www.letshostit.org/wp-content/uploads/2016/10/free-Windows-Server-2012.jpg\" alt=\"free Windows-Server-2012\" width=\"455\" height=\"273\" /></a>\n\nThis is not for people that need a powerful machine and use a lot of accounts, for that you will need a better server and there are a lot of places where you can get that online, you should know better if you’re at that level so we’re not going to get into that.\n\nIn this article we’re going to cover the following:\n<ol>\n \t<li><a href=\"#01\">How to get a free windows VPS for 1 year</a></li>\n \t<li><a href=\"#02\">How to connect to your VPS using remote desktop on Windows</a></li>\n \t<li><a href=\"#03\">How to connect to your VPS using remote desktop on Mac OS X</a></li>\n \t<li><a href=\"#04\">How to use your local drive in remote connections(or how to copy data from your PC to the VPS)</a></li>\n \t<li><a href=\"#05\">How to use your local drives in remote connections(or how to copy data from your Mac OS X to the VPS)</a></li>\n \t<li><a href=\"#06\">How to install and start using Mass Planner on your new VPS</a></li>\n \t<li><a href=\"#07\">How to disable IE Enhanced Security in Windows Server 2012</a></li>\n \t<li><a href=\"#08\">Final notes</a></li>\n</ol>\nSo let’s get started:\n<h3><a name=\"01\"></a>1. How to get a free windows vps for 1 year</h3>\nSome of you might know but most of you probably don’t – Amazon offers everybody that wants to test their services a free vps for a year. They make it a little hard to navigate through all their settings and signup pages so here’s a short tutorial on how to do it fast and easy.\n\n<strong>Here is what you will need:</strong>\n<ul>\n \t<li>a credit card, it will not be billed and the vps is free but they require you to enter one</li>\n \t<li>a telephone number – they will call to verify your identity(call is automated not human)</li>\n \t<li>5-15 minutes of your time depending on how fast you are filling up forms and following instructions.</li>\n</ul>\n<strong>Here is what you will get:</strong>\n<ul>\n \t<li>1Gb of RAM</li>\n \t<li>30Gb Hdd ( you’ll have around 11Gb free after the OS is installed)</li>\n \t<li>1 virtual processor at 2.49Ghz</li>\n \t<li>OS: Microsoft Windows Server 2012 R2 Standard.</li>\n \t<li>1GB monthly free traffic ( if you go over they will charge you $0.12 per 1Gb which is almost free as well ? )</li>\n</ul>\nAs you can see, it’s not much but it’s pretty decent, it’s a lot better than my first computer ( though that was a while back). What’s most important is that it’s free for a year and it will suffice for any day-to-day post scheduling.\n\nIf you want to go ahead and get your own server like the one above, just go over to Amazon at : <a href=\"https://www.letshostit.org/wp-content/uploads/2016/10/free\" target=\"_blank\" rel=\"noopener\">http://aws.amazon.com/free/</a>. You will see this server being referred to as AWS account( it means Amazon Web Services account).\n\nYou can read a lot more information on their page about the free plan, you can go ahead and read that or if you just simply want to continue, click the yellow “Get started today” button that looks like this :\n\n<a href=\"https://www.letshostit.org/wp-content/uploads/2016/10/get-your-free-vps-from-amazon.png\"><img class=\"aligncenter size-full wp-image-1646\" src=\"https://www.letshostit.org/wp-content/uploads/2016/10/get-your-free-vps-from-amazon.png\" alt=\"get your free vps from amazon\" width=\"246\" height=\"127\" /></a>\n\nNow you will be taken to the signup page for the AWS service, go ahead and create a new account by selecting “I am a new user” and entering your email like this:\n\n \n\n<a href=\"https://www.letshostit.org/wp-content/uploads/2016/10/signing-up-for-amazon-aws.png\"><img class=\"aligncenter size-full wp-image-1647\" src=\"https://www.letshostit.org/wp-content/uploads/2016/10/signing-up-for-amazon-aws.png\" alt=\"signing up for amazon aws\" width=\"483\" height=\"417\" /></a>\n\nAfter filing in the above click the yellow “Sign in using our secure server” button and you will be taken to another form to complete the signup process.\n\n<a href=\"https://www.letshostit.org/wp-content/uploads/2016/10/Amazon-AWS-login-credentials.png\"><img class=\"aligncenter size-full wp-image-1648\" src=\"https://www.letshostit.org/wp-content/uploads/2016/10/Amazon-AWS-login-credentials.png\" alt=\"Amazon AWS login credentials\" width=\"704\" height=\"340\" /></a>\n\nGo ahead and fill these too with your name, email as before and select a new password. After you’re done click the “Create account” button. You will then be redirected to another page that will require you to actually sign up to AWS after creating your account:\n\n<a href=\"https://www.letshostit.org/wp-content/uploads/2016/10/signup-for-AWS.png\"><img class=\"aligncenter size-full wp-image-1649\" src=\"https://www.letshostit.org/wp-content/uploads/2016/10/signup-for-AWS.png\" alt=\"signup for AWS\" width=\"753\" height=\"205\" /></a>\n\nClick the “sign up for AWS” link and you will be redirected to a page that will ask for your details( the AWS console signup page). You will need to fill this up in order to proceed to the next step.\n\n \n\n<a href=\"https://www.letshostit.org/wp-content/uploads/2016/10/the-aws-signup-console-page.png\"><img class=\"aligncenter size-full wp-image-1650\" src=\"https://www.letshostit.org/wp-content/uploads/2016/10/the-aws-signup-console-page.png\" alt=\"the aws signup console page\" width=\"437\" height=\"577\" /></a>\n\nFill everything up correctly, don’t make stuff up but fill in your real name and address as you will also have to enter your credit card information later and if they don’t match you might get denied and done all this for nothing. So fill in your Full name, company( if any), select your country, enter address, city, state, postal code, phone number, the security code and finally check the AWS customer agreement. After everything is filled in nicely click the Create Account and Continue button. You will be redirected to the page where you need to enter your credit card details:\n\n<a href=\"https://www.letshostit.org/wp-content/uploads/2016/10/aws-payment-filling-step.png\"><img class=\"aligncenter size-full wp-image-1651\" src=\"https://www.letshostit.org/wp-content/uploads/2016/10/aws-payment-filling-step.png\" alt=\"aws payment filling step\" width=\"504\" height=\"479\" /></a>\n\nFill in your credit card number and select the expiration date. Enter you name as before, either leave the address that you already entered(as I did) or select a new one, after that press “Continue”. You will be redirected to the Identity verification step:\n\n<a href=\"https://www.letshostit.org/wp-content/uploads/2016/10/aws-identity-verification-step.png\"><img class=\"aligncenter size-full wp-image-1652\" src=\"https://www.letshostit.org/wp-content/uploads/2016/10/aws-identity-verification-step.png\" alt=\"aws identity verification step\" width=\"496\" height=\"362\" /></a>Now they want to verify that you are who you say you are so you are going to get an automated call from Amazon and will need to enter the provided PIN number in order to proceed. Make sure again that you entered your phone number correctly, have your telephone close by and click the “Call me now” yellow button.\n\nYou should immediately receive a call from Amazon, they will also display a PIN number on your computer screen you will need to enter that PIN number on your telephone keypad or just say it loud one digit at a time. If/When successful you will receive a message on your screen stating that your identity verification is complete:\n\n<a href=\"https://www.letshostit.org/wp-content/uploads/2016/10/aws-identity-verification-complete.png\"><img class=\"aligncenter size-full wp-image-1653\" src=\"https://www.letshostit.org/wp-content/uploads/2016/10/aws-identity-verification-complete.png\" alt=\"aws identity verification complete\" width=\"463\" height=\"307\" /></a>Now just click the “Continue to select your Support Plan” button. You will need to select the support plan for your VPS:\n\n<a href=\"https://www.letshostit.org/wp-content/uploads/2016/10/choose-aws-support-plan.png\"><img class=\"aligncenter size-full wp-image-1654\" src=\"https://www.letshostit.org/wp-content/uploads/2016/10/choose-aws-support-plan.png\" alt=\"choose aws support plan\" width=\"497\" height=\"457\" /></a>\n\nThis one should be quite simple, if Basic(Free) is already selected leave it like this, if something else is selected just select Basic(Free) and click Continue and you finally have your Amazon Web Services account:\n\n<a href=\"https://www.letshostit.org/wp-content/uploads/2016/10/welcome-to-amazon-web-services.png\"><img class=\"aligncenter size-full wp-image-1655\" src=\"https://www.letshostit.org/wp-content/uploads/2016/10/welcome-to-amazon-web-services.png\" alt=\"welcome to amazon web services\" width=\"536\" height=\"103\" /></a>\n\nCongratulations, you have you AWS account, now all you need to do is set up your Windows VPS. In order to do that just click on the yellow “Launch Management Console”\n\n<a href=\"https://www.letshostit.org/wp-content/uploads/2016/10/launch-aws-management-console.png\"><img class=\"aligncenter size-full wp-image-1656\" src=\"https://www.letshostit.org/wp-content/uploads/2016/10/launch-aws-management-console.png\" alt=\"launch aws management console\" width=\"396\" height=\"61\" /></a>At this point you might be prompted to enter your AWS password again, the one that we created a few steps above when we started. Go ahead and enter that and login again to the AWS management console. Don’t mind all the services amazon is providing here, there are a lot of them and someone that is new to this might feel a little lost, here’s how the management console looks like:\n\n<a href=\"https://www.letshostit.org/wp-content/uploads/2016/10/all-the-amazon-web-services.png\"><img class=\"aligncenter size-full wp-image-1657\" src=\"https://www.letshostit.org/wp-content/uploads/2016/10/all-the-amazon-web-services.png\" alt=\"all the amazon web services\" width=\"500\" height=\"241\" /></a>\n\nAgain, don’t mind them all, just click on EC2(Virtual Servers in the Cloud), should be the second from top to bottom in the left column. You will be taken to another screen that again is full with a lot of information that might be overwhelming ( Amazon did not make this easy at all for beginners ? ).\n\n<a href=\"https://www.letshostit.org/wp-content/uploads/2016/10/create-your-amazon-vps.png\"><img class=\"aligncenter size-full wp-image-1658\" src=\"https://www.letshostit.org/wp-content/uploads/2016/10/create-your-amazon-vps.png\" alt=\"create your amazon vps\" width=\"544\" height=\"472\" /></a>\n\nJust click the blue “Launch Instance” button and you will be redirected to a page where you will need to choose what operating system to install on your VPS:\n\n<a href=\"https://www.letshostit.org/wp-content/uploads/2016/10/virtual-servers-available-for-free-from-amazon.png\"><img class=\"aligncenter size-full wp-image-1659\" src=\"https://www.letshostit.org/wp-content/uploads/2016/10/virtual-servers-available-for-free-from-amazon.png\" alt=\"virtual servers available for free from amazon\" width=\"473\" height=\"404\" /></a>\n\nAs you can see there are several choices of operating systems, if you are doing this in order to use it with other software at this point you can choose either linux or windows. As we have created this tutorial to use a Windows VPS with Mass Planner ( as it does not currently work on linux) we’ll be continuing by choosing the last item in this list “Microsoft Windows Server 2012 R2 Base”. In order to proceed click the blue “Select” button to the right of the Windows items:\n\n<a href=\"https://www.letshostit.org/wp-content/uploads/2016/10/select-a-windows-vps-installation.png\"><img class=\"aligncenter size-full wp-image-1660\" src=\"https://www.letshostit.org/wp-content/uploads/2016/10/select-a-windows-vps-installation.png\" alt=\"select a windows vps installation\" width=\"136\" height=\"77\" /></a>Now you will be taken through a couple of steps in order to select the specs of your new VPS. In order to keep it free, always select the one that has the green “Free tire eligible” text :\n\n<a href=\"https://www.letshostit.org/wp-content/uploads/2016/10/select-the-general-purpose-t2-micro-vps.png\"><img class=\"aligncenter size-full wp-image-1661\" src=\"https://www.letshostit.org/wp-content/uploads/2016/10/select-the-general-purpose-t2-micro-vps.png\" alt=\"select the general purpose t2 micro vps\" width=\"504\" height=\"201\" /></a>\n\nIt should already be selected, if not select the first item, General purpose t2 micro which is the only one that is free. Now, you can either go through the rest of the steps and see what each offers you, or just simply click the blue “Review and Launch” and jump to the end:\n\n<a href=\"https://www.letshostit.org/wp-content/uploads/2016/10/click-the-review-and-launch-button.png\"><img class=\"aligncenter size-full wp-image-1662\" src=\"https://www.letshostit.org/wp-content/uploads/2016/10/click-the-review-and-launch-button.png\" alt=\"click the review and launch button\" width=\"593\" height=\"50\" /></a>\n\nIf you’ve pressed the Review and Launch button you should be at step 7, Review instance launch, they’re just giving you a lot more information about the server, you can skip everything and click the blue “Launch” button in the bottom right corner.\n\n<a href=\"https://www.letshostit.org/wp-content/uploads/2016/10/aws-review-instance-launch.png\"><img class=\"aligncenter size-full wp-image-1663\" src=\"https://www.letshostit.org/wp-content/uploads/2016/10/aws-review-instance-launch.png\" alt=\"aws review instance launch\" width=\"473\" height=\"430\" /></a>You will be prompted to select a new key pair or create one. This will be useful in case you loose your password and need to login to your VPS, as you have just created a new account you won’t have one already, so select to create a new key pair and enter a name for it.\n\n<a href=\"https://www.letshostit.org/wp-content/uploads/2016/10/creating-a-new-key-pair-fo-aws-vps.png\"><img class=\"aligncenter size-full wp-image-1665\" src=\"https://www.letshostit.org/wp-content/uploads/2016/10/creating-a-new-key-pair-fo-aws-vps.png\" alt=\"creating a new key pair fo aws vps\" width=\"459\" height=\"338\" /></a>\n\nAfter entering the name for your key pair click on “download key pair” and your browser should prompt you to download a new file to your computer, it will be named as the name you gave it above, without spaces and with a .pem extension. Save it somewhere on your computer and keep it safe just in case.\n\nNow the blue “Launch instances” button should be usable, so click it and after a little setup wait time you should receive a message that your new instance is launching:\n\n<a href=\"https://www.letshostit.org/wp-content/uploads/2016/10/aws-vps-instance-launched.png\"><img class=\"aligncenter size-full wp-image-1666\" src=\"https://www.letshostit.org/wp-content/uploads/2016/10/aws-vps-instance-launched.png\" alt=\"aws vps instance launched\" width=\"575\" height=\"338\" /></a>Click on the blue button and you will be taken back to the AWS console where your newly created VPS instance will be listed, it should look something like this :\n\n<a href=\"https://www.letshostit.org/wp-content/uploads/2016/10/lists-of-your-vps-instances.png\"><img class=\"aligncenter size-full wp-image-1667\" src=\"https://www.letshostit.org/wp-content/uploads/2016/10/lists-of-your-vps-instances.png\" alt=\"lists of your vps instances\" width=\"581\" height=\"165\" /></a>\n\nYou will see your VPS with the status of running. Notice the Connect button above it, click that and another window should appear with instructions on how to connect to your VPS. It looks like this:\n\n<a href=\"https://www.letshostit.org/wp-content/uploads/2016/10/connect-to-your-amazon-VPS.png\"><img class=\"aligncenter size-full wp-image-1668\" src=\"https://www.letshostit.org/wp-content/uploads/2016/10/connect-to-your-amazon-VPS.png\" alt=\"connect to your amazon VPS\" width=\"524\" height=\"304\" /></a>I know it’s been a long signup but we’re almost there and the good news is you only have to do this once for a whole year of free VPS.\n\nFirst, click on “Download Remote Desktop File” and save that file somewhere on your computer, it’s what you will use to connect to your VPS. Next, you will need a password so click the Get Password button. You will now need to provide the Key Pair that you created earlier in order to get your password:\n\n<a href=\"https://www.letshostit.org/wp-content/uploads/2016/10/get-your-amazon-vps-password.png\"><img class=\"aligncenter size-full wp-image-1669\" src=\"https://www.letshostit.org/wp-content/uploads/2016/10/get-your-amazon-vps-password.png\" alt=\"get your amazon vps password\" width=\"461\" height=\"347\" /></a>\n\nEither upload your .pem file or copy its content in the provided field and click decrypt password. As soon as you do you should see your VPS password, write it down somwhere as that’s what you’ll use every time you connect to your VPS.\n\nI can’t believe I’m going to say this and I think you were all waiting for this: <strong>You’re done</strong>. <strong>Now you have your free Windows VPS up and running for a whole year</strong>, you have your .rdp file which you will be using to connect to it and you have your password. In case you used a VPS before you should now know how to proceed. In case this is your first time, just read on.\n\nAlso I just want to re-iterate, this was a one time setup process, from now on, you have your VPS ready and running at all times, all you need to do is connect to it.\n\n \n<h3><a name=\"02\"></a>2. How to connect to your VPS using remote desktop</h3>\n<p style=\"text-align: left;\">Connecting to your newly created VPS through remote desktop is quite simple, if you did not have the .rdp file that you downloaded earlier you would have had to create your connection manually and enter the ip of your vps. This is not the case though, just double click the .rdp file, the name should be something like the-ip-of-the-vps.rdp ( something like 192.168.1.1.rdp …just an example). When you double click it for the first time something like this will appear:</p>\n<p style=\"text-align: left;\"><a href=\"https://www.letshostit.org/wp-content/uploads/2016/10/connecting-to-your-amazon-vps.png\"><img class=\"aligncenter size-full wp-image-1671\" src=\"https://www.letshostit.org/wp-content/uploads/2016/10/connecting-to-your-amazon-vps.png\" alt=\"connecting to your amazon vps\" width=\"491\" height=\"280\" /></a></p>\n<p style=\"text-align: left;\">Make sure to check the “Don’t ask me again for connections to this computer” checkbox so you don’t need to do this every time and skip an extra step and click “Connect”. Now you will be presented with the login screen where you need to enter your password:</p>\n<p style=\"text-align: left;\"><a href=\"https://www.letshostit.org/wp-content/uploads/2016/10/enter-your-amazon-vps-credentials-2.png\"><img class=\"aligncenter size-full wp-image-1673\" src=\"https://www.letshostit.org/wp-content/uploads/2016/10/enter-your-amazon-vps-credentials-2.png\" alt=\"enter your amazon vps credentials 2\" width=\"377\" height=\"279\" /></a></p>\n<p style=\"text-align: left;\">Enter you password under Administrator and click ok. Also check the “Remember my credentials” checkbox underneath so you don’t need to enter your password every time. After that click OK. Again, the first time you will do this you will have an extra window appear :</p>\n<p style=\"text-align: left;\"><a href=\"https://www.letshostit.org/wp-content/uploads/2016/10/accept-the-certificate-from-amazon-vps-connection.png\"><img class=\"aligncenter size-full wp-image-1674\" src=\"https://www.letshostit.org/wp-content/uploads/2016/10/accept-the-certificate-from-amazon-vps-connection.png\" sizes=\"(max-width: 389px) 100vw, 389px\" srcset=\"http://www.massplanner.com/wp-flksdentisuz/uploads/2014/10/accept-the-certificate-from-amazon-vps-connection.png 389w, http://www.massplanner.com/wp-flksdentisuz/uploads/2014/10/accept-the-certificate-from-amazon-vps-connection-150x150.png 150w, http://www.massplanner.com/wp-flksdentisuz/uploads/2014/10/accept-the-certificate-from-amazon-vps-connection-300x300.png 300w, http://www.massplanner.com/wp-flksdentisuz/uploads/2014/10/accept-the-certificate-from-amazon-vps-connection-1024x1024.png 1024w\" alt=\"accept the certificate from amazon vps connection\" width=\"389\" height=\"388\" /></a></p>\n<p style=\"text-align: left;\">Just check the “Don’t ask me again for connections to this computer” checkbox and click Yes and this will never show up again. Once you click Yes, you will enter you VPS. You are now connected to your new Windows VPS machine and can do anything you want with it. Just use it as you would use any other computer, install programs on it. It will run 24/7 and you don’t need to worry about anything. By the way, congratulations for getting your very own free windows vps, you deserver it after all this work!</p>\n<p style=\"text-align: left;\">Again, you will have to do all these steps only once when you first set everything up, after that you will only need to double click your .rdp file and you will be automatically logged in to your VPS, so just place that file somewhere where you can easily access it like your desktop.</p>\n\n<h3><a name=\"03\"></a>3.How to connect to your VPS using remote desktop on Mac OS X</h3>\nIf you followed the above tutorial, you now have your .rdp file which you will be using to connect to the windows VPS. However you are on Mac and things will be a little different, though not so much.\n\nFirst of all you will need to install a remote desktop connection client, I installed Microsoft Remote Desktop which is easy to use and it’s free (you can find it in the App Store), here’s now it should look like :\n\n<a href=\"https://www.letshostit.org/wp-content/uploads/2016/10/microsoft-remote-desktop-app-for-max-os-x.jpg\"><img class=\"aligncenter size-full wp-image-1720\" src=\"https://www.letshostit.org/wp-content/uploads/2016/10/microsoft-remote-desktop-app-for-max-os-x.jpg\" alt=\"microsoft remote desktop app for max os x\" width=\"559\" height=\"164\" /></a>\n\nAfter you install the application you need to create your connection. If you have the .rdp file at hand and so you don’t waste time setting everything up manually, just import it using the “Import” option in the menu bar:\n\n<a href=\"https://www.letshostit.org/wp-content/uploads/2016/10/importing-the-rdp-file-in-remote-desktop-in-mac-os-x.jpg\"><img class=\"aligncenter size-full wp-image-1721\" src=\"https://www.letshostit.org/wp-content/uploads/2016/10/importing-the-rdp-file-in-remote-desktop-in-mac-os-x.jpg\" alt=\"importing the rdp file in remote desktop in mac os x\" width=\"480\" height=\"247\" /></a>\n\nIn case you did not have the .rdp file, you had to manually create your connection, by entering the ip of your VPS, the user name and password as show below:\n\n<a href=\"https://www.letshostit.org/wp-content/uploads/2016/10/creating-a-remote-desktop-connection-in-mac-os-x.png\"><img class=\"aligncenter size-full wp-image-1722\" src=\"https://www.letshostit.org/wp-content/uploads/2016/10/creating-a-remote-desktop-connection-in-mac-os-x.png\" alt=\"creating a remote desktop connection in mac os x\" width=\"408\" height=\"469\" /></a>\n\nAs long as we’re on this screen let’s make a few more tweaks too. If you imported the .rdp file, edit the imported connection and make sure you add the password (so you don’t have to enter it every time you connect) and choose the optimal resolution depending on your screen. Make sure to save everything and you are done setting everything up.\n\nOnce the configuration is done, you just have to double click on your newly created connection and you can start massplanning.\n\n<a href=\"https://www.letshostit.org/wp-content/uploads/2016/10/double-click-the-remote-desktop-connection.png\"><img class=\"aligncenter size-full wp-image-1725\" src=\"https://www.letshostit.org/wp-content/uploads/2016/10/double-click-the-remote-desktop-connection.png\" alt=\"double click the remote desktop connection\" width=\"511\" height=\"205\" /></a>\n<h3><a name=\"04\"></a>4. How to use your local drives in remote connections(or how to copy data from your PC to the VPS)</h3>\n<p style=\"text-align: left;\">Depending on what you want to setup on your VPS you might find the need of using one of your local drives in remote desktop connections. This will help move data from your computer to the VPS like installers, folders with posts or the whole massplanner folder if you already had that running on your computer. It’s not a hard task although it’s a little hidden and not everybody know that this can be done.</p>\n<p style=\"text-align: left;\">Ok, so let’s get started, right click on your amazon vps .rdp file and select edit, the remote connection options should show up like this :</p>\n<p style=\"text-align: left;\"><a href=\"https://www.letshostit.org/wp-content/uploads/2016/10/remote-connections-options.png\"><img class=\"aligncenter size-full wp-image-1675\" src=\"https://www.letshostit.org/wp-content/uploads/2016/10/remote-connections-options.png\" alt=\"remote connections options\" width=\"409\" height=\"463\" /></a></p>\n<p style=\"text-align: left;\">Here click on Local Resources, and on that tab, at the bottom under Local Devices and resources click More..</p>\n<p style=\"text-align: left;\"><a href=\"https://www.letshostit.org/wp-content/uploads/2016/10/remote-connections-options-local-resources.png\"><img class=\"aligncenter size-full wp-image-1676\" src=\"https://www.letshostit.org/wp-content/uploads/2016/10/remote-connections-options-local-resources.png\" alt=\"remote connections options local resources\" width=\"404\" height=\"467\" /></a></p>\n<p style=\"text-align: left;\">Now click on the + sign besides Drives and all your local drives will show up. Either select a few of them that you want to make available when you connect to the VPS or just select them all. Your drives are available on the VPS only when you are connected and only one person can connect at a time so your data is completely safe. After selecting one or more drives, click on OK. will you get back to the Local resources tab, now you need to save the changes that you made to the remote connection so go back to the General tab and click Save.</p>\n<p style=\"text-align: left;\"><a href=\"https://www.letshostit.org/wp-content/uploads/2016/10/select-all-drives-within-remote-desktop-connection.png\"><img class=\"aligncenter size-full wp-image-1677\" src=\"https://www.letshostit.org/wp-content/uploads/2016/10/select-all-drives-within-remote-desktop-connection.png\" alt=\"select all drives within remote desktop connection\" width=\"397\" height=\"366\" /></a></p>\n<p style=\"text-align: left;\">After this you can connect as you would normally do and you will notice in My computer that you also have access to your local drive when you’re inside your VPS.</p>\n<p style=\"text-align: left;\">If you want to move Mass Planner to your VPS you will find the files in : c:Users<strong>youruser</strong>AppDataRoamingMassPlanner – change youruser with the user you are using on your computer. Here are the <a href=\"http://www.massplanner.com/mass-planner-stores-files/\">full instructions about that</a>.</p>\n\n<h3><a name=\"05\"></a>5. How to use your local drives in remote connections(or how to copy data from your Mac OS X to the VPS)</h3>\nIf you want to share folders with files between your Mac and your new VPS machine, you just have to follow these simple steps:\n\n<strong>1. First, open the Microsoft Remote Desktop application that you installed in the previous step.</strong>\n\nYou will see your previously created connection, like in the picture below:\n\n<a href=\"https://www.letshostit.org/wp-content/uploads/2016/10/microsoft-remote-desktop-connection.png\"><img class=\"aligncenter size-full wp-image-3862\" src=\"https://www.letshostit.org/wp-content/uploads/2016/10/microsoft-remote-desktop-connection.png\" sizes=\"(max-width: 510px) 100vw, 510px\" srcset=\"http://www.massplanner.com/wp-flksdentisuz/uploads/2014/10/microsoft-remote-desktop-connection.png 510w, http://www.massplanner.com/wp-flksdentisuz/uploads/2014/10/microsoft-remote-desktop-connection-300x191.png 300w\" alt=\"microsoft remote desktop connection\" width=\"510\" height=\"325\" /></a>\n\n<strong>2. Right-click on your connection and choose Edit</strong>\n\nOr you can select your VPS connection and click on the Edit button in the menu. The Edit window will appear with the 3 tabs: General, Session and Redirection.\n\n<a href=\"https://www.letshostit.org/wp-content/uploads/2016/10/Mac-OS-add-local-folder-to-VPS.png\"><img class=\"aligncenter size-full wp-image-3863\" src=\"https://www.letshostit.org/wp-content/uploads/2016/10/Mac-OS-add-local-folder-to-VPS.png\" sizes=\"(max-width: 486px) 100vw, 486px\" srcset=\"http://www.massplanner.com/wp-flksdentisuz/uploads/2014/10/Mac-OS-add-local-folder-to-VPS.png 486w, http://www.massplanner.com/wp-flksdentisuz/uploads/2014/10/Mac-OS-add-local-folder-to-VPS-230x300.png 230w\" alt=\"Mac OS add local folder to VPS\" width=\"486\" height=\"634\" /></a>\n\n<strong>3. Click on the Redirection tab and add a local folder</strong>\n\nFrom the Redirection tab, click on the “+” button, and you will be able to add a new local folder to your VPS. You just have to give it a name and select the target folder by entering the Path in the corresponding field (or simply choose Browse and select the wanted folder).\n\n<strong>4. See your shared folder in the VPS machine</strong>\n\nNow you can close the Edit window, and go ahead and double-click on the VPS connection to connect. Here, open the File Explorer and, in the Devices and Drivers section, you will see the selected folder form your Mac machine.\n\n<a href=\"https://www.letshostit.org/wp-content/uploads/2016/10/See-local-Mac-folder-on-VPS.png\"><img class=\"aligncenter size-full wp-image-3864\" src=\"https://www.letshostit.org/wp-content/uploads/2016/10/See-local-Mac-folder-on-VPS.png\" sizes=\"(max-width: 843px) 100vw, 843px\" srcset=\"http://www.massplanner.com/wp-flksdentisuz/uploads/2014/10/See-local-Mac-folder-on-VPS.png 843w, http://www.massplanner.com/wp-flksdentisuz/uploads/2014/10/See-local-Mac-folder-on-VPS-300x148.png 300w, http://www.massplanner.com/wp-flksdentisuz/uploads/2014/10/See-local-Mac-folder-on-VPS-600x296.png 600w\" alt=\"See local Mac folder on VPS\" width=\"843\" height=\"416\" /></a>\n\nNow you just have to repeat these steps for all the folders you need for your work and you’re all set.\n<h3><a name=\"06\"></a>6. How to install and start using Mass Planner on your new VPS.</h3>\n<p style=\"text-align: left;\">Installing Mass Planner or the vps is the same as installing it on any Windows based computer, all you need to do is double click the installer and you will be guided through the steps that you need to take before installing it. In order to get the installer on your VPS either use your local drives on your VPS as explained in the previous step or just download the installer directly on your server. In case you don’t have the instructions email that you received when subscribing to Mass Planner at hand, here’s a <a href=\"http://www.massplanner.com/knowledge-base/downloading-installing-mass-planner/\" target=\"_blank\" rel=\"noopener\">quick link to the installer.</a></p>\n<p style=\"text-align: left;\"><a href=\"https://www.letshostit.org/wp-content/uploads/2016/10/installing-mass-planner-on-your-vps.png\"><img class=\"aligncenter size-full wp-image-1678\" src=\"https://www.letshostit.org/wp-content/uploads/2016/10/installing-mass-planner-on-your-vps.png\" alt=\"installing mass planner on your vps\" width=\"363\" height=\"306\" /></a></p>\n<p style=\"text-align: left;\">After downloading the installed on your VPS double click it and start the installation process, click next, next a couple of time and it should be installed, after that all is left for you to do is enter your credentials and start using it as you would use it on your own computer. It will be always running, 24/7 so you can set it up and let it post for you. Just use the remote desktop connection to check up on it from time to time to see everything is in order.</p>\n<p style=\"text-align: left;\">You should already know how to use Mass Planner if you reached this point, however if you’re just starting, the best way to learn to use it is by watching our <a title=\"massplanner video tutorials\" href=\"https://www.letshostit.org/wp-content/uploads/2016/10/video-tutorials\" target=\"_blank\" rel=\"noopener\">video tutorials</a>.</p>\n\n<h3><a name=\"07\"></a>7. How to disable IE Enhanced Security in Windows Server 2012</h3>\n<p style=\"text-align: left;\">This might not seem very important to you, until you open up the only browser available on your new VPS – Internet Explorer in order to browse the web, access and download stuff and see that it’s not working. For some reason Microsoft thought it would be a smart idea to create the “IE Enhanced Security” which basically blocks you from browsing any website, not even Google is accessible unless you do 5-7 clicks first and add it to the safe list. If you do a search on google then it’s a new website/page and you need to add that as well and so on. Crazy fun, you might decide you can do this for a little while until you download Firefox or a better browser but it’s easier to disable this feature as it’s not really hard but it requires you to know exactly where to look for it.</p>\n<p style=\"text-align: left;\">So let’s get started, first you will need to click on the start menu in the bottom left corner:</p>\n<p style=\"text-align: left;\"><a href=\"https://www.letshostit.org/wp-content/uploads/2016/10/click-on-the-start-menu-on-your-server.png\"><img class=\"aligncenter size-full wp-image-1713\" src=\"https://www.letshostit.org/wp-content/uploads/2016/10/click-on-the-start-menu-on-your-server.png\" alt=\"click on the start menu on your server\" width=\"290\" height=\"132\" /></a></p>\n<p style=\"text-align: left;\">From the popup menu that shows up select Server Manager, should be the first one in the top left corner. After the Server Manager is loaded click on Local Server:</p>\n<p style=\"text-align: left;\"><a href=\"https://www.letshostit.org/wp-content/uploads/2016/10/click-on-local-server.png\"><img class=\"aligncenter size-full wp-image-1714\" src=\"https://www.letshostit.org/wp-content/uploads/2016/10/click-on-local-server.png\" alt=\"click on local server\" width=\"312\" height=\"198\" /></a></p>\n<p style=\"text-align: left;\">After you have clicked on Local server look on the right side now and notice the IE Enhanced security configuration area and that is is turned on:</p>\n<p style=\"text-align: left;\"><a href=\"https://www.letshostit.org/wp-content/uploads/2016/10/see-the-ie-enhanced-security-configuration-is-on.png\"><img class=\"aligncenter size-full wp-image-1715\" src=\"https://www.letshostit.org/wp-content/uploads/2016/10/see-the-ie-enhanced-security-configuration-is-on.png\" alt=\"see the ie enhanced security configuration is on\" width=\"373\" height=\"110\" /></a></p>\n<p style=\"text-align: left;\">Click on “On” and more setting will appear where you can actually disable that setting. Here’s what it will look like:</p>\n<p style=\"text-align: left;\"><a href=\"https://www.letshostit.org/wp-content/uploads/2016/10/switch-off-ie-enhanced-security.png\"><img class=\"aligncenter size-full wp-image-1716\" src=\"https://www.letshostit.org/wp-content/uploads/2016/10/switch-off-ie-enhanced-security.png\" alt=\"switch off ie enhanced security\" width=\"324\" height=\"442\" /></a></p>\n<p style=\"text-align: left;\">As you can see I have already selected Off for Administrators – that’s what you should do too. If you want you can do the same for Users, though if you’re the only one that you’ll be using the VPS that is really not necessary. After selecting Off click on OK. Now you’re back in Server Manager and you will notice that it still says On for the IE security, just press F5 now to refresh the window and it will correctly say Off:</p>\n<p style=\"text-align: left;\"><a href=\"https://www.letshostit.org/wp-content/uploads/2016/10/finally-ie-enhanced-security-is-off.png\"><img class=\"aligncenter size-full wp-image-1717\" src=\"https://www.letshostit.org/wp-content/uploads/2016/10/finally-ie-enhanced-security-is-off.png\" alt=\"finally ie enhanced security is off\" width=\"370\" height=\"77\" /></a></p>\n<p style=\"text-align: left;\">And you’re done. You can close the Server Manager and open IE and see that it works normally now, no more crazy prompts. use it to do your bidding or just download your favorite browser and use that ?</p>\n\n<h3><a name=\"07\"></a>8. Final notes.</h3>\n<p style=\"text-align: left;\">It took a few steps but now you have a fully functional windows vps that you can use however you want for one whole year. We have tested it with Mass Planner with 2 accounts for Facebook, 2 for Twitter and 2 for Pinterest with a posting rate of 10-30 posts for each account per day and 1-3 tools enabled for each account and it worked without any problems for over a month(it’s still working, we just waited for a month to see everything is in order before making this tutorial).</p>\n<p style=\"text-align: left;\">Depending on how much you use it it should also work for you if you use it moderately without any problems. If you’re looking to post hundreds and hundreds of posts per day with several accounts it might be slower but might still work. If you are looking for even more posting power you should change to a paid vps that provides more resources. We think however that this setup is decent enough for most of our moderate users.</p>\n<p style=\"text-align: left;\">You can also use this server for anything else, if you have other sofware that doesn’t require a lot of resources and that you want to keep online 24/7 this will work. Keep in mind though that there are a few limitation to the server and you have your Credit Card entered, the way Amazon works is that if you go over the traffic limit or any other limit it charges you for the extra usage. Although the rates are really affordable I just wanted to make sure you know about this and don’t over-do use your VPS ( like installing a software that crawls and downloads a lot of big images and that will create a lot of traffic….just an example)</p>\n<p style=\"text-align: left;\">Let us know what you think, is this free server working good for you, do you have another way of getting a good reliable free vps? Did you encounter any problem with the signup process or everything was a breeze and you just want to say thanks for sharing this with you? <strong>You can also share this with your friends using the below buttons</strong> ?</p>\n\n<div class=\"yarpp-related yarpp-related-none\">\n\nNo related posts.\n\n</div>",
"json_metadata": "{\"tags\":[\"amazon\",\"rdp\",\"free\"],\"image\":[\"https://www.letshostit.org/wp-content/uploads/2016/10/free-Windows-Server-2012.jpg\",\"https://www.letshostit.org/wp-content/uploads/2016/10/get-your-free-vps-from-amazon.png\",\"https://www.letshostit.org/wp-content/uploads/2016/10/signing-up-for-amazon-aws.png\",\"https://www.letshostit.org/wp-content/uploads/2016/10/Amazon-AWS-login-credentials.png\",\"https://www.letshostit.org/wp-content/uploads/2016/10/signup-for-AWS.png\",\"https://www.letshostit.org/wp-content/uploads/2016/10/the-aws-signup-console-page.png\",\"https://www.letshostit.org/wp-content/uploads/2016/10/aws-payment-filling-step.png\",\"https://www.letshostit.org/wp-content/uploads/2016/10/aws-identity-verification-step.png\",\"https://www.letshostit.org/wp-content/uploads/2016/10/aws-identity-verification-complete.png\",\"https://www.letshostit.org/wp-content/uploads/2016/10/choose-aws-support-plan.png\",\"https://www.letshostit.org/wp-content/uploads/2016/10/welcome-to-amazon-web-services.png\",\"https://www.letshostit.org/wp-content/uploads/2016/10/launch-aws-management-console.png\",\"https://www.letshostit.org/wp-content/uploads/2016/10/all-the-amazon-web-services.png\",\"https://www.letshostit.org/wp-content/uploads/2016/10/create-your-amazon-vps.png\",\"https://www.letshostit.org/wp-content/uploads/2016/10/virtual-servers-available-for-free-from-amazon.png\",\"https://www.letshostit.org/wp-content/uploads/2016/10/select-a-windows-vps-installation.png\",\"https://www.letshostit.org/wp-content/uploads/2016/10/select-the-general-purpose-t2-micro-vps.png\",\"https://www.letshostit.org/wp-content/uploads/2016/10/click-the-review-and-launch-button.png\",\"https://www.letshostit.org/wp-content/uploads/2016/10/aws-review-instance-launch.png\",\"https://www.letshostit.org/wp-content/uploads/2016/10/creating-a-new-key-pair-fo-aws-vps.png\",\"https://www.letshostit.org/wp-content/uploads/2016/10/aws-vps-instance-launched.png\",\"https://www.letshostit.org/wp-content/uploads/2016/10/lists-of-your-vps-instances.png\",\"https://www.letshostit.org/wp-content/uploads/2016/10/connect-to-your-amazon-VPS.png\",\"https://www.letshostit.org/wp-content/uploads/2016/10/get-your-amazon-vps-password.png\",\"https://www.letshostit.org/wp-content/uploads/2016/10/connecting-to-your-amazon-vps.png\",\"https://www.letshostit.org/wp-content/uploads/2016/10/enter-your-amazon-vps-credentials-2.png\",\"https://www.letshostit.org/wp-content/uploads/2016/10/accept-the-certificate-from-amazon-vps-connection.png\",\"https://www.letshostit.org/wp-content/uploads/2016/10/microsoft-remote-desktop-app-for-max-os-x.jpg\",\"https://www.letshostit.org/wp-content/uploads/2016/10/importing-the-rdp-file-in-remote-desktop-in-mac-os-x.jpg\",\"https://www.letshostit.org/wp-content/uploads/2016/10/creating-a-remote-desktop-connection-in-mac-os-x.png\",\"https://www.letshostit.org/wp-content/uploads/2016/10/double-click-the-remote-desktop-connection.png\",\"https://www.letshostit.org/wp-content/uploads/2016/10/remote-connections-options.png\",\"https://www.letshostit.org/wp-content/uploads/2016/10/remote-connections-options-local-resources.png\",\"https://www.letshostit.org/wp-content/uploads/2016/10/select-all-drives-within-remote-desktop-connection.png\",\"https://www.letshostit.org/wp-content/uploads/2016/10/microsoft-remote-desktop-connection.png\",\"https://www.letshostit.org/wp-content/uploads/2016/10/Mac-OS-add-local-folder-to-VPS.png\",\"https://www.letshostit.org/wp-content/uploads/2016/10/See-local-Mac-folder-on-VPS.png\",\"https://www.letshostit.org/wp-content/uploads/2016/10/installing-mass-planner-on-your-vps.png\",\"https://www.letshostit.org/wp-content/uploads/2016/10/click-on-the-start-menu-on-your-server.png\",\"https://www.letshostit.org/wp-content/uploads/2016/10/click-on-local-server.png\",\"https://www.letshostit.org/wp-content/uploads/2016/10/see-the-ie-enhanced-security-configuration-is-on.png\",\"https://www.letshostit.org/wp-content/uploads/2016/10/switch-off-ie-enhanced-security.png\",\"https://www.letshostit.org/wp-content/uploads/2016/10/finally-ie-enhanced-security-is-off.png\"],\"links\":[\"https://www.letshostit.org/wp-content/uploads/2016/10/free-Windows-Server-2012.jpg\",\"#01\",\"#02\",\"#03\",\"#04\",\"#05\",\"#06\",\"#07\",\"#08\",\"https://www.letshostit.org/wp-content/uploads/2016/10/free\",\"https://www.letshostit.org/wp-content/uploads/2016/10/get-your-free-vps-from-amazon.png\",\"https://www.letshostit.org/wp-content/uploads/2016/10/signing-up-for-amazon-aws.png\",\"https://www.letshostit.org/wp-content/uploads/2016/10/Amazon-AWS-login-credentials.png\",\"https://www.letshostit.org/wp-content/uploads/2016/10/signup-for-AWS.png\",\"https://www.letshostit.org/wp-content/uploads/2016/10/the-aws-signup-console-page.png\",\"https://www.letshostit.org/wp-content/uploads/2016/10/aws-payment-filling-step.png\",\"https://www.letshostit.org/wp-content/uploads/2016/10/aws-identity-verification-step.png\",\"https://www.letshostit.org/wp-content/uploads/2016/10/aws-identity-verification-complete.png\",\"https://www.letshostit.org/wp-content/uploads/2016/10/choose-aws-support-plan.png\",\"https://www.letshostit.org/wp-content/uploads/2016/10/welcome-to-amazon-web-services.png\",\"https://www.letshostit.org/wp-content/uploads/2016/10/launch-aws-management-console.png\",\"https://www.letshostit.org/wp-content/uploads/2016/10/all-the-amazon-web-services.png\",\"https://www.letshostit.org/wp-content/uploads/2016/10/create-your-amazon-vps.png\",\"https://www.letshostit.org/wp-content/uploads/2016/10/virtual-servers-available-for-free-from-amazon.png\",\"https://www.letshostit.org/wp-content/uploads/2016/10/select-a-windows-vps-installation.png\",\"https://www.letshostit.org/wp-content/uploads/2016/10/select-the-general-purpose-t2-micro-vps.png\",\"https://www.letshostit.org/wp-content/uploads/2016/10/click-the-review-and-launch-button.png\",\"https://www.letshostit.org/wp-content/uploads/2016/10/aws-review-instance-launch.png\",\"https://www.letshostit.org/wp-content/uploads/2016/10/creating-a-new-key-pair-fo-aws-vps.png\",\"https://www.letshostit.org/wp-content/uploads/2016/10/aws-vps-instance-launched.png\",\"https://www.letshostit.org/wp-content/uploads/2016/10/lists-of-your-vps-instances.png\",\"https://www.letshostit.org/wp-content/uploads/2016/10/connect-to-your-amazon-VPS.png\",\"https://www.letshostit.org/wp-content/uploads/2016/10/get-your-amazon-vps-password.png\",\"https://www.letshostit.org/wp-content/uploads/2016/10/connecting-to-your-amazon-vps.png\",\"https://www.letshostit.org/wp-content/uploads/2016/10/enter-your-amazon-vps-credentials-2.png\",\"https://www.letshostit.org/wp-content/uploads/2016/10/accept-the-certificate-from-amazon-vps-connection.png\",\"https://www.letshostit.org/wp-content/uploads/2016/10/microsoft-remote-desktop-app-for-max-os-x.jpg\",\"https://www.letshostit.org/wp-content/uploads/2016/10/importing-the-rdp-file-in-remote-desktop-in-mac-os-x.jpg\",\"https://www.letshostit.org/wp-content/uploads/2016/10/creating-a-remote-desktop-connection-in-mac-os-x.png\",\"https://www.letshostit.org/wp-content/uploads/2016/10/double-click-the-remote-desktop-connection.png\",\"https://www.letshostit.org/wp-content/uploads/2016/10/remote-connections-options.png\",\"https://www.letshostit.org/wp-content/uploads/2016/10/remote-connections-options-local-resources.png\",\"https://www.letshostit.org/wp-content/uploads/2016/10/select-all-drives-within-remote-desktop-connection.png\",\"http://www.massplanner.com/mass-planner-stores-files/\",\"https://www.letshostit.org/wp-content/uploads/2016/10/microsoft-remote-desktop-connection.png\",\"https://www.letshostit.org/wp-content/uploads/2016/10/Mac-OS-add-local-folder-to-VPS.png\",\"https://www.letshostit.org/wp-content/uploads/2016/10/See-local-Mac-folder-on-VPS.png\",\"http://www.massplanner.com/knowledge-base/downloading-installing-mass-planner/\",\"https://www.letshostit.org/wp-content/uploads/2016/10/installing-mass-planner-on-your-vps.png\",\"https://www.letshostit.org/wp-content/uploads/2016/10/video-tutorials\",\"https://www.letshostit.org/wp-content/uploads/2016/10/click-on-the-start-menu-on-your-server.png\",\"https://www.letshostit.org/wp-content/uploads/2016/10/click-on-local-server.png\",\"https://www.letshostit.org/wp-content/uploads/2016/10/see-the-ie-enhanced-security-configuration-is-on.png\",\"https://www.letshostit.org/wp-content/uploads/2016/10/switch-off-ie-enhanced-security.png\",\"https://www.letshostit.org/wp-content/uploads/2016/10/finally-ie-enhanced-security-is-off.png\"],\"app\":\"steemit/0.1\",\"format\":\"markdown\"}"
}
]
}pierre-anna28upvoted (100.00%) @ranarehan / the-uncle-that-make-mahool-on-every-wedding2018/02/01 03:42:18
pierre-anna28upvoted (100.00%) @ranarehan / the-uncle-that-make-mahool-on-every-wedding
2018/02/01 03:42:18
| voter | pierre-anna28 |
| author | ranarehan |
| permlink | the-uncle-that-make-mahool-on-every-wedding |
| weight | 10000 (100.00%) |
| Transaction Info | Block #19478025/Trx 726eab946f1feb028981b676cc6c0f3c24c0f114 |
View Raw JSON Data
{
  "trx_id": "726eab946f1feb028981b676cc6c0f3c24c0f114",
  "block": 19478025,
  "trx_in_block": 1,
  "op_in_trx": 0,
  "virtual_op": 0,
  "timestamp": "2018-02-01T03:42:18",
  "op": [
    "vote",
    {
      "voter": "pierre-anna28",
      "author": "ranarehan",
      "permlink": "the-uncle-that-make-mahool-on-every-wedding",
      "weight": 10000
    }
  ]
}2018/01/31 21:02:51
2018/01/31 21:02:51
| voter | techmojo |
| author | ranarehan |
| permlink | re-techmojo-building-a-very-compact-gaming-pc-part-3-review-and-benchmark-results-are-in-20180131t090512603z |
| weight | 10000 (100.00%) |
| Transaction Info | Block #19470050/Trx e8d78022ea716370741db23f640949a4ad6aa642 |
View Raw JSON Data
{
  "trx_id": "e8d78022ea716370741db23f640949a4ad6aa642",
  "block": 19470050,
  "trx_in_block": 16,
  "op_in_trx": 0,
  "virtual_op": 0,
  "timestamp": "2018-01-31T21:02:51",
  "op": [
    "vote",
    {
      "voter": "techmojo",
      "author": "ranarehan",
      "permlink": "re-techmojo-building-a-very-compact-gaming-pc-part-3-review-and-benchmark-results-are-in-20180131t090512603z",
      "weight": 10000
    }
  ]
}2018/01/31 13:34:15
2018/01/31 13:34:15
| parent author | ranarehan |
| parent permlink | re-annadeda-the-hard-work-to-accomplish-your-goal-tokio-2020-paralympic-games-boccia-20180131t090357409z |
| author | annadeda |
| permlink | re-ranarehan-re-annadeda-the-hard-work-to-accomplish-your-goal-tokio-2020-paralympic-games-boccia-20180131t133412214z |
| title | |
| body | Being polite reflects your character Thanks a lot |
| json metadata | {"tags":["steemit"],"app":"steemit/0.1"} |
| Transaction Info | Block #19461080/Trx 60dbb46845b02d7450346f51a15921866c28478d |
View Raw JSON Data
{
  "trx_id": "60dbb46845b02d7450346f51a15921866c28478d",
  "block": 19461080,
  "trx_in_block": 21,
  "op_in_trx": 0,
  "virtual_op": 0,
  "timestamp": "2018-01-31T13:34:15",
  "op": [
    "comment",
    {
      "parent_author": "ranarehan",
      "parent_permlink": "re-annadeda-the-hard-work-to-accomplish-your-goal-tokio-2020-paralympic-games-boccia-20180131t090357409z",
      "author": "annadeda",
      "permlink": "re-ranarehan-re-annadeda-the-hard-work-to-accomplish-your-goal-tokio-2020-paralympic-games-boccia-20180131t133412214z",
      "title": "",
      "body": "Being polite reflects your character Thanks a lot",
      "json_metadata": "{\"tags\":[\"steemit\"],\"app\":\"steemit/0.1\"}"
    }
  ]
}jonas160upvoted (100.00%) @ranarehan / re-jonas160-invisible-bike-edited-20180131t090242965z2018/01/31 11:03:51
jonas160upvoted (100.00%) @ranarehan / re-jonas160-invisible-bike-edited-20180131t090242965z
2018/01/31 11:03:51
| voter | jonas160 |
| author | ranarehan |
| permlink | re-jonas160-invisible-bike-edited-20180131t090242965z |
| weight | 10000 (100.00%) |
| Transaction Info | Block #19458076/Trx ec92721f8cea73d8ed0de95aa535dd044f323d46 |
View Raw JSON Data
{
  "trx_id": "ec92721f8cea73d8ed0de95aa535dd044f323d46",
  "block": 19458076,
  "trx_in_block": 17,
  "op_in_trx": 0,
  "virtual_op": 0,
  "timestamp": "2018-01-31T11:03:51",
  "op": [
    "vote",
    {
      "voter": "jonas160",
      "author": "ranarehan",
      "permlink": "re-jonas160-invisible-bike-edited-20180131t090242965z",
      "weight": 10000
    }
  ]
}2018/01/31 10:10:48
2018/01/31 10:10:48
| voter | pierre-anna28 |
| author | ranarehan |
| permlink | how-to-setup-clipbucket-to-start-video-sharing-website-in-linux |
| weight | 10000 (100.00%) |
| Transaction Info | Block #19457015/Trx 35ad302e43c64f9caff7ce31ebccf41ed4348720 |
View Raw JSON Data
{
  "trx_id": "35ad302e43c64f9caff7ce31ebccf41ed4348720",
  "block": 19457015,
  "trx_in_block": 24,
  "op_in_trx": 0,
  "virtual_op": 0,
  "timestamp": "2018-01-31T10:10:48",
  "op": [
    "vote",
    {
      "voter": "pierre-anna28",
      "author": "ranarehan",
      "permlink": "how-to-setup-clipbucket-to-start-video-sharing-website-in-linux",
      "weight": 10000
    }
  ]
}2018/01/31 09:05:15
2018/01/31 09:05:15
| parent author | techmojo |
| parent permlink | building-a-very-compact-gaming-pc-part-3-review-and-benchmark-results-are-in |
| author | ranarehan |
| permlink | re-techmojo-building-a-very-compact-gaming-pc-part-3-review-and-benchmark-results-are-in-20180131t090512603z |
| title | |
| body | really awesome pc ;p upvote and comment back please :) |
| json metadata | {"tags":["gaming"],"app":"steemit/0.1"} |
| Transaction Info | Block #19455704/Trx 245c79cf197306188ad090ed890ff475a78b6b1f |
View Raw JSON Data
{
  "trx_id": "245c79cf197306188ad090ed890ff475a78b6b1f",
  "block": 19455704,
  "trx_in_block": 13,
  "op_in_trx": 0,
  "virtual_op": 0,
  "timestamp": "2018-01-31T09:05:15",
  "op": [
    "comment",
    {
      "parent_author": "techmojo",
      "parent_permlink": "building-a-very-compact-gaming-pc-part-3-review-and-benchmark-results-are-in",
      "author": "ranarehan",
      "permlink": "re-techmojo-building-a-very-compact-gaming-pc-part-3-review-and-benchmark-results-are-in-20180131t090512603z",
      "title": "",
      "body": "really awesome pc ;p \nupvote and comment back please :)",
      "json_metadata": "{\"tags\":[\"gaming\"],\"app\":\"steemit/0.1\"}"
    }
  ]
}2018/01/31 09:04:00
2018/01/31 09:04:00
| parent author | annadeda |
| parent permlink | the-hard-work-to-accomplish-your-goal-tokio-2020-paralympic-games-boccia |
| author | ranarehan |
| permlink | re-annadeda-the-hard-work-to-accomplish-your-goal-tokio-2020-paralympic-games-boccia-20180131t090357409z |
| title | |
| body | hardwork is everything keep working until you succeeded and you will learn a lot of ways that don't work but other don't all the other people will keep blaming you they will try to change your destination but be polite on your goals :) |
| json metadata | {"tags":["steemit"],"app":"steemit/0.1"} |
| Transaction Info | Block #19455679/Trx c1e6a274ca9ffb4364e3f3b2359936c7212d6757 |
View Raw JSON Data
{
  "trx_id": "c1e6a274ca9ffb4364e3f3b2359936c7212d6757",
  "block": 19455679,
  "trx_in_block": 13,
  "op_in_trx": 0,
  "virtual_op": 0,
  "timestamp": "2018-01-31T09:04:00",
  "op": [
    "comment",
    {
      "parent_author": "annadeda",
      "parent_permlink": "the-hard-work-to-accomplish-your-goal-tokio-2020-paralympic-games-boccia",
      "author": "ranarehan",
      "permlink": "re-annadeda-the-hard-work-to-accomplish-your-goal-tokio-2020-paralympic-games-boccia-20180131t090357409z",
      "title": "",
      "body": "hardwork is everything keep working until you succeeded and you will learn a lot of ways that don't work but other don't all the other people will keep blaming you they will try to change your destination but be polite on your goals :)",
      "json_metadata": "{\"tags\":[\"steemit\"],\"app\":\"steemit/0.1\"}"
    }
  ]
}ranarehanupvoted (100.00%) @jonas160 / invisible-bike-edited2018/01/31 09:02:51
ranarehanupvoted (100.00%) @jonas160 / invisible-bike-edited
2018/01/31 09:02:51
| voter | ranarehan |
| author | jonas160 |
| permlink | invisible-bike-edited |
| weight | 10000 (100.00%) |
| Transaction Info | Block #19455656/Trx 856bbbc9a46428f6541fb533444e828ded820199 |
View Raw JSON Data
{
  "trx_id": "856bbbc9a46428f6541fb533444e828ded820199",
  "block": 19455656,
  "trx_in_block": 6,
  "op_in_trx": 0,
  "virtual_op": 0,
  "timestamp": "2018-01-31T09:02:51",
  "op": [
    "vote",
    {
      "voter": "ranarehan",
      "author": "jonas160",
      "permlink": "invisible-bike-edited",
      "weight": 10000
    }
  ]
}2018/01/31 09:02:45
2018/01/31 09:02:45
| parent author | jonas160 |
| parent permlink | invisible-bike-edited |
| author | ranarehan |
| permlink | re-jonas160-invisible-bike-edited-20180131t090242965z |
| title | |
| body | ohh my good i don't think this is invisible edited :O |
| json metadata | {"tags":["photo"],"app":"steemit/0.1"} |
| Transaction Info | Block #19455654/Trx 221d527707dfb60affaf77cde740f367457f5ac2 |
View Raw JSON Data
{
  "trx_id": "221d527707dfb60affaf77cde740f367457f5ac2",
  "block": 19455654,
  "trx_in_block": 9,
  "op_in_trx": 0,
  "virtual_op": 0,
  "timestamp": "2018-01-31T09:02:45",
  "op": [
    "comment",
    {
      "parent_author": "jonas160",
      "parent_permlink": "invisible-bike-edited",
      "author": "ranarehan",
      "permlink": "re-jonas160-invisible-bike-edited-20180131t090242965z",
      "title": "",
      "body": "ohh my good i don't think this is invisible edited :O",
      "json_metadata": "{\"tags\":[\"photo\"],\"app\":\"steemit/0.1\"}"
    }
  ]
}ranarehanupvoted (100.00%) @ranarehan / how-to-setup-clipbucket-to-start-video-sharing-website-in-linux2018/01/31 08:56:24
ranarehanupvoted (100.00%) @ranarehan / how-to-setup-clipbucket-to-start-video-sharing-website-in-linux
2018/01/31 08:56:24
| voter | ranarehan |
| author | ranarehan |
| permlink | how-to-setup-clipbucket-to-start-video-sharing-website-in-linux |
| weight | 10000 (100.00%) |
| Transaction Info | Block #19455527/Trx 72ef94e8c1f4aa7d2e9bf142c172fdd12c89fa7e |
View Raw JSON Data
{
  "trx_id": "72ef94e8c1f4aa7d2e9bf142c172fdd12c89fa7e",
  "block": 19455527,
  "trx_in_block": 61,
  "op_in_trx": 0,
  "virtual_op": 0,
  "timestamp": "2018-01-31T08:56:24",
  "op": [
    "vote",
    {
      "voter": "ranarehan",
      "author": "ranarehan",
      "permlink": "how-to-setup-clipbucket-to-start-video-sharing-website-in-linux",
      "weight": 10000
    }
  ]
}ranarehanupdated options for how-to-setup-clipbucket-to-start-video-sharing-website-in-linux2018/01/31 08:56:24
ranarehanupdated options for how-to-setup-clipbucket-to-start-video-sharing-website-in-linux
2018/01/31 08:56:24
| author | ranarehan |
| permlink | how-to-setup-clipbucket-to-start-video-sharing-website-in-linux |
| max accepted payout | 1000000.000 SBD |
| percent steem dollars | 0 |
| allow votes | true |
| allow curation rewards | true |
| extensions | [] |
| Transaction Info | Block #19455527/Trx 72ef94e8c1f4aa7d2e9bf142c172fdd12c89fa7e |
View Raw JSON Data
{
  "trx_id": "72ef94e8c1f4aa7d2e9bf142c172fdd12c89fa7e",
  "block": 19455527,
  "trx_in_block": 61,
  "op_in_trx": 0,
  "virtual_op": 0,
  "timestamp": "2018-01-31T08:56:24",
  "op": [
    "comment_options",
    {
      "author": "ranarehan",
      "permlink": "how-to-setup-clipbucket-to-start-video-sharing-website-in-linux",
      "max_accepted_payout": "1000000.000 SBD",
      "percent_steem_dollars": 0,
      "allow_votes": true,
      "allow_curation_rewards": true,
      "extensions": []
    }
  ]
}ranarehanpublished a new post: how-to-setup-clipbucket-to-start-video-sharing-website-in-linux2018/01/31 08:56:24
ranarehanpublished a new post: how-to-setup-clipbucket-to-start-video-sharing-website-in-linux
2018/01/31 08:56:24
| parent author | |
| parent permlink | clipbucket |
| author | ranarehan |
| permlink | how-to-setup-clipbucket-to-start-video-sharing-website-in-linux |
| title | How to Setup ClipBucket to Start Video Sharing Website in Linux |
| body | ClipBucket is a free and open source software which helps us to create a complete video sharing website like Youtube, Dailymotion, Metacafe, Veoh, Hulu in few minutes of setup. ClipBucket is the fastest growing application which was first started as Youtube Clone but now its advance features & enhancements makes it the most versatile, reliable & scalable media distribution platform with latest social networking features. It uses FFMPEG for video conversion and thumbs generation which is the most widely used application so, users can stream it straight away using the Flash & HTML 5 Players. Here are some of the awesome features available in ClipBucket. .jpg) <ol> <li>ClipBucket is 100% free and open source web application making it extensible and pretty easy to customize.</li> <li>It uses FFMpeg for real time conversion of videos to make on fly video conversion allowing users to stream using the Flash & HTML 5 Players.</li> <li>It has a beautiful media management, user management and messaging system.</li> <li>It also contains ajax based comments, ratings and channels and user feeds.</li> <li>In addition, it also consists of a built-in language editor.</li> <li>ClipBucket promises to make it 100% secure from different Security issues like SQL injection.</li> </ol> Here are some easy steps on how we can setup ClipBucket to start our own Video Sharing platform running in a linux based operating system. In this tutorial, we'll cover the installation of ClipBucket in Ubuntu 14.04 LTS and CentOS 7 linux distributions. <h2>1. Installing LAMP Stack</h2> First of all, we'll need to install a complete LAMP Stack. LAMP stack is the combination of Apache Web Server, MySQL/MariaDB Database server and PHP modules. In order to setup, we'll need to run the following command as shown below with respect to the distribution of linux we're running. Here, in this tutorial, we'll be focusing on two distributions of linux, CentOS and Ubuntu. <h3>On Ubuntu 14.04</h3> First of all, we'll gonna update the local repository index of our Ubuntu system so that we'll get the repository index of the latest available software packages. <blockquote># apt-get update</blockquote> After the update is complete, we'll go for the installation of the lamp stack using apt-get command line as shown below. <blockquote># apt-get install apache2 mariadb-server php5 php5-gd php5-mysql php5-curl php5-xsl php5-cli php-pear unzip</blockquote> In Ubuntu, we'll be asked to enter a new password for the MariaDB root user as shown below. We'll need this password in future for accessing the root user of MariaDB database server. <a href="https://www.letshostit.org/wp-content/uploads/2017/02/set-mariadb-root-password-ubuntu.png"><img class="wp-image-12645 size-full aligncenter" src="https://www.letshostit.org/wp-content/uploads/2017/02/set-mariadb-root-password-ubuntu.png" sizes="(max-width: 638px) 100vw, 638px" srcset="http://blog.linoxide.com/wp-content/uploads/2015/12/set-mariadb-root-password-ubuntu.png 638w, http://blog.linoxide.com/wp-content/uploads/2015/12/set-mariadb-root-password-ubuntu-300x200.png 300w" alt="Set MariaDB Root Password Ubuntu" width="638" height="426" /></a> <h3>On CentOS 7</h3> On CentOS 7, as we have yum as the package manager, we'll run the following command to install lamp stack. <blockquote># yum install httpd mariadb-server mariadb php php-gd php-mysql php-curl php-xsl php-cli php-mbstring php-pear unzip</blockquote> <h2>2. Installing ImageMagick</h2> After our LAMP Stack has been successfully installed, we'll now go for the installation of ImageMagick in our linux machine. ImageMagick will allow our clipbucket to process and manipulate the images. To setup, we'll need to run the following commands according to the linux distribution we are running in our machine. <h3>On Ubuntu 14.04</h3> <blockquote># apt-get install imagemagick php5-imagick # php5enmod imagick</blockquote> <h3>On CentOS 7</h3> <blockquote># yum install ImageMagick ImageMagick-devel ImageMagick-perl</blockquote> After installing ImageMagick and its other packages, we'll now install imagick which is a php module for ImageMagick. To install that, we'll need to run pecl command as shown below. <blockquote># pecl install imagick</blockquote> And then, we'll need to append <strong>/etc/php.ini</strong> configuration file and add <strong>extension=imagick.so</strong> in the end of the file. <blockquote># echo extension=imagick.so >> /etc/php.ini</blockquote> <h2>3. Installing FFMPEG</h2> Next, we'll need to setup FFMPEG in our system. FFMPEG allows us to easily record, convert and stream audio and video. It will be used by Clipbucket to make a working video streaming site. In order to install it, we'll need to run the following commands in a console or terminal with sudo or root access as shown below. <h3>On Ubuntu 14.04</h3> As FFMPEG is currently not available in Ubuntu's repository, we'll either need to compile it and setup using the source code or install it via a PPA hosted in launchpad. There is a PPA of FFMPEG available which we can add by running the following command. <blockquote># apt-add-repository ppa:mc3man/trusty-media <strong>If You GOt Error Like "apt-add-respostitory command not found"</strong> <strong>then first run this command</strong> #sudo apt-get install software-properties-common python-software-properties</blockquote> After done, we'll need to update the local repository index using the following command. <blockquote># apt-get update</blockquote> Then, we can install the required FFMPEG packages by running the following apt-get command. <blockquote># apt-get install ffmpeg gstreamer0.10-ffmpeg</blockquote> <h3>On CentOS 7</h3> FFMPEG is also not available in the official repository of CentOS so, we'll need to install NUX Dextop Release and EPEL "Extra Packages for Enterprise Linux" repository in our CentOS machine as its available in it. <blockquote># rpm -Uvh http://li.nux.ro/download/nux/dextop/el7/x86_64/nux-dextop-release-0-1.el7.nux.noarch.rpm # yum install epel-release</blockquote> After the repositories are added in our machine, we'll now go for the installation of FFMPEG in our machine by running the following yum package manager. <blockquote># yum install ffmpeg</blockquote> <h2>4. Installing FLVTool2</h2> We'll now install FLVTool2 which is an application for the manipulation of Macromedia Flash Video files (FLV). It can calculate a lot of meta data, insert an onMetaData tag, cut FLV files, add cue points and more. To install it we'll first need to install ruby in our machine. To do so, we'll need to run the following command. <h3>Installing Ruby</h3> <strong>On Ubuntu 14.04</strong> <blockquote># apt-get install ruby</blockquote> <strong>On CentOS 7</strong> <blockquote># yum install ruby</blockquote> After ruby and its dependencies are installed successfully, we'll need to install flvtool2 using gem as shown below. <h3>Installing via gem</h3> <blockquote># gem install flvtool2 Fetching: flvtool2-1.0.6.gem (100%) Successfully installed flvtool2-1.0.6 1 gem installed Installing ri documentation for flvtool2-1.0.6... Installing RDoc documentation for flvtool2-1.0.6...</blockquote> <h2>5. Installing MP4Box (GPAC)</h2> we'll then need to install GPAC which is also known as MP4Box. It is needed by Clipbucked for performing many manipulations on multimedia files like AVI, MPG, TS, but mostly on ISO media files like MP4, 3GP. To install it, we'll need to execute the following command depending on the distributions we are running. <h3>On Ubuntu 14.04</h3> <blockquote># apt-get install gpac mediainfo</blockquote> <h3>On CentOS 7</h3> <blockquote># yum install gpac mediainfo</blockquote> <h2>6. Configuring PHP Configurations</h2> After everything above is installed successfully, we'll now go for configuring the PHP configuration. We'll need to edit the php.ini file which is located in different directory according to the distribution. In Ubuntu, php.ini file is located under /etc/php5/apache2/ directory whereas in CentOS, it is located under /etc/ directory. <h3>On Ubuntu 14.04</h3> <blockquote># nano /etc/php5/apache2/php.ini</blockquote> <h3>On CentOS 7</h3> <blockquote># nano /etc/php.ini</blockquote> After opening the file with the text editor, we'll make sure that we have the configuration file configured as shown below. We'll need to append the opened file as the configurations shown below. <blockquote>upload_max_filesize = 500M max_execution_time = 300 max_input_time = 300 memory_limit = 256M magic_quotes_gpc = on magic_quotes_runtime = off post_max_size = 500M register_globals = off safe_mode = off output_buffering = off display_errors = on</blockquote> After done, we'll need to restart the Apache Web Server that is running in our machine. <strong>On Ubuntu 14.04</strong> <blockquote># service apache2 restart</blockquote> <strong>On CentOS 7</strong> <blockquote># systemctl restart httpd</blockquote> <h2>7. Configuring MariaDB server</h2> As we have already set password for our MariaDB root user in our machine running Ubuntu, we'll simply skip this step of configuring MariaDB and continue the next step of creating the database. But if we are running CentOS, we haven't configured MariaDB server so, we'll need to follow this step. At first, as we haven't set any root password for our MariaDB server, we'll need to configure a root password for it. And after its done, we'll move forward towards the creation of a database user and a database so that Clip-Bucket can utilize it to store its data. To configure MariaDB and assign a root password, we’ll need to run the following command. <blockquote># mysql_secure_installation This will ask us to enter the password for root but as we haven’t set any password before and its our first time we’ve installed mariadb, we’ll simply press enter and go further. Then, we’ll be asked to set root password, here we’ll hit Y and enter our password for root of MariaDB. Then, we’ll simply hit enter to set the default values for the further configurations. …. so you should just press enter here. Enter current password for root (enter for none): OK, successfully used password, moving on… Setting the root password ensures that nobody can log into the MariaDB root user without the proper authorisation. Set root password? [Y/n] y New password: Re-enter new password: Password updated successfully! Reloading privilege tables.. … Success! … installation should now be secure. Thanks for using MariaDB!</blockquote> <h3><strong>Lines that needed in vesta CP Only</strong></h3> <blockquote>replace here with the password that you given in maria db #nano /root/.my.cnf #nano /usr/local/vesta/conf/mysql.conf</blockquote> <h2>8. Creating a MariaDB Database</h2> Next, we’ll login to the MariaDB command prompt as root. Here, we’ll need to enter the password of the MariaDB root account that we had set above. <blockquote># mysql -u root -p</blockquote> After we’re logged in into the mariadb command prompt, we’ll gonna create the database for clip-bucket. <blockquote>> CREATE DATABASE clipbucketdb; > CREATE USER 'clipbucketuser'@'localhost' IDENTIFIED BY 'Pa$$worD'; > GRANT ALL PRIVILEGES ON clipbucketdb.* TO 'clipbucketuser'@'localhost'; > FLUSH PRIVILEGES; > EXIT;</blockquote> <img class="size-full wp-image-12646 aligncenter" src="https://www.letshostit.org/wp-content/uploads/2017/02/creating-database-clipbucket.png" sizes="(max-width: 641px) 100vw, 641px" srcset="http://blog.linoxide.com/wp-content/uploads/2015/12/creating-database-clipbucket.png 641w, http://blog.linoxide.com/wp-content/uploads/2015/12/creating-database-clipbucket-300x214.png 300w" alt=" Creating Database Clipbucket" width="641" height="457" /> Finally, we’ve successfully created a database named clipbucketdb with username clipbucketuser and password as Pa$$worD . <strong>Note: </strong>It is strongly recommended to replace the above variables as your desire for the security issue. <h2>9. Configuring Apache Web Server</h2> We'll now add a new virtualhost in the apache configuration so that we can define a specific apache configuration to our clipbucket installation. Creating it will help us to define specific ports, webroot, domain, alias and other configurations for our ClipBucket installation. Here are some configurations we'll setup in this tutorial respective to the distribution of linux we're running. <h3>On Ubuntu 14.04 LTS</h3> <blockquote># touch /etc/apache2/sites-available/clipbucket.conf # ln -s /etc/apache2/sites-available/clipbucket.conf /etc/apache2/sites-enabled/clipbucket.conf # nano /etc/apache2/sites-available/clipbucket.conf</blockquote> Now, we'll gonna add the following lines of configuration into the opened file. <blockquote><VirtualHost *:80> ServerAdmin [email protected] DocumentRoot /var/www/clipbucket/ ServerName clipbucket.linoxide.com ServerAlias www.clipbucket.linoxide.com <Directory /var/www/clipbucket/> Options FollowSymLinks AllowOverride All </Directory> ErrorLog /var/log/apache2/clipbucket.linoxide.com-error_log CustomLog /var/log/apache2/clipbucket.linoxide.com-access_log common </VirtualHost></blockquote> After done, we'll gonna save the file and exit the text editor. Then, we'll need to make sure that mod is enabled. To enable it, we'll need to execute the following command. <blockquote># a2enmod rewrite Enabling module rewrite. To activate the new configuration, you need to run: service apache2 restart</blockquote> Then, we'll restart our apache web server. <blockquote># service apache2 restart</blockquote> <h3>On CentOS 7</h3> In our CentOS machine, we'll create a file named clipbucket.conf under /etc/httpd/conf.d/ directory using a text editor. <blockquote># nano /etc/httpd/conf.d/clipbucket.conf</blockquote> Then, we'll gonna add the following lines of configuration into the file. <blockquote><VirtualHost *:80> ServerAdmin [email protected] DocumentRoot /var/www/clipbucket/ ServerName clipbucket.linoxide.com ServerAlias www.clipbucket.linoxide.com <Directory /var/www/clipbucket/> Options FollowSymLinks AllowOverride All </Directory> ErrorLog /var/log/httpd/clipbucket.linoxide.com-error_log CustomLog /var/log/httpd/clipbucket.linoxide.com-access_log common </VirtualHost></blockquote> Once done, we'll simply save the file and exit the editor. And then, we'll gonna restart our apache web server. <blockquote># systemctl restart httpd</blockquote> <h2>10. Downloading ClipBucket</h2> We'll now go for downloading the Clip Bucket package from the <a href="https://www.letshostit.org/wp-content/uploads/2017/02/latest.php">Official Clip Bucket Download Page</a> . As the latest release of Clip Bucket is version 2.8, we'll get the link from the download page and then start the download using wget as follows under /tmp/ directory. <blockquote># cd /tmp/ # wget http://downloads.sourceforge.net/project/clipbucket/ClipBucket%20v2/clipbucket-2.8.v3354-stable.zip --2015-12-12 11:15:16-- http://downloads.sourceforge.net/project/clipbucket/ClipBucket%20v2/clipbucket-2.8.v3354-stable.zip Resolving downloads.sourceforge.net (downloads.sourceforge.net)... 216.34.181.59 ... Connecting to liquidtelecom.dl.sourceforge.net (liquidtelecom.dl.sourceforge.net)|197.155.77.8|:80... connected. HTTP request sent, awaiting response... 200 OK Length: 10710544 (10M) [application/octet-stream] Saving to: 'clipbucket-2.8.v3354-stable.zip' 100%[===============================================>] 10,710,544 37.0KB/s in 3m 1s 2015-12-12 11:18:18 (57.9 KB/s) - 'clipbucket-2.8.v3354-stable.zip' saved [10710544/10710544]</blockquote> After the download is completed, we'll gonna extract the zip file using unzip. <blockquote># unzip clipbucket-2.8.v3354-stable.zip</blockquote> Once the compressed zip file is extracted, we'll get inside the extracted folder in which we'll see two folders named upload and do_not_upload. Under upload folder we'll see that there is the ClipBucket installation file which we'll copy to the webroot of apache server ie /var/www/html/ by default. Whereas under do_not_upload folder, we'll see a file named admin_change_pass.php which we can use to change the default password of Clipbucket login administration user. To copy the installation files and directories of Clipbucket which lies under upload directory, we'll need to run the following command. <blockquote># mkdir /var/www/clipbucket # cp -r /tmp/clipbucket-2.8.v3354-stable/upload/* /var/www/clipbucket/ # cp /tmp/clipbucket-2.8.v3354-stable/upload/.htaccess /var/www/clipbucket/</blockquote> <h2>11. Fixing File Permission</h2> After the compressed Clip Bucket zip file is extracted and moved to the webroot, we'll go further towards fixing of permission in the files and directories which lies under the installation directory. <blockquote># chmod -R 777 /var/www/clipbucket/includes/ # chmod -R 777 /var/www/clipbucket/files/ # chmod -R 777 /var/www/clipbucket/images/ # chmod -R 777 /var/www/clipbucket/cache/ # chmod -R 777 /var/www/clipbucket/cb_install/</blockquote> After that, we'll also set the ownership of the installation directory to apache user as it should have full access to the files. To set the ownership of the directory to apache processes, we'll need to run the following command according to the distribution as the apache process owner may be different in different linux distribution. <h3>On Ubuntu 14.04</h3> <blockquote># chown www-data:www-data -R /var/www/clipbucket/</blockquote> <h3>On CentOS 7</h3> <blockquote># chown apache:apache -R /var/www/clipbucket/</blockquote> <h2>12. Setting Up Crons</h2> Now, its time for setting up the cronjob for making some scripts automated. We'll need to run <strong>crontab -e</strong> command which will open the crontab file in which we'll configure the automation. <blockquote># crontab -e</blockquote> Then, we'll simply need to append the file with the following lines and we can even adjust the frequency of it according to our need for better performance. <blockquote>* * * * * php -q /var/www/clipbucket/actions/video_convert.php * * * * * php -q /var/www/clipbucket/actions/verify_converted_videos.php 0 0,12,13 * * * php -q /var/www/clipbucket/actions/update_cb_stats.php</blockquote> After done, we'll simply save and close the text editor. <h2>13. Allowing Firewall</h2> Now, we'll allow port 80 to expose on the internet so that our site is accessible in the same network. To enable http or allow port 80, we'll need to run the following command. <h3>On Ubuntu 14.04</h3> Iptables is a very popular firewall solution program used in Ubuntu 14.04. So, to allow or expose port 80, we'll need to execute the following iptables command. <blockquote># iptables -A INPUT -p tcp -m tcp --dport 80 -j ACCEPT # iptables-save > /etc/iptables-up.rules</blockquote> <h3>On CentOS 7</h3> As systemd is used as the init system in CentOS 7, we'll have firewalld installed for firewall program. To allow port 80 or http service, we'll need to run the following commands. <blockquote># firewall-cmd --permanent --add-service=http # firewall-cmd --reload</blockquote> <h2>14. Web based Installation</h2> Finally, as we have setup and configured everything correctly in above steps, we'll now go further towards the web based installation of ClipBucket. To do so, we'll need to point our web browser to http://ip-address/ or http://domain.com according to the configuration of the server. Here, in this tutorial, we'll point our browser to http://clipbucket.linoxide.com/ . After the site is loaded in our browser, we'll see the first web installation page of Clipbucket asking us to accept the license and continue the installation. <a href="https://www.letshostit.org/wp-content/uploads/2017/02/clipbucket-web-installation-license.png"><img class="size-full wp-image-12647 aligncenter" src="https://www.letshostit.org/wp-content/uploads/2017/02/clipbucket-web-installation-license.png" sizes="(max-width: 1038px) 100vw, 1038px" srcset="http://blog.linoxide.com/wp-content/uploads/2015/12/clipbucket-web-installation-license.png 1038w, http://blog.linoxide.com/wp-content/uploads/2015/12/clipbucket-web-installation-license-300x201.png 300w, http://blog.linoxide.com/wp-content/uploads/2015/12/clipbucket-web-installation-license-1024x687.png 1024w" alt="ClipBucket Web Installation License" width="1038" height="696" /></a> Once we have clicked on I agree and Continue, we'll be directed towards the next step of the installation where we'll see the components installed and missing in our system. Here, as PhpShield is an optional package, we haven't installed it so it must be showing red cross in it. Though, if you need to setup the missing dependencies for better performance, you can do that later too. And after that, we'll click on<strong> Continue to Next Step</strong> to continue further towards the next page. <a href="https://www.letshostit.org/wp-content/uploads/2017/02/dependencies-check.png"><img class="size-full wp-image-12648 aligncenter" src="https://www.letshostit.org/wp-content/uploads/2017/02/dependencies-check.png" sizes="(max-width: 989px) 100vw, 989px" srcset="http://blog.linoxide.com/wp-content/uploads/2015/12/dependencies-check.png 989w, http://blog.linoxide.com/wp-content/uploads/2015/12/dependencies-check-300x180.png 300w" alt="Dependencies Check" width="989" height="593" /></a> In this page, we'll see everywhere green colored tick as we have successfully made those directories writeable in the above steps. So, we'll continue further towards the database page. <a href="https://www.letshostit.org/wp-content/uploads/2017/02/directory-permission-check.png"><img class="size-full wp-image-12650 aligncenter" src="https://www.letshostit.org/wp-content/uploads/2017/02/directory-permission-check.png" sizes="(max-width: 997px) 100vw, 997px" srcset="http://blog.linoxide.com/wp-content/uploads/2015/12/directory-permission-check.png 997w, http://blog.linoxide.com/wp-content/uploads/2015/12/directory-permission-check-300x181.png 300w" alt="Directory Permission Check" width="997" height="603" /></a> We'll now further set the database configuration according to the database we had created above. Here, we'll keep the hostname as localhost, database name as clipbucketdb, database user as clipbucketuser and password as Pa$$worD , and after done, we'll simply move forward by clicking on Check Connection in order to ensure that our ClipBucket application is able to connect to the database server. <img class="size-full wp-image-12649 aligncenter" src="https://www.letshostit.org/wp-content/uploads/2017/02/database-configuration-clipbucket.png" sizes="(max-width: 971px) 100vw, 971px" srcset="http://blog.linoxide.com/wp-content/uploads/2015/12/database-configuration-clipbucket.png 971w, http://blog.linoxide.com/wp-content/uploads/2015/12/database-configuration-clipbucket-300x189.png 300w" alt="Database Configuration Clipbucket" width="971" height="612" /> Next, we'll be asked to set the admin username, password and email address. Here, we set the default username and password ie admin and admin respectively. <a href="https://www.letshostit.org/wp-content/uploads/2017/02/admin-login-config-clipbucket.png"><img class="size-full wp-image-12651 aligncenter" src="https://www.letshostit.org/wp-content/uploads/2017/02/admin-login-config-clipbucket.png" sizes="(max-width: 820px) 100vw, 820px" srcset="http://blog.linoxide.com/wp-content/uploads/2015/12/admin-login-config-clipbucket.png 820w, http://blog.linoxide.com/wp-content/uploads/2015/12/admin-login-config-clipbucket-300x212.png 300w" alt="Admin Login Config Clipbucket" width="820" height="580" /></a> Now, we'll be asked to enter the Website Title, Slogan and URL of our brand new video streaming site. <a href="https://www.letshostit.org/wp-content/uploads/2017/02/setting-site-information.png"><img class="size-full wp-image-12652 aligncenter" src="https://www.letshostit.org/wp-content/uploads/2017/02/setting-site-information.png" sizes="(max-width: 1011px) 100vw, 1011px" srcset="http://blog.linoxide.com/wp-content/uploads/2015/12/setting-site-information.png 1011w, http://blog.linoxide.com/wp-content/uploads/2015/12/setting-site-information-300x160.png 300w" alt="Setting Site Information" width="1011" height="540" /></a> Then, finally we'll see another screen where we'll be said that Clipbucket has been successfully installed. After its installed, we'll need to further make sure to perform post installation tasks. <a href="https://www.letshostit.org/wp-content/uploads/2017/02/clipbucket-installation-successfull.png"><img class="size-full wp-image-12653 aligncenter" src="https://www.letshostit.org/wp-content/uploads/2017/02/clipbucket-installation-successfull.png" sizes="(max-width: 1028px) 100vw, 1028px" srcset="http://blog.linoxide.com/wp-content/uploads/2015/12/clipbucket-installation-successfull.png 1028w, http://blog.linoxide.com/wp-content/uploads/2015/12/clipbucket-installation-successfull-300x165.png 300w, http://blog.linoxide.com/wp-content/uploads/2015/12/clipbucket-installation-successfull-1024x565.png 1024w" alt="ClipBucket Installation Successfull" width="1028" height="567" /></a> <h2>15. Post Installation</h2> After its installed, we'll be asked to delete cb_install directory from the Clipbucket website path. To do so, we'll need to run the following command. <blockquote># rm -rf /var/www/clipbucket/cb_install/</blockquote> After its done, we'll go to the login page and enter our username and password as admin and admin respectively. We strictly recommend everyone to change your administration username and password for the security measures. |
| json metadata | {"tags":["clipbucket","video","sharing","website","sudo"],"image":["https://steemitimages.com/DQmWom6WuYatpqRLUTxTBjYhmXsB913kycMfZU4stV5ZZ8i/hqdefault%20(1).jpg","https://www.letshostit.org/wp-content/uploads/2017/02/set-mariadb-root-password-ubuntu.png","https://www.letshostit.org/wp-content/uploads/2017/02/creating-database-clipbucket.png","https://www.letshostit.org/wp-content/uploads/2017/02/clipbucket-web-installation-license.png","https://www.letshostit.org/wp-content/uploads/2017/02/dependencies-check.png","https://www.letshostit.org/wp-content/uploads/2017/02/directory-permission-check.png","https://www.letshostit.org/wp-content/uploads/2017/02/database-configuration-clipbucket.png","https://www.letshostit.org/wp-content/uploads/2017/02/admin-login-config-clipbucket.png","https://www.letshostit.org/wp-content/uploads/2017/02/setting-site-information.png","https://www.letshostit.org/wp-content/uploads/2017/02/clipbucket-installation-successfull.png"],"links":["https://www.letshostit.org/wp-content/uploads/2017/02/set-mariadb-root-password-ubuntu.png","http://li.nux.ro/download/nux/dextop/el7/x86_64/nux-dextop-release-0-1.el7.nux.noarch.rpm","https://www.letshostit.org/wp-content/uploads/2017/02/latest.php","http://ip-address/","http://domain.com","http://clipbucket.linoxide.com/","https://www.letshostit.org/wp-content/uploads/2017/02/clipbucket-web-installation-license.png","https://www.letshostit.org/wp-content/uploads/2017/02/dependencies-check.png","https://www.letshostit.org/wp-content/uploads/2017/02/directory-permission-check.png","https://www.letshostit.org/wp-content/uploads/2017/02/admin-login-config-clipbucket.png","https://www.letshostit.org/wp-content/uploads/2017/02/setting-site-information.png","https://www.letshostit.org/wp-content/uploads/2017/02/clipbucket-installation-successfull.png"],"app":"steemit/0.1","format":"markdown"} |
| Transaction Info | Block #19455527/Trx 72ef94e8c1f4aa7d2e9bf142c172fdd12c89fa7e |
View Raw JSON Data
{
"trx_id": "72ef94e8c1f4aa7d2e9bf142c172fdd12c89fa7e",
"block": 19455527,
"trx_in_block": 61,
"op_in_trx": 0,
"virtual_op": 0,
"timestamp": "2018-01-31T08:56:24",
"op": [
"comment",
{
"parent_author": "",
"parent_permlink": "clipbucket",
"author": "ranarehan",
"permlink": "how-to-setup-clipbucket-to-start-video-sharing-website-in-linux",
"title": "How to Setup ClipBucket to Start Video Sharing Website in Linux",
"body": "ClipBucket is a free and open source software which helps us to create a complete video sharing website like Youtube, Dailymotion, Metacafe, Veoh, Hulu in few minutes of setup. ClipBucket is the fastest growing application which was first started as Youtube Clone but now its advance features & enhancements makes it the most versatile, reliable & scalable media distribution platform with latest social networking features. It uses FFMPEG for video conversion and thumbs generation which is the most widely used application so, users can stream it straight away using the Flash & HTML 5 Players. Here are some of the awesome features available in ClipBucket.\n.jpg)\n<ol>\n \t<li>ClipBucket is 100% free and open source web application making it extensible and pretty easy to customize.</li>\n \t<li>It uses FFMpeg for real time conversion of videos to make on fly video conversion allowing users to stream using the Flash & HTML 5 Players.</li>\n \t<li>It has a beautiful media management, user management and messaging system.</li>\n \t<li>It also contains ajax based comments, ratings and channels and user feeds.</li>\n \t<li>In addition, it also consists of a built-in language editor.</li>\n \t<li>ClipBucket promises to make it 100% secure from different Security issues like SQL injection.</li>\n</ol>\nHere are some easy steps on how we can setup ClipBucket to start our own Video Sharing platform running in a linux based operating system. In this tutorial, we'll cover the installation of ClipBucket in Ubuntu 14.04 LTS and CentOS 7 linux distributions.\n<h2>1. Installing LAMP Stack</h2>\nFirst of all, we'll need to install a complete LAMP Stack. LAMP stack is the combination of Apache Web Server, MySQL/MariaDB Database server and PHP modules. In order to setup, we'll need to run the following command as shown below with respect to the distribution of linux we're running. Here, in this tutorial, we'll be focusing on two distributions of linux, CentOS and Ubuntu.\n<h3>On Ubuntu 14.04</h3>\nFirst of all, we'll gonna update the local repository index of our Ubuntu system so that we'll get the repository index of the latest available software packages.\n<blockquote># apt-get update</blockquote>\nAfter the update is complete, we'll go for the installation of the lamp stack using apt-get command line as shown below.\n<blockquote># apt-get install apache2 mariadb-server php5 php5-gd php5-mysql php5-curl php5-xsl php5-cli php-pear unzip</blockquote>\nIn Ubuntu, we'll be asked to enter a new password for the MariaDB root user as shown below. We'll need this password in future for accessing the root user of MariaDB database server.\n\n<a href=\"https://www.letshostit.org/wp-content/uploads/2017/02/set-mariadb-root-password-ubuntu.png\"><img class=\"wp-image-12645 size-full aligncenter\" src=\"https://www.letshostit.org/wp-content/uploads/2017/02/set-mariadb-root-password-ubuntu.png\" sizes=\"(max-width: 638px) 100vw, 638px\" srcset=\"http://blog.linoxide.com/wp-content/uploads/2015/12/set-mariadb-root-password-ubuntu.png 638w, http://blog.linoxide.com/wp-content/uploads/2015/12/set-mariadb-root-password-ubuntu-300x200.png 300w\" alt=\"Set MariaDB Root Password Ubuntu\" width=\"638\" height=\"426\" /></a>\n<h3>On CentOS 7</h3>\nOn CentOS 7, as we have yum as the package manager, we'll run the following command to install lamp stack.\n<blockquote># yum install httpd mariadb-server mariadb php php-gd php-mysql php-curl php-xsl php-cli php-mbstring php-pear unzip</blockquote>\n<h2>2. Installing ImageMagick</h2>\nAfter our LAMP Stack has been successfully installed, we'll now go for the installation of ImageMagick in our linux machine. ImageMagick will allow our clipbucket to process and manipulate the images. To setup, we'll need to run the following commands according to the linux distribution we are running in our machine.\n<h3>On Ubuntu 14.04</h3>\n<blockquote># apt-get install imagemagick php5-imagick\n# php5enmod imagick</blockquote>\n<h3>On CentOS 7</h3>\n<blockquote># yum install ImageMagick ImageMagick-devel ImageMagick-perl</blockquote>\nAfter installing ImageMagick and its other packages, we'll now install imagick which is a php module for ImageMagick. To install that, we'll need to run pecl command as shown below.\n<blockquote># pecl install imagick</blockquote>\nAnd then, we'll need to append <strong>/etc/php.ini</strong> configuration file and add <strong>extension=imagick.so</strong> in the end of the file.\n<blockquote># echo extension=imagick.so >> /etc/php.ini</blockquote>\n<h2>3. Installing FFMPEG</h2>\nNext, we'll need to setup FFMPEG in our system. FFMPEG allows us to easily record, convert and stream audio and video. It will be used by Clipbucket to make a working video streaming site. In order to install it, we'll need to run the following commands in a console or terminal with sudo or root access as shown below.\n<h3>On Ubuntu 14.04</h3>\nAs FFMPEG is currently not available in Ubuntu's repository, we'll either need to compile it and setup using the source code or install it via a PPA hosted in launchpad. There is a PPA of FFMPEG available which we can add by running the following command.\n<blockquote># apt-add-repository ppa:mc3man/trusty-media\n\n<strong>If You GOt Error Like \"apt-add-respostitory command not found\"</strong>\n\n<strong>then first run this command</strong>\n\n#sudo apt-get install software-properties-common python-software-properties</blockquote>\nAfter done, we'll need to update the local repository index using the following command.\n<blockquote># apt-get update</blockquote>\nThen, we can install the required FFMPEG packages by running the following apt-get command.\n<blockquote># apt-get install ffmpeg gstreamer0.10-ffmpeg</blockquote>\n<h3>On CentOS 7</h3>\nFFMPEG is also not available in the official repository of CentOS so, we'll need to install NUX Dextop Release and EPEL \"Extra Packages for Enterprise Linux\" repository in our CentOS machine as its available in it.\n<blockquote># rpm -Uvh http://li.nux.ro/download/nux/dextop/el7/x86_64/nux-dextop-release-0-1.el7.nux.noarch.rpm\n# yum install epel-release</blockquote>\nAfter the repositories are added in our machine, we'll now go for the installation of FFMPEG in our machine by running the following yum package manager.\n<blockquote># yum install ffmpeg</blockquote>\n<h2>4. Installing FLVTool2</h2>\nWe'll now install FLVTool2 which is an application for the manipulation of Macromedia Flash Video files (FLV). It can calculate a lot of meta data, insert an onMetaData tag, cut FLV files, add cue points and more. To install it we'll first need to install ruby in our machine. To do so, we'll need to run the following command.\n<h3>Installing Ruby</h3>\n<strong>On Ubuntu 14.04</strong>\n<blockquote># apt-get install ruby</blockquote>\n<strong>On CentOS 7</strong>\n<blockquote># yum install ruby</blockquote>\nAfter ruby and its dependencies are installed successfully, we'll need to install flvtool2 using gem as shown below.\n<h3>Installing via gem</h3>\n<blockquote># gem install flvtool2\n\nFetching: flvtool2-1.0.6.gem (100%)\nSuccessfully installed flvtool2-1.0.6\n1 gem installed\nInstalling ri documentation for flvtool2-1.0.6...\nInstalling RDoc documentation for flvtool2-1.0.6...</blockquote>\n<h2>5. Installing MP4Box (GPAC)</h2>\nwe'll then need to install GPAC which is also known as MP4Box. It is needed by Clipbucked for performing many manipulations on multimedia files like AVI, MPG, TS, but mostly on ISO media files like MP4, 3GP. To install it, we'll need to execute the following command depending on the distributions we are running.\n<h3>On Ubuntu 14.04</h3>\n<blockquote># apt-get install gpac mediainfo</blockquote>\n<h3>On CentOS 7</h3>\n<blockquote># yum install gpac mediainfo</blockquote>\n<h2>6. Configuring PHP Configurations</h2>\nAfter everything above is installed successfully, we'll now go for configuring the PHP configuration. We'll need to edit the php.ini file which is located in different directory according to the distribution. In Ubuntu, php.ini file is located under /etc/php5/apache2/ directory whereas in CentOS, it is located under /etc/ directory.\n<h3>On Ubuntu 14.04</h3>\n<blockquote># nano /etc/php5/apache2/php.ini</blockquote>\n<h3>On CentOS 7</h3>\n<blockquote># nano /etc/php.ini</blockquote>\nAfter opening the file with the text editor, we'll make sure that we have the configuration file configured as shown below. We'll need to append the opened file as the configurations shown below.\n<blockquote>upload_max_filesize = 500M\nmax_execution_time = 300\nmax_input_time = 300\nmemory_limit = 256M\nmagic_quotes_gpc = on\nmagic_quotes_runtime = off\npost_max_size = 500M\nregister_globals = off\nsafe_mode = off\noutput_buffering = off\ndisplay_errors = on</blockquote>\nAfter done, we'll need to restart the Apache Web Server that is running in our machine.\n\n<strong>On Ubuntu 14.04</strong>\n<blockquote># service apache2 restart</blockquote>\n<strong>On CentOS 7</strong>\n<blockquote># systemctl restart httpd</blockquote>\n<h2>7. Configuring MariaDB server</h2>\nAs we have already set password for our MariaDB root user in our machine running Ubuntu, we'll simply skip this step of configuring MariaDB and continue the next step of creating the database. But if we are running CentOS, we haven't configured MariaDB server so, we'll need to follow this step.\n\nAt first, as we haven't set any root password for our MariaDB server, we'll need to configure a root password for it. And after its done, we'll move forward towards the creation of a database user and a database so that Clip-Bucket can utilize it to store its data. To configure MariaDB and assign a root password, we’ll need to run the following command.\n<blockquote># mysql_secure_installation\nThis will ask us to enter the password for root but as we haven’t set any password before and its our first time we’ve installed mariadb, we’ll simply press enter and go further. Then, we’ll be asked to set root password, here we’ll hit Y and enter our password for root of MariaDB. Then, we’ll simply hit enter to set the default values for the further configurations.\n….\nso you should just press enter here.\nEnter current password for root (enter for none):\nOK, successfully used password, moving on…\nSetting the root password ensures that nobody can log into the MariaDB\nroot user without the proper authorisation.\nSet root password? [Y/n] y\nNew password:\nRe-enter new password:\nPassword updated successfully!\nReloading privilege tables..\n… Success!\n…\ninstallation should now be secure.\nThanks for using MariaDB!</blockquote>\n \n<h3><strong>Lines that needed in vesta CP Only</strong></h3>\n<blockquote>replace here with the password that you given in maria db\n\n#nano /root/.my.cnf\n#nano /usr/local/vesta/conf/mysql.conf</blockquote>\n<h2>8. Creating a MariaDB Database</h2>\nNext, we’ll login to the MariaDB command prompt as root. Here, we’ll need to enter the password of the MariaDB root account that we had set above.\n<blockquote># mysql -u root -p</blockquote>\nAfter we’re logged in into the mariadb command prompt, we’ll gonna create the database for clip-bucket.\n<blockquote>> CREATE DATABASE clipbucketdb;\n> CREATE USER 'clipbucketuser'@'localhost' IDENTIFIED BY 'Pa$$worD';\n> GRANT ALL PRIVILEGES ON clipbucketdb.* TO 'clipbucketuser'@'localhost';\n> FLUSH PRIVILEGES;\n> EXIT;</blockquote>\n \n\n<img class=\"size-full wp-image-12646 aligncenter\" src=\"https://www.letshostit.org/wp-content/uploads/2017/02/creating-database-clipbucket.png\" sizes=\"(max-width: 641px) 100vw, 641px\" srcset=\"http://blog.linoxide.com/wp-content/uploads/2015/12/creating-database-clipbucket.png 641w, http://blog.linoxide.com/wp-content/uploads/2015/12/creating-database-clipbucket-300x214.png 300w\" alt=\" Creating Database Clipbucket\" width=\"641\" height=\"457\" />\n\nFinally, we’ve successfully created a database named clipbucketdb with username clipbucketuser and password as Pa$$worD .\n\n<strong>Note: </strong>It is strongly recommended to replace the above variables as your desire for the security issue.\n<h2>9. Configuring Apache Web Server</h2>\nWe'll now add a new virtualhost in the apache configuration so that we can define a specific apache configuration to our clipbucket installation. Creating it will help us to define specific ports, webroot, domain, alias and other configurations for our ClipBucket installation. Here are some configurations we'll setup in this tutorial respective to the distribution of linux we're running.\n<h3>On Ubuntu 14.04 LTS</h3>\n<blockquote># touch /etc/apache2/sites-available/clipbucket.conf\n# ln -s /etc/apache2/sites-available/clipbucket.conf /etc/apache2/sites-enabled/clipbucket.conf\n# nano /etc/apache2/sites-available/clipbucket.conf</blockquote>\nNow, we'll gonna add the following lines of configuration into the opened file.\n<blockquote><VirtualHost *:80>\nServerAdmin [email protected]\nDocumentRoot /var/www/clipbucket/\nServerName clipbucket.linoxide.com\nServerAlias www.clipbucket.linoxide.com\n<Directory /var/www/clipbucket/>\nOptions FollowSymLinks\nAllowOverride All\n</Directory>\nErrorLog /var/log/apache2/clipbucket.linoxide.com-error_log\nCustomLog /var/log/apache2/clipbucket.linoxide.com-access_log common\n</VirtualHost></blockquote>\nAfter done, we'll gonna save the file and exit the text editor. Then, we'll need to make sure that mod is enabled. To enable it, we'll need to execute the following command.\n<blockquote># a2enmod rewrite\n\nEnabling module rewrite.\nTo activate the new configuration, you need to run:\nservice apache2 restart</blockquote>\nThen, we'll restart our apache web server.\n<blockquote># service apache2 restart</blockquote>\n<h3>On CentOS 7</h3>\nIn our CentOS machine, we'll create a file named clipbucket.conf under /etc/httpd/conf.d/ directory using a text editor.\n<blockquote># nano /etc/httpd/conf.d/clipbucket.conf</blockquote>\nThen, we'll gonna add the following lines of configuration into the file.\n<blockquote><VirtualHost *:80>\nServerAdmin [email protected]\nDocumentRoot /var/www/clipbucket/\nServerName clipbucket.linoxide.com\nServerAlias www.clipbucket.linoxide.com\n<Directory /var/www/clipbucket/>\nOptions FollowSymLinks\nAllowOverride All\n</Directory>\nErrorLog /var/log/httpd/clipbucket.linoxide.com-error_log\nCustomLog /var/log/httpd/clipbucket.linoxide.com-access_log common\n</VirtualHost></blockquote>\nOnce done, we'll simply save the file and exit the editor. And then, we'll gonna restart our apache web server.\n<blockquote># systemctl restart httpd</blockquote>\n<h2>10. Downloading ClipBucket</h2>\nWe'll now go for downloading the Clip Bucket package from the <a href=\"https://www.letshostit.org/wp-content/uploads/2017/02/latest.php\">Official Clip Bucket Download Page</a> . As the latest release of Clip Bucket is version 2.8, we'll get the link from the download page and then start the download using wget as follows under /tmp/ directory.\n<blockquote># cd /tmp/\n# wget http://downloads.sourceforge.net/project/clipbucket/ClipBucket%20v2/clipbucket-2.8.v3354-stable.zip\n\n--2015-12-12 11:15:16-- http://downloads.sourceforge.net/project/clipbucket/ClipBucket%20v2/clipbucket-2.8.v3354-stable.zip\nResolving downloads.sourceforge.net (downloads.sourceforge.net)... 216.34.181.59\n...\nConnecting to liquidtelecom.dl.sourceforge.net (liquidtelecom.dl.sourceforge.net)|197.155.77.8|:80... connected.\nHTTP request sent, awaiting response... 200 OK\nLength: 10710544 (10M) [application/octet-stream]\nSaving to: 'clipbucket-2.8.v3354-stable.zip'\n100%[===============================================>] 10,710,544 37.0KB/s in 3m 1s\n2015-12-12 11:18:18 (57.9 KB/s) - 'clipbucket-2.8.v3354-stable.zip' saved [10710544/10710544]</blockquote>\nAfter the download is completed, we'll gonna extract the zip file using unzip.\n<blockquote># unzip clipbucket-2.8.v3354-stable.zip</blockquote>\nOnce the compressed zip file is extracted, we'll get inside the extracted folder in which we'll see two folders named upload and do_not_upload. Under upload folder we'll see that there is the ClipBucket installation file which we'll copy to the webroot of apache server ie /var/www/html/ by default. Whereas under do_not_upload folder, we'll see a file named admin_change_pass.php which we can use to change the default password of Clipbucket login administration user.\n\nTo copy the installation files and directories of Clipbucket which lies under upload directory, we'll need to run the following command.\n<blockquote># mkdir /var/www/clipbucket\n# cp -r /tmp/clipbucket-2.8.v3354-stable/upload/* /var/www/clipbucket/\n# cp /tmp/clipbucket-2.8.v3354-stable/upload/.htaccess /var/www/clipbucket/</blockquote>\n<h2>11. Fixing File Permission</h2>\nAfter the compressed Clip Bucket zip file is extracted and moved to the webroot, we'll go further towards fixing of permission in the files and directories which lies under the installation directory.\n<blockquote># chmod -R 777 /var/www/clipbucket/includes/\n# chmod -R 777 /var/www/clipbucket/files/\n# chmod -R 777 /var/www/clipbucket/images/\n# chmod -R 777 /var/www/clipbucket/cache/\n# chmod -R 777 /var/www/clipbucket/cb_install/</blockquote>\nAfter that, we'll also set the ownership of the installation directory to apache user as it should have full access to the files. To set the ownership of the directory to apache processes, we'll need to run the following command according to the distribution as the apache process owner may be different in different linux distribution.\n<h3>On Ubuntu 14.04</h3>\n<blockquote># chown www-data:www-data -R /var/www/clipbucket/</blockquote>\n<h3>On CentOS 7</h3>\n<blockquote># chown apache:apache -R /var/www/clipbucket/</blockquote>\n<h2>12. Setting Up Crons</h2>\nNow, its time for setting up the cronjob for making some scripts automated. We'll need to run <strong>crontab -e</strong> command which will open the crontab file in which we'll configure the automation.\n<blockquote># crontab -e</blockquote>\nThen, we'll simply need to append the file with the following lines and we can even adjust the frequency of it according to our need for better performance.\n<blockquote>* * * * * php -q /var/www/clipbucket/actions/video_convert.php\n* * * * * php -q /var/www/clipbucket/actions/verify_converted_videos.php\n0 0,12,13 * * * php -q /var/www/clipbucket/actions/update_cb_stats.php</blockquote>\nAfter done, we'll simply save and close the text editor.\n<h2>13. Allowing Firewall</h2>\nNow, we'll allow port 80 to expose on the internet so that our site is accessible in the same network. To enable http or allow port 80, we'll need to run the following command.\n<h3>On Ubuntu 14.04</h3>\nIptables is a very popular firewall solution program used in Ubuntu 14.04. So, to allow or expose port 80, we'll need to execute the following iptables command.\n<blockquote># iptables -A INPUT -p tcp -m tcp --dport 80 -j ACCEPT\n# iptables-save > /etc/iptables-up.rules</blockquote>\n<h3>On CentOS 7</h3>\nAs systemd is used as the init system in CentOS 7, we'll have firewalld installed for firewall program. To allow port 80 or http service, we'll need to run the following commands.\n<blockquote># firewall-cmd --permanent --add-service=http\n# firewall-cmd --reload</blockquote>\n<h2>14. Web based Installation</h2>\nFinally, as we have setup and configured everything correctly in above steps, we'll now go further towards the web based installation of ClipBucket. To do so, we'll need to point our web browser to http://ip-address/ or http://domain.com according to the configuration of the server. Here, in this tutorial, we'll point our browser to http://clipbucket.linoxide.com/ . After the site is loaded in our browser, we'll see the first web installation page of Clipbucket asking us to accept the license and continue the installation.\n\n<a href=\"https://www.letshostit.org/wp-content/uploads/2017/02/clipbucket-web-installation-license.png\"><img class=\"size-full wp-image-12647 aligncenter\" src=\"https://www.letshostit.org/wp-content/uploads/2017/02/clipbucket-web-installation-license.png\" sizes=\"(max-width: 1038px) 100vw, 1038px\" srcset=\"http://blog.linoxide.com/wp-content/uploads/2015/12/clipbucket-web-installation-license.png 1038w, http://blog.linoxide.com/wp-content/uploads/2015/12/clipbucket-web-installation-license-300x201.png 300w, http://blog.linoxide.com/wp-content/uploads/2015/12/clipbucket-web-installation-license-1024x687.png 1024w\" alt=\"ClipBucket Web Installation License\" width=\"1038\" height=\"696\" /></a>\n\nOnce we have clicked on I agree and Continue, we'll be directed towards the next step of the installation where we'll see the components installed and missing in our system. Here, as PhpShield is an optional package, we haven't installed it so it must be showing red cross in it. Though, if you need to setup the missing dependencies for better performance, you can do that later too. And after that, we'll click on<strong> Continue to Next Step</strong> to continue further towards the next page.\n\n<a href=\"https://www.letshostit.org/wp-content/uploads/2017/02/dependencies-check.png\"><img class=\"size-full wp-image-12648 aligncenter\" src=\"https://www.letshostit.org/wp-content/uploads/2017/02/dependencies-check.png\" sizes=\"(max-width: 989px) 100vw, 989px\" srcset=\"http://blog.linoxide.com/wp-content/uploads/2015/12/dependencies-check.png 989w, http://blog.linoxide.com/wp-content/uploads/2015/12/dependencies-check-300x180.png 300w\" alt=\"Dependencies Check\" width=\"989\" height=\"593\" /></a>\n\nIn this page, we'll see everywhere green colored tick as we have successfully made those directories writeable in the above steps. So, we'll continue further towards the database page.\n\n<a href=\"https://www.letshostit.org/wp-content/uploads/2017/02/directory-permission-check.png\"><img class=\"size-full wp-image-12650 aligncenter\" src=\"https://www.letshostit.org/wp-content/uploads/2017/02/directory-permission-check.png\" sizes=\"(max-width: 997px) 100vw, 997px\" srcset=\"http://blog.linoxide.com/wp-content/uploads/2015/12/directory-permission-check.png 997w, http://blog.linoxide.com/wp-content/uploads/2015/12/directory-permission-check-300x181.png 300w\" alt=\"Directory Permission Check\" width=\"997\" height=\"603\" /></a>\n\nWe'll now further set the database configuration according to the database we had created above. Here, we'll keep the hostname as localhost, database name as clipbucketdb, database user as clipbucketuser and password as Pa$$worD , and after done, we'll simply move forward by clicking on Check Connection in order to ensure that our ClipBucket application is able to connect to the database server.\n\n<img class=\"size-full wp-image-12649 aligncenter\" src=\"https://www.letshostit.org/wp-content/uploads/2017/02/database-configuration-clipbucket.png\" sizes=\"(max-width: 971px) 100vw, 971px\" srcset=\"http://blog.linoxide.com/wp-content/uploads/2015/12/database-configuration-clipbucket.png 971w, http://blog.linoxide.com/wp-content/uploads/2015/12/database-configuration-clipbucket-300x189.png 300w\" alt=\"Database Configuration Clipbucket\" width=\"971\" height=\"612\" />\n\nNext, we'll be asked to set the admin username, password and email address. Here, we set the default username and password ie admin and admin respectively.\n\n<a href=\"https://www.letshostit.org/wp-content/uploads/2017/02/admin-login-config-clipbucket.png\"><img class=\"size-full wp-image-12651 aligncenter\" src=\"https://www.letshostit.org/wp-content/uploads/2017/02/admin-login-config-clipbucket.png\" sizes=\"(max-width: 820px) 100vw, 820px\" srcset=\"http://blog.linoxide.com/wp-content/uploads/2015/12/admin-login-config-clipbucket.png 820w, http://blog.linoxide.com/wp-content/uploads/2015/12/admin-login-config-clipbucket-300x212.png 300w\" alt=\"Admin Login Config Clipbucket\" width=\"820\" height=\"580\" /></a>\n\nNow, we'll be asked to enter the Website Title, Slogan and URL of our brand new video streaming site.\n\n<a href=\"https://www.letshostit.org/wp-content/uploads/2017/02/setting-site-information.png\"><img class=\"size-full wp-image-12652 aligncenter\" src=\"https://www.letshostit.org/wp-content/uploads/2017/02/setting-site-information.png\" sizes=\"(max-width: 1011px) 100vw, 1011px\" srcset=\"http://blog.linoxide.com/wp-content/uploads/2015/12/setting-site-information.png 1011w, http://blog.linoxide.com/wp-content/uploads/2015/12/setting-site-information-300x160.png 300w\" alt=\"Setting Site Information\" width=\"1011\" height=\"540\" /></a>\n\nThen, finally we'll see another screen where we'll be said that Clipbucket has been successfully installed. After its installed, we'll need to further make sure to perform post installation tasks.\n\n<a href=\"https://www.letshostit.org/wp-content/uploads/2017/02/clipbucket-installation-successfull.png\"><img class=\"size-full wp-image-12653 aligncenter\" src=\"https://www.letshostit.org/wp-content/uploads/2017/02/clipbucket-installation-successfull.png\" sizes=\"(max-width: 1028px) 100vw, 1028px\" srcset=\"http://blog.linoxide.com/wp-content/uploads/2015/12/clipbucket-installation-successfull.png 1028w, http://blog.linoxide.com/wp-content/uploads/2015/12/clipbucket-installation-successfull-300x165.png 300w, http://blog.linoxide.com/wp-content/uploads/2015/12/clipbucket-installation-successfull-1024x565.png 1024w\" alt=\"ClipBucket Installation Successfull\" width=\"1028\" height=\"567\" /></a>\n<h2>15. Post Installation</h2>\nAfter its installed, we'll be asked to delete cb_install directory from the Clipbucket website path. To do so, we'll need to run the following command.\n<blockquote># rm -rf /var/www/clipbucket/cb_install/</blockquote>\nAfter its done, we'll go to the login page and enter our username and password as admin and admin respectively. We strictly recommend everyone to change your administration username and password for the security measures.",
"json_metadata": "{\"tags\":[\"clipbucket\",\"video\",\"sharing\",\"website\",\"sudo\"],\"image\":[\"https://steemitimages.com/DQmWom6WuYatpqRLUTxTBjYhmXsB913kycMfZU4stV5ZZ8i/hqdefault%20(1).jpg\",\"https://www.letshostit.org/wp-content/uploads/2017/02/set-mariadb-root-password-ubuntu.png\",\"https://www.letshostit.org/wp-content/uploads/2017/02/creating-database-clipbucket.png\",\"https://www.letshostit.org/wp-content/uploads/2017/02/clipbucket-web-installation-license.png\",\"https://www.letshostit.org/wp-content/uploads/2017/02/dependencies-check.png\",\"https://www.letshostit.org/wp-content/uploads/2017/02/directory-permission-check.png\",\"https://www.letshostit.org/wp-content/uploads/2017/02/database-configuration-clipbucket.png\",\"https://www.letshostit.org/wp-content/uploads/2017/02/admin-login-config-clipbucket.png\",\"https://www.letshostit.org/wp-content/uploads/2017/02/setting-site-information.png\",\"https://www.letshostit.org/wp-content/uploads/2017/02/clipbucket-installation-successfull.png\"],\"links\":[\"https://www.letshostit.org/wp-content/uploads/2017/02/set-mariadb-root-password-ubuntu.png\",\"http://li.nux.ro/download/nux/dextop/el7/x86_64/nux-dextop-release-0-1.el7.nux.noarch.rpm\",\"https://www.letshostit.org/wp-content/uploads/2017/02/latest.php\",\"http://ip-address/\",\"http://domain.com\",\"http://clipbucket.linoxide.com/\",\"https://www.letshostit.org/wp-content/uploads/2017/02/clipbucket-web-installation-license.png\",\"https://www.letshostit.org/wp-content/uploads/2017/02/dependencies-check.png\",\"https://www.letshostit.org/wp-content/uploads/2017/02/directory-permission-check.png\",\"https://www.letshostit.org/wp-content/uploads/2017/02/admin-login-config-clipbucket.png\",\"https://www.letshostit.org/wp-content/uploads/2017/02/setting-site-information.png\",\"https://www.letshostit.org/wp-content/uploads/2017/02/clipbucket-installation-successfull.png\"],\"app\":\"steemit/0.1\",\"format\":\"markdown\"}"
}
]
}2018/01/31 07:58:42
2018/01/31 07:58:42
| parent author | krexchange |
| parent permlink | 2-65-eos |
| author | ranarehan |
| permlink | re-krexchange-2-65-eos-20180131t075839937z |
| title | |
| body | 어떤 숫자도 사용하지 않으면, 최선의 자금을 조달 한 동전이 아마도 정확할 것이라고 추측 할 수 있습니다. 대부분 1 년에 걸친 ICO 때문입니다. ICO의 수입은 일반적으로 개발자에게 돌아가지만 일단 소프트웨어가 출시되면 추가 자금을 조달하기가 어렵습니다. ICO는 ICO 동전의 과대 선전과 가치 증대를위한 시간을 제공합니다. 소프트웨어가 출시 된 후 동전의 가치는 프로젝트에 자금을 투입하는 데 도움이되지 않습니다. 돈을 얻기 위해서는 개발자가 현금을 내고 팔아서 플랫폼의 모든 권력을 포기해야하기 때문입니다. |
| json metadata | {"tags":["kr-exchange"],"app":"steemit/0.1"} |
| Transaction Info | Block #19454373/Trx 147a74a5c0ea398861c5f90a0a5e9eada94f1011 |
View Raw JSON Data
{
  "trx_id": "147a74a5c0ea398861c5f90a0a5e9eada94f1011",
  "block": 19454373,
  "trx_in_block": 17,
  "op_in_trx": 0,
  "virtual_op": 0,
  "timestamp": "2018-01-31T07:58:42",
  "op": [
    "comment",
    {
      "parent_author": "krexchange",
      "parent_permlink": "2-65-eos",
      "author": "ranarehan",
      "permlink": "re-krexchange-2-65-eos-20180131t075839937z",
      "title": "",
      "body": "어떤 숫자도 사용하지 않으면, 최선의 자금을 조달 한 동전이 아마도 정확할 것이라고 추측 할 수 있습니다. 대부분 1 년에 걸친 ICO 때문입니다.\n\nICO의 수입은 일반적으로 개발자에게 돌아가지만 일단 소프트웨어가 출시되면 추가 자금을 조달하기가 어렵습니다.\n\nICO는 ICO 동전의 과대 선전과 가치 증대를위한 시간을 제공합니다. 소프트웨어가 출시 된 후 동전의 가치는 프로젝트에 자금을 투입하는 데 도움이되지 않습니다. 돈을 얻기 위해서는 개발자가 현금을 내고 팔아서 플랫폼의 모든 권력을 포기해야하기 때문입니다.",
      "json_metadata": "{\"tags\":[\"kr-exchange\"],\"app\":\"steemit/0.1\"}"
    }
  ]
}Manabar
Voting Power100.00%
Downvote Power100.00%
Resource Credits100.00%
Reputation Progress98.99%
{
  "voting_manabar": {
    "current_mana": "8143659806",
    "last_update_time": 1779082188
  },
  "downvote_manabar": {
    "current_mana": 2035914951,
    "last_update_time": 1779082188
  },
  "rc_account": {
    "account": "ranarehan",
    "rc_manabar": {
      "current_mana": "10164408779",
      "last_update_time": 1779082188
    },
    "max_rc_creation_adjustment": {
      "amount": "2020748973",
      "precision": 6,
      "nai": "@@000000037"
    },
    "max_rc": "10164408779"
  }
}
Account Metadata
| POSTING JSON METADATA | |
| profile | {"name":"Muhammad Rehan Aslam","about":"I had 7 years experience in Wordpres,Linux,Web Hosting,and all about Handling and managing of the Server's Websites etc. Iam studying in 14th.I Love to work in ","location":"Shahzad Abad Colony ArifWala","website":"https://www.letshostit.org/","profile_image":"https://image.prntscr.com/image/xQPSNe5xR9m04eVyoORhNQ.jpeg","cover_image":"https://image.prntscr.com/image/oO-OYg8kTWGrBdc7WJ7t8g.jpeg"} |
| JSON METADATA | |
| profile | {"name":"Muhammad Rehan Aslam","about":"I had 7 years experience in Wordpres,Linux,Web Hosting,and all about Handling and managing of the Server's Websites etc. Iam studying in 14th.I Love to work in ","location":"Shahzad Abad Colony ArifWala","website":"https://www.letshostit.org/","profile_image":"https://image.prntscr.com/image/xQPSNe5xR9m04eVyoORhNQ.jpeg","cover_image":"https://image.prntscr.com/image/oO-OYg8kTWGrBdc7WJ7t8g.jpeg"} |
{
  "posting_json_metadata": {
    "profile": {
      "name": "Muhammad Rehan Aslam",
      "about": "I had 7 years experience in Wordpres,Linux,Web Hosting,and all about Handling and managing of the Server's Websites etc. Iam studying in 14th.I Love to work in ",
      "location": "Shahzad Abad Colony ArifWala",
      "website": "https://www.letshostit.org/",
      "profile_image": "https://image.prntscr.com/image/xQPSNe5xR9m04eVyoORhNQ.jpeg",
      "cover_image": "https://image.prntscr.com/image/oO-OYg8kTWGrBdc7WJ7t8g.jpeg"
    }
  },
  "json_metadata": {
    "profile": {
      "name": "Muhammad Rehan Aslam",
      "about": "I had 7 years experience in Wordpres,Linux,Web Hosting,and all about Handling and managing of the Server's Websites etc. Iam studying in 14th.I Love to work in ",
      "location": "Shahzad Abad Colony ArifWala",
      "website": "https://www.letshostit.org/",
      "profile_image": "https://image.prntscr.com/image/xQPSNe5xR9m04eVyoORhNQ.jpeg",
      "cover_image": "https://image.prntscr.com/image/oO-OYg8kTWGrBdc7WJ7t8g.jpeg"
    }
  }
}
Auth Keys
Owner
Single Signature
Public Keys
STM65TfX6A7Dtoqme4ziEPrEuT5y1oRiYiTr5Acz5HL62SpfmG2Sx1/1
Active
Single Signature
Public Keys
STM8Ydb1RuMYHmFGTF2Uh6W6jjFHHUoLS85CEwWYHv18nXEcAaN231/1
Posting
Single Signature
Public Keys
STM6mvRshkTnKS2wWkujhUv9wHYCMSgHmufa2bmo7uNn7L4cDwmvG1/1
App Permissions
@dtube.app1/1
Memo
STM7c6pjTnUZob6zrFdtpFBFYGjoNBRzsNPmy83kZWdF5kVDShuDD
{
  "owner": {
    "weight_threshold": 1,
    "account_auths": [],
    "key_auths": [
      [
        "STM65TfX6A7Dtoqme4ziEPrEuT5y1oRiYiTr5Acz5HL62SpfmG2Sx",
        1
      ]
    ]
  },
  "active": {
    "weight_threshold": 1,
    "account_auths": [],
    "key_auths": [
      [
        "STM8Ydb1RuMYHmFGTF2Uh6W6jjFHHUoLS85CEwWYHv18nXEcAaN23",
        1
      ]
    ]
  },
  "posting": {
    "weight_threshold": 1,
    "account_auths": [
      [
        "dtube.app",
        1
      ]
    ],
    "key_auths": [
      [
        "STM6mvRshkTnKS2wWkujhUv9wHYCMSgHmufa2bmo7uNn7L4cDwmvG",
        1
      ]
    ]
  },
  "memo": "STM7c6pjTnUZob6zrFdtpFBFYGjoNBRzsNPmy83kZWdF5kVDShuDD"
}
Witness Votes
0 / 30
No active witness votes.
[]