VOTING POWER100.00%
DOWNVOTE POWER100.00%
RESOURCE CREDITS100.00%
REPUTATION PROGRESS0.00%
Net Worth
0.071USD
STEEM
0.017STEEM
SBD
0.000SBD
Effective Power
5.001SP
├── Own SP
1.303SP
└── Incoming DelegationsDeleg
+3.698SP
Detailed Balance
| STEEM | ||
| balance | 0.017STEEM | STEEM |
| market_balance | 0.000STEEM | STEEM |
| savings_balance | 0.000STEEM | STEEM |
| reward_steem_balance | 0.000STEEM | STEEM |
| STEEM POWER | ||
| Own SP | 1.303SP | SP |
| Delegated Out | 0.000SP | SP |
| Delegation In | 3.698SP | SP |
| Effective Power | 5.001SP | SP |
| Reward SP (pending) | 0.000SP | SP |
| SBD | ||
| sbd_balance | 0.000SBD | SBD |
| sbd_conversions | 0.000SBD | SBD |
| sbd_market_balance | 0.000SBD | SBD |
| savings_sbd_balance | 0.000SBD | SBD |
| reward_sbd_balance | 0.000SBD | SBD |
{
  "balance": "0.017 STEEM",
  "savings_balance": "0.000 STEEM",
  "reward_steem_balance": "0.000 STEEM",
  "vesting_shares": "2121.563324 VESTS",
  "delegated_vesting_shares": "0.000000 VESTS",
  "received_vesting_shares": "6022.096482 VESTS",
  "sbd_balance": "0.000 SBD",
  "savings_sbd_balance": "0.000 SBD",
  "reward_sbd_balance": "0.000 SBD",
  "conversions": []
}
Account Info
| name | tzman |
| id | 161369 |
| rank | 642,754 |
| reputation | 702319419 |
| created | 2017-05-16T07:52:33 |
| recovery_account | steem |
| proxy | None |
| post_count | 6 |
| comment_count | 0 |
| lifetime_vote_count | 0 |
| witnesses_voted_for | 0 |
| last_post | 2019-10-01T18:56:51 |
| last_root_post | 2019-10-01T18:56:51 |
| last_vote_time | 2017-05-22T14:22:51 |
| proxied_vsf_votes | 0, 0, 0, 0 |
| can_vote | 1 |
| voting_power | 0 |
| delayed_votes | 0 |
| balance | 0.017 STEEM |
| savings_balance | 0.000 STEEM |
| sbd_balance | 0.000 SBD |
| savings_sbd_balance | 0.000 SBD |
| vesting_shares | 2121.563324 VESTS |
| delegated_vesting_shares | 0.000000 VESTS |
| received_vesting_shares | 6022.096482 VESTS |
| reward_vesting_balance | 0.000000 VESTS |
| vesting_balance | 0.000 STEEM |
| vesting_withdraw_rate | 0.000000 VESTS |
| next_vesting_withdrawal | 1969-12-31T23:59:59 |
| withdrawn | 0 |
| to_withdraw | 0 |
| withdraw_routes | 0 |
| savings_withdraw_requests | 0 |
| last_account_recovery | 1970-01-01T00:00:00 |
| reset_account | null |
| last_owner_update | 1970-01-01T00:00:00 |
| last_account_update | 2017-05-22T10:42:15 |
| mined | No |
| sbd_seconds | 0 |
| sbd_last_interest_payment | 2017-06-19T08:53:24 |
| savings_sbd_last_interest_payment | 1970-01-01T00:00:00 |
{
  "id": 161369,
  "name": "tzman",
  "owner": {
    "weight_threshold": 1,
    "account_auths": [],
    "key_auths": [
      [
        "STM4xwVE9g5MKvEpHR3miZAUit5yLCs1kCHcvw2GrYeyaZTpNF2wg",
        1
      ]
    ]
  },
  "active": {
    "weight_threshold": 1,
    "account_auths": [],
    "key_auths": [
      [
        "STM8TX553iA4CNe4yL7fnFiWFfXhFbG6hvzkd8Ei1PEtp5XRZCQdD",
        1
      ]
    ]
  },
  "posting": {
    "weight_threshold": 1,
    "account_auths": [],
    "key_auths": [
      [
        "STM8harBgF2v5xNzPY4G2KmuQXmNXgbj7Ygug1qsUmRDPyir5Q8e9",
        1
      ]
    ]
  },
  "memo_key": "STM5TMZCogq9u3KHUQ6fVgvsQWtRqnmqwaNjb1qzqM1rDNfgiS6fo",
  "json_metadata": "{\"profile\":{\"profile_image\":\"http://i.imgur.com/uytF9bN.png\",\"name\":\"tzman\",\"location\":\"Bosnia\"}}",
  "posting_json_metadata": "{\"profile\":{\"profile_image\":\"http://i.imgur.com/uytF9bN.png\",\"name\":\"tzman\",\"location\":\"Bosnia\"}}",
  "proxy": "",
  "last_owner_update": "1970-01-01T00:00:00",
  "last_account_update": "2017-05-22T10:42:15",
  "created": "2017-05-16T07:52:33",
  "mined": false,
  "recovery_account": "steem",
  "last_account_recovery": "1970-01-01T00:00:00",
  "reset_account": "null",
  "comment_count": 0,
  "lifetime_vote_count": 0,
  "post_count": 6,
  "can_vote": true,
  "voting_manabar": {
    "current_mana": "8143659806",
    "last_update_time": 1779090303
  },
  "downvote_manabar": {
    "current_mana": 2035914951,
    "last_update_time": 1779090303
  },
  "voting_power": 0,
  "balance": "0.017 STEEM",
  "savings_balance": "0.000 STEEM",
  "sbd_balance": "0.000 SBD",
  "sbd_seconds": "0",
  "sbd_seconds_last_update": "2017-06-19T08:53:24",
  "sbd_last_interest_payment": "2017-06-19T08:53:24",
  "savings_sbd_balance": "0.000 SBD",
  "savings_sbd_seconds": "0",
  "savings_sbd_seconds_last_update": "1970-01-01T00:00:00",
  "savings_sbd_last_interest_payment": "1970-01-01T00:00:00",
  "savings_withdraw_requests": 0,
  "reward_sbd_balance": "0.000 SBD",
  "reward_steem_balance": "0.000 STEEM",
  "reward_vesting_balance": "0.000000 VESTS",
  "reward_vesting_steem": "0.000 STEEM",
  "vesting_shares": "2121.563324 VESTS",
  "delegated_vesting_shares": "0.000000 VESTS",
  "received_vesting_shares": "6022.096482 VESTS",
  "vesting_withdraw_rate": "0.000000 VESTS",
  "next_vesting_withdrawal": "1969-12-31T23:59:59",
  "withdrawn": 0,
  "to_withdraw": 0,
  "withdraw_routes": 0,
  "curation_rewards": 0,
  "posting_rewards": 45,
  "proxied_vsf_votes": [
    0,
    0,
    0,
    0
  ],
  "witnesses_voted_for": 0,
  "last_post": "2019-10-01T18:56:51",
  "last_root_post": "2019-10-01T18:56:51",
  "last_vote_time": "2017-05-22T14:22:51",
  "post_bandwidth": 0,
  "pending_claimed_accounts": 0,
  "vesting_balance": "0.000 STEEM",
  "reputation": 702319419,
  "transfer_history": [],
  "market_history": [],
  "post_history": [],
  "vote_history": [],
  "other_history": [],
  "witness_votes": [],
  "tags_usage": [],
  "guest_bloggers": [],
  "rank": 642754
}
Withdraw Routes
| Incoming | Outgoing |
|---|---|
Empty | Empty |
{
  "incoming": [],
  "outgoing": []
}From Date
To Date
2026/05/18 07:45:03
2026/05/18 07:45:03
| delegator | steem |
| delegatee | tzman |
| vesting shares | 6022.096482 VESTS |
| Transaction Info | Block #106152408/Trx aa27a322a02ddefb5c32ed8920dd7063dc543b87 |
View Raw JSON Data
{
  "trx_id": "aa27a322a02ddefb5c32ed8920dd7063dc543b87",
  "block": 106152408,
  "trx_in_block": 2,
  "op_in_trx": 0,
  "virtual_op": 0,
  "timestamp": "2026-05-18T07:45:03",
  "op": [
    "delegate_vesting_shares",
    {
      "delegator": "steem",
      "delegatee": "tzman",
      "vesting_shares": "6022.096482 VESTS"
    }
  ]
}2026/05/13 10:14:21
2026/05/13 10:14:21
| delegator | steem |
| delegatee | tzman |
| vesting shares | 3309.886077 VESTS |
| Transaction Info | Block #106012102/Trx 7915d3166bf584690d363966305cd1012d04fa55 |
View Raw JSON Data
{
  "trx_id": "7915d3166bf584690d363966305cd1012d04fa55",
  "block": 106012102,
  "trx_in_block": 1,
  "op_in_trx": 0,
  "virtual_op": 0,
  "timestamp": "2026-05-13T10:14:21",
  "op": [
    "delegate_vesting_shares",
    {
      "delegator": "steem",
      "delegatee": "tzman",
      "vesting_shares": "3309.886077 VESTS"
    }
  ]
}2026/04/26 06:55:00
2026/04/26 06:55:00
| delegator | steem |
| delegatee | tzman |
| vesting shares | 6034.612238 VESTS |
| Transaction Info | Block #105519857/Trx 8a00b19cd63a6f32f2a12dfcb3d5ec2c0592d019 |
View Raw JSON Data
{
  "trx_id": "8a00b19cd63a6f32f2a12dfcb3d5ec2c0592d019",
  "block": 105519857,
  "trx_in_block": 0,
  "op_in_trx": 0,
  "virtual_op": 0,
  "timestamp": "2026-04-26T06:55:00",
  "op": [
    "delegate_vesting_shares",
    {
      "delegator": "steem",
      "delegatee": "tzman",
      "vesting_shares": "6034.612238 VESTS"
    }
  ]
}2026/01/24 03:56:03
2026/01/24 03:56:03
| delegator | steem |
| delegatee | tzman |
| vesting shares | 3351.432896 VESTS |
| Transaction Info | Block #102875920/Trx 428191d4100666cca408ca43f48a72e95bbab62b |
View Raw JSON Data
{
  "trx_id": "428191d4100666cca408ca43f48a72e95bbab62b",
  "block": 102875920,
  "trx_in_block": 2,
  "op_in_trx": 0,
  "virtual_op": 0,
  "timestamp": "2026-01-24T03:56:03",
  "op": [
    "delegate_vesting_shares",
    {
      "delegator": "steem",
      "delegatee": "tzman",
      "vesting_shares": "3351.432896 VESTS"
    }
  ]
}2024/12/17 23:04:36
2024/12/17 23:04:36
| delegator | steem |
| delegatee | tzman |
| vesting shares | 3515.652093 VESTS |
| Transaction Info | Block #91322111/Trx 7365264b9d793a76f5efc44b1aacc564eb4936c1 |
View Raw JSON Data
{
  "trx_id": "7365264b9d793a76f5efc44b1aacc564eb4936c1",
  "block": 91322111,
  "trx_in_block": 6,
  "op_in_trx": 0,
  "virtual_op": 0,
  "timestamp": "2024-12-17T23:04:36",
  "op": [
    "delegate_vesting_shares",
    {
      "delegator": "steem",
      "delegatee": "tzman",
      "vesting_shares": "3515.652093 VESTS"
    }
  ]
}2023/11/14 14:43:00
2023/11/14 14:43:00
| delegator | steem |
| delegatee | tzman |
| vesting shares | 3684.785625 VESTS |
| Transaction Info | Block #79876194/Trx 221445b6d278250db8c9144868088582972a2ce9 |
View Raw JSON Data
{
  "trx_id": "221445b6d278250db8c9144868088582972a2ce9",
  "block": 79876194,
  "trx_in_block": 2,
  "op_in_trx": 0,
  "virtual_op": 0,
  "timestamp": "2023-11-14T14:43:00",
  "op": [
    "delegate_vesting_shares",
    {
      "delegator": "steem",
      "delegatee": "tzman",
      "vesting_shares": "3684.785625 VESTS"
    }
  ]
}2023/09/22 12:06:09
2023/09/22 12:06:09
| delegator | steem |
| delegatee | tzman |
| vesting shares | 6621.694411 VESTS |
| Transaction Info | Block #78364910/Trx 2ccb3373771c34539b1aff82a025a71c58531497 |
View Raw JSON Data
{
  "trx_id": "2ccb3373771c34539b1aff82a025a71c58531497",
  "block": 78364910,
  "trx_in_block": 11,
  "op_in_trx": 0,
  "virtual_op": 0,
  "timestamp": "2023-09-22T12:06:09",
  "op": [
    "delegate_vesting_shares",
    {
      "delegator": "steem",
      "delegatee": "tzman",
      "vesting_shares": "6621.694411 VESTS"
    }
  ]
}2022/11/03 19:22:36
2022/11/03 19:22:36
| delegator | steem |
| delegatee | tzman |
| vesting shares | 6843.745849 VESTS |
| Transaction Info | Block #69122426/Trx a1b8c7b364d46782628f06617c5c4a232eb8e3f0 |
View Raw JSON Data
{
  "trx_id": "a1b8c7b364d46782628f06617c5c4a232eb8e3f0",
  "block": 69122426,
  "trx_in_block": 1,
  "op_in_trx": 0,
  "virtual_op": 0,
  "timestamp": "2022-11-03T19:22:36",
  "op": [
    "delegate_vesting_shares",
    {
      "delegator": "steem",
      "delegatee": "tzman",
      "vesting_shares": "6843.745849 VESTS"
    }
  ]
}2022/01/18 00:25:57
2022/01/18 00:25:57
| delegator | steem |
| delegatee | tzman |
| vesting shares | 7063.853450 VESTS |
| Transaction Info | Block #60825505/Trx 0fdf9c504673a79aae1d9dac3cd5a65cb66c4f73 |
View Raw JSON Data
{
  "trx_id": "0fdf9c504673a79aae1d9dac3cd5a65cb66c4f73",
  "block": 60825505,
  "trx_in_block": 70,
  "op_in_trx": 0,
  "virtual_op": 0,
  "timestamp": "2022-01-18T00:25:57",
  "op": [
    "delegate_vesting_shares",
    {
      "delegator": "steem",
      "delegatee": "tzman",
      "vesting_shares": "7063.853450 VESTS"
    }
  ]
}2021/06/14 07:33:18
2021/06/14 07:33:18
| delegator | steem |
| delegatee | tzman |
| vesting shares | 7248.047738 VESTS |
| Transaction Info | Block #54615753/Trx 19d98ca1400919551fa4bbd58b093330b609c9e5 |
View Raw JSON Data
{
  "trx_id": "19d98ca1400919551fa4bbd58b093330b609c9e5",
  "block": 54615753,
  "trx_in_block": 2,
  "op_in_trx": 0,
  "virtual_op": 0,
  "timestamp": "2021-06-14T07:33:18",
  "op": [
    "delegate_vesting_shares",
    {
      "delegator": "steem",
      "delegatee": "tzman",
      "vesting_shares": "7248.047738 VESTS"
    }
  ]
}2020/12/11 17:44:09
2020/12/11 17:44:09
| delegator | steem |
| delegatee | tzman |
| vesting shares | 7435.469712 VESTS |
| Transaction Info | Block #49362969/Trx 04fddb43182eda3a2cd167e999ce8f2b72bb964d |
View Raw JSON Data
{
  "trx_id": "04fddb43182eda3a2cd167e999ce8f2b72bb964d",
  "block": 49362969,
  "trx_in_block": 5,
  "op_in_trx": 0,
  "virtual_op": 0,
  "timestamp": "2020-12-11T17:44:09",
  "op": [
    "delegate_vesting_shares",
    {
      "delegator": "steem",
      "delegatee": "tzman",
      "vesting_shares": "7435.469712 VESTS"
    }
  ]
}2020/12/06 11:19:27
2020/12/06 11:19:27
| delegator | steem |
| delegatee | tzman |
| vesting shares | 1912.543513 VESTS |
| Transaction Info | Block #49214486/Trx 5992b2b33d0647a2e2e2eaf699f5461997e45bd6 |
View Raw JSON Data
{
  "trx_id": "5992b2b33d0647a2e2e2eaf699f5461997e45bd6",
  "block": 49214486,
  "trx_in_block": 2,
  "op_in_trx": 0,
  "virtual_op": 0,
  "timestamp": "2020-12-06T11:19:27",
  "op": [
    "delegate_vesting_shares",
    {
      "delegator": "steem",
      "delegatee": "tzman",
      "vesting_shares": "1912.543513 VESTS"
    }
  ]
}2020/12/05 21:22:03
2020/12/05 21:22:03
| delegator | steem |
| delegatee | tzman |
| vesting shares | 7441.677566 VESTS |
| Transaction Info | Block #49198053/Trx 3dfdcfe1a4e380e23cae53a7984fb8bea6dc1524 |
View Raw JSON Data
{
  "trx_id": "3dfdcfe1a4e380e23cae53a7984fb8bea6dc1524",
  "block": 49198053,
  "trx_in_block": 4,
  "op_in_trx": 0,
  "virtual_op": 0,
  "timestamp": "2020-12-05T21:22:03",
  "op": [
    "delegate_vesting_shares",
    {
      "delegator": "steem",
      "delegatee": "tzman",
      "vesting_shares": "7441.677566 VESTS"
    }
  ]
}2020/11/03 05:19:18
2020/11/03 05:19:18
| delegator | steem |
| delegatee | tzman |
| vesting shares | 1920.017158 VESTS |
| Transaction Info | Block #48273912/Trx 5bc5a75bb057990dceb264e51cd156f8af0eafea |
View Raw JSON Data
{
  "trx_id": "5bc5a75bb057990dceb264e51cd156f8af0eafea",
  "block": 48273912,
  "trx_in_block": 0,
  "op_in_trx": 0,
  "virtual_op": 0,
  "timestamp": "2020-11-03T05:19:18",
  "op": [
    "delegate_vesting_shares",
    {
      "delegator": "steem",
      "delegatee": "tzman",
      "vesting_shares": "1920.017158 VESTS"
    }
  ]
}2020/05/09 12:23:51
2020/05/09 12:23:51
| delegator | steem |
| delegatee | tzman |
| vesting shares | 7644.482925 VESTS |
| Transaction Info | Block #43224835/Trx c896c84d3a49c431cbf0d04413cf1fe9950816c5 |
View Raw JSON Data
{
  "trx_id": "c896c84d3a49c431cbf0d04413cf1fe9950816c5",
  "block": 43224835,
  "trx_in_block": 2,
  "op_in_trx": 0,
  "virtual_op": 0,
  "timestamp": "2020-05-09T12:23:51",
  "op": [
    "delegate_vesting_shares",
    {
      "delegator": "steem",
      "delegatee": "tzman",
      "vesting_shares": "7644.482925 VESTS"
    }
  ]
}2020/05/08 16:59:39
2020/05/08 16:59:39
| delegator | steem |
| delegatee | tzman |
| vesting shares | 1953.311140 VESTS |
| Transaction Info | Block #43202101/Trx 7f4f13d6ab1be5dc5399d8b5430c812f40ad6993 |
View Raw JSON Data
{
  "trx_id": "7f4f13d6ab1be5dc5399d8b5430c812f40ad6993",
  "block": 43202101,
  "trx_in_block": 21,
  "op_in_trx": 0,
  "virtual_op": 0,
  "timestamp": "2020-05-08T16:59:39",
  "op": [
    "delegate_vesting_shares",
    {
      "delegator": "steem",
      "delegatee": "tzman",
      "vesting_shares": "1953.311140 VESTS"
    }
  ]
}2019/12/31 19:21:09
2019/12/31 19:21:09
| delegator | steem |
| delegatee | tzman |
| vesting shares | 7715.218313 VESTS |
| Transaction Info | Block #39526754/Trx f4ff86269cacff3fd82b9cbf85b59d1077014565 |
View Raw JSON Data
{
  "trx_id": "f4ff86269cacff3fd82b9cbf85b59d1077014565",
  "block": 39526754,
  "trx_in_block": 10,
  "op_in_trx": 0,
  "virtual_op": 0,
  "timestamp": "2019-12-31T19:21:09",
  "op": [
    "delegate_vesting_shares",
    {
      "delegator": "steem",
      "delegatee": "tzman",
      "vesting_shares": "7715.218313 VESTS"
    }
  ]
}2019/10/01 20:28:24
2019/10/01 20:28:24
| delegator | steem |
| delegatee | tzman |
| vesting shares | 28610.659620 VESTS |
| Transaction Info | Block #36912321/Trx c65ab0ad9fa36a3586b2dc30bcb0b26750e4b1a8 |
View Raw JSON Data
{
  "trx_id": "c65ab0ad9fa36a3586b2dc30bcb0b26750e4b1a8",
  "block": 36912321,
  "trx_in_block": 18,
  "op_in_trx": 0,
  "virtual_op": 0,
  "timestamp": "2019-10-01T20:28:24",
  "op": [
    "delegate_vesting_shares",
    {
      "delegator": "steem",
      "delegatee": "tzman",
      "vesting_shares": "28610.659620 VESTS"
    }
  ]
}tzmanpublished a new post: sculpture-on-the-pencil2019/10/01 18:59:42
tzmanpublished a new post: sculpture-on-the-pencil
2019/10/01 18:59:42
| parent author | |
| parent permlink | sculpture |
| author | tzman |
| permlink | sculpture-on-the-pencil |
| title | Sculpture on the pencil |
| body | This is my best friends work.This is some amazing stuff he is making. If anyone is interested to get in contact with him, just let me know  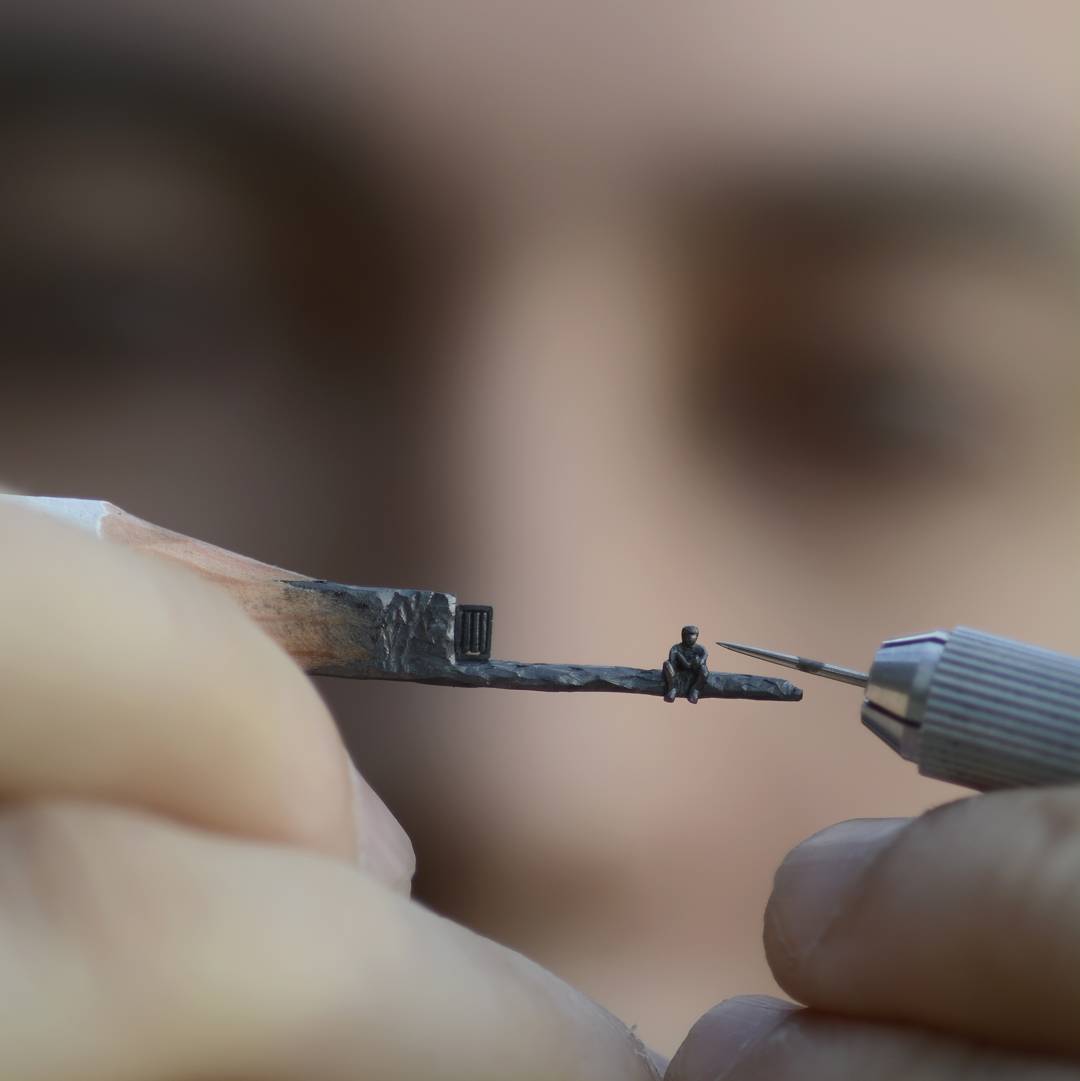  |
| json metadata | {"tags":["art","pencil","amazing","talent"],"image":["https://cdn.steemitimages.com/DQmPvVRLhtBibSsXm7d2XgKLvsyrs1mTChzXjEkXbib87zi/jas.jpg","https://cdn.steemitimages.com/DQmV82o2RSUoP59Agq7LryCwXRiiJZX5C78rN7JiKWARLQb/jas2.jpg","https://cdn.steemitimages.com/DQmXfCrX5BC8xhs72sbKpSDdYvzRbCdNBAJ5pjzqTNAXapX/jas3.jpg"],"app":"steemit/0.1","format":"markdown"} |
| Transaction Info | Block #36910549/Trx 7e122e5de7ec4bdc54f540ba1557520b802df966 |
View Raw JSON Data
{
"trx_id": "7e122e5de7ec4bdc54f540ba1557520b802df966",
"block": 36910549,
"trx_in_block": 8,
"op_in_trx": 0,
"virtual_op": 0,
"timestamp": "2019-10-01T18:59:42",
"op": [
"comment",
{
"parent_author": "",
"parent_permlink": "sculpture",
"author": "tzman",
"permlink": "sculpture-on-the-pencil",
"title": "Sculpture on the pencil",
"body": "This is my best friends work.This is some amazing stuff he is making.\nIf anyone is interested to get in contact with him, just let me know\n\n\n\n",
"json_metadata": "{\"tags\":[\"art\",\"pencil\",\"amazing\",\"talent\"],\"image\":[\"https://cdn.steemitimages.com/DQmPvVRLhtBibSsXm7d2XgKLvsyrs1mTChzXjEkXbib87zi/jas.jpg\",\"https://cdn.steemitimages.com/DQmV82o2RSUoP59Agq7LryCwXRiiJZX5C78rN7JiKWARLQb/jas2.jpg\",\"https://cdn.steemitimages.com/DQmXfCrX5BC8xhs72sbKpSDdYvzRbCdNBAJ5pjzqTNAXapX/jas3.jpg\"],\"app\":\"steemit/0.1\",\"format\":\"markdown\"}"
}
]
}tzmanpublished a new post: sculpture-on-the-pencil2019/10/01 18:56:51
tzmanpublished a new post: sculpture-on-the-pencil
2019/10/01 18:56:51
| parent author | |
| parent permlink | sculpture |
| author | tzman |
| permlink | sculpture-on-the-pencil |
| title | Sculpture on the pencil |
| body | This is my best friends work.This is some amazing stuff he is making. If anyone is interested to get in contact with him, just let me know    |
| json metadata | {"tags":["sculpture","pencil","amazing","talent","gift"],"image":["https://cdn.steemitimages.com/DQmPvVRLhtBibSsXm7d2XgKLvsyrs1mTChzXjEkXbib87zi/jas.jpg","https://cdn.steemitimages.com/DQmV82o2RSUoP59Agq7LryCwXRiiJZX5C78rN7JiKWARLQb/jas2.jpg","https://cdn.steemitimages.com/DQmXfCrX5BC8xhs72sbKpSDdYvzRbCdNBAJ5pjzqTNAXapX/jas3.jpg"],"app":"steemit/0.1","format":"markdown"} |
| Transaction Info | Block #36910492/Trx 85c809c6dff812379066a3563ea1b610f1219bce |
View Raw JSON Data
{
"trx_id": "85c809c6dff812379066a3563ea1b610f1219bce",
"block": 36910492,
"trx_in_block": 14,
"op_in_trx": 0,
"virtual_op": 0,
"timestamp": "2019-10-01T18:56:51",
"op": [
"comment",
{
"parent_author": "",
"parent_permlink": "sculpture",
"author": "tzman",
"permlink": "sculpture-on-the-pencil",
"title": "Sculpture on the pencil",
"body": "This is my best friends work.This is some amazing stuff he is making.\nIf anyone is interested to get in contact with him, just let me know\n\n\n\n",
"json_metadata": "{\"tags\":[\"sculpture\",\"pencil\",\"amazing\",\"talent\",\"gift\"],\"image\":[\"https://cdn.steemitimages.com/DQmPvVRLhtBibSsXm7d2XgKLvsyrs1mTChzXjEkXbib87zi/jas.jpg\",\"https://cdn.steemitimages.com/DQmV82o2RSUoP59Agq7LryCwXRiiJZX5C78rN7JiKWARLQb/jas2.jpg\",\"https://cdn.steemitimages.com/DQmXfCrX5BC8xhs72sbKpSDdYvzRbCdNBAJ5pjzqTNAXapX/jas3.jpg\"],\"app\":\"steemit/0.1\",\"format\":\"markdown\"}"
}
]
}2019/08/23 08:48:09
2019/08/23 08:48:09
| delegator | steem |
| delegatee | tzman |
| vesting shares | 7792.315539 VESTS |
| Transaction Info | Block #35799342/Trx a60624a40ed77e0ad1eca9dbb57cc9b1ded7c145 |
View Raw JSON Data
{
  "trx_id": "a60624a40ed77e0ad1eca9dbb57cc9b1ded7c145",
  "block": 35799342,
  "trx_in_block": 17,
  "op_in_trx": 0,
  "virtual_op": 0,
  "timestamp": "2019-08-23T08:48:09",
  "op": [
    "delegate_vesting_shares",
    {
      "delegator": "steem",
      "delegatee": "tzman",
      "vesting_shares": "7792.315539 VESTS"
    }
  ]
}2019/05/16 09:06:09
2019/05/16 09:06:09
| parent author | tzman |
| parent permlink | setup-bitenx-masternode-on-ubuntu |
| author | steemitboard |
| permlink | steemitboard-notify-tzman-20190516t090609000z |
| title | |
| body | Congratulations @tzman! You received a personal award! <table><tr><td>https://steemitimages.com/70x70/http://steemitboard.com/@tzman/birthday2.png</td><td>Happy Birthday! - You are on the Steem blockchain for 2 years!</td></tr></table> <sub>_You can view [your badges on your Steem Board](https://steemitboard.com/@tzman) and compare to others on the [Steem Ranking](http://steemitboard.com/ranking/index.php?name=tzman)_</sub> **Do not miss the last post from @steemitboard:** <table><tr><td><a href="https://steemit.com/japanese/@steemitboard/new-japanese-speaking-community-steem-meetup-badge"><img src="https://steemitimages.com/64x128/https://cdn.steemitimages.com/DQmRWbAjbeETEaqSPLcpwYX1JN5pZhdPffv4q6DaBs6xvZm/image.png"></a></td><td><a href="https://steemit.com/japanese/@steemitboard/new-japanese-speaking-community-steem-meetup-badge">New japanese speaking community Steem Meetup badge</a></td></tr></table> ###### [Vote for @Steemitboard as a witness](https://v2.steemconnect.com/sign/account-witness-vote?witness=steemitboard&approve=1) to get one more award and increased upvotes! |
| json metadata | {"image":["https://steemitboard.com/img/notify.png"]} |
| Transaction Info | Block #32953663/Trx 0f7ef69ffc8b12766b97efd0695cbd50dd15a459 |
View Raw JSON Data
{
  "trx_id": "0f7ef69ffc8b12766b97efd0695cbd50dd15a459",
  "block": 32953663,
  "trx_in_block": 17,
  "op_in_trx": 0,
  "virtual_op": 0,
  "timestamp": "2019-05-16T09:06:09",
  "op": [
    "comment",
    {
      "parent_author": "tzman",
      "parent_permlink": "setup-bitenx-masternode-on-ubuntu",
      "author": "steemitboard",
      "permlink": "steemitboard-notify-tzman-20190516t090609000z",
      "title": "",
      "body": "Congratulations @tzman! You received a personal award!\n\n<table><tr><td>https://steemitimages.com/70x70/http://steemitboard.com/@tzman/birthday2.png</td><td>Happy Birthday! - You are on the Steem blockchain for 2 years!</td></tr></table>\n\n<sub>_You can view [your badges on your Steem Board](https://steemitboard.com/@tzman) and compare to others on the [Steem Ranking](http://steemitboard.com/ranking/index.php?name=tzman)_</sub>\n\n\n**Do not miss the last post from @steemitboard:**\n<table><tr><td><a href=\"https://steemit.com/japanese/@steemitboard/new-japanese-speaking-community-steem-meetup-badge\"><img src=\"https://steemitimages.com/64x128/https://cdn.steemitimages.com/DQmRWbAjbeETEaqSPLcpwYX1JN5pZhdPffv4q6DaBs6xvZm/image.png\"></a></td><td><a href=\"https://steemit.com/japanese/@steemitboard/new-japanese-speaking-community-steem-meetup-badge\">New  japanese speaking community Steem Meetup badge</a></td></tr></table>\n\n###### [Vote for @Steemitboard as a witness](https://v2.steemconnect.com/sign/account-witness-vote?witness=steemitboard&approve=1) to get one more award and increased upvotes!",
      "json_metadata": "{\"image\":[\"https://steemitboard.com/img/notify.png\"]}"
    }
  ]
}2018/09/09 13:41:45
2018/09/09 13:41:45
| delegator | steem |
| delegatee | tzman |
| vesting shares | 7990.649296 VESTS |
| Transaction Info | Block #25810198/Trx 8bed0a92e43ea07de57275daa101748ea7282bd6 |
View Raw JSON Data
{
  "trx_id": "8bed0a92e43ea07de57275daa101748ea7282bd6",
  "block": 25810198,
  "trx_in_block": 29,
  "op_in_trx": 0,
  "virtual_op": 0,
  "timestamp": "2018-09-09T13:41:45",
  "op": [
    "delegate_vesting_shares",
    {
      "delegator": "steem",
      "delegatee": "tzman",
      "vesting_shares": "7990.649296 VESTS"
    }
  ]
}tzmanpublished a new post: setup-bitenx-masternode-on-ubuntu2018/06/10 12:51:06
tzmanpublished a new post: setup-bitenx-masternode-on-ubuntu
2018/06/10 12:51:06
| parent author | |
| parent permlink | bitenx |
| author | tzman |
| permlink | setup-bitenx-masternode-on-ubuntu |
| title | Setup BitenX Masternode on Ubuntu |
| body | @@ -2914,18 +2914,25 @@ =1 %0A -staking=0 +maxconnections=24 %0Aext @@ -2941,17 +2941,22 @@ nalip=IP -: +%0Aport= 44445%0Ama |
| json metadata | {"tags":["bitenx","masternode","guide"],"links":["https://bitcointalk.org/index.php?topic=4412676.0","https://www.digitalocean.com/community/tutorials/how-to-add-swap-on-ubuntu-14-04","https://github.com/BitenCoin/bitenx","https://github.com/BitenCoin/bitenx-sentinel.git"],"app":"steemit/0.1","format":"markdown"} |
| Transaction Info | Block #23200360/Trx d8b0f2c0bc95d08fbd2782a79fecbdb9680d795f |
View Raw JSON Data
{
  "trx_id": "d8b0f2c0bc95d08fbd2782a79fecbdb9680d795f",
  "block": 23200360,
  "trx_in_block": 24,
  "op_in_trx": 0,
  "virtual_op": 0,
  "timestamp": "2018-06-10T12:51:06",
  "op": [
    "comment",
    {
      "parent_author": "",
      "parent_permlink": "bitenx",
      "author": "tzman",
      "permlink": "setup-bitenx-masternode-on-ubuntu",
      "title": "Setup BitenX Masternode on Ubuntu",
      "body": "@@ -2914,18 +2914,25 @@\n =1 %0A\n-staking=0 \n+maxconnections=24\n %0Aext\n@@ -2941,17 +2941,22 @@\n nalip=IP\n-:\n+%0Aport=\n 44445%0Ama\n",
      "json_metadata": "{\"tags\":[\"bitenx\",\"masternode\",\"guide\"],\"links\":[\"https://bitcointalk.org/index.php?topic=4412676.0\",\"https://www.digitalocean.com/community/tutorials/how-to-add-swap-on-ubuntu-14-04\",\"https://github.com/BitenCoin/bitenx\",\"https://github.com/BitenCoin/bitenx-sentinel.git\"],\"app\":\"steemit/0.1\",\"format\":\"markdown\"}"
    }
  ]
}tzmanpublished a new post: setup-bitenx-masternode-on-ubuntu2018/06/10 10:24:54
tzmanpublished a new post: setup-bitenx-masternode-on-ubuntu
2018/06/10 10:24:54
| parent author | |
| parent permlink | bitenx |
| author | tzman |
| permlink | setup-bitenx-masternode-on-ubuntu |
| title | Setup BitenX Masternode on Ubuntu |
| body | @@ -4268,16 +4268,181 @@ d job.%0A%0A +Create a crontab entry to wake sentinel every minute%0A%0Acrontab -e%0A* * * * * cd /root/.bitenx/sentinel && ./venv/bin/python bin/sentinel.py 2%3E&1 %3E%3E sentinel-cron.log%0A%0A Checking |
| json metadata | {"tags":["bitenx","masternode","guide"],"links":["https://bitcointalk.org/index.php?topic=4412676.0","https://www.digitalocean.com/community/tutorials/how-to-add-swap-on-ubuntu-14-04","https://github.com/BitenCoin/bitenx","https://github.com/BitenCoin/bitenx-sentinel.git"],"app":"steemit/0.1","format":"markdown"} |
| Transaction Info | Block #23197443/Trx a413c376b05a622d2fe21ace85537e0599b679a0 |
View Raw JSON Data
{
  "trx_id": "a413c376b05a622d2fe21ace85537e0599b679a0",
  "block": 23197443,
  "trx_in_block": 8,
  "op_in_trx": 0,
  "virtual_op": 0,
  "timestamp": "2018-06-10T10:24:54",
  "op": [
    "comment",
    {
      "parent_author": "",
      "parent_permlink": "bitenx",
      "author": "tzman",
      "permlink": "setup-bitenx-masternode-on-ubuntu",
      "title": "Setup BitenX Masternode on Ubuntu",
      "body": "@@ -4268,16 +4268,181 @@\n d job.%0A%0A\n+Create a crontab entry to wake sentinel every minute%0A%0Acrontab -e%0A* * * * * cd /root/.bitenx/sentinel && ./venv/bin/python bin/sentinel.py 2%3E&1 %3E%3E sentinel-cron.log%0A%0A\n Checking\n",
      "json_metadata": "{\"tags\":[\"bitenx\",\"masternode\",\"guide\"],\"links\":[\"https://bitcointalk.org/index.php?topic=4412676.0\",\"https://www.digitalocean.com/community/tutorials/how-to-add-swap-on-ubuntu-14-04\",\"https://github.com/BitenCoin/bitenx\",\"https://github.com/BitenCoin/bitenx-sentinel.git\"],\"app\":\"steemit/0.1\",\"format\":\"markdown\"}"
    }
  ]
}tzmanpublished a new post: setup-bitenx-masternode-on-ubuntu2018/06/10 10:20:36
tzmanpublished a new post: setup-bitenx-masternode-on-ubuntu
2018/06/10 10:20:36
| parent author | |
| parent permlink | bitenx |
| author | tzman |
| permlink | setup-bitenx-masternode-on-ubuntu |
| title | Setup BitenX Masternode on Ubuntu |
| body | @@ -4383,17 +4383,16 @@ yping:%0A%0A -. bitenx-c |
| json metadata | {"tags":["bitenx","masternode","guide"],"links":["https://bitcointalk.org/index.php?topic=4412676.0","https://www.digitalocean.com/community/tutorials/how-to-add-swap-on-ubuntu-14-04","https://github.com/BitenCoin/bitenx","https://github.com/BitenCoin/bitenx-sentinel.git"],"app":"steemit/0.1","format":"markdown"} |
| Transaction Info | Block #23197358/Trx f6ac4647ad9c77fafd87cf60a266309f2956cec9 |
View Raw JSON Data
{
  "trx_id": "f6ac4647ad9c77fafd87cf60a266309f2956cec9",
  "block": 23197358,
  "trx_in_block": 22,
  "op_in_trx": 0,
  "virtual_op": 0,
  "timestamp": "2018-06-10T10:20:36",
  "op": [
    "comment",
    {
      "parent_author": "",
      "parent_permlink": "bitenx",
      "author": "tzman",
      "permlink": "setup-bitenx-masternode-on-ubuntu",
      "title": "Setup BitenX Masternode on Ubuntu",
      "body": "@@ -4383,17 +4383,16 @@\n yping:%0A%0A\n-.\n bitenx-c\n",
      "json_metadata": "{\"tags\":[\"bitenx\",\"masternode\",\"guide\"],\"links\":[\"https://bitcointalk.org/index.php?topic=4412676.0\",\"https://www.digitalocean.com/community/tutorials/how-to-add-swap-on-ubuntu-14-04\",\"https://github.com/BitenCoin/bitenx\",\"https://github.com/BitenCoin/bitenx-sentinel.git\"],\"app\":\"steemit/0.1\",\"format\":\"markdown\"}"
    }
  ]
}tzmanpublished a new post: setup-bitenx-masternode-on-ubuntu2018/06/10 10:20:21
tzmanpublished a new post: setup-bitenx-masternode-on-ubuntu
2018/06/10 10:20:21
| parent author | |
| parent permlink | bitenx |
| author | tzman |
| permlink | setup-bitenx-masternode-on-ubuntu |
| title | Setup BitenX Masternode on Ubuntu |
| body | @@ -840,329 +840,64 @@ t)%0A%0A -The basic reasoning for BitenX requirements is that, you get to keep your BTENX in your local wallet, and host your masternode remotely, securely.%0A%0AFor this guide, I%E2%80%99m going to BitenX to your main computer%E2%80%99s wallet as the main wallet, and the masternode wallet as the masternode wallets.%0A%0ASetting up the Masternode wallet +%0AFor this guide we are creating masternode on Ubuntu VPS %0A%0AFi @@ -1647,22 +1647,13 @@ enX -headless clien +walle t%0A%0Ac @@ -1658,32 +1658,66 @@ %0Acd src%0A -./ +cp bitenx - -daemon +d /usr/bin%0Acp bitenx-cli /usr/bin%0Abitenxd %0A%0AYou sh @@ -1776,159 +1776,32 @@ l.%0A%0A -Setting up the main%C2%A0wallet%0A%0AGo to your local computer BitenX your main wallet is running with all your coins inside. Go to the wallet debug console and +%0AAfter wallet in synced, typ @@ -1934,23 +1934,15 @@ hen -go to the debug +type in con @@ -2378,14 +2378,8 @@ the -debug + cons @@ -2519,29 +2519,24 @@ ory of your -main wallet (in L @@ -2619,25 +2619,18 @@ %C2%A0:%0A%0AMN1 -127.0.0.1 +IP :44445 m @@ -2664,302 +2664,105 @@ t %0A%0A -Save it and close it. Restart your main wallet.%0A%0ANote that each line of the%C2%A0masternode.conf%C2%A0file corresponds to one masternode.%0A%0ABack to the Masternode wallet%0A%0ANavigate to the data directory by typing%0A%0Acd .bitenx%0A%0AThe%C2%A0user%C2%A0corresponds to your computer username in which you are logged in.%0A%0Anano +You need to change IP to your VPS IP address%0ASave it and close it. Restart your wallet.%0A%0ANow open bit @@ -2775,13 +2775,9 @@ nf%0A%0A -Now c +C opy @@ -3222,72 +3222,51 @@ es.%0A -%0AType Ctrl + X =%3E Y =%3E Enter. The file%C2%A0bitenx.conf%C2%A0is now saved. +Save it and close it. Restart your wallet.%0A %0A%0AIf @@ -3370,390 +3370,614 @@ cp%0A%0A -Now start you masternode wallet by navigating through your BitenX folder.%0A%0Acd +%0AEncrypt your wallet and now wait for your wallet to sync%0A%0AInstall sentinel%0A%0Asudo apt-get update%0Asudo apt-get install -y git python-virtualenv %0Acd +. bitenx -/src/%0A./bitenx -daemon%0A%0AWait like 10 mins for your wallet to download the blockchain. %0AYou can check the progress with the following command%C2%A0:%0A%0A./bitenx-cli getblockcount%0A%0AThe block number has to catch up with th +%0Agit clone https://github.com/BitenCoin/bitenx-sentinel.git%0Acd sentinel%0Avirtualenv venv%0Asudo apt-get install -y virtualenv%0Avenv/bin/pip install -r requirements.txt%0Avenv/bin/python bin/sentinel.py%0A%0AYou should see: %22bitenxd not synced with network! Awaiting full sync before running Sentinel.%22%0AThis is exactly what we want to se e -l at -est on the%C2%A0explorer.%0A%0AStarting the Masternode%0A%0AGo back to your main wallet, to + this stage%0A%0AType:%0A%0Abitenx-cli mnsync status%0A%0AYou should see - AssetId 999, all trues, one false, and a FINISHED.%0A%0AStarting the @@ -3991,13 +3991,8 @@ node - tab. %0A%0AYo @@ -4116,168 +4116,162 @@ e.%0A%0A -If the Masternode tab isn't showing, you need to go to Options%3EWallet%3EShow Masternodes Tab.%0A%0AClick %22start-alias%22. Your masternode should be now up and running%C2%A0! +bitenx-cli walletpassphrase YOURPASSPHRASE 120%0Amasternode start-alias LABEL%0A%0Avenv/bin/python bin/sentinel.py%0AIf it don't show anything you did a good job. %0A%0ACh @@ -4384,17 +4384,16 @@ ping:%0A%0A. -/ bitenx-c @@ -4495,16 +4495,17 @@ arted%22.%0A +%0A NOTE: Yo |
| json metadata | {"tags":["bitenx","masternode","guide"],"links":["https://bitcointalk.org/index.php?topic=4412676.0","https://www.digitalocean.com/community/tutorials/how-to-add-swap-on-ubuntu-14-04","https://github.com/BitenCoin/bitenx","https://github.com/BitenCoin/bitenx-sentinel.git"],"app":"steemit/0.1","format":"markdown"} |
| Transaction Info | Block #23197353/Trx d46fb8d3d91d3718761702691e58725fc1849139 |
View Raw JSON Data
{
  "trx_id": "d46fb8d3d91d3718761702691e58725fc1849139",
  "block": 23197353,
  "trx_in_block": 32,
  "op_in_trx": 0,
  "virtual_op": 0,
  "timestamp": "2018-06-10T10:20:21",
  "op": [
    "comment",
    {
      "parent_author": "",
      "parent_permlink": "bitenx",
      "author": "tzman",
      "permlink": "setup-bitenx-masternode-on-ubuntu",
      "title": "Setup BitenX Masternode on Ubuntu",
      "body": "@@ -840,329 +840,64 @@\n t)%0A%0A\n-The basic reasoning for BitenX requirements is that, you get to keep your BTENX in your local wallet, and host your masternode remotely, securely.%0A%0AFor this guide, I%E2%80%99m going to BitenX to your main computer%E2%80%99s wallet as the main wallet, and the masternode wallet as the masternode wallets.%0A%0ASetting up the Masternode wallet\n+%0AFor this guide we are creating masternode on Ubuntu VPS\n %0A%0AFi\n@@ -1647,22 +1647,13 @@\n enX \n-headless clien\n+walle\n t%0A%0Ac\n@@ -1658,32 +1658,66 @@\n %0Acd src%0A\n-./\n+cp \n bitenx\n- -daemon\n+d /usr/bin%0Acp bitenx-cli /usr/bin%0Abitenxd\n %0A%0AYou sh\n@@ -1776,159 +1776,32 @@\n l.%0A%0A\n-Setting up the main%C2%A0wallet%0A%0AGo to your local computer BitenX your main wallet is running with all your coins inside. Go to the wallet debug console and\n+%0AAfter wallet in synced,\n  typ\n@@ -1934,23 +1934,15 @@\n hen \n-go to the debug\n+type in\n  con\n@@ -2378,14 +2378,8 @@\n the \n-debug \n \n+\n cons\n@@ -2519,29 +2519,24 @@\n ory of your \n-main \n wallet (in L\n@@ -2619,25 +2619,18 @@\n %C2%A0:%0A%0AMN1 \n-127.0.0.1\n+IP\n :44445 m\n@@ -2664,302 +2664,105 @@\n t %0A%0A\n-Save it and close it. Restart your main wallet.%0A%0ANote that each line of the%C2%A0masternode.conf%C2%A0file corresponds to one masternode.%0A%0ABack to the Masternode wallet%0A%0ANavigate to the data directory by typing%0A%0Acd .bitenx%0A%0AThe%C2%A0user%C2%A0corresponds to your computer username in which you are logged in.%0A%0Anano\n+You need to change IP to your VPS IP address%0ASave it and close it. Restart your wallet.%0A%0ANow open\n  bit\n@@ -2775,13 +2775,9 @@\n nf%0A%0A\n-Now c\n+C\n opy \n@@ -3222,72 +3222,51 @@\n es.%0A\n-%0AType Ctrl + X =%3E Y =%3E Enter. The file%C2%A0bitenx.conf%C2%A0is now saved.\n+Save it and close it. Restart your wallet.%0A\n %0A%0AIf\n@@ -3370,390 +3370,614 @@\n cp%0A%0A\n-Now start you masternode wallet by navigating through your BitenX folder.%0A%0Acd\n+%0AEncrypt your wallet and now wait for your wallet to sync%0A%0AInstall sentinel%0A%0Asudo apt-get update%0Asudo apt-get install -y git python-virtualenv\n %0Acd \n+.\n bitenx\n-/src/%0A./bitenx -daemon%0A%0AWait like 10 mins for your wallet to download the blockchain. %0AYou can check the progress with the following command%C2%A0:%0A%0A./bitenx-cli getblockcount%0A%0AThe block number has to catch up with th\n+%0Agit clone https://github.com/BitenCoin/bitenx-sentinel.git%0Acd sentinel%0Avirtualenv venv%0Asudo apt-get install -y virtualenv%0Avenv/bin/pip install -r requirements.txt%0Avenv/bin/python bin/sentinel.py%0A%0AYou should see: %22bitenxd not synced with network! Awaiting full sync before running Sentinel.%22%0AThis is exactly what we want to se\n e \n-l\n at\n-est on the%C2%A0explorer.%0A%0AStarting the Masternode%0A%0AGo back to your main wallet, to\n+ this stage%0A%0AType:%0A%0Abitenx-cli mnsync status%0A%0AYou should see - AssetId 999, all trues, one false, and a FINISHED.%0A%0AStarting\n  the\n@@ -3991,13 +3991,8 @@\n node\n- tab.\n %0A%0AYo\n@@ -4116,168 +4116,162 @@\n e.%0A%0A\n-If the Masternode tab isn't showing, you need to go to Options%3EWallet%3EShow Masternodes Tab.%0A%0AClick %22start-alias%22. Your masternode should be now up and running%C2%A0!\n+bitenx-cli walletpassphrase YOURPASSPHRASE 120%0Amasternode start-alias LABEL%0A%0Avenv/bin/python bin/sentinel.py%0AIf it don't show anything you did a good job.\n %0A%0ACh\n@@ -4384,17 +4384,16 @@\n ping:%0A%0A.\n-/\n bitenx-c\n@@ -4495,16 +4495,17 @@\n arted%22.%0A\n+%0A\n NOTE: Yo\n",
      "json_metadata": "{\"tags\":[\"bitenx\",\"masternode\",\"guide\"],\"links\":[\"https://bitcointalk.org/index.php?topic=4412676.0\",\"https://www.digitalocean.com/community/tutorials/how-to-add-swap-on-ubuntu-14-04\",\"https://github.com/BitenCoin/bitenx\",\"https://github.com/BitenCoin/bitenx-sentinel.git\"],\"app\":\"steemit/0.1\",\"format\":\"markdown\"}"
    }
  ]
}tzmanpublished a new post: setup-bitenx-masternode-on-ubuntu2018/06/07 21:20:33
tzmanpublished a new post: setup-bitenx-masternode-on-ubuntu
2018/06/07 21:20:33
| parent author | |
| parent permlink | bitenx |
| author | tzman |
| permlink | setup-bitenx-masternode-on-ubuntu |
| title | Setup BitenX Masternode on Ubuntu |
| body | @@ -4897,8 +4897,43 @@ tarted%22. +%0ANOTE: You must encrypt your wallet |
| json metadata | {"tags":["bitenx","masternode","guide"],"links":["https://bitcointalk.org/index.php?topic=4412676.0","https://www.digitalocean.com/community/tutorials/how-to-add-swap-on-ubuntu-14-04","https://github.com/BitenCoin/bitenx"],"app":"steemit/0.1","format":"markdown"} |
| Transaction Info | Block #23124188/Trx 0c479709b61f2d97fa7d43a307d33a4fa3466f52 |
View Raw JSON Data
{
  "trx_id": "0c479709b61f2d97fa7d43a307d33a4fa3466f52",
  "block": 23124188,
  "trx_in_block": 20,
  "op_in_trx": 0,
  "virtual_op": 0,
  "timestamp": "2018-06-07T21:20:33",
  "op": [
    "comment",
    {
      "parent_author": "",
      "parent_permlink": "bitenx",
      "author": "tzman",
      "permlink": "setup-bitenx-masternode-on-ubuntu",
      "title": "Setup BitenX Masternode on Ubuntu",
      "body": "@@ -4897,8 +4897,43 @@\n tarted%22.\n+%0ANOTE: You must encrypt your wallet\n",
      "json_metadata": "{\"tags\":[\"bitenx\",\"masternode\",\"guide\"],\"links\":[\"https://bitcointalk.org/index.php?topic=4412676.0\",\"https://www.digitalocean.com/community/tutorials/how-to-add-swap-on-ubuntu-14-04\",\"https://github.com/BitenCoin/bitenx\"],\"app\":\"steemit/0.1\",\"format\":\"markdown\"}"
    }
  ]
}tzmanpublished a new post: setup-bitenx-masternode-on-ubuntu2018/06/07 21:15:45
tzmanpublished a new post: setup-bitenx-masternode-on-ubuntu
2018/06/07 21:15:45
| parent author | |
| parent permlink | bitenx |
| author | tzman |
| permlink | setup-bitenx-masternode-on-ubuntu |
| title | Setup BitenX Masternode on Ubuntu |
| body | @@ -3055,41 +3055,8 @@ git - (if windows masternode then put %0A%0ASa |
| json metadata | {"tags":["bitenx","masternode","guide"],"links":["https://bitcointalk.org/index.php?topic=4412676.0","https://www.digitalocean.com/community/tutorials/how-to-add-swap-on-ubuntu-14-04","https://github.com/BitenCoin/bitenx"],"app":"steemit/0.1","format":"markdown"} |
| Transaction Info | Block #23124092/Trx 9b2d9068c1eb530271decd230df333a7f11f32df |
View Raw JSON Data
{
  "trx_id": "9b2d9068c1eb530271decd230df333a7f11f32df",
  "block": 23124092,
  "trx_in_block": 63,
  "op_in_trx": 0,
  "virtual_op": 0,
  "timestamp": "2018-06-07T21:15:45",
  "op": [
    "comment",
    {
      "parent_author": "",
      "parent_permlink": "bitenx",
      "author": "tzman",
      "permlink": "setup-bitenx-masternode-on-ubuntu",
      "title": "Setup BitenX Masternode on Ubuntu",
      "body": "@@ -3055,41 +3055,8 @@\n git \n- (if windows masternode then put \n %0A%0ASa\n",
      "json_metadata": "{\"tags\":[\"bitenx\",\"masternode\",\"guide\"],\"links\":[\"https://bitcointalk.org/index.php?topic=4412676.0\",\"https://www.digitalocean.com/community/tutorials/how-to-add-swap-on-ubuntu-14-04\",\"https://github.com/BitenCoin/bitenx\"],\"app\":\"steemit/0.1\",\"format\":\"markdown\"}"
    }
  ]
}tzmanpublished a new post: setup-bitenx-masternode-on-ubuntu2018/06/07 21:15:27
tzmanpublished a new post: setup-bitenx-masternode-on-ubuntu
2018/06/07 21:15:27
| parent author | |
| parent permlink | bitenx |
| author | tzman |
| permlink | setup-bitenx-masternode-on-ubuntu |
| title | Setup BitenX Masternode on Ubuntu |
| body | @@ -3005,18 +3005,25 @@ %C2%A0:%0A%0AMN1 -IP +127.0.0.1 :44445 m @@ -3050,16 +3050,50 @@ id digit + (if windows masternode then put %0A%0ASave i |
| json metadata | {"tags":["bitenx","masternode","guide"],"links":["https://bitcointalk.org/index.php?topic=4412676.0","https://www.digitalocean.com/community/tutorials/how-to-add-swap-on-ubuntu-14-04","https://github.com/BitenCoin/bitenx"],"app":"steemit/0.1","format":"markdown"} |
| Transaction Info | Block #23124086/Trx e2ace65c2a9a8744393926b00e1b7d2a15ab9497 |
View Raw JSON Data
{
  "trx_id": "e2ace65c2a9a8744393926b00e1b7d2a15ab9497",
  "block": 23124086,
  "trx_in_block": 78,
  "op_in_trx": 0,
  "virtual_op": 0,
  "timestamp": "2018-06-07T21:15:27",
  "op": [
    "comment",
    {
      "parent_author": "",
      "parent_permlink": "bitenx",
      "author": "tzman",
      "permlink": "setup-bitenx-masternode-on-ubuntu",
      "title": "Setup BitenX Masternode on Ubuntu",
      "body": "@@ -3005,18 +3005,25 @@\n %C2%A0:%0A%0AMN1 \n-IP\n+127.0.0.1\n :44445 m\n@@ -3050,16 +3050,50 @@\n id digit\n+  (if windows masternode then put \n %0A%0ASave i\n",
      "json_metadata": "{\"tags\":[\"bitenx\",\"masternode\",\"guide\"],\"links\":[\"https://bitcointalk.org/index.php?topic=4412676.0\",\"https://www.digitalocean.com/community/tutorials/how-to-add-swap-on-ubuntu-14-04\",\"https://github.com/BitenCoin/bitenx\"],\"app\":\"steemit/0.1\",\"format\":\"markdown\"}"
    }
  ]
}2018/06/03 20:40:00
2018/06/03 20:40:00
| delegator | steem |
| delegatee | tzman |
| vesting shares | 28372.519590 VESTS |
| Transaction Info | Block #23008219/Trx bbaa3886b1548befae1708e7e803ef42964c8581 |
View Raw JSON Data
{
  "trx_id": "bbaa3886b1548befae1708e7e803ef42964c8581",
  "block": 23008219,
  "trx_in_block": 34,
  "op_in_trx": 0,
  "virtual_op": 0,
  "timestamp": "2018-06-03T20:40:00",
  "op": [
    "delegate_vesting_shares",
    {
      "delegator": "steem",
      "delegatee": "tzman",
      "vesting_shares": "28372.519590 VESTS"
    }
  ]
}tzmanpublished a new post: setup-bitenx-masternode-on-ubuntu2018/06/03 16:38:42
tzmanpublished a new post: setup-bitenx-masternode-on-ubuntu
2018/06/03 16:38:42
| parent author | |
| parent permlink | bitenx |
| author | tzman |
| permlink | setup-bitenx-masternode-on-ubuntu |
| title | Setup BitenX Masternode on Ubuntu |
| body | @@ -3008,21 +3008,21 @@ %0AMN1 IP: -66666 +44445 mastern @@ -3521,21 +3521,21 @@ alip=IP: -66666 +44445 %0Amastern @@ -3770,21 +3770,21 @@ ould be -66666 +44445 for all @@ -3933,21 +3933,21 @@ pen the -66666 +44445 port%C2%A0:%0A @@ -3966,13 +3966,13 @@ low -66666 +44445 /tcp |
| json metadata | {"tags":["bitenx","masternode","guide"],"links":["https://bitcointalk.org/index.php?topic=4412676.0","https://www.digitalocean.com/community/tutorials/how-to-add-swap-on-ubuntu-14-04","https://github.com/BitenCoin/bitenx"],"app":"steemit/0.1","format":"markdown"} |
| Transaction Info | Block #23003393/Trx 86bddeb59e29b2b8edb39e34f656143cf3b99c0c |
View Raw JSON Data
{
  "trx_id": "86bddeb59e29b2b8edb39e34f656143cf3b99c0c",
  "block": 23003393,
  "trx_in_block": 38,
  "op_in_trx": 0,
  "virtual_op": 0,
  "timestamp": "2018-06-03T16:38:42",
  "op": [
    "comment",
    {
      "parent_author": "",
      "parent_permlink": "bitenx",
      "author": "tzman",
      "permlink": "setup-bitenx-masternode-on-ubuntu",
      "title": "Setup BitenX Masternode on Ubuntu",
      "body": "@@ -3008,21 +3008,21 @@\n %0AMN1 IP:\n-66666\n+44445\n  mastern\n@@ -3521,21 +3521,21 @@\n alip=IP:\n-66666\n+44445\n %0Amastern\n@@ -3770,21 +3770,21 @@\n ould be \n-66666\n+44445\n  for all\n@@ -3933,21 +3933,21 @@\n pen the \n-66666\n+44445\n  port%C2%A0:%0A\n@@ -3966,13 +3966,13 @@\n low \n-66666\n+44445\n /tcp\n",
      "json_metadata": "{\"tags\":[\"bitenx\",\"masternode\",\"guide\"],\"links\":[\"https://bitcointalk.org/index.php?topic=4412676.0\",\"https://www.digitalocean.com/community/tutorials/how-to-add-swap-on-ubuntu-14-04\",\"https://github.com/BitenCoin/bitenx\"],\"app\":\"steemit/0.1\",\"format\":\"markdown\"}"
    }
  ]
}ax3upvoted (1.00%) @tzman / setup-bitenx-masternode-on-ubuntu2018/06/03 15:57:18
ax3upvoted (1.00%) @tzman / setup-bitenx-masternode-on-ubuntu
2018/06/03 15:57:18
| voter | ax3 |
| author | tzman |
| permlink | setup-bitenx-masternode-on-ubuntu |
| weight | 100 (1.00%) |
| Transaction Info | Block #23002565/Trx 32cdffca43a39e7b02b3ecc3850756ec6ac249db |
View Raw JSON Data
{
  "trx_id": "32cdffca43a39e7b02b3ecc3850756ec6ac249db",
  "block": 23002565,
  "trx_in_block": 51,
  "op_in_trx": 0,
  "virtual_op": 0,
  "timestamp": "2018-06-03T15:57:18",
  "op": [
    "vote",
    {
      "voter": "ax3",
      "author": "tzman",
      "permlink": "setup-bitenx-masternode-on-ubuntu",
      "weight": 100
    }
  ]
}tzmanpublished a new post: setup-bitenx-masternode-on-ubuntu2018/06/03 15:57:09
tzmanpublished a new post: setup-bitenx-masternode-on-ubuntu
2018/06/03 15:57:09
| parent author | |
| parent permlink | bitenx |
| author | tzman |
| permlink | setup-bitenx-masternode-on-ubuntu |
| title | Setup BitenX Masternode on Ubuntu |
| body | @@ -3933,21 +3933,21 @@ pen the -44444 +66666 port%C2%A0:%0A @@ -3966,13 +3966,13 @@ low -44444 +66666 /tcp |
| json metadata | {"tags":["bitenx","masternode","guide"],"links":["https://bitcointalk.org/index.php?topic=4412676.0","https://www.digitalocean.com/community/tutorials/how-to-add-swap-on-ubuntu-14-04","https://github.com/BitenCoin/bitenx"],"app":"steemit/0.1","format":"markdown"} |
| Transaction Info | Block #23002562/Trx 3c59ed67236b7a0c8d0bc1b849a9c1cbd1f96cee |
View Raw JSON Data
{
  "trx_id": "3c59ed67236b7a0c8d0bc1b849a9c1cbd1f96cee",
  "block": 23002562,
  "trx_in_block": 3,
  "op_in_trx": 0,
  "virtual_op": 0,
  "timestamp": "2018-06-03T15:57:09",
  "op": [
    "comment",
    {
      "parent_author": "",
      "parent_permlink": "bitenx",
      "author": "tzman",
      "permlink": "setup-bitenx-masternode-on-ubuntu",
      "title": "Setup BitenX Masternode on Ubuntu",
      "body": "@@ -3933,21 +3933,21 @@\n pen the \n-44444\n+66666\n  port%C2%A0:%0A\n@@ -3966,13 +3966,13 @@\n low \n-44444\n+66666\n /tcp\n",
      "json_metadata": "{\"tags\":[\"bitenx\",\"masternode\",\"guide\"],\"links\":[\"https://bitcointalk.org/index.php?topic=4412676.0\",\"https://www.digitalocean.com/community/tutorials/how-to-add-swap-on-ubuntu-14-04\",\"https://github.com/BitenCoin/bitenx\"],\"app\":\"steemit/0.1\",\"format\":\"markdown\"}"
    }
  ]
}tzmanpublished a new post: setup-bitenx-masternode-on-ubuntu2018/06/03 15:49:03
tzmanpublished a new post: setup-bitenx-masternode-on-ubuntu
2018/06/03 15:49:03
| parent author | |
| parent permlink | bitenx |
| author | tzman |
| permlink | setup-bitenx-masternode-on-ubuntu |
| title | Setup BitenX Masternode on Ubuntu |
| body | @@ -3008,21 +3008,21 @@ %0AMN1 IP: -44444 +66666 mastern @@ -3521,21 +3521,21 @@ alip=IP: -44444 +66666 %0Amastern @@ -3770,21 +3770,21 @@ ould be -44444 +66666 for all |
| json metadata | {"tags":["bitenx","masternode","guide"],"links":["https://bitcointalk.org/index.php?topic=4412676.0","https://www.digitalocean.com/community/tutorials/how-to-add-swap-on-ubuntu-14-04","https://github.com/BitenCoin/bitenx"],"app":"steemit/0.1","format":"markdown"} |
| Transaction Info | Block #23002400/Trx 55189bf6a2afa00fb0abffd0136932925f133c53 |
View Raw JSON Data
{
  "trx_id": "55189bf6a2afa00fb0abffd0136932925f133c53",
  "block": 23002400,
  "trx_in_block": 24,
  "op_in_trx": 0,
  "virtual_op": 0,
  "timestamp": "2018-06-03T15:49:03",
  "op": [
    "comment",
    {
      "parent_author": "",
      "parent_permlink": "bitenx",
      "author": "tzman",
      "permlink": "setup-bitenx-masternode-on-ubuntu",
      "title": "Setup BitenX Masternode on Ubuntu",
      "body": "@@ -3008,21 +3008,21 @@\n %0AMN1 IP:\n-44444\n+66666\n  mastern\n@@ -3521,21 +3521,21 @@\n alip=IP:\n-44444\n+66666\n %0Amastern\n@@ -3770,21 +3770,21 @@\n ould be \n-44444\n+66666\n  for all\n",
      "json_metadata": "{\"tags\":[\"bitenx\",\"masternode\",\"guide\"],\"links\":[\"https://bitcointalk.org/index.php?topic=4412676.0\",\"https://www.digitalocean.com/community/tutorials/how-to-add-swap-on-ubuntu-14-04\",\"https://github.com/BitenCoin/bitenx\"],\"app\":\"steemit/0.1\",\"format\":\"markdown\"}"
    }
  ]
}2018/06/03 13:30:51
2018/06/03 13:30:51
| parent author | tzman |
| parent permlink | setup-bitenx-masternode-on-ubuntu |
| author | cheetah |
| permlink | cheetah-re-tzmansetup-bitenx-masternode-on-ubuntu |
| title | |
| body | Hi! I am a robot. I just upvoted you! I found similar content that readers might be interested in: https://steemit.com/masternode/@juniormasters/desire-vps-masternode-setup-guide |
| json metadata | |
| Transaction Info | Block #22999636/Trx eaa7df6209805ca72f3e27bb165b05542ce5b781 |
View Raw JSON Data
{
  "trx_id": "eaa7df6209805ca72f3e27bb165b05542ce5b781",
  "block": 22999636,
  "trx_in_block": 4,
  "op_in_trx": 0,
  "virtual_op": 0,
  "timestamp": "2018-06-03T13:30:51",
  "op": [
    "comment",
    {
      "parent_author": "tzman",
      "parent_permlink": "setup-bitenx-masternode-on-ubuntu",
      "author": "cheetah",
      "permlink": "cheetah-re-tzmansetup-bitenx-masternode-on-ubuntu",
      "title": "",
      "body": "Hi! I am a robot. I just upvoted you! I found similar content that readers might be interested in:\nhttps://steemit.com/masternode/@juniormasters/desire-vps-masternode-setup-guide",
      "json_metadata": ""
    }
  ]
}cheetahupvoted (0.08%) @tzman / setup-bitenx-masternode-on-ubuntu2018/06/03 13:30:36
cheetahupvoted (0.08%) @tzman / setup-bitenx-masternode-on-ubuntu
2018/06/03 13:30:36
| voter | cheetah |
| author | tzman |
| permlink | setup-bitenx-masternode-on-ubuntu |
| weight | 8 (0.08%) |
| Transaction Info | Block #22999631/Trx 984bbc00d6f84f008e2bf0a03b2244a0b4bc924e |
View Raw JSON Data
{
  "trx_id": "984bbc00d6f84f008e2bf0a03b2244a0b4bc924e",
  "block": 22999631,
  "trx_in_block": 24,
  "op_in_trx": 0,
  "virtual_op": 0,
  "timestamp": "2018-06-03T13:30:36",
  "op": [
    "vote",
    {
      "voter": "cheetah",
      "author": "tzman",
      "permlink": "setup-bitenx-masternode-on-ubuntu",
      "weight": 8
    }
  ]
}tzmanpublished a new post: setup-bitenx-masternode-on-ubuntu2018/06/03 13:30:18
tzmanpublished a new post: setup-bitenx-masternode-on-ubuntu
2018/06/03 13:30:18
| parent author | |
| parent permlink | bitenx |
| author | tzman |
| permlink | setup-bitenx-masternode-on-ubuntu |
| title | Setup BitenX Masternode on Ubuntu |
| body | Bitenx ANN: https://bitcointalk.org/index.php?topic=4412676.0 This guide is for a single masternode, on a Ubuntu 14 64bit server (2GB RAM minimum) that will be controlled from the wallet on your local computer. If you don't have enough RAM, create 2–4GB of swap memory using this guide: https://www.digitalocean.com/community/tutorials/how-to-add-swap-on-ubuntu-14-04 After you've got your server running, I would recommend you to go through the initial setup guide here before doing anything masternode related, for security purposes. Basic requirements: - 5,000 BTENX - A main computer (containing the main wallet BitenX your coins will be stored) - Masternode Server (The VPS that will be on 24/7) - A unique IP address for EACH masternode (For security reasons, you’re gonna need a different IP for each masternode you plan to host) The basic reasoning for BitenX requirements is that, you get to keep your BTENX in your local wallet, and host your masternode remotely, securely. For this guide, I’m going to BitenX to your main computer’s wallet as the main wallet, and the masternode wallet as the masternode wallets. Setting up the Masternode wallet First, you'll have to install the required packages: sudo apt-get install build-essential libtool automake autoconf sudo apt-get install autotools-dev autoconf pkg-config libssl-dev sudo apt-get install libgmp3-dev libevent-dev bsdmainutils libboost-all-dev sudo add-apt-repository ppa:bitcoin/bitcoin sudo apt-get update sudo apt-get install libdb4.8-dev libdb4.8++-dev sudo apt-get install libminiupnpc-dev Now we have to build the wallet. Clone the Github BitenX repository. sudo apt-get install git git clone https://github.com/BitenCoin/bitenx Then navigate to the newly created BitenX folder and execute the following lines : cd bitenx chmod 755 autogen.sh ./autogen.sh ./configure chmod 755 share/genbuild.sh make Now start the BitenX headless client cd src ./bitenx -daemon You should get an error about the .conf file, that's normal. Setting up the main wallet Go to your local computer BitenX your main wallet is running with all your coins inside. Go to the wallet debug console and type : getnewaddress MN1 Then copy the returned address and send exactly 5000 BTENX to this address. Wait for 1 confirmation, then go to the debug console : masternode outputs You should see one line corresponding to the transaction id (tx_id) of your 5000 coins with a digit identifier (digit). Save BitenX two strings in a text file. Note that if you get more than 1 line, it's because you made multiple 5000 coins transactions, with the tx_id and digit associated. Now we have to create the masternode private key to link the main wallet and the VPS masternode. Type in the debug console : masternode genkey Copy this key somewhere. It will be referred as masternodeprivkey. Next, you have to go to the data directory of your main wallet (in Linux it's located at /root/.bitenx). Open the masternode.conf file and type : MN1 IP:44444 masternodeprivkey tx_id digit Save it and close it. Restart your main wallet. Note that each line of the masternode.conf file corresponds to one masternode. Back to the Masternode wallet Navigate to the data directory by typing cd .bitenx The user corresponds to your computer username in which you are logged in. nano bitenx.conf Now copy paste the following configuration : rpcuser=yourrpcuser rpcpassword=yourrpcpass rpcallowip=127.0.0.1 listen=1 server=1 daemon=1 staking=0 externalip=IP:44444 masternode=1 masternodeprivkey=masternodeprivkey You need to change IP to your VPS IP address, the masternodeprivkey is the one that you got from the main wallet. Choose whatever you like for user and password. Note that the port should be 44444 for all BitenX masternodes. Type Ctrl + X => Y => Enter. The file bitenx.conf is now saved. If you have a firewall (with this guide), you need to open the 44444 port : sudo ufw allow 44444/tcp Now start you masternode wallet by navigating through your BitenX folder. cd cd bitenx/src/ ./bitenx -daemon Wait like 10 mins for your wallet to download the blockchain. You can check the progress with the following command : ./bitenx-cli getblockcount The block number has to catch up with the latest on the explorer. Starting the Masternode Go back to your main wallet, to the Masternode tab. You need to wait for 15 confirmations in order to start the masternode. Select the line corresponding to the masternode. If the Masternode tab isn't showing, you need to go to Options>Wallet>Show Masternodes Tab. Click "start-alias". Your masternode should be now up and running ! Checking the Masternode status You can check the masternode status by going to the masternode wallet and typing: ./bitenx-cli masternode status If your masternode is running it should print "Masternode successfully started". |
| json metadata | {"tags":["bitenx","masternode","guide"],"links":["https://bitcointalk.org/index.php?topic=4412676.0","https://www.digitalocean.com/community/tutorials/how-to-add-swap-on-ubuntu-14-04","https://github.com/BitenCoin/bitenx"],"app":"steemit/0.1","format":"markdown"} |
| Transaction Info | Block #22999625/Trx cf111cebc6a111b6ac7193b267119eff91fda18d |
View Raw JSON Data
{
  "trx_id": "cf111cebc6a111b6ac7193b267119eff91fda18d",
  "block": 22999625,
  "trx_in_block": 48,
  "op_in_trx": 0,
  "virtual_op": 0,
  "timestamp": "2018-06-03T13:30:18",
  "op": [
    "comment",
    {
      "parent_author": "",
      "parent_permlink": "bitenx",
      "author": "tzman",
      "permlink": "setup-bitenx-masternode-on-ubuntu",
      "title": "Setup BitenX Masternode on Ubuntu",
      "body": "Bitenx ANN: https://bitcointalk.org/index.php?topic=4412676.0\n\nThis guide is for a single masternode, on a Ubuntu 14 64bit server (2GB RAM minimum) that will be controlled from the wallet on your local computer.\n\nIf you don't have enough RAM, create 2–4GB of swap memory using this guide:\nhttps://www.digitalocean.com/community/tutorials/how-to-add-swap-on-ubuntu-14-04\n\nAfter you've got your server running, I would recommend you to go through the initial setup guide here before doing anything masternode related, for security purposes.\n\nBasic requirements:\n\n- 5,000 BTENX\n- A main computer (containing the main wallet BitenX your coins will be stored)\n- Masternode Server (The VPS that will be on 24/7)\n- A unique IP address for EACH masternode\n(For security reasons, you’re gonna need a different IP for each masternode you plan to host)\n\nThe basic reasoning for BitenX requirements is that, you get to keep your BTENX in your local wallet, and host your masternode remotely, securely.\n\nFor this guide, I’m going to BitenX to your main computer’s wallet as the main wallet, and the masternode wallet as the masternode wallets.\n\nSetting up the Masternode wallet\n\nFirst, you'll have to install the required packages:\n\nsudo apt-get install build-essential libtool automake autoconf\nsudo apt-get install autotools-dev autoconf pkg-config libssl-dev \nsudo apt-get install libgmp3-dev libevent-dev bsdmainutils libboost-all-dev\nsudo add-apt-repository ppa:bitcoin/bitcoin\nsudo apt-get update\nsudo apt-get install libdb4.8-dev libdb4.8++-dev\nsudo apt-get install libminiupnpc-dev\n\nNow we have to build the wallet. Clone the Github BitenX repository.\n\nsudo apt-get install git\ngit clone https://github.com/BitenCoin/bitenx\n\nThen navigate to the newly created BitenX folder and execute the following lines :\n\ncd bitenx\nchmod 755 autogen.sh\n./autogen.sh\n./configure\nchmod 755 share/genbuild.sh\nmake\n\nNow start the BitenX headless client\n\ncd src\n./bitenx -daemon\n\nYou should get an error about the .conf file, that's normal.\n\nSetting up the main wallet\n\nGo to your local computer BitenX your main wallet is running with all your coins inside. Go to the wallet debug console and type :\n\ngetnewaddress MN1\n\nThen copy the returned address and send exactly 5000 BTENX to this address. Wait for 1 confirmation, then go to the debug console :\n\nmasternode outputs\n\nYou should see one line corresponding to the transaction id (tx_id) of your 5000 coins with a digit identifier (digit). \nSave BitenX two strings in a text file.\n\nNote that if you get more than 1 line, it's because you made multiple 5000 coins transactions, with the tx_id and digit associated.\n\nNow we have to create the masternode private key to link the main wallet and the VPS masternode. \nType in the debug console :\n\nmasternode genkey\n\nCopy this key somewhere. It will be referred as masternodeprivkey.\n\nNext, you have to go to the data directory of your main wallet (in Linux it's located at /root/.bitenx). \nOpen the masternode.conf file and type :\n\nMN1 IP:44444 masternodeprivkey tx_id digit\n\nSave it and close it. Restart your main wallet.\n\nNote that each line of the masternode.conf file corresponds to one masternode.\n\nBack to the Masternode wallet\n\nNavigate to the data directory by typing\n\ncd .bitenx\n\nThe user corresponds to your computer username in which you are logged in.\n\nnano bitenx.conf\n\nNow copy paste the following configuration :\n\nrpcuser=yourrpcuser \nrpcpassword=yourrpcpass \nrpcallowip=127.0.0.1\nlisten=1 \nserver=1 \ndaemon=1 \nstaking=0 \nexternalip=IP:44444\nmasternode=1 \nmasternodeprivkey=masternodeprivkey\n\nYou need to change IP to your VPS IP address, the masternodeprivkey is the one that you got from the main wallet. \nChoose whatever you like for user and password. Note that the port should be 44444 for all BitenX masternodes.\n\nType Ctrl + X => Y => Enter. The file bitenx.conf is now saved.\n\nIf you have a firewall (with this guide), you need to open the 44444 port :\n\nsudo ufw allow 44444/tcp\n\nNow start you masternode wallet by navigating through your BitenX folder.\n\ncd\ncd bitenx/src/\n./bitenx -daemon\n\nWait like 10 mins for your wallet to download the blockchain. \nYou can check the progress with the following command :\n\n./bitenx-cli getblockcount\n\nThe block number has to catch up with the latest on the explorer.\n\nStarting the Masternode\n\nGo back to your main wallet, to the Masternode tab.\n\nYou need to wait for 15 confirmations in order to start the masternode. \nSelect the line corresponding to the masternode.\n\nIf the Masternode tab isn't showing, you need to go to Options>Wallet>Show Masternodes Tab.\n\nClick \"start-alias\". Your masternode should be now up and running !\n\nChecking the Masternode status\n\nYou can check the masternode status by going to the masternode wallet and typing:\n\n./bitenx-cli masternode status\n\nIf your masternode is running it should print \"Masternode successfully started\".",
      "json_metadata": "{\"tags\":[\"bitenx\",\"masternode\",\"guide\"],\"links\":[\"https://bitcointalk.org/index.php?topic=4412676.0\",\"https://www.digitalocean.com/community/tutorials/how-to-add-swap-on-ubuntu-14-04\",\"https://github.com/BitenCoin/bitenx\"],\"app\":\"steemit/0.1\",\"format\":\"markdown\"}"
    }
  ]
}2018/05/17 03:29:57
2018/05/17 03:29:57
| delegator | steem |
| delegatee | tzman |
| vesting shares | 8052.502278 VESTS |
| Transaction Info | Block #22498497/Trx ab980ca31bb5c5bc8a992d8f40ac0c80b0633a67 |
View Raw JSON Data
{
  "trx_id": "ab980ca31bb5c5bc8a992d8f40ac0c80b0633a67",
  "block": 22498497,
  "trx_in_block": 18,
  "op_in_trx": 0,
  "virtual_op": 0,
  "timestamp": "2018-05-17T03:29:57",
  "op": [
    "delegate_vesting_shares",
    {
      "delegator": "steem",
      "delegatee": "tzman",
      "vesting_shares": "8052.502278 VESTS"
    }
  ]
}dtubixreplied to @tzman / re-shopify-guide-to-earn-alot-of-money-2952018/02/17 07:23:54
dtubixreplied to @tzman / re-shopify-guide-to-earn-alot-of-money-295
2018/02/17 07:23:54
| parent author | tzman |
| parent permlink | shopify-guide-to-earn-alot-of-money |
| author | dtubix |
| permlink | re-shopify-guide-to-earn-alot-of-money-295 |
| title | |
| body | Cool! I follow you. +upvote |
| json metadata | |
| Transaction Info | Block #19942547/Trx deba610e19fe1014b9d4181293b7864b1ff6d56d |
View Raw JSON Data
{
  "trx_id": "deba610e19fe1014b9d4181293b7864b1ff6d56d",
  "block": 19942547,
  "trx_in_block": 7,
  "op_in_trx": 0,
  "virtual_op": 0,
  "timestamp": "2018-02-17T07:23:54",
  "op": [
    "comment",
    {
      "parent_author": "tzman",
      "parent_permlink": "shopify-guide-to-earn-alot-of-money",
      "author": "dtubix",
      "permlink": "re-shopify-guide-to-earn-alot-of-money-295",
      "title": "",
      "body": "Cool! I follow you.  +upvote",
      "json_metadata": ""
    }
  ]
}dtubixupvoted (50.00%) @tzman / shopify-guide-to-earn-alot-of-money2018/02/17 07:23:45
dtubixupvoted (50.00%) @tzman / shopify-guide-to-earn-alot-of-money
2018/02/17 07:23:45
| voter | dtubix |
| author | tzman |
| permlink | shopify-guide-to-earn-alot-of-money |
| weight | 5000 (50.00%) |
| Transaction Info | Block #19942544/Trx 98ca2ea3c61e334289098751fe8de194e10c5287 |
View Raw JSON Data
{
  "trx_id": "98ca2ea3c61e334289098751fe8de194e10c5287",
  "block": 19942544,
  "trx_in_block": 12,
  "op_in_trx": 0,
  "virtual_op": 0,
  "timestamp": "2018-02-17T07:23:45",
  "op": [
    "vote",
    {
      "voter": "dtubix",
      "author": "tzman",
      "permlink": "shopify-guide-to-earn-alot-of-money",
      "weight": 5000
    }
  ]
}2018/01/09 07:14:45
2018/01/09 07:14:45
| delegator | steem |
| delegatee | tzman |
| vesting shares | 28603.590227 VESTS |
| Transaction Info | Block #18820291/Trx a4bcc8734651c8a0bfefbae16b5371e5288087fa |
View Raw JSON Data
{
  "trx_id": "a4bcc8734651c8a0bfefbae16b5371e5288087fa",
  "block": 18820291,
  "trx_in_block": 28,
  "op_in_trx": 0,
  "virtual_op": 0,
  "timestamp": "2018-01-09T07:14:45",
  "op": [
    "delegate_vesting_shares",
    {
      "delegator": "steem",
      "delegatee": "tzman",
      "vesting_shares": "28603.590227 VESTS"
    }
  ]
}2017/08/04 05:22:45
2017/08/04 05:22:45
| delegator | steem |
| delegatee | tzman |
| vesting shares | 28854.436676 VESTS |
| Transaction Info | Block #14271528/Trx d335c4524c738e13f678b27a823c6803f38645c3 |
View Raw JSON Data
{
  "trx_id": "d335c4524c738e13f678b27a823c6803f38645c3",
  "block": 14271528,
  "trx_in_block": 4,
  "op_in_trx": 0,
  "virtual_op": 0,
  "timestamp": "2017-08-04T05:22:45",
  "op": [
    "delegate_vesting_shares",
    {
      "delegator": "steem",
      "delegatee": "tzman",
      "vesting_shares": "28854.436676 VESTS"
    }
  ]
}tzmanblockchain operation: limit order create2017/06/19 08:53:24
tzmanblockchain operation: limit order create
2017/06/19 08:53:24
| owner | tzman |
| orderid | 1497862391 |
| amount to sell | 0.021 SBD |
| min to receive | 0.017 STEEM |
| fill or kill | false |
| expiration | 1969-12-31T23:59:59 |
| Transaction Info | Block #12952875/Trx ce40a48c0d070e2c8c067d39a0ce2bc43fd18864 |
View Raw JSON Data
{
  "trx_id": "ce40a48c0d070e2c8c067d39a0ce2bc43fd18864",
  "block": 12952875,
  "trx_in_block": 9,
  "op_in_trx": 0,
  "virtual_op": 0,
  "timestamp": "2017-06-19T08:53:24",
  "op": [
    "limit_order_create",
    {
      "owner": "tzman",
      "orderid": 1497862391,
      "amount_to_sell": "0.021 SBD",
      "min_to_receive": "0.017 STEEM",
      "fill_or_kill": false,
      "expiration": "1969-12-31T23:59:59"
    }
  ]
}2017/06/19 08:53:24
2017/06/19 08:53:24
| current owner | tzman |
| current orderid | 1497862391 |
| current pays | 0.021 SBD |
| open owner | enki |
| open orderid | 475004693 |
| open pays | 0.017 STEEM |
| Transaction Info | Block #12952875/Trx ce40a48c0d070e2c8c067d39a0ce2bc43fd18864 |
View Raw JSON Data
{
  "trx_id": "ce40a48c0d070e2c8c067d39a0ce2bc43fd18864",
  "block": 12952875,
  "trx_in_block": 9,
  "op_in_trx": 0,
  "virtual_op": 1,
  "timestamp": "2017-06-19T08:53:24",
  "op": [
    "fill_order",
    {
      "current_owner": "tzman",
      "current_orderid": 1497862391,
      "current_pays": "0.021 SBD",
      "open_owner": "enki",
      "open_orderid": 475004693,
      "open_pays": "0.017 STEEM"
    }
  ]
}mirusupvoted (100.00%) @tzman / shopify-guide-to-earn-alot-of-money2017/06/19 01:15:48
mirusupvoted (100.00%) @tzman / shopify-guide-to-earn-alot-of-money
2017/06/19 01:15:48
| voter | mirus |
| author | tzman |
| permlink | shopify-guide-to-earn-alot-of-money |
| weight | 10000 (100.00%) |
| Transaction Info | Block #12943733/Trx 4da0f13a113bde40258609ae722aaaea3e03f534 |
View Raw JSON Data
{
  "trx_id": "4da0f13a113bde40258609ae722aaaea3e03f534",
  "block": 12943733,
  "trx_in_block": 5,
  "op_in_trx": 0,
  "virtual_op": 0,
  "timestamp": "2017-06-19T01:15:48",
  "op": [
    "vote",
    {
      "voter": "mirus",
      "author": "tzman",
      "permlink": "shopify-guide-to-earn-alot-of-money",
      "weight": 10000
    }
  ]
}tzmanclaimed reward balance: 0.021 SBD, 0.029 SP2017/05/29 17:21:36
tzmanclaimed reward balance: 0.021 SBD, 0.029 SP
2017/05/29 17:21:36
| account | tzman |
| reward steem | 0.000 STEEM |
| reward sbd | 0.021 SBD |
| reward vests | 47.666292 VESTS |
| Transaction Info | Block #12358720/Trx 44ab86491c48356e58355a013c94359f15c00e7a |
View Raw JSON Data
{
  "trx_id": "44ab86491c48356e58355a013c94359f15c00e7a",
  "block": 12358720,
  "trx_in_block": 2,
  "op_in_trx": 0,
  "virtual_op": 0,
  "timestamp": "2017-05-29T17:21:36",
  "op": [
    "claim_reward_balance",
    {
      "account": "tzman",
      "reward_steem": "0.000 STEEM",
      "reward_sbd": "0.021 SBD",
      "reward_vests": "47.666292 VESTS"
    }
  ]
}tzmanreceived 0.021 SBD, 0.029 SP author reward for @tzman / half-moon-by-amateur2017/05/29 11:19:24
tzmanreceived 0.021 SBD, 0.029 SP author reward for @tzman / half-moon-by-amateur
2017/05/29 11:19:24
| author | tzman |
| permlink | half-moon-by-amateur |
| sbd payout | 0.021 SBD |
| steem payout | 0.000 STEEM |
| vesting payout | 47.666292 VESTS |
| Transaction Info | Block #12351492/Virtual Operation #3 |
View Raw JSON Data
{
  "trx_id": "0000000000000000000000000000000000000000",
  "block": 12351492,
  "trx_in_block": 4294967295,
  "op_in_trx": 0,
  "virtual_op": 3,
  "timestamp": "2017-05-29T11:19:24",
  "op": [
    "author_reward",
    {
      "author": "tzman",
      "permlink": "half-moon-by-amateur",
      "sbd_payout": "0.021 SBD",
      "steem_payout": "0.000 STEEM",
      "vesting_payout": "47.666292 VESTS"
    }
  ]
}williebeamanupvoted (100.00%) @tzman / half-moon-by-amateur2017/05/23 09:07:24
williebeamanupvoted (100.00%) @tzman / half-moon-by-amateur
2017/05/23 09:07:24
| voter | williebeaman |
| author | tzman |
| permlink | half-moon-by-amateur |
| weight | 10000 (100.00%) |
| Transaction Info | Block #12176212/Trx 408ebfc971b6d776fbd8972907637fda6faf38ec |
View Raw JSON Data
{
  "trx_id": "408ebfc971b6d776fbd8972907637fda6faf38ec",
  "block": 12176212,
  "trx_in_block": 4,
  "op_in_trx": 0,
  "virtual_op": 0,
  "timestamp": "2017-05-23T09:07:24",
  "op": [
    "vote",
    {
      "voter": "williebeaman",
      "author": "tzman",
      "permlink": "half-moon-by-amateur",
      "weight": 10000
    }
  ]
}jasonrussellupvoted (49.00%) @tzman / half-moon-by-amateur2017/05/23 03:17:39
jasonrussellupvoted (49.00%) @tzman / half-moon-by-amateur
2017/05/23 03:17:39
| voter | jasonrussell |
| author | tzman |
| permlink | half-moon-by-amateur |
| weight | 4900 (49.00%) |
| Transaction Info | Block #12169217/Trx d0c2dddacd05da5971bf2293f577e74a8512591a |
View Raw JSON Data
{
  "trx_id": "d0c2dddacd05da5971bf2293f577e74a8512591a",
  "block": 12169217,
  "trx_in_block": 4,
  "op_in_trx": 0,
  "virtual_op": 0,
  "timestamp": "2017-05-23T03:17:39",
  "op": [
    "vote",
    {
      "voter": "jasonrussell",
      "author": "tzman",
      "permlink": "half-moon-by-amateur",
      "weight": 4900
    }
  ]
}whalieupvoted (10.00%) @tzman / shopify-guide-to-earn-alot-of-money2017/05/22 14:40:51
whalieupvoted (10.00%) @tzman / shopify-guide-to-earn-alot-of-money
2017/05/22 14:40:51
| voter | whalie |
| author | tzman |
| permlink | shopify-guide-to-earn-alot-of-money |
| weight | 1000 (10.00%) |
| Transaction Info | Block #12154101/Trx 55b78f23d906b3555329ec29f6c5cc87d866683d |
View Raw JSON Data
{
  "trx_id": "55b78f23d906b3555329ec29f6c5cc87d866683d",
  "block": 12154101,
  "trx_in_block": 11,
  "op_in_trx": 0,
  "virtual_op": 0,
  "timestamp": "2017-05-22T14:40:51",
  "op": [
    "vote",
    {
      "voter": "whalie",
      "author": "tzman",
      "permlink": "shopify-guide-to-earn-alot-of-money",
      "weight": 1000
    }
  ]
}tzmanpublished a new post: shopify-guide-to-earn-alot-of-money2017/05/22 14:32:33
tzmanpublished a new post: shopify-guide-to-earn-alot-of-money
2017/05/22 14:32:33
| parent author | |
| parent permlink | earn |
| author | tzman |
| permlink | shopify-guide-to-earn-alot-of-money |
| title | Shopify guide to earn alot of money |
| body | <b>Getting Started</b> In this guide we will be focusing on the dropship model because from my experience it's the easiest and least time consuming. First of all you will need to sign up on Shopify. If you head over to their website you will get an option to get started with a 14 days trial plan but like I said I want people reading this thread to actually apply this whole method so here is coupon code that I found online which will give you a trial for 45 days. 45 days trial - https://www.shopify.com/smart-marketer In the beginning, I mentioned I will explain how you can be profitable even before you spend a penny. This is a part of that. And if anyone is wondering I am no way affiliated with the link above. When you go for signing up Shopify will ask you for your email, password and store name. Use your email and pass and in the store name section choose a nice/catchy name which should be something like this, first an adjective like "amazing, awesome etc" then products/store. Hopefully you get the idea. Now one thing to remember is that if you are not gonna use a custom domain for your store, you will have to stick to this name meaning this StoreName.Shopify.com will be your permanent URL and you WON'T be able to change this so if you are going to be using a Shopify sub domain make sure you choose the store name you want when signing up. Then click on online store and on the next page fill up your info. Then you will be asked a series of questions. Answer them with the following - 1. I am already selling online using a different system 2. Amazon 3. $5k to $50k And click Enter My Store and your store is up and running. You can choose any other option if you want but this is what I choose and I am just making things easier. <b>Setting Up Your Store</b> Then once you are on the home page Shopify will tell you everything you need to do in different tabs which will include setting up your shipping setting, tax info, adding products, choosing themes etc. I will go through each of the things you will need to do step by step. First click on settings on the left and click General and choose your store name which will be the same as the URL and then the two email fields and then the store address. Just fill them up accordingly. Then click on the Payment. There are two payments that you have to include and that's Shopify payments by Stripe which will allow you accept credit cards which will ask you to a series of questions. Answer those questions randomly. They don't really matter but what I have seen a lot of people who live outside US struggle with here is Tax ID and SIN number. Let me tell you that you don't need to worry about these just use random numbers. For those who are wondering you add your Payoneer US payment service here as well. The next thing you will need to choose is Paypal Express Checkout and you are done. Then moving on to Checkout, this part is really a personal preference but I will tell you what I will use. Customer accounts - optional Full name - Require first and last name Company - optional Apt - optional Phone number - optional Keep the rest as it is except select automatically archive my order under after an order has been paid. Then you will see a box that says additional scripts, this is where you will be using your Fb retargeting/conversion pixels. I will explain in a later step. Once you are done with the above go the bottom of the page where you see three boxes (Refund policy, Privacy Policy and TOS) click on generate sample for all three and you are done here. Now let's move on to Shipping. First you will have your shipping rate, leave it as it is and move on to shipping rates and add them based on weight and add these shipping rates - 0 - 0.9 = $9.99 1 - 1.9 = 14.99 2.0 - 2.9 = 17.99 3.0 - 3.9 = 19.99 4.0 - 4.9 = 21.99 And that should be enough for now. As we will be focusing on a dropship model shipping based on weight will be ideal. <b>Designing Your Store</b> Your store design will depend on what niche your products are in but what I would recommend is going for multiple products. Okay so first choose your theme. From my experience the best converting free themes are Classic theme and the Minimal theme. And once you choose the theme you want click on install them and it will get set up. These themes come with everything already set up including the menus, categories and products which you will be editing according to the products you will use. You can modify the theme any way you right but I will just recommend changing the logo and tagline and keep the coloring and stuff same as it is as they are made in a way which will have the highest conversion rate. You can set up your own custom domain if you want which gives your store a more natural feel but I would say sticking with shopify works just fine but if you want to click on online store and then domains and choose a custom domain. Now one thing that I would like to put emphasis on is branding and how important it is so you will want a really professional logo as the logo is the first thing someone will see when they come to your site so get a nice logo for your site. Another important thing that you need to set up is your store navigation which you will find under online store. Page that you need to include About Us, Shipping Info, Contact Us. Here is a sample of an About Us page. If you want you can use the exact this, just edit out the store name - Welcome to "Store Name"! We strive to provide our customer with the best customer service and support and the most convenient shopping experience online. Whether you are at home at work or on the go you can rest assured that your orders are handled securely and with the utmost care. All our products are specifically tailored for the customer looking for the BEST DEALS in the latest trinkets and gadgets! We love hearing from our customers and would love your feedback! Invite friends/family and loved ones to shop with us at "Store Name"! And here is a sample for your shipping page - Shipping depends on the product ordered. For promotional "FREE" items it may take 3-5 weeks to arrive since our items are coming overseas and from different warehouse. For non-promotional items, the shipping can take up to 14 to 30 days. Please allow 14 days before contacting us. No email correspondence will be entered into on the subject of delivery until after this period. This is to allow for any delays in the postal system and to keep email administration down to a manageable level. And there you have it your store is all done. Next thing you need to do is get products in your store. <b>Niche Product Research</b> I could let you spend hours figuring out what products you should put in your store but I am just going to go ahead and provide the niches that worked for me and all you have to do is just copy me. Before I go into it let me mention that you will be targeting keychains, plush toys, lamps, chains, earrings, rings and basically anything in the $1 - $3 mark in Aliexpress. And yes you will be sourcing your products from Aliexpress. Okay so what works best are movie products ( avengers,batman, superman, harry potter etc), anime (my neighbor Totoro, Pokemon) and Tv shows - Game of Thrones (my best selling niche). Now the way you will be finding products is head over to aliexpress and search up the niche for example pokemon then click on the most number of orders. The top products are what others are reselling. I am sure you heard phrase the money lies with the competition. Next you will be adding products to your store. <b>Adding A Product</b> Click on Product then add a product. First the title and then the description. Here is an example plush toy listing and how it would look on your site. Title - Frozen Sven's Plush Toy Description - Take home a limited edition Sven Plush Doll FOR FREE Normally priced at 14.99. We want you to have it for free! Order 2 or more to save on shipping. Only 200 available. **Limit 10 order per person** Limited time only! Allow 4-6 weeks shipping Pricing will be something like $14.99 and discount it to zero. Now head over to aliexpress and add a variety of items to your site. And once you have around 30 products on your site you are done. To make your site look generic you want to add products with different price ranges. Now we get the traffic. <b>Getting Traffic And Sales</b> Now remember when I said I will show you how to do this without spending a penny, well this is the 2nd part of that. We will be using Facebook to bring in the traffic. Now Facebook allows you a credit of a certain amount which is more than enough to start getting sales and start banking. Whenever you add a card to your account Facebook lets you advertise right away and bills you once you reach that credit appointed to you by Facebook. So let's up the ad. First you will need to create a Facebook fanpage under brand/product then sub category website and fill up the about and add a profile picture and add your website URL. Now the aim here is to make a passive income from this so you have to make everything look generic so make sure you put emphasis on the details so everything looks natural. Now lets create the ad. Go on your page and go to post like this - Hey Totoro lovers! This is for you! FREE for a LIMITED TIME ONLY! Just help us with shipping. Get yours here ➩➩ *link to product* There is one more step before we finish up your ad setup and that it your target audience. I want everyone reading this thread to actually apply this and scale accordingly so you will need to how to find the right audience for your ads. Login to your ad manager then go to tools and then audience insights. Once it loads click on everyone on Facebook. So let's assume our ad is going to be for the plush toy above so what we will be doing is on the interest tab include everything that related to this product in this case my neighbour totoro and any related pages and as soon as you include them you can see the demographics you will be targeting for your ads. Look for the ones with the highest bar for example lets say female and age 19 - 34 and change it up on the left. After demographics click on Page likes and then you will see the pages that these people are most interested in and that's by looking at the affinity score which determines how relevant the page is to the audience. The higher the score the more relevant it is. Add those pages on the interest tab on the left. Then save the audience. We will use this audience for our ad. Now create a conversion pixel and paste it in the store where I showed earlier. Since our post is ready. Go to create ad and click on Increase Conversions On Your Website and name the campaign and then and click on Use a Saved Audience and choose the audience from earlier and choose your pixel. Then for placement choose all platforms and in platforms choose only facebook and feeds. Cross out everything else and Set ad budget to $20/day on the first day (after 12pm set budget to $10 to gain edge rank, then $20 the next day). After that you will be going to the ad section and here select your page and and the post you made earlier and then click on place order and you are done. Now since your product is free you will start getting orders in no time and you will get $9.99 for shipping. Assuming your product is $0.99 you will make $9 on each sale! Once you start getting a few sales then follow the scale up section and upsell your buyers with higher priced products. You will need to get 11 sales a day to get 100+ per day which is really easy once you get the hang of it. You can actually make a lot more if you do the upsell correctly. I have had buyers who got the first product for free and went on to purchase $200+ worth of products in upsells. <b>Scaling Up</b> Now to scale up add more products and keep testing. Also create different ad sets with different target audiences. Kill the ones that don't convert and keep your top converting ads. You can do this for multiple products. And make sure to milk your top converting ad by increasing you budget. Once $ starts coming in there are few other things you can do to really kick it up a notch and it add apps on your shopify store. The only one you really need is "Yo - display recent sales in real time" which will show recent sales on the left side of your store. This app really boosts sales like crazy. Other things you need to do is add an upsell by adding an upsell app which will allow you to upsell clients on items from the same niche. Also keep in mind you will be making a buyers list from this as well so don't hesitate to pitch other products in the same niche to your buyers. Once you start to really kill it with this business model you will want to start creating your own products. <b>Conclusion</b> Okay that's all. You will be suprised how much you can make with this method. Once people come into your store 70% of these people will buy other things too if you set up everything properly and that is why I said to make your site look as professional as possible and add as many products as you can. I have explained everything in details so everyone can apply this method. If you need any help and have any questions feel free to ask below. Now go and TAKE ACTION! |
| json metadata | {"tags":["money","earn","shopify","shop","business"],"links":["https://www.shopify.com/smart-marketer"],"app":"steemit/0.1","format":"markdown"} |
| Transaction Info | Block #12153935/Trx 189aefe36846111ae9979190f52d17afb9cd4718 |
View Raw JSON Data
{
  "trx_id": "189aefe36846111ae9979190f52d17afb9cd4718",
  "block": 12153935,
  "trx_in_block": 6,
  "op_in_trx": 0,
  "virtual_op": 0,
  "timestamp": "2017-05-22T14:32:33",
  "op": [
    "comment",
    {
      "parent_author": "",
      "parent_permlink": "earn",
      "author": "tzman",
      "permlink": "shopify-guide-to-earn-alot-of-money",
      "title": "Shopify guide to earn alot of money",
      "body": "<b>Getting Started</b>\n\nIn this guide we will be focusing on the dropship model because from my experience it's the easiest and least time consuming. First of all you will need to sign up on Shopify. If you head over to their website you will get an option to get started with a 14 days trial plan but like I said I want people reading this thread to actually apply this whole method so here is coupon code that I found online which will give you a trial for 45 days.\n\n45 days trial - https://www.shopify.com/smart-marketer\n\nIn the beginning, I mentioned I will explain how you can be profitable even before you spend a penny. This is a part of that. And if anyone is wondering I am no way affiliated with the link above.\n\nWhen you go for signing up Shopify will ask you for your email, password and store name. Use your email and pass and in the store name section choose a nice/catchy name which should be something like this, first an adjective like \"amazing, awesome etc\" then products/store. Hopefully you get the idea. Now one thing to remember is that if you are not gonna use a custom domain for your store, you will have to stick to this name meaning this StoreName.Shopify.com will be your permanent URL and you WON'T be able to change this so if you are going to be using a Shopify sub domain make sure you choose the store name you want when signing up. Then click on online store and on the next page fill up your info. Then you will be asked a series of questions. Answer them with the following -\n\n1. I am already selling online using a different system\n\n2. Amazon\n\n3. $5k to $50k\n\nAnd click Enter My Store and your store is up and running. You can choose any other option if you want but this is what I choose and I am just making things easier.\n\n\n<b>Setting Up Your Store</b>\n\nThen once you are on the home page Shopify will tell you everything you need to do in different tabs which will include setting up your shipping setting, tax info, adding products, choosing themes etc. I will go through each of the things you will need to do step by step.\n\nFirst click on settings on the left and click General and choose your store name which will be the same as the URL and then the two email fields and then the store address. Just fill them up accordingly. Then click on the Payment. There are two payments that you have to include and that's Shopify payments by Stripe which will allow you accept credit cards which will ask you to a series of questions. Answer those questions randomly. They don't really matter but what I have seen a lot of people who live outside US struggle with here is Tax ID and SIN number. Let me tell you that you don't need to worry about these just use random numbers. For those who are wondering you add your Payoneer US payment service here as well. The next thing you will need to choose is Paypal Express Checkout and you are done. Then moving on to Checkout, this part is really a personal preference but I will tell you what I will use.\n\nCustomer accounts - optional\n\nFull name - Require first and last name\n\nCompany - optional\n\nApt - optional\n\nPhone number - optional\n\nKeep the rest as it is except select automatically archive my order under after an order has been paid. Then you will see a box that says additional scripts, this is where you will be using your Fb retargeting/conversion pixels. I will explain in a later step. Once you are done with the above go the bottom of the page where you see three boxes (Refund policy, Privacy Policy and TOS) click on generate sample for all three and you are done here.\n\nNow let's move on to Shipping. First you will have your shipping rate, leave it as it is and move on to shipping rates and add them based on weight and add these shipping rates -\n\n0 - 0.9 = $9.99\n1 - 1.9 = 14.99\n2.0 - 2.9 = 17.99\n3.0 - 3.9 = 19.99\n4.0 - 4.9 = 21.99\n\nAnd that should be enough for now. As we will be focusing on a dropship model shipping based on weight will be ideal.\n\n\n<b>Designing Your Store</b>\n\nYour store design will depend on what niche your products are in but what I would recommend is going for multiple products. Okay so first choose your theme. From my experience the best converting free themes are Classic theme and the Minimal theme. And once you choose the theme you want click on install them and it will get set up. These themes come with everything already set up including the menus, categories and products which you will be editing according to the products you will use. You can modify the theme any way you right but I will just recommend changing the logo and tagline and keep the coloring and stuff same as it is as they are made in a way which will have the highest conversion rate.\n\nYou can set up your own custom domain if you want which gives your store a more natural feel but I would say sticking with shopify works just fine but if you want to click on online store and then domains and choose a custom domain.\n\nNow one thing that I would like to put emphasis on is branding and how important it is so you will want a really professional logo as the logo is the first thing someone will see when they come to your site so get a nice logo for your site.\n\nAnother important thing that you need to set up is your store navigation which you will find under online store. Page that you need to include About Us, Shipping Info, Contact Us.\n\nHere is a sample of an About Us page. If you want you can use the exact this, just edit out the store name -\n\nWelcome to \"Store Name\"!\n\nWe strive to provide our customer with the best customer service and support and the most convenient shopping experience online.\n\nWhether you are at home at work or on the go you can rest assured that your orders are handled securely and with the utmost care.\n\nAll our products are specifically tailored for the customer looking for the BEST DEALS in the latest trinkets and gadgets!\n\nWe love hearing from our customers and would love your feedback!\n\nInvite friends/family and loved ones to shop with us at \"Store Name\"!\n\nAnd here is a sample for your shipping page -\n\nShipping depends on the product ordered. For promotional \"FREE\" items it may take 3-5 weeks to arrive since our items are coming overseas and from different warehouse. For non-promotional items, the shipping can take up to 14 to 30 days. Please allow 14 days before contacting us. No email correspondence will be entered into on the subject of delivery until after this period. This is to allow for any delays in the postal system and to keep email administration down to a manageable level.\n\nAnd there you have it your store is all done. Next thing you need to do is get products in your store.\n\n\n<b>Niche Product Research</b>\n\nI could let you spend hours figuring out what products you should put in your store but I am just going to go ahead and provide the niches that worked for me and all you have to do is just copy me. Before I go into it let me mention that you will be targeting keychains, plush toys, lamps, chains, earrings, rings and basically anything in the $1 - $3 mark in Aliexpress. And yes you will be sourcing your products from Aliexpress. Okay so what works best are movie products ( avengers,batman, superman, harry potter etc), anime (my neighbor Totoro, Pokemon) and Tv shows - Game of Thrones (my best selling niche). Now the way you will be finding products is head over to aliexpress and search up the niche for example pokemon then click on the most number of orders. The top products are what others are reselling. I am sure you heard phrase the money lies with the competition. Next you will be adding products to your store.\n\n\n<b>Adding A Product</b>\n\nClick on Product then add a product. First the title and then the description. Here is an example plush toy listing and how it would look on your site.\n\nTitle -\n\nFrozen Sven's Plush Toy\n\nDescription -\n\nTake home a limited edition Sven Plush Doll FOR FREE\n\nNormally priced at 14.99. We want you to have it for free!\n\nOrder 2 or more to save on shipping.\n\nOnly 200 available. **Limit 10 order per person**\nLimited time only! Allow 4-6 weeks shipping\n\n Pricing will be something like $14.99 and discount it to zero. Now head over to aliexpress and add a variety of items to your site. And once you have around 30 products on your site you are done. To make your site look generic you want to add products with different price ranges. Now we get the traffic.\n\n<b>Getting Traffic And Sales</b>\n\nNow remember when I said I will show you how to do this without spending a penny, well this is the 2nd part of that. We will be using Facebook to bring in the traffic. Now Facebook allows you a credit of a certain amount which is more than enough to start getting sales and start banking. Whenever you add a card to your account Facebook lets you advertise right away and bills you once you reach that credit appointed to you by Facebook. So let's up the ad.\n\nFirst you will need to create a Facebook fanpage under brand/product then sub category website and fill up the about and add a profile picture and add your website URL. Now the aim here is to make a passive income from this so you have to make everything look generic so make sure you put emphasis on the details so everything looks natural.\n\nNow lets create the ad. Go on your page and go to post like this -\n\nHey Totoro lovers! This is for you!\nFREE for a LIMITED TIME ONLY! Just help us with shipping.\nGet yours here ➩➩ *link to product*\n\nThere is one more step before we finish up your ad setup and that it your target audience. I want everyone reading this thread to actually apply this and scale accordingly so you will need to how to find the right audience for your ads. Login to your ad manager then go to tools and then audience insights. Once it loads click on everyone on Facebook. So let's assume our ad is going to be for the plush toy above so what we will be doing is on the interest tab include everything that related to this product in this case my neighbour totoro and any related pages and as soon as you include them you can see the demographics you will be targeting for your ads. Look for the ones with the highest bar for example lets say female and age 19 - 34 and change it up on the left.\n\nAfter demographics click on Page likes and then you will see the pages that these people are most interested in and that's by looking at the affinity score which determines how relevant the page is to the audience. The higher the score the more relevant it is. Add those pages on the interest tab on the left. Then save the audience. We will use this audience for our ad. Now create a conversion pixel and paste it in the store where I showed earlier.\n\nSince our post is ready. Go to create ad and click on Increase Conversions On Your Website and name the campaign and then and click on Use a Saved Audience and choose the audience from earlier and choose your pixel. Then for placement choose all platforms and in platforms choose only facebook and feeds. Cross out everything else and Set ad budget to $20/day on the first day (after 12pm set budget to $10 to gain edge rank, then $20 the next day).\n\nAfter that you will be going to the ad section and here select your page and and the post you made earlier and then click on place order and you are done.\n\nNow since your product is free you will start getting orders in no time and you will get $9.99 for shipping. Assuming your product is $0.99 you will make $9 on each sale! Once you start getting a few sales then follow the scale up section and upsell your buyers with higher priced products. You will need to get 11 sales a day to get 100+ per day which is really easy once you get the hang of it. You can actually make a lot more if you do the upsell correctly. I have had buyers who got the first product for free and went on to purchase $200+ worth of products in upsells.\n\n<b>Scaling Up</b>\n\nNow to scale up add more products and keep testing. Also create different ad sets with different target audiences. Kill the ones that don't convert and keep your top converting ads. You can do this for multiple products. And make sure to milk your top converting ad by increasing you budget. Once $ starts coming in there are few other things you can do to really kick it up a notch and it add apps on your shopify store. The only one you really need is \"Yo - display recent sales in real time\" which will show recent sales on the left side of your store.\n\nThis app really boosts sales like crazy. Other things you need to do is add an upsell by adding an upsell app which will allow you to upsell clients on items from the same niche. Also keep in mind you will be making a buyers list from this as well so don't hesitate to pitch other products in the same niche to your buyers.\n\nOnce you start to really kill it with this business model you will want to start creating your own products.\n\n\n<b>Conclusion</b>\n\nOkay that's all. You will be suprised how much you can make with this method. Once people come into your store 70% of these people will buy other things too if you set up everything properly and that is why I said to make your site look as professional as possible and add as many products as you can. I have explained everything in details so everyone can apply this method. If you need any help and have any questions feel free to ask below. Now go and TAKE ACTION!",
      "json_metadata": "{\"tags\":[\"money\",\"earn\",\"shopify\",\"shop\",\"business\"],\"links\":[\"https://www.shopify.com/smart-marketer\"],\"app\":\"steemit/0.1\",\"format\":\"markdown\"}"
    }
  ]
}marifaupvoted (100.00%) @tzman / shopify-guide-to-earn-alot-of-money2017/05/22 14:23:45
marifaupvoted (100.00%) @tzman / shopify-guide-to-earn-alot-of-money
2017/05/22 14:23:45
| voter | marifa |
| author | tzman |
| permlink | shopify-guide-to-earn-alot-of-money |
| weight | 10000 (100.00%) |
| Transaction Info | Block #12153759/Trx 933681d0bb918543e8eb71297393e4bdd27e1a87 |
View Raw JSON Data
{
  "trx_id": "933681d0bb918543e8eb71297393e4bdd27e1a87",
  "block": 12153759,
  "trx_in_block": 9,
  "op_in_trx": 0,
  "virtual_op": 0,
  "timestamp": "2017-05-22T14:23:45",
  "op": [
    "vote",
    {
      "voter": "marifa",
      "author": "tzman",
      "permlink": "shopify-guide-to-earn-alot-of-money",
      "weight": 10000
    }
  ]
}ilonavnijnattenupvoted (100.00%) @tzman / half-moon-by-amateur2017/05/22 14:23:39
ilonavnijnattenupvoted (100.00%) @tzman / half-moon-by-amateur
2017/05/22 14:23:39
| voter | ilonavnijnatten |
| author | tzman |
| permlink | half-moon-by-amateur |
| weight | 10000 (100.00%) |
| Transaction Info | Block #12153757/Trx ea81c00cf0bf8afeda8729edbb59f93c800e7dac |
View Raw JSON Data
{
  "trx_id": "ea81c00cf0bf8afeda8729edbb59f93c800e7dac",
  "block": 12153757,
  "trx_in_block": 4,
  "op_in_trx": 0,
  "virtual_op": 0,
  "timestamp": "2017-05-22T14:23:39",
  "op": [
    "vote",
    {
      "voter": "ilonavnijnatten",
      "author": "tzman",
      "permlink": "half-moon-by-amateur",
      "weight": 10000
    }
  ]
}abcdoctorupvoted (100.00%) @tzman / shopify-guide-to-earn-alot-of-money2017/05/22 14:23:27
abcdoctorupvoted (100.00%) @tzman / shopify-guide-to-earn-alot-of-money
2017/05/22 14:23:27
| voter | abcdoctor |
| author | tzman |
| permlink | shopify-guide-to-earn-alot-of-money |
| weight | 10000 (100.00%) |
| Transaction Info | Block #12153753/Trx e4450f14e268f528d7f587462288044f63ac92f8 |
View Raw JSON Data
{
  "trx_id": "e4450f14e268f528d7f587462288044f63ac92f8",
  "block": 12153753,
  "trx_in_block": 2,
  "op_in_trx": 0,
  "virtual_op": 0,
  "timestamp": "2017-05-22T14:23:27",
  "op": [
    "vote",
    {
      "voter": "abcdoctor",
      "author": "tzman",
      "permlink": "shopify-guide-to-earn-alot-of-money",
      "weight": 10000
    }
  ]
}tzmanupvoted (100.00%) @tzman / shopify-guide-to-earn-alot-of-money2017/05/22 14:22:51
tzmanupvoted (100.00%) @tzman / shopify-guide-to-earn-alot-of-money
2017/05/22 14:22:51
| voter | tzman |
| author | tzman |
| permlink | shopify-guide-to-earn-alot-of-money |
| weight | 10000 (100.00%) |
| Transaction Info | Block #12153741/Trx 1acb623f1ca7458a923200158c195e38d2987179 |
View Raw JSON Data
{
  "trx_id": "1acb623f1ca7458a923200158c195e38d2987179",
  "block": 12153741,
  "trx_in_block": 8,
  "op_in_trx": 0,
  "virtual_op": 0,
  "timestamp": "2017-05-22T14:22:51",
  "op": [
    "vote",
    {
      "voter": "tzman",
      "author": "tzman",
      "permlink": "shopify-guide-to-earn-alot-of-money",
      "weight": 10000
    }
  ]
}tzmanpublished a new post: shopify-guide-to-earn-alot-of-money2017/05/22 14:22:51
tzmanpublished a new post: shopify-guide-to-earn-alot-of-money
2017/05/22 14:22:51
| parent author | |
| parent permlink | earn |
| author | tzman |
| permlink | shopify-guide-to-earn-alot-of-money |
| title | Shopify guide to earn alot of money |
| body | <b>Getting Started</b> In this guide we will be focusing on the dropship model because from my experience it's the easiest and least time consuming. First of all you will need to sign up on Shopify. If you head over to their website you will get an option to get started with a 14 days trial plan but like I said I want people reading this thread to actually apply this whole method so here is coupon code that I found online which will give you a trial for 45 days. 45 days trial - https://www.shopify.com/smart-marketer In the beginning, I mentioned I will explain how you can be profitable even before you spend a penny. This is a part of that. And if anyone is wondering I am no way affiliated with the link above. When you go for signing up Shopify will ask you for your email, password and store name. Use your email and pass and in the store name section choose a nice/catchy name which should be something like this, first an adjective like "amazing, awesome etc" then products/store. Hopefully you get the idea. Now one thing to remember is that if you are not gonna use a custom domain for your store, you will have to stick to this name meaning this StoreName.Shopify.com will be your permanent URL and you WON'T be able to change this so if you are going to be using a Shopify sub domain make sure you choose the store name you want when signing up. Then click on online store and on the next page fill up your info. Then you will be asked a series of questions. Answer them with the following - 1. I am already selling online using a different system 2. Amazon 3. $5k to $50k And click Enter My Store and your store is up and running. You can choose any other option if you want but this is what I choose and I am just making things easier. <b>Setting Up Your Store</b> Then once you are on the home page Shopify will tell you everything you need to do in different tabs which will include setting up your shipping setting, tax info, adding products, choosing themes etc. I will go through each of the things you will need to do step by step. First click on settings on the left and click General and choose your store name which will be the same as the URL and then the two email fields and then the store address. Just fill them up accordingly. Then click on the Payment. There are two payments that you have to include and that's Shopify payments by Stripe which will allow you accept credit cards which will ask you to a series of questions. Answer those questions randomly. They don't really matter but what I have seen a lot of people who live outside US struggle with here is Tax ID and SIN number. Let me tell you that you don't need to worry about these just use random numbers. For those who are wondering you add your Payoneer US payment service here as well. The next thing you will need to choose is Paypal Express Checkout and you are done. Then moving on to Checkout, this part is really a personal preference but I will tell you what I will use. Customer accounts - optional Full name - Require first and last name Company - optional Apt - optional Phone number - optional Keep the rest as it is except select automatically archive my order under after an order has been paid. Then you will see a box that says additional scripts, this is where you will be using your Fb retargeting/conversion pixels. I will explain in a later step. Once you are done with the above go the bottom of the page where you see three boxes (Refund policy, Privacy Policy and TOS) click on generate sample for all three and you are done here. Now let's move on to Shipping. First you will have your shipping rate, leave it as it is and move on to shipping rates and add them based on weight and add these shipping rates - 0 - 0.9 = $9.99 1 - 1.9 = 14.99 2.0 - 2.9 = 17.99 3.0 - 3.9 = 19.99 4.0 - 4.9 = 21.99 And that should be enough for now. As we will be focusing on a dropship model shipping based on weight will be ideal. <b>Designing Your Store</b> Your store design will depend on what niche your products are in but what I would recommend is going for multiple products. Okay so first choose your theme. From my experience the best converting free themes are Classic theme and the Minimal theme. And once you choose the theme you want click on install them and it will get set up. These themes come with everything already set up including the menus, categories and products which you will be editing according to the products you will use. You can modify the theme any way you right but I will just recommend changing the logo and tagline and keep the coloring and stuff same as it is as they are made in a way which will have the highest conversion rate. You can set up your own custom domain if you want which gives your store a more natural feel but I would say sticking with shopify works just fine but if you want to click on online store and then domains and choose a custom domain. Now one thing that I would like to put emphasis on is branding and how important it is so you will want a really professional logo as the logo is the first thing someone will see when they come to your site so get a nice logo for your site. Another important thing that you need to set up is your store navigation which you will find under online store. Page that you need to include About Us, Shipping Info, Contact Us. Here is a sample of an About Us page. If you want you can use the exact this, just edit out the store name - Welcome to "Store Name"! We strive to provide our customer with the best customer service and support and the most convenient shopping experience online. Whether you are at home at work or on the go you can rest assured that your orders are handled securely and with the utmost care. All our products are specifically tailored for the customer looking for the BEST DEALS in the latest trinkets and gadgets! We love hearing from our customers and would love your feedback! Invite friends/family and loved ones to shop with us at "Store Name"! And here is a sample for your shipping page - Shipping depends on the product ordered. For promotional "FREE" items it may take 3-5 weeks to arrive since our items are coming overseas and from different warehouse. For non-promotional items, the shipping can take up to 14 to 30 days. Please allow 14 days before contacting us. No email correspondence will be entered into on the subject of delivery until after this period. This is to allow for any delays in the postal system and to keep email administration down to a manageable level. And there you have it your store is all done. Next thing you need to do is get products in your store. <b>Niche Product Research</b> I could let you spend hours figuring out what products you should put in your store but I am just going to go ahead and provide the niches that worked for me and all you have to do is just copy me. Before I go into it let me mention that you will be targeting keychains, plush toys, lamps, chains, earrings, rings and basically anything in the $1 - $3 mark in Aliexpress. And yes you will be sourcing your products from Aliexpress. Okay so what works best are movie products ( avengers,batman, superman, harry potter etc), anime (my neighbor Totoro, Pokemon) and Tv shows - Game of Thrones (my best selling niche). Now the way you will be finding products is head over to aliexpress and search up the niche for example pokemon then click on the most number of orders. The top products are what others are reselling. I am sure you heard phrase the money lies with the competition. Next you will be adding products to your store. <b>Adding A Product</b> Click on Product then add a product. First the title and then the description. Here is an example plush toy listing and how it would look on your site. Title - Frozen Sven's Plush Toy Description - Take home a limited edition Sven Plush Doll FOR FREE Normally priced at 14.99. We want you to have it for free! Order 2 or more to save on shipping. Only 200 available. **Limit 10 order per person** Limited time only! Allow 4-6 weeks shipping Pricing will be something like $14.99 and discount it to zero. Now head over to aliexpress and add a variety of items to your site. And once you have around 30 products on your site you are done. To make your site look generic you want to add products with different price ranges. Now we get the traffic. <b>Getting Traffic And Sales</b> Now remember when I said I will show you how to do this without spending a penny, well this is the 2nd part of that. We will be using Facebook to bring in the traffic. Now Facebook allows you a credit of a certain amount which is more than enough to start getting sales and start banking. Whenever you add a card to your account Facebook lets you advertise right away and bills you once you reach that credit appointed to you by Facebook. So let's up the ad. First you will need to create a Facebook fanpage under brand/product then sub category website and fill up the about and add a profile picture and add your website URL. Now the aim here is to make a passive income from this so you have to make everything look generic so make sure you put emphasis on the details so everything looks natural. Now lets create the ad. Go on your page and go to post like this - Hey Totoro lovers! This is for you! FREE for a LIMITED TIME ONLY! Just help us with shipping. Get yours here ➩➩ *link to product* There is one more step before we finish up your ad setup and that it your target audience. I want everyone reading this thread to actually apply this and scale accordingly so you will need to how to find the right audience for your ads. Login to your ad manager then go to tools and then audience insights. Once it loads click on everyone on Facebook. So let's assume our ad is going to be for the plush toy above so what we will be doing is on the interest tab include everything that related to this product in this case my neighbour totoro and any related pages and as soon as you include them you can see the demographics you will be targeting for your ads. Look for the ones with the highest bar for example lets say female and age 19 - 34 and change it up on the left. After demographics click on Page likes and then you will see the pages that these people are most interested in and that's by looking at the affinity score which determines how relevant the page is to the audience. The higher the score the more relevant it is. Add those pages on the interest tab on the left. Then save the audience. We will use this audience for our ad. Now create a conversion pixel and paste it in the store where I showed earlier. Since our post is ready. Go to create ad and click on Increase Conversions On Your Website and name the campaign and then and click on Use a Saved Audience and choose the audience from earlier and choose your pixel. Then for placement choose all platforms and in platforms choose only facebook and feeds. Cross out everything else and Set ad budget to $20/day on the first day (after 12pm set budget to $10 to gain edge rank, then $20 the next day). After that you will be going to the ad section and here select your page and and the post you made earlier and then click on place order and you are done. Now since your product is free you will start getting orders in no time and you will get $9.99 for shipping. Assuming your product is $0.99 you will make $9 on each sale! Once you start getting a few sales then follow the scale up section and upsell your buyers with higher priced products. You will need to get 11 sales a day to get 100+ per day which is really easy once you get the hang of it. You can actually make a lot more if you do the upsell correctly. I have had buyers who got the first product for free and went on to purchase $200+ worth of products in upsells. <b>Scaling Up</b> Now to scale up add more products and keep testing. Also create different ad sets with different target audiences. Kill the ones that don't convert and keep your top converting ads. You can do this for multiple products. And make sure to milk your top converting ad by increasing you budget. Once $ starts coming in there are few other things you can do to really kick it up a notch and it add apps on your shopify store. The only one you really need is "Yo - display recent sales in real time" which will show recent sales on the left side of your store. This app really boosts sales like crazy. Other things you need to do is add an upsell by adding an upsell app which will allow you to upsell clients on items from the same niche. Also keep in mind you will be making a buyers list from this as well so don't hesitate to pitch other products in the same niche to your buyers. Once you start to really kill it with this business model you will want to start creating your own products. <b>Conclusion</b> Okay that's all. You will be suprised how much you can make with this method. Once people come into your store 70% of these people will buy other things too if you set up everything properly and that is why I said to make your site look as professional as possible and add as many products as you can. I have explained everything in details so everyone can apply this method. If you need any help and have any questions feel free to ask below. Now go and TAKE ACTION! |
| json metadata | {"tags":["earn","shopify","money","shop","business"],"links":["https://www.shopify.com/smart-marketer"],"app":"steemit/0.1","format":"markdown"} |
| Transaction Info | Block #12153741/Trx 1acb623f1ca7458a923200158c195e38d2987179 |
View Raw JSON Data
{
  "trx_id": "1acb623f1ca7458a923200158c195e38d2987179",
  "block": 12153741,
  "trx_in_block": 8,
  "op_in_trx": 0,
  "virtual_op": 0,
  "timestamp": "2017-05-22T14:22:51",
  "op": [
    "comment",
    {
      "parent_author": "",
      "parent_permlink": "earn",
      "author": "tzman",
      "permlink": "shopify-guide-to-earn-alot-of-money",
      "title": "Shopify guide to earn alot of money",
      "body": "<b>Getting Started</b>\n\nIn this guide we will be focusing on the dropship model because from my experience it's the easiest and least time consuming. First of all you will need to sign up on Shopify. If you head over to their website you will get an option to get started with a 14 days trial plan but like I said I want people reading this thread to actually apply this whole method so here is coupon code that I found online which will give you a trial for 45 days.\n\n45 days trial - https://www.shopify.com/smart-marketer\n\nIn the beginning, I mentioned I will explain how you can be profitable even before you spend a penny. This is a part of that. And if anyone is wondering I am no way affiliated with the link above.\n\nWhen you go for signing up Shopify will ask you for your email, password and store name. Use your email and pass and in the store name section choose a nice/catchy name which should be something like this, first an adjective like \"amazing, awesome etc\" then products/store. Hopefully you get the idea. Now one thing to remember is that if you are not gonna use a custom domain for your store, you will have to stick to this name meaning this StoreName.Shopify.com will be your permanent URL and you WON'T be able to change this so if you are going to be using a Shopify sub domain make sure you choose the store name you want when signing up. Then click on online store and on the next page fill up your info. Then you will be asked a series of questions. Answer them with the following -\n\n1. I am already selling online using a different system\n\n2. Amazon\n\n3. $5k to $50k\n\nAnd click Enter My Store and your store is up and running. You can choose any other option if you want but this is what I choose and I am just making things easier.\n\n\n<b>Setting Up Your Store</b>\n\nThen once you are on the home page Shopify will tell you everything you need to do in different tabs which will include setting up your shipping setting, tax info, adding products, choosing themes etc. I will go through each of the things you will need to do step by step.\n\nFirst click on settings on the left and click General and choose your store name which will be the same as the URL and then the two email fields and then the store address. Just fill them up accordingly. Then click on the Payment. There are two payments that you have to include and that's Shopify payments by Stripe which will allow you accept credit cards which will ask you to a series of questions. Answer those questions randomly. They don't really matter but what I have seen a lot of people who live outside US struggle with here is Tax ID and SIN number. Let me tell you that you don't need to worry about these just use random numbers. For those who are wondering you add your Payoneer US payment service here as well. The next thing you will need to choose is Paypal Express Checkout and you are done. Then moving on to Checkout, this part is really a personal preference but I will tell you what I will use.\n\nCustomer accounts - optional\n\nFull name - Require first and last name\n\nCompany - optional\n\nApt - optional\n\nPhone number - optional\n\nKeep the rest as it is except select automatically archive my order under after an order has been paid. Then you will see a box that says additional scripts, this is where you will be using your Fb retargeting/conversion pixels. I will explain in a later step. Once you are done with the above go the bottom of the page where you see three boxes (Refund policy, Privacy Policy and TOS) click on generate sample for all three and you are done here.\n\nNow let's move on to Shipping. First you will have your shipping rate, leave it as it is and move on to shipping rates and add them based on weight and add these shipping rates -\n\n0 - 0.9 = $9.99\n1 - 1.9 = 14.99\n2.0 - 2.9 = 17.99\n3.0 - 3.9 = 19.99\n4.0 - 4.9 = 21.99\n\nAnd that should be enough for now. As we will be focusing on a dropship model shipping based on weight will be ideal.\n\n\n<b>Designing Your Store</b>\n\nYour store design will depend on what niche your products are in but what I would recommend is going for multiple products. Okay so first choose your theme. From my experience the best converting free themes are Classic theme and the Minimal theme. And once you choose the theme you want click on install them and it will get set up. These themes come with everything already set up including the menus, categories and products which you will be editing according to the products you will use. You can modify the theme any way you right but I will just recommend changing the logo and tagline and keep the coloring and stuff same as it is as they are made in a way which will have the highest conversion rate.\n\nYou can set up your own custom domain if you want which gives your store a more natural feel but I would say sticking with shopify works just fine but if you want to click on online store and then domains and choose a custom domain.\n\nNow one thing that I would like to put emphasis on is branding and how important it is so you will want a really professional logo as the logo is the first thing someone will see when they come to your site so get a nice logo for your site.\n\nAnother important thing that you need to set up is your store navigation which you will find under online store. Page that you need to include About Us, Shipping Info, Contact Us.\n\nHere is a sample of an About Us page. If you want you can use the exact this, just edit out the store name -\n\nWelcome to \"Store Name\"!\n\nWe strive to provide our customer with the best customer service and support and the most convenient shopping experience online.\n\nWhether you are at home at work or on the go you can rest assured that your orders are handled securely and with the utmost care.\n\nAll our products are specifically tailored for the customer looking for the BEST DEALS in the latest trinkets and gadgets!\n\nWe love hearing from our customers and would love your feedback!\n\nInvite friends/family and loved ones to shop with us at \"Store Name\"!\n\nAnd here is a sample for your shipping page -\n\nShipping depends on the product ordered. For promotional \"FREE\" items it may take 3-5 weeks to arrive since our items are coming overseas and from different warehouse. For non-promotional items, the shipping can take up to 14 to 30 days. Please allow 14 days before contacting us. No email correspondence will be entered into on the subject of delivery until after this period. This is to allow for any delays in the postal system and to keep email administration down to a manageable level.\n\nAnd there you have it your store is all done. Next thing you need to do is get products in your store.\n\n\n<b>Niche Product Research</b>\n\nI could let you spend hours figuring out what products you should put in your store but I am just going to go ahead and provide the niches that worked for me and all you have to do is just copy me. Before I go into it let me mention that you will be targeting keychains, plush toys, lamps, chains, earrings, rings and basically anything in the $1 - $3 mark in Aliexpress. And yes you will be sourcing your products from Aliexpress. Okay so what works best are movie products ( avengers,batman, superman, harry potter etc), anime (my neighbor Totoro, Pokemon) and Tv shows - Game of Thrones (my best selling niche). Now the way you will be finding products is head over to aliexpress and search up the niche for example pokemon then click on the most number of orders. The top products are what others are reselling. I am sure you heard phrase the money lies with the competition. Next you will be adding products to your store.\n\n\n<b>Adding A Product</b>\n\nClick on Product then add a product. First the title and then the description. Here is an example plush toy listing and how it would look on your site.\n\nTitle -\n\nFrozen Sven's Plush Toy\n\nDescription -\n\nTake home a limited edition Sven Plush Doll FOR FREE\n\nNormally priced at 14.99. We want you to have it for free!\n\nOrder 2 or more to save on shipping.\n\nOnly 200 available. **Limit 10 order per person**\nLimited time only! Allow 4-6 weeks shipping\n\n Pricing will be something like $14.99 and discount it to zero. Now head over to aliexpress and add a variety of items to your site. And once you have around 30 products on your site you are done. To make your site look generic you want to add products with different price ranges. Now we get the traffic.\n\n<b>Getting Traffic And Sales</b>\n\nNow remember when I said I will show you how to do this without spending a penny, well this is the 2nd part of that. We will be using Facebook to bring in the traffic. Now Facebook allows you a credit of a certain amount which is more than enough to start getting sales and start banking. Whenever you add a card to your account Facebook lets you advertise right away and bills you once you reach that credit appointed to you by Facebook. So let's up the ad.\n\nFirst you will need to create a Facebook fanpage under brand/product then sub category website and fill up the about and add a profile picture and add your website URL. Now the aim here is to make a passive income from this so you have to make everything look generic so make sure you put emphasis on the details so everything looks natural.\n\nNow lets create the ad. Go on your page and go to post like this -\n\nHey Totoro lovers! This is for you!\nFREE for a LIMITED TIME ONLY! Just help us with shipping.\nGet yours here ➩➩ *link to product*\n\nThere is one more step before we finish up your ad setup and that it your target audience. I want everyone reading this thread to actually apply this and scale accordingly so you will need to how to find the right audience for your ads. Login to your ad manager then go to tools and then audience insights. Once it loads click on everyone on Facebook. So let's assume our ad is going to be for the plush toy above so what we will be doing is on the interest tab include everything that related to this product in this case my neighbour totoro and any related pages and as soon as you include them you can see the demographics you will be targeting for your ads. Look for the ones with the highest bar for example lets say female and age 19 - 34 and change it up on the left.\n\nAfter demographics click on Page likes and then you will see the pages that these people are most interested in and that's by looking at the affinity score which determines how relevant the page is to the audience. The higher the score the more relevant it is. Add those pages on the interest tab on the left. Then save the audience. We will use this audience for our ad. Now create a conversion pixel and paste it in the store where I showed earlier.\n\nSince our post is ready. Go to create ad and click on Increase Conversions On Your Website and name the campaign and then and click on Use a Saved Audience and choose the audience from earlier and choose your pixel. Then for placement choose all platforms and in platforms choose only facebook and feeds. Cross out everything else and Set ad budget to $20/day on the first day (after 12pm set budget to $10 to gain edge rank, then $20 the next day).\n\nAfter that you will be going to the ad section and here select your page and and the post you made earlier and then click on place order and you are done.\n\nNow since your product is free you will start getting orders in no time and you will get $9.99 for shipping. Assuming your product is $0.99 you will make $9 on each sale! Once you start getting a few sales then follow the scale up section and upsell your buyers with higher priced products. You will need to get 11 sales a day to get 100+ per day which is really easy once you get the hang of it. You can actually make a lot more if you do the upsell correctly. I have had buyers who got the first product for free and went on to purchase $200+ worth of products in upsells.\n\n<b>Scaling Up</b>\n\nNow to scale up add more products and keep testing. Also create different ad sets with different target audiences. Kill the ones that don't convert and keep your top converting ads. You can do this for multiple products. And make sure to milk your top converting ad by increasing you budget. Once $ starts coming in there are few other things you can do to really kick it up a notch and it add apps on your shopify store. The only one you really need is \"Yo - display recent sales in real time\" which will show recent sales on the left side of your store.\n\nThis app really boosts sales like crazy. Other things you need to do is add an upsell by adding an upsell app which will allow you to upsell clients on items from the same niche. Also keep in mind you will be making a buyers list from this as well so don't hesitate to pitch other products in the same niche to your buyers.\n\nOnce you start to really kill it with this business model you will want to start creating your own products.\n\n\n<b>Conclusion</b>\n\nOkay that's all. You will be suprised how much you can make with this method. Once people come into your store 70% of these people will buy other things too if you set up everything properly and that is why I said to make your site look as professional as possible and add as many products as you can. I have explained everything in details so everyone can apply this method. If you need any help and have any questions feel free to ask below. Now go and TAKE ACTION!",
      "json_metadata": "{\"tags\":[\"earn\",\"shopify\",\"money\",\"shop\",\"business\"],\"links\":[\"https://www.shopify.com/smart-marketer\"],\"app\":\"steemit/0.1\",\"format\":\"markdown\"}"
    }
  ]
}drac59upvoted (100.00%) @tzman / half-moon-by-amateur2017/05/22 11:27:09
drac59upvoted (100.00%) @tzman / half-moon-by-amateur
2017/05/22 11:27:09
| voter | drac59 |
| author | tzman |
| permlink | half-moon-by-amateur |
| weight | 10000 (100.00%) |
| Transaction Info | Block #12150323/Trx 91f165df12f62283e920b0fea8442e0cf098c4af |
View Raw JSON Data
{
  "trx_id": "91f165df12f62283e920b0fea8442e0cf098c4af",
  "block": 12150323,
  "trx_in_block": 3,
  "op_in_trx": 0,
  "virtual_op": 0,
  "timestamp": "2017-05-22T11:27:09",
  "op": [
    "vote",
    {
      "voter": "drac59",
      "author": "tzman",
      "permlink": "half-moon-by-amateur",
      "weight": 10000
    }
  ]
}2017/05/22 11:22:12
2017/05/22 11:22:12
| parent author | tzman |
| parent permlink | half-moon-by-amateur |
| author | roden |
| permlink | re-tzman-half-moon-by-amateur-20170522t112212420z |
| title | |
| body | Very nice. Well done, I like that you can see the craters |
| json metadata | {"tags":["steemitphotochallenge"],"app":"steemit/0.1"} |
| Transaction Info | Block #12150224/Trx 6c90d2837adb36770420f59893cd92e10be88c11 |
View Raw JSON Data
{
  "trx_id": "6c90d2837adb36770420f59893cd92e10be88c11",
  "block": 12150224,
  "trx_in_block": 5,
  "op_in_trx": 0,
  "virtual_op": 0,
  "timestamp": "2017-05-22T11:22:12",
  "op": [
    "comment",
    {
      "parent_author": "tzman",
      "parent_permlink": "half-moon-by-amateur",
      "author": "roden",
      "permlink": "re-tzman-half-moon-by-amateur-20170522t112212420z",
      "title": "",
      "body": "Very nice.\nWell done, I like that you can see the craters",
      "json_metadata": "{\"tags\":[\"steemitphotochallenge\"],\"app\":\"steemit/0.1\"}"
    }
  ]
}2017/05/22 11:21:18
2017/05/22 11:21:18
| parent author | artwatch |
| parent permlink | re-tzman-half-moon-by-amateur-20170522t112031281z |
| author | tzman |
| permlink | re-artwatch-re-tzman-half-moon-by-amateur-20170522t112117833z |
| title | |
| body | Thank you |
| json metadata | {"tags":["steemitphotochallenge"],"app":"steemit/0.1"} |
| Transaction Info | Block #12150206/Trx 02026639f00fcdc5480b55be8747729244b8dfea |
View Raw JSON Data
{
  "trx_id": "02026639f00fcdc5480b55be8747729244b8dfea",
  "block": 12150206,
  "trx_in_block": 2,
  "op_in_trx": 0,
  "virtual_op": 0,
  "timestamp": "2017-05-22T11:21:18",
  "op": [
    "comment",
    {
      "parent_author": "artwatch",
      "parent_permlink": "re-tzman-half-moon-by-amateur-20170522t112031281z",
      "author": "tzman",
      "permlink": "re-artwatch-re-tzman-half-moon-by-amateur-20170522t112117833z",
      "title": "",
      "body": "Thank you",
      "json_metadata": "{\"tags\":[\"steemitphotochallenge\"],\"app\":\"steemit/0.1\"}"
    }
  ]
}rodenupvoted (100.00%) @tzman / half-moon-by-amateur2017/05/22 11:20:42
rodenupvoted (100.00%) @tzman / half-moon-by-amateur
2017/05/22 11:20:42
| voter | roden |
| author | tzman |
| permlink | half-moon-by-amateur |
| weight | 10000 (100.00%) |
| Transaction Info | Block #12150194/Trx c947c940af9ec768016923332254b3a5cac61df0 |
View Raw JSON Data
{
  "trx_id": "c947c940af9ec768016923332254b3a5cac61df0",
  "block": 12150194,
  "trx_in_block": 8,
  "op_in_trx": 0,
  "virtual_op": 0,
  "timestamp": "2017-05-22T11:20:42",
  "op": [
    "vote",
    {
      "voter": "roden",
      "author": "tzman",
      "permlink": "half-moon-by-amateur",
      "weight": 10000
    }
  ]
}2017/05/22 11:20:33
2017/05/22 11:20:33
| parent author | tzman |
| parent permlink | half-moon-by-amateur |
| author | artwatch |
| permlink | re-tzman-half-moon-by-amateur-20170522t112031281z |
| title | |
| body | Wonderful! |
| json metadata | {"tags":["steemitphotochallenge"],"app":"steemit/0.1"} |
| Transaction Info | Block #12150191/Trx fb37aaf123b5d8533568b17facf57d94b997f0ed |
View Raw JSON Data
{
  "trx_id": "fb37aaf123b5d8533568b17facf57d94b997f0ed",
  "block": 12150191,
  "trx_in_block": 4,
  "op_in_trx": 0,
  "virtual_op": 0,
  "timestamp": "2017-05-22T11:20:33",
  "op": [
    "comment",
    {
      "parent_author": "tzman",
      "parent_permlink": "half-moon-by-amateur",
      "author": "artwatch",
      "permlink": "re-tzman-half-moon-by-amateur-20170522t112031281z",
      "title": "",
      "body": "Wonderful!",
      "json_metadata": "{\"tags\":[\"steemitphotochallenge\"],\"app\":\"steemit/0.1\"}"
    }
  ]
}artwatchupvoted (100.00%) @tzman / half-moon-by-amateur2017/05/22 11:20:15
artwatchupvoted (100.00%) @tzman / half-moon-by-amateur
2017/05/22 11:20:15
| voter | artwatch |
| author | tzman |
| permlink | half-moon-by-amateur |
| weight | 10000 (100.00%) |
| Transaction Info | Block #12150185/Trx 6c686506cc674f1ae0f459d795f5150b13a2b18f |
View Raw JSON Data
{
  "trx_id": "6c686506cc674f1ae0f459d795f5150b13a2b18f",
  "block": 12150185,
  "trx_in_block": 2,
  "op_in_trx": 0,
  "virtual_op": 0,
  "timestamp": "2017-05-22T11:20:15",
  "op": [
    "vote",
    {
      "voter": "artwatch",
      "author": "tzman",
      "permlink": "half-moon-by-amateur",
      "weight": 10000
    }
  ]
}andriannaupvoted (100.00%) @tzman / half-moon-by-amateur2017/05/22 11:19:45
andriannaupvoted (100.00%) @tzman / half-moon-by-amateur
2017/05/22 11:19:45
| voter | andrianna |
| author | tzman |
| permlink | half-moon-by-amateur |
| weight | 10000 (100.00%) |
| Transaction Info | Block #12150175/Trx 693e616d6b921c4269f81a7f04c2a206e49135b3 |
View Raw JSON Data
{
  "trx_id": "693e616d6b921c4269f81a7f04c2a206e49135b3",
  "block": 12150175,
  "trx_in_block": 4,
  "op_in_trx": 0,
  "virtual_op": 0,
  "timestamp": "2017-05-22T11:19:45",
  "op": [
    "vote",
    {
      "voter": "andrianna",
      "author": "tzman",
      "permlink": "half-moon-by-amateur",
      "weight": 10000
    }
  ]
}dimimpupvoted (1.00%) @tzman / half-moon-by-amateur2017/05/22 11:19:36
dimimpupvoted (1.00%) @tzman / half-moon-by-amateur
2017/05/22 11:19:36
| voter | dimimp |
| author | tzman |
| permlink | half-moon-by-amateur |
| weight | 100 (1.00%) |
| Transaction Info | Block #12150172/Trx 082716e70f1a70393569f8582ec1a9a06de5f9f8 |
View Raw JSON Data
{
  "trx_id": "082716e70f1a70393569f8582ec1a9a06de5f9f8",
  "block": 12150172,
  "trx_in_block": 6,
  "op_in_trx": 0,
  "virtual_op": 0,
  "timestamp": "2017-05-22T11:19:36",
  "op": [
    "vote",
    {
      "voter": "dimimp",
      "author": "tzman",
      "permlink": "half-moon-by-amateur",
      "weight": 100
    }
  ]
}tzmanupvoted (100.00%) @tzman / half-moon-by-amateur2017/05/22 11:19:24
tzmanupvoted (100.00%) @tzman / half-moon-by-amateur
2017/05/22 11:19:24
| voter | tzman |
| author | tzman |
| permlink | half-moon-by-amateur |
| weight | 10000 (100.00%) |
| Transaction Info | Block #12150168/Trx e0e9143a6f61ff2d2897eb743c8c2ce7d694a38e |
View Raw JSON Data
{
  "trx_id": "e0e9143a6f61ff2d2897eb743c8c2ce7d694a38e",
  "block": 12150168,
  "trx_in_block": 4,
  "op_in_trx": 0,
  "virtual_op": 0,
  "timestamp": "2017-05-22T11:19:24",
  "op": [
    "vote",
    {
      "voter": "tzman",
      "author": "tzman",
      "permlink": "half-moon-by-amateur",
      "weight": 10000
    }
  ]
}tzmanpublished a new post: half-moon-by-amateur2017/05/22 11:19:24
tzmanpublished a new post: half-moon-by-amateur
2017/05/22 11:19:24
| parent author | |
| parent permlink | steemitphotochallenge |
| author | tzman |
| permlink | half-moon-by-amateur |
| title | Half moon by amateur |
| body | I took this with my Canon SX60 HS,I'm total amateur, this is one of the first photos I took with it .  |
| json metadata | {"tags":["steemitphotochallenge","photography","moon","photo"],"image":["https://steemitimages.com/DQmapyUP2BgtioYfnL792GAtFq2oPNGLR9CqdzTcimdEsV5/moon-tzman.jpg"],"app":"steemit/0.1","format":"markdown"} |
| Transaction Info | Block #12150168/Trx e0e9143a6f61ff2d2897eb743c8c2ce7d694a38e |
View Raw JSON Data
{
"trx_id": "e0e9143a6f61ff2d2897eb743c8c2ce7d694a38e",
"block": 12150168,
"trx_in_block": 4,
"op_in_trx": 0,
"virtual_op": 0,
"timestamp": "2017-05-22T11:19:24",
"op": [
"comment",
{
"parent_author": "",
"parent_permlink": "steemitphotochallenge",
"author": "tzman",
"permlink": "half-moon-by-amateur",
"title": "Half moon by amateur",
"body": "I took this with my Canon SX60 HS,I'm total amateur, this is one of the first photos I took with it .\n\n",
"json_metadata": "{\"tags\":[\"steemitphotochallenge\",\"photography\",\"moon\",\"photo\"],\"image\":[\"https://steemitimages.com/DQmapyUP2BgtioYfnL792GAtFq2oPNGLR9CqdzTcimdEsV5/moon-tzman.jpg\"],\"app\":\"steemit/0.1\",\"format\":\"markdown\"}"
}
]
}2017/05/22 11:12:03
2017/05/22 11:12:03
| required auths | [] |
| required posting auths | ["tzman"] |
| id | follow |
| json | ["follow",{"follower":"tzman","following":"themagus","what":["blog"]}] |
| Transaction Info | Block #12150022/Trx 176e06c3dbd8f5cfb7ebdf442c0d194583b8e3af |
View Raw JSON Data
{
  "trx_id": "176e06c3dbd8f5cfb7ebdf442c0d194583b8e3af",
  "block": 12150022,
  "trx_in_block": 4,
  "op_in_trx": 0,
  "virtual_op": 0,
  "timestamp": "2017-05-22T11:12:03",
  "op": [
    "custom_json",
    {
      "required_auths": [],
      "required_posting_auths": [
        "tzman"
      ],
      "id": "follow",
      "json": "[\"follow\",{\"follower\":\"tzman\",\"following\":\"themagus\",\"what\":[\"blog\"]}]"
    }
  ]
}2017/05/22 11:11:39
2017/05/22 11:11:39
| required auths | [] |
| required posting auths | ["tzman"] |
| id | follow |
| json | ["follow",{"follower":"tzman","following":"gavvet","what":["blog"]}] |
| Transaction Info | Block #12150014/Trx 8dc9697c9c434a7747169f3eadc2f7295f6ee28b |
View Raw JSON Data
{
  "trx_id": "8dc9697c9c434a7747169f3eadc2f7295f6ee28b",
  "block": 12150014,
  "trx_in_block": 5,
  "op_in_trx": 0,
  "virtual_op": 0,
  "timestamp": "2017-05-22T11:11:39",
  "op": [
    "custom_json",
    {
      "required_auths": [],
      "required_posting_auths": [
        "tzman"
      ],
      "id": "follow",
      "json": "[\"follow\",{\"follower\":\"tzman\",\"following\":\"gavvet\",\"what\":[\"blog\"]}]"
    }
  ]
}2017/05/22 11:10:39
2017/05/22 11:10:39
| required auths | [] |
| required posting auths | ["tzman"] |
| id | follow |
| json | ["follow",{"follower":"tzman","following":"furion","what":["blog"]}] |
| Transaction Info | Block #12149994/Trx 313dbf6fc9f8e4548f748402205630cb16098974 |
View Raw JSON Data
{
  "trx_id": "313dbf6fc9f8e4548f748402205630cb16098974",
  "block": 12149994,
  "trx_in_block": 2,
  "op_in_trx": 0,
  "virtual_op": 0,
  "timestamp": "2017-05-22T11:10:39",
  "op": [
    "custom_json",
    {
      "required_auths": [],
      "required_posting_auths": [
        "tzman"
      ],
      "id": "follow",
      "json": "[\"follow\",{\"follower\":\"tzman\",\"following\":\"furion\",\"what\":[\"blog\"]}]"
    }
  ]
}andriannaupvoted (100.00%) @tzman / how-to-setup-cheap-vps-to-preform-very-fast-with-wordpress2017/05/22 11:00:06
andriannaupvoted (100.00%) @tzman / how-to-setup-cheap-vps-to-preform-very-fast-with-wordpress
2017/05/22 11:00:06
| voter | andrianna |
| author | tzman |
| permlink | how-to-setup-cheap-vps-to-preform-very-fast-with-wordpress |
| weight | 10000 (100.00%) |
| Transaction Info | Block #12149783/Trx 837fa64bbaff6a69b9f1b7cdac71e9cc23cba013 |
View Raw JSON Data
{
  "trx_id": "837fa64bbaff6a69b9f1b7cdac71e9cc23cba013",
  "block": 12149783,
  "trx_in_block": 8,
  "op_in_trx": 0,
  "virtual_op": 0,
  "timestamp": "2017-05-22T11:00:06",
  "op": [
    "vote",
    {
      "voter": "andrianna",
      "author": "tzman",
      "permlink": "how-to-setup-cheap-vps-to-preform-very-fast-with-wordpress",
      "weight": 10000
    }
  ]
}tzmanupvoted (100.00%) @ausbitbank / why-you-should-promote-your-steemit-posts-on-reddit2017/05/22 10:46:24
tzmanupvoted (100.00%) @ausbitbank / why-you-should-promote-your-steemit-posts-on-reddit
2017/05/22 10:46:24
| voter | tzman |
| author | ausbitbank |
| permlink | why-you-should-promote-your-steemit-posts-on-reddit |
| weight | 10000 (100.00%) |
| Transaction Info | Block #12149510/Trx a50b068755875e6f653baad7a9cdf8cd03d37a1b |
View Raw JSON Data
{
  "trx_id": "a50b068755875e6f653baad7a9cdf8cd03d37a1b",
  "block": 12149510,
  "trx_in_block": 0,
  "op_in_trx": 0,
  "virtual_op": 0,
  "timestamp": "2017-05-22T10:46:24",
  "op": [
    "vote",
    {
      "voter": "tzman",
      "author": "ausbitbank",
      "permlink": "why-you-should-promote-your-steemit-posts-on-reddit",
      "weight": 10000
    }
  ]
}tzmanupdated their account properties2017/05/22 10:42:15
tzmanupdated their account properties
2017/05/22 10:42:15
| account | tzman |
| memo key | STM5TMZCogq9u3KHUQ6fVgvsQWtRqnmqwaNjb1qzqM1rDNfgiS6fo |
| json metadata | {"profile":{"profile_image":"http://i.imgur.com/uytF9bN.png","name":"tzman","location":"Bosnia"}} |
| Transaction Info | Block #12149427/Trx 777f66c92c78bd46fb9658815b638adc37fae4df |
View Raw JSON Data
{
  "trx_id": "777f66c92c78bd46fb9658815b638adc37fae4df",
  "block": 12149427,
  "trx_in_block": 7,
  "op_in_trx": 0,
  "virtual_op": 0,
  "timestamp": "2017-05-22T10:42:15",
  "op": [
    "account_update",
    {
      "account": "tzman",
      "memo_key": "STM5TMZCogq9u3KHUQ6fVgvsQWtRqnmqwaNjb1qzqM1rDNfgiS6fo",
      "json_metadata": "{\"profile\":{\"profile_image\":\"http://i.imgur.com/uytF9bN.png\",\"name\":\"tzman\",\"location\":\"Bosnia\"}}"
    }
  ]
}tzmanupvoted (100.00%) @tzman / how-to-setup-cheap-vps-to-preform-very-fast-with-wordpress2017/05/22 10:39:57
tzmanupvoted (100.00%) @tzman / how-to-setup-cheap-vps-to-preform-very-fast-with-wordpress
2017/05/22 10:39:57
| voter | tzman |
| author | tzman |
| permlink | how-to-setup-cheap-vps-to-preform-very-fast-with-wordpress |
| weight | 10000 (100.00%) |
| Transaction Info | Block #12149381/Trx 3f333f4389e56c36488c304075a8ab14012b8a99 |
View Raw JSON Data
{
  "trx_id": "3f333f4389e56c36488c304075a8ab14012b8a99",
  "block": 12149381,
  "trx_in_block": 4,
  "op_in_trx": 0,
  "virtual_op": 0,
  "timestamp": "2017-05-22T10:39:57",
  "op": [
    "vote",
    {
      "voter": "tzman",
      "author": "tzman",
      "permlink": "how-to-setup-cheap-vps-to-preform-very-fast-with-wordpress",
      "weight": 10000
    }
  ]
}tzmanpublished a new post: how-to-setup-cheap-vps-to-preform-very-fast-with-wordpress2017/05/22 10:39:57
tzmanpublished a new post: how-to-setup-cheap-vps-to-preform-very-fast-with-wordpress
2017/05/22 10:39:57
| parent author | |
| parent permlink | wordpress |
| author | tzman |
| permlink | how-to-setup-cheap-vps-to-preform-very-fast-with-wordpress |
| title | How to setup cheap VPS to preform very fast with Wordpress |
| body | I'm sure many of you are aware how quickly a website loads is a ranking factor for SEO. I don't think it is heavily weighted, but the fact of the matter is you can easily lose traffic because your site is taking too long to load. If you're doing PPC then you MUST MUST MUST have a quick loading website. Now, I'm no expert in the field, but I thought I would give a quick tutorial encase someone needed help. Shared hosting plans are bad. VPS is better, but managed can be quite costly $50+/monthly. Instead we will use an unmanaged VPS to host wordpress. Using this setup I have a site that loads under 1 second for $5/month <b>Step 1: </b> Let's get a VPS - linode.com The $5/month plan will be fine. Note: Select a linode that is closest to where your users live, that will help with website load speeds. <b>Step 2: </b> Check <a href="https://www.linode.com/docs/websites/cms/install-wordpress-on-ubuntu-16-04">THIS</a> guide <b>Step 3: </b> Now we install the LAMP Stack Before you begin any installation, make sure that your software is up to date: <code>sudo apt-get update</code> Install Apache: <code>sudo apt-get install apache2</code> Set Apache to start on server boot: <code>sudo update-rc.d apache2 defaults</code> Install MySQL Install the mysql-server package and choose a secure password when prompted: <code>sudo apt-get install mysql-server</code> Create a MySQL Database Log into MySQL: <code>mysql -u root -p</code> Enter MySQL’s root password, and you’ll be presented with a MySQL prompt (most likely skip). If no password was entered in the previous section, or if you want to change the root password, enter the following command. Replace password with a new root password: <code>ALTER USER 'root'@'localhost' IDENTIFIED WITH 'mysql_native_password' BY 'password';</code> Create a database and a user with permissions for it. In this example, the database is called webdata, the user webuser, and password password: <code>CREATE DATABASE webdata;</code> <code>GRANT ALL ON webdata.* TO 'webuser' IDENTIFIED BY 'password';</code> Exit MySQL: <code>quit</code> <b>PHP 7.0</b> Install PHP, the PHP Extension and Application Repository, Apache support, and MySQL support: <code>sudo apt-get install php7.0 php-pear libapache2-mod-php7.0 php7.0-mysql</code> Optionally, install additional cURL, JSON, and CGI support: <code>sudo apt-get install php7.0-curl php7.0-json php7.0-cgi</code> Create the log directory for PHP and give ownership to the Apache system user: <code> sudo mkdir /var/log/php</code> <code> sudo chown www-data /var/log/php</code> Restart Apache: <code> sudo systemctl restart apache2</code> Step 4: Configure Virtual Apache Host Create the virtual directories for your domain: <code>sudo mkdir -p /var/www/coolexample.com/public_html</code> Change the ownership to the Apache group: <code>sudo chown -R www-data:www-data /var/www/coolexample.com/public_html</code> This lets Apache modify files in your web directories. Change the directory's permissions so its files can be read from the internet: <code>sudo chmod -R 755 /var/www/coolexample.com/public_html</code> Create Virtual Host File: For the virtual host configuration file, we're going to copy Apache's default config file called 000-default.conf from the sites-available directory as a template. Copy the 000-default.conf file: <code> sudo cp /etc/apache2/sites-available/000-default.conf /etc/apache2/sites-available/coolexample.com.conf</code> Open your newly copied config file: <code>sudo vim /etc/apache2/sites-available/coolexample.com.conf</code> In the file, find DocumentRoot towards the beginning of the file, and update with your own domain: <code> DocumentRoot /var/www/coolexample.com/public_html</code> Below DocumentRoot, add these two lines: <code>ServerName http://www.coolexample.com</code> <code> ServerAlias coolexample.com</code> Save and close the file: <code> Press ESC then :wq!</code> Enable your virtual host: <code> sudo a2ensite coolexample.com.conf</code> Restart Apache: <code> sudo service apache2 restart</code> Log into where you bought your domain and point your domain name to your server. On Namecheap go to Domain List > Manage > Advanced DNS > Add new record <code> Type:NS Host:www Value: ns1.linode.com value auto</code> <code>Type:NS Host:www Value: ns2.linode.com value auto</code> <code>Type:NS Host:www Value: ns3.linode.com value auto</code> <code>Type:NS Host:www Value: ns4.linode.com value auto</code> <b>Step 5: </b> Check <a href="https://www.linode.com/docs/websites/cms/install-wordpress-on-ubuntu-16-04">THIS</a> guide <b>Note: </b> Once you have your wordpress set up you can use Amazon AWS - S3 to host your images. A CDN will help with the load time of your website. |
| json metadata | {"tags":["wordpress","vps","website","seo","webmaster"],"links":["https://www.linode.com/docs/websites/cms/install-wordpress-on-ubuntu-16-04"],"app":"steemit/0.1","format":"markdown"} |
| Transaction Info | Block #12149381/Trx 3f333f4389e56c36488c304075a8ab14012b8a99 |
View Raw JSON Data
{
  "trx_id": "3f333f4389e56c36488c304075a8ab14012b8a99",
  "block": 12149381,
  "trx_in_block": 4,
  "op_in_trx": 0,
  "virtual_op": 0,
  "timestamp": "2017-05-22T10:39:57",
  "op": [
    "comment",
    {
      "parent_author": "",
      "parent_permlink": "wordpress",
      "author": "tzman",
      "permlink": "how-to-setup-cheap-vps-to-preform-very-fast-with-wordpress",
      "title": "How to setup cheap VPS to preform very fast with Wordpress",
      "body": "I'm sure many of you are aware how quickly a website loads is a ranking factor for SEO. I don't think it is heavily weighted, but the fact of the matter is you can easily lose traffic because your site is taking too long to load. If you're doing PPC then you MUST MUST MUST have a quick loading website.\n\nNow, I'm no expert in the field, but I thought I would give a quick tutorial encase someone needed help. Shared hosting plans are bad. VPS is better, but managed can be quite costly $50+/monthly. Instead we will use an unmanaged VPS to host wordpress. Using this setup I have a site that loads under 1 second for $5/month\n\n<b>Step 1: </b>\nLet's get a VPS - linode.com The $5/month plan will be fine. Note: Select a linode that is closest to where your users live, that will help with website load speeds. \n\n<b>Step 2: </b>\nCheck <a href=\"https://www.linode.com/docs/websites/cms/install-wordpress-on-ubuntu-16-04\">THIS</a> guide\n\n<b>Step 3: </b>\nNow we install the LAMP Stack\n\nBefore you begin any installation, make sure that your software is up to date:\n<code>sudo apt-get update</code>\n\nInstall Apache:\n<code>sudo apt-get install apache2</code>\nSet Apache to start on server boot:\n<code>sudo update-rc.d apache2 defaults</code>\n\nInstall MySQL\n\nInstall the mysql-server package and choose a secure password when prompted:\n<code>sudo apt-get install mysql-server</code>\n\nCreate a MySQL Database\n\nLog into MySQL:\n<code>mysql -u root -p</code>\n\nEnter MySQL’s root password, and you’ll be presented with a MySQL prompt (most likely skip).\n\nIf no password was entered in the previous section, or if you want to change the root password, enter the following command. \n\nReplace password with a new root password:\n<code>ALTER USER 'root'@'localhost' IDENTIFIED WITH 'mysql_native_password' BY 'password';</code>\n\nCreate a database and a user with permissions for it. In this example, the database is called webdata, the user webuser, and password password:\n<code>CREATE DATABASE webdata;</code>\n<code>GRANT ALL ON webdata.* TO 'webuser' IDENTIFIED BY 'password';</code>\n\nExit MySQL:\n<code>quit</code>\n\n\n<b>PHP 7.0</b>\n\nInstall PHP, the PHP Extension and Application Repository, Apache support, and MySQL support:\n<code>sudo apt-get install php7.0 php-pear libapache2-mod-php7.0 php7.0-mysql</code>\n\nOptionally, install additional cURL, JSON, and CGI support:\n<code>sudo apt-get install php7.0-curl php7.0-json php7.0-cgi</code>\n\nCreate the log directory for PHP and give ownership to the Apache system user:\n\n<code> sudo mkdir /var/log/php</code>\n\n<code> sudo chown www-data /var/log/php</code>\n\n\nRestart Apache:\n<code> sudo systemctl restart apache2</code>\n\n\nStep 4: Configure Virtual Apache Host\n\nCreate the virtual directories for your domain:\n<code>sudo mkdir -p /var/www/coolexample.com/public_html</code>\n\n\nChange the ownership to the Apache group:\n\n<code>sudo chown -R www-data:www-data /var/www/coolexample.com/public_html</code>\n\n\nThis lets Apache modify files in your web directories.\nChange the directory's permissions so its files can be read from the internet:\n\n<code>sudo chmod -R 755 /var/www/coolexample.com/public_html</code>\n\n\nCreate Virtual Host File:\nFor the virtual host configuration file, we're going to copy Apache's default config file called 000-default.conf from the sites-available directory as a template.\n\nCopy the 000-default.conf file:\n\n<code> sudo cp /etc/apache2/sites-available/000-default.conf /etc/apache2/sites-available/coolexample.com.conf</code>\n\n\nOpen your newly copied config file:\n\n<code>sudo vim /etc/apache2/sites-available/coolexample.com.conf</code>\n\nIn the file, find DocumentRoot towards the beginning of the file, and update with your own domain:\n\n<code> DocumentRoot /var/www/coolexample.com/public_html</code>\n\nBelow DocumentRoot, add these two lines:\n\n<code>ServerName http://www.coolexample.com</code>\n\n<code> ServerAlias coolexample.com</code>\n\nSave and close the file:\n\n<code> Press ESC then :wq!</code>\n\nEnable your virtual host:\n\n<code> sudo a2ensite coolexample.com.conf</code>\n\nRestart Apache:\n\n<code> sudo service apache2 restart</code>\n\nLog into where you bought your domain and point your domain name to your server. On Namecheap go to\nDomain List > Manage > Advanced DNS > Add new record\n\n<code> Type:NS Host:www Value: ns1.linode.com value auto</code>\n\n<code>Type:NS Host:www Value: ns2.linode.com value auto</code>\n\n<code>Type:NS Host:www Value: ns3.linode.com value auto</code>\n\n<code>Type:NS Host:www Value: ns4.linode.com value auto</code>\n\n<b>Step 5: </b>\nCheck <a href=\"https://www.linode.com/docs/websites/cms/install-wordpress-on-ubuntu-16-04\">THIS</a> guide\n\n<b>Note: </b>\nOnce you have your wordpress set up you can use Amazon AWS - S3 to host your images. A CDN will help with the load time of your website.",
      "json_metadata": "{\"tags\":[\"wordpress\",\"vps\",\"website\",\"seo\",\"webmaster\"],\"links\":[\"https://www.linode.com/docs/websites/cms/install-wordpress-on-ubuntu-16-04\"],\"app\":\"steemit/0.1\",\"format\":\"markdown\"}"
    }
  ]
}Manabar
Voting Power100.00%
Downvote Power100.00%
Resource Credits100.00%
Reputation Progress0.00%
{
  "voting_manabar": {
    "current_mana": "8143659806",
    "last_update_time": 1779090303
  },
  "downvote_manabar": {
    "current_mana": 2035914951,
    "last_update_time": 1779090303
  },
  "rc_account": {
    "account": "tzman",
    "max_rc": "10164408779",
    "max_rc_creation_adjustment": {
      "amount": "2020748973",
      "nai": "@@000000037",
      "precision": 6
    },
    "rc_manabar": {
      "current_mana": "10164408779",
      "last_update_time": 1779090303
    }
  }
}
Account Metadata
| POSTING JSON METADATA | |
| profile | {"profile_image":"http://i.imgur.com/uytF9bN.png","name":"tzman","location":"Bosnia"} |
| JSON METADATA | |
| profile | {"profile_image":"http://i.imgur.com/uytF9bN.png","name":"tzman","location":"Bosnia"} |
{
  "posting_json_metadata": {
    "profile": {
      "profile_image": "http://i.imgur.com/uytF9bN.png",
      "name": "tzman",
      "location": "Bosnia"
    }
  },
  "json_metadata": {
    "profile": {
      "profile_image": "http://i.imgur.com/uytF9bN.png",
      "name": "tzman",
      "location": "Bosnia"
    }
  }
}
Auth Keys
Owner
Single Signature
Public Keys
STM4xwVE9g5MKvEpHR3miZAUit5yLCs1kCHcvw2GrYeyaZTpNF2wg1/1
Active
Single Signature
Public Keys
STM8TX553iA4CNe4yL7fnFiWFfXhFbG6hvzkd8Ei1PEtp5XRZCQdD1/1
Posting
Single Signature
Public Keys
STM8harBgF2v5xNzPY4G2KmuQXmNXgbj7Ygug1qsUmRDPyir5Q8e91/1
Memo
STM5TMZCogq9u3KHUQ6fVgvsQWtRqnmqwaNjb1qzqM1rDNfgiS6fo
{
  "owner": {
    "weight_threshold": 1,
    "account_auths": [],
    "key_auths": [
      [
        "STM4xwVE9g5MKvEpHR3miZAUit5yLCs1kCHcvw2GrYeyaZTpNF2wg",
        1
      ]
    ]
  },
  "active": {
    "weight_threshold": 1,
    "account_auths": [],
    "key_auths": [
      [
        "STM8TX553iA4CNe4yL7fnFiWFfXhFbG6hvzkd8Ei1PEtp5XRZCQdD",
        1
      ]
    ]
  },
  "posting": {
    "weight_threshold": 1,
    "account_auths": [],
    "key_auths": [
      [
        "STM8harBgF2v5xNzPY4G2KmuQXmNXgbj7Ygug1qsUmRDPyir5Q8e9",
        1
      ]
    ]
  },
  "memo": "STM5TMZCogq9u3KHUQ6fVgvsQWtRqnmqwaNjb1qzqM1rDNfgiS6fo"
}
Witness Votes
0 / 30
No active witness votes.
[]