VOTING POWER100.00%
DOWNVOTE POWER100.00%
RESOURCE CREDITS100.00%
REPUTATION PROGRESS15.64%
Net Worth
35.707USD
STEEM
0.002STEEM
SBD
69.362SBD
Own SP
27.672SP
Detailed Balance
| STEEM | ||
| balance | 0.002STEEM | STEEM |
| market_balance | 0.000STEEM | STEEM |
| savings_balance | 0.000STEEM | STEEM |
| reward_steem_balance | 0.000STEEM | STEEM |
| STEEM POWER | ||
| Own SP | 27.672SP | SP |
| Delegated Out | 0.000SP | SP |
| Delegation In | 0.000SP | SP |
| Effective Power | 27.672SP | SP |
| Reward SP (pending) | 0.000SP | SP |
| SBD | ||
| sbd_balance | 69.362SBD | SBD |
| sbd_conversions | 0.000SBD | SBD |
| sbd_market_balance | 0.000SBD | SBD |
| savings_sbd_balance | 0.000SBD | SBD |
| reward_sbd_balance | 0.000SBD | SBD |
{
  "balance": "0.002 STEEM",
  "savings_balance": "0.000 STEEM",
  "reward_steem_balance": "0.000 STEEM",
  "vesting_shares": "45059.950530 VESTS",
  "delegated_vesting_shares": "0.000000 VESTS",
  "received_vesting_shares": "0.000000 VESTS",
  "sbd_balance": "69.362 SBD",
  "savings_sbd_balance": "0.000 SBD",
  "reward_sbd_balance": "0.000 SBD",
  "conversions": []
}
Account Info
| name | jamthewriter |
| id | 43592 |
| rank | 67,444 |
| reputation | 374056740708 |
| created | 2016-08-01T14:18:27 |
| recovery_account | steem |
| proxy | None |
| post_count | 44 |
| comment_count | 0 |
| lifetime_vote_count | 0 |
| witnesses_voted_for | 0 |
| last_post | 2018-03-13T06:27:54 |
| last_root_post | 2018-03-13T06:27:54 |
| last_vote_time | 2018-02-22T10:06:54 |
| proxied_vsf_votes | 0, 0, 0, 0 |
| can_vote | 1 |
| voting_power | 9,800 |
| delayed_votes | 0 |
| balance | 0.002 STEEM |
| savings_balance | 0.000 STEEM |
| sbd_balance | 69.362 SBD |
| savings_sbd_balance | 0.000 SBD |
| vesting_shares | 45059.950530 VESTS |
| delegated_vesting_shares | 0.000000 VESTS |
| received_vesting_shares | 0.000000 VESTS |
| reward_vesting_balance | 0.000000 VESTS |
| vesting_balance | 0.000 STEEM |
| vesting_withdraw_rate | 0.000000 VESTS |
| next_vesting_withdrawal | 1969-12-31T23:59:59 |
| withdrawn | 0 |
| to_withdraw | 0 |
| withdraw_routes | 0 |
| savings_withdraw_requests | 0 |
| last_account_recovery | 1970-01-01T00:00:00 |
| reset_account | null |
| last_owner_update | 2018-01-29T10:57:12 |
| last_account_update | 2018-01-29T10:57:12 |
| mined | No |
| sbd_seconds | 115,011,939,600 |
| sbd_last_interest_payment | 2018-03-08T03:39:48 |
| savings_sbd_last_interest_payment | 1970-01-01T00:00:00 |
{
  "id": 43592,
  "name": "jamthewriter",
  "owner": {
    "weight_threshold": 1,
    "account_auths": [],
    "key_auths": [
      [
        "STM8ewiCZkzjrn1vod2PrzEjNabUwgFeJt2ihbetj1HQVGhtu9Qzs",
        1
      ]
    ]
  },
  "active": {
    "weight_threshold": 1,
    "account_auths": [],
    "key_auths": [
      [
        "STM5jvyQvHXhgFEDMfcYiZD78fKavfdX5iSHubgUa9GkF9ADGc9tT",
        1
      ]
    ]
  },
  "posting": {
    "weight_threshold": 1,
    "account_auths": [],
    "key_auths": [
      [
        "STM84cWGTYdguKr79SbyRzQT3qVUmQvHXropQxjHYTKRBKuRxUfDP",
        1
      ]
    ]
  },
  "memo_key": "STM8BHgKzNAvZaqYS8WZkXooBvLhxrjNNrVhupBwCXsrEd6LgVAFB",
  "json_metadata": "{\"profile\":{\"profile_image\":\"https://i.imgur.com/z7CFLQR.jpg\",\"cover_image\":\"https://assets.rpgsite.net/images/images/000/057/297/original/MHW-170828-022.jpg\",\"name\":\"Jam\",\"about\":\"Writing, lifting, playing, writing. \",\"location\":\"Lapu-Lapu City, Philippines\",\"website\":\"http://jamalpollok.com\"}}",
  "posting_json_metadata": "{\"profile\":{\"profile_image\":\"https://i.imgur.com/z7CFLQR.jpg\",\"cover_image\":\"https://assets.rpgsite.net/images/images/000/057/297/original/MHW-170828-022.jpg\",\"name\":\"Jam\",\"about\":\"Writing, lifting, playing, writing. \",\"location\":\"Lapu-Lapu City, Philippines\",\"website\":\"http://jamalpollok.com\"}}",
  "proxy": "",
  "last_owner_update": "2018-01-29T10:57:12",
  "last_account_update": "2018-01-29T10:57:12",
  "created": "2016-08-01T14:18:27",
  "mined": false,
  "recovery_account": "steem",
  "last_account_recovery": "1970-01-01T00:00:00",
  "reset_account": "null",
  "comment_count": 0,
  "lifetime_vote_count": 0,
  "post_count": 44,
  "can_vote": true,
  "voting_manabar": {
    "current_mana": 9800,
    "last_update_time": 1519294014
  },
  "downvote_manabar": {
    "current_mana": 0,
    "last_update_time": 1470061107
  },
  "voting_power": 9800,
  "balance": "0.002 STEEM",
  "savings_balance": "0.000 STEEM",
  "sbd_balance": "69.362 SBD",
  "sbd_seconds": "115011939600",
  "sbd_seconds_last_update": "2018-03-27T08:39:48",
  "sbd_last_interest_payment": "2018-03-08T03:39:48",
  "savings_sbd_balance": "0.000 SBD",
  "savings_sbd_seconds": "0",
  "savings_sbd_seconds_last_update": "1970-01-01T00:00:00",
  "savings_sbd_last_interest_payment": "1970-01-01T00:00:00",
  "savings_withdraw_requests": 0,
  "reward_sbd_balance": "0.000 SBD",
  "reward_steem_balance": "0.000 STEEM",
  "reward_vesting_balance": "0.000000 VESTS",
  "reward_vesting_steem": "0.000 STEEM",
  "vesting_shares": "45059.950530 VESTS",
  "delegated_vesting_shares": "0.000000 VESTS",
  "received_vesting_shares": "0.000000 VESTS",
  "vesting_withdraw_rate": "0.000000 VESTS",
  "next_vesting_withdrawal": "1969-12-31T23:59:59",
  "withdrawn": 0,
  "to_withdraw": 0,
  "withdraw_routes": 0,
  "curation_rewards": 0,
  "posting_rewards": 32444,
  "proxied_vsf_votes": [
    0,
    0,
    0,
    0
  ],
  "witnesses_voted_for": 0,
  "last_post": "2018-03-13T06:27:54",
  "last_root_post": "2018-03-13T06:27:54",
  "last_vote_time": "2018-02-22T10:06:54",
  "post_bandwidth": 10000,
  "pending_claimed_accounts": 0,
  "vesting_balance": "0.000 STEEM",
  "reputation": "374056740708",
  "transfer_history": [],
  "market_history": [],
  "post_history": [],
  "vote_history": [],
  "other_history": [],
  "witness_votes": [],
  "tags_usage": [],
  "guest_bloggers": [],
  "rank": 67444
}
Withdraw Routes
| Incoming | Outgoing |
|---|---|
Empty | Empty |
{
  "incoming": [],
  "outgoing": []
}From Date
To Date
2019/08/01 15:56:06
2019/08/01 15:56:06
| parent author | jamthewriter |
| parent permlink | how-to-charge-blade-in-mh4u-and-mhw |
| author | steemitboard |
| permlink | steemitboard-notify-jamthewriter-20190801t155605000z |
| title | |
| body | Congratulations @jamthewriter! You received a personal award! <table><tr><td>https://steemitimages.com/70x70/http://steemitboard.com/@jamthewriter/birthday3.png</td><td>Happy Birthday! - You are on the Steem blockchain for 3 years!</td></tr></table> <sub>_You can view [your badges on your Steem Board](https://steemitboard.com/@jamthewriter) and compare to others on the [Steem Ranking](https://steemitboard.com/ranking/index.php?name=jamthewriter)_</sub> ###### [Vote for @Steemitboard as a witness](https://v2.steemconnect.com/sign/account-witness-vote?witness=steemitboard&approve=1) to get one more award and increased upvotes! |
| json metadata | {"image":["https://steemitboard.com/img/notify.png"]} |
| Transaction Info | Block #35176298/Trx 09883515b6e7bb77f8c032853577366eb6742af4 |
View Raw JSON Data
{
  "trx_id": "09883515b6e7bb77f8c032853577366eb6742af4",
  "block": 35176298,
  "trx_in_block": 5,
  "op_in_trx": 0,
  "virtual_op": 0,
  "timestamp": "2019-08-01T15:56:06",
  "op": [
    "comment",
    {
      "parent_author": "jamthewriter",
      "parent_permlink": "how-to-charge-blade-in-mh4u-and-mhw",
      "author": "steemitboard",
      "permlink": "steemitboard-notify-jamthewriter-20190801t155605000z",
      "title": "",
      "body": "Congratulations @jamthewriter! You received a personal award!\n\n<table><tr><td>https://steemitimages.com/70x70/http://steemitboard.com/@jamthewriter/birthday3.png</td><td>Happy Birthday! - You are on the Steem blockchain for 3 years!</td></tr></table>\n\n<sub>_You can view [your badges on your Steem Board](https://steemitboard.com/@jamthewriter) and compare to others on the [Steem Ranking](https://steemitboard.com/ranking/index.php?name=jamthewriter)_</sub>\n\n\n###### [Vote for @Steemitboard as a witness](https://v2.steemconnect.com/sign/account-witness-vote?witness=steemitboard&approve=1) to get one more award and increased upvotes!",
      "json_metadata": "{\"image\":[\"https://steemitboard.com/img/notify.png\"]}"
    }
  ]
}2018/05/14 03:42:36
2018/05/14 03:42:36
| parent author | jamthewriter |
| parent permlink | how-to-charge-blade-in-mh4u-and-mhw |
| author | tarifhossain757 |
| permlink | re-jamthewriter-how-to-charge-blade-in-mh4u-and-mhw-20180514t034230145z |
| title | |
| body | good |
| json metadata | {"tags":["monsterhunter"],"app":"steemit/0.1"} |
| Transaction Info | Block #22412363/Trx c3104ce40b94b148ebc35447bbf1ad9400950740 |
View Raw JSON Data
{
  "trx_id": "c3104ce40b94b148ebc35447bbf1ad9400950740",
  "block": 22412363,
  "trx_in_block": 26,
  "op_in_trx": 0,
  "virtual_op": 0,
  "timestamp": "2018-05-14T03:42:36",
  "op": [
    "comment",
    {
      "parent_author": "jamthewriter",
      "parent_permlink": "how-to-charge-blade-in-mh4u-and-mhw",
      "author": "tarifhossain757",
      "permlink": "re-jamthewriter-how-to-charge-blade-in-mh4u-and-mhw-20180514t034230145z",
      "title": "",
      "body": "good",
      "json_metadata": "{\"tags\":[\"monsterhunter\"],\"app\":\"steemit/0.1\"}"
    }
  ]
}tarifhossain757upvoted (100.00%) @jamthewriter / how-to-charge-blade-in-mh4u-and-mhw2018/05/14 03:42:12
tarifhossain757upvoted (100.00%) @jamthewriter / how-to-charge-blade-in-mh4u-and-mhw
2018/05/14 03:42:12
| voter | tarifhossain757 |
| author | jamthewriter |
| permlink | how-to-charge-blade-in-mh4u-and-mhw |
| weight | 10000 (100.00%) |
| Transaction Info | Block #22412355/Trx 35b9dfb461913b3c3ec3cafcb27406a1c66346db |
View Raw JSON Data
{
  "trx_id": "35b9dfb461913b3c3ec3cafcb27406a1c66346db",
  "block": 22412355,
  "trx_in_block": 30,
  "op_in_trx": 0,
  "virtual_op": 0,
  "timestamp": "2018-05-14T03:42:12",
  "op": [
    "vote",
    {
      "voter": "tarifhossain757",
      "author": "jamthewriter",
      "permlink": "how-to-charge-blade-in-mh4u-and-mhw",
      "weight": 10000
    }
  ]
}senghbehupvoted (100.00%) @jamthewriter / dealing-the-most-damage-in-monster-hunter-world2018/03/29 05:28:21
senghbehupvoted (100.00%) @jamthewriter / dealing-the-most-damage-in-monster-hunter-world
2018/03/29 05:28:21
| voter | senghbeh |
| author | jamthewriter |
| permlink | dealing-the-most-damage-in-monster-hunter-world |
| weight | 10000 (100.00%) |
| Transaction Info | Block #21090569/Trx 279045a53540235934fcea03c41da2d7aaf97a87 |
View Raw JSON Data
{
  "trx_id": "279045a53540235934fcea03c41da2d7aaf97a87",
  "block": 21090569,
  "trx_in_block": 24,
  "op_in_trx": 0,
  "virtual_op": 0,
  "timestamp": "2018-03-29T05:28:21",
  "op": [
    "vote",
    {
      "voter": "senghbeh",
      "author": "jamthewriter",
      "permlink": "dealing-the-most-damage-in-monster-hunter-world",
      "weight": 10000
    }
  ]
}jamthewriterclaimed reward balance: 0.002 STEEM, 0.061 SBD, 0.045 SP2018/03/27 08:39:48
jamthewriterclaimed reward balance: 0.002 STEEM, 0.061 SBD, 0.045 SP
2018/03/27 08:39:48
| account | jamthewriter |
| reward steem | 0.002 STEEM |
| reward sbd | 0.061 SBD |
| reward vests | 73.475311 VESTS |
| Transaction Info | Block #21036819/Trx 19c6b2a4f57c43bb73c64849fd8ecee067398dd2 |
View Raw JSON Data
{
  "trx_id": "19c6b2a4f57c43bb73c64849fd8ecee067398dd2",
  "block": 21036819,
  "trx_in_block": 27,
  "op_in_trx": 0,
  "virtual_op": 0,
  "timestamp": "2018-03-27T08:39:48",
  "op": [
    "claim_reward_balance",
    {
      "account": "jamthewriter",
      "reward_steem": "0.002 STEEM",
      "reward_sbd": "0.061 SBD",
      "reward_vests": "73.475311 VESTS"
    }
  ]
}jamthewriterreceived 0.002 STEEM, 0.061 SBD, 0.045 SP author reward for @jamthewriter / how-to-charge-blade-in-mh4u-and-mhw2018/03/20 06:27:54
jamthewriterreceived 0.002 STEEM, 0.061 SBD, 0.045 SP author reward for @jamthewriter / how-to-charge-blade-in-mh4u-and-mhw
2018/03/20 06:27:54
| author | jamthewriter |
| permlink | how-to-charge-blade-in-mh4u-and-mhw |
| sbd payout | 0.061 SBD |
| steem payout | 0.002 STEEM |
| vesting payout | 73.475311 VESTS |
| Transaction Info | Block #20833431/Virtual Operation #18 |
View Raw JSON Data
{
  "trx_id": "0000000000000000000000000000000000000000",
  "block": 20833431,
  "trx_in_block": 4294967295,
  "op_in_trx": 0,
  "virtual_op": 18,
  "timestamp": "2018-03-20T06:27:54",
  "op": [
    "author_reward",
    {
      "author": "jamthewriter",
      "permlink": "how-to-charge-blade-in-mh4u-and-mhw",
      "sbd_payout": "0.061 SBD",
      "steem_payout": "0.002 STEEM",
      "vesting_payout": "73.475311 VESTS"
    }
  ]
}2018/03/13 14:32:00
2018/03/13 14:32:00
| parent author | jamthewriter |
| parent permlink | how-to-charge-blade-in-mh4u-and-mhw |
| author | houseofwenday |
| permlink | re-how-to-charge-blade-in-mh4u-and-mhw-0 |
| title | |
| body | jamthewriter looks like you copy / pasted some content of this post from this article:<br><a href="http://bit.ly/2FDevmY " >Stoner Sunday - 03/11/18</a><br>Please consider to avoid plagiarism!<br> |
| json metadata | |
| Transaction Info | Block #20641664/Trx 70a04eaf511292563b908c5e1be0c35814bf8032 |
View Raw JSON Data
{
  "trx_id": "70a04eaf511292563b908c5e1be0c35814bf8032",
  "block": 20641664,
  "trx_in_block": 13,
  "op_in_trx": 0,
  "virtual_op": 0,
  "timestamp": "2018-03-13T14:32:00",
  "op": [
    "comment",
    {
      "parent_author": "jamthewriter",
      "parent_permlink": "how-to-charge-blade-in-mh4u-and-mhw",
      "author": "houseofwenday",
      "permlink": "re-how-to-charge-blade-in-mh4u-and-mhw-0",
      "title": "",
      "body": "jamthewriter looks like you copy / pasted some content of this post from this article:<br><a href=\"http://bit.ly/2FDevmY\n\" >Stoner Sunday - 03/11/18</a><br>Please consider to avoid plagiarism!<br>",
      "json_metadata": ""
    }
  ]
}michelnillesupvoted (100.00%) @jamthewriter / how-to-charge-blade-in-mh4u-and-mhw2018/03/13 13:36:39
michelnillesupvoted (100.00%) @jamthewriter / how-to-charge-blade-in-mh4u-and-mhw
2018/03/13 13:36:39
| voter | michelnilles |
| author | jamthewriter |
| permlink | how-to-charge-blade-in-mh4u-and-mhw |
| weight | 10000 (100.00%) |
| Transaction Info | Block #20640558/Trx f66c739635da8ce90ddaa9d5d50c484a7a84c273 |
View Raw JSON Data
{
  "trx_id": "f66c739635da8ce90ddaa9d5d50c484a7a84c273",
  "block": 20640558,
  "trx_in_block": 61,
  "op_in_trx": 0,
  "virtual_op": 0,
  "timestamp": "2018-03-13T13:36:39",
  "op": [
    "vote",
    {
      "voter": "michelnilles",
      "author": "jamthewriter",
      "permlink": "how-to-charge-blade-in-mh4u-and-mhw",
      "weight": 10000
    }
  ]
}minnowlifeupvoted (100.00%) @jamthewriter / how-to-charge-blade-in-mh4u-and-mhw2018/03/13 12:18:24
minnowlifeupvoted (100.00%) @jamthewriter / how-to-charge-blade-in-mh4u-and-mhw
2018/03/13 12:18:24
| voter | minnowlife |
| author | jamthewriter |
| permlink | how-to-charge-blade-in-mh4u-and-mhw |
| weight | 10000 (100.00%) |
| Transaction Info | Block #20638995/Trx dd5f7ee416e30ca0a7a3e96daae68d8eb29fce9b |
View Raw JSON Data
{
  "trx_id": "dd5f7ee416e30ca0a7a3e96daae68d8eb29fce9b",
  "block": 20638995,
  "trx_in_block": 27,
  "op_in_trx": 0,
  "virtual_op": 0,
  "timestamp": "2018-03-13T12:18:24",
  "op": [
    "vote",
    {
      "voter": "minnowlife",
      "author": "jamthewriter",
      "permlink": "how-to-charge-blade-in-mh4u-and-mhw",
      "weight": 10000
    }
  ]
}jazzheroupvoted (100.00%) @jamthewriter / how-to-charge-blade-in-mh4u-and-mhw2018/03/13 12:18:18
jazzheroupvoted (100.00%) @jamthewriter / how-to-charge-blade-in-mh4u-and-mhw
2018/03/13 12:18:18
| voter | jazzhero |
| author | jamthewriter |
| permlink | how-to-charge-blade-in-mh4u-and-mhw |
| weight | 10000 (100.00%) |
| Transaction Info | Block #20638993/Trx 61076a67e2ed84ac8524d6337a1ea3a9f9cb31be |
View Raw JSON Data
{
  "trx_id": "61076a67e2ed84ac8524d6337a1ea3a9f9cb31be",
  "block": 20638993,
  "trx_in_block": 23,
  "op_in_trx": 0,
  "virtual_op": 0,
  "timestamp": "2018-03-13T12:18:18",
  "op": [
    "vote",
    {
      "voter": "jazzhero",
      "author": "jamthewriter",
      "permlink": "how-to-charge-blade-in-mh4u-and-mhw",
      "weight": 10000
    }
  ]
}sensationupvoted (100.00%) @jamthewriter / how-to-charge-blade-in-mh4u-and-mhw2018/03/13 07:55:24
sensationupvoted (100.00%) @jamthewriter / how-to-charge-blade-in-mh4u-and-mhw
2018/03/13 07:55:24
| voter | sensation |
| author | jamthewriter |
| permlink | how-to-charge-blade-in-mh4u-and-mhw |
| weight | 10000 (100.00%) |
| Transaction Info | Block #20633739/Trx 1152d3549f822fa40696426ef0d5a9f7a0984ae8 |
View Raw JSON Data
{
  "trx_id": "1152d3549f822fa40696426ef0d5a9f7a0984ae8",
  "block": 20633739,
  "trx_in_block": 23,
  "op_in_trx": 0,
  "virtual_op": 0,
  "timestamp": "2018-03-13T07:55:24",
  "op": [
    "vote",
    {
      "voter": "sensation",
      "author": "jamthewriter",
      "permlink": "how-to-charge-blade-in-mh4u-and-mhw",
      "weight": 10000
    }
  ]
}jamthewriterpublished a new post: how-to-charge-blade-in-mh4u-and-mhw2018/03/13 06:27:54
jamthewriterpublished a new post: how-to-charge-blade-in-mh4u-and-mhw
2018/03/13 06:27:54
| parent author | |
| parent permlink | monsterhunter |
| author | jamthewriter |
| permlink | how-to-charge-blade-in-mh4u-and-mhw |
| title | How to Charge Blade (in MH4U and MHW) |
| body | When I first picked up a copy of Monster Hunter 4 Ultimate, I gave the game a shot without any previous knowledge or tutorials. I tried a handful of weapons, eventually landing on the Insect Glaive, and after bumbling my way through a few quests, I hit a wall and gave up. It took a few months until I was reminded of the game again when looking for something to play with a friend. This time, I prepared. I read up and watched videos, and took the time to go through each individual weapon to find something I liked to play. I eventually landed on the greatsword, because of its simplicity and sheer killing power. But when I began to get bored of it, I decided to dabble with some of the more complicated weapons. In MH4U, there are few melee weapons more complicated than the Charge Blade. It's an over-sized sword and shield, with the ability to morph into a giant double-sided axe, the shield serving as an axe-head. It's mechanic revolves around charging energy in the sword through attacks, then storing that energy into the shield, and using the axe mode to discharge said energy back into the monster. It's a fluid, cyclical weapon with outstanding damage potential and incredible defense, alongside a very high skill ceiling for beginning players. After a hundred hours and several hundred uses of the Charge Blade, it clicked with me. And nearly a thousand hours of gameplay later, not one of the other weapons in Monster Hunter gives me as much satisfaction to use effectively. But therein lies the key. Efficiency. Without much of an explanation, the Charge Blade starts off as a clunky and needlessly complicated weapon. There's much to play with, but no clear sign of how, or when. Understanding the Charge Blade can turn you into a freakish killing machine, effectively stun-locking monsters and eviscerating them in minutes, in both MH4U and MHW. While the weapon has been made much stronger due to a simple change in mechanics, it still takes some skill to use effectively - and today, we'll go through all the ins and outs of using the Charge Blade. ## Controlling the Charge Blade _For the sake of this guide, I'll refer to X (3DS)/Triangle (PS4) as the primary attack button, or attack 1, and A/Circle as the secondary attack button, or attack 2._ The Charge Blade starts off as a sword and shield. Hitting attack 1 thrice gives you the basic combo - two sword slashes, and a roundhouse slash. In-between every attack, hitting attack 1 and 2 at the same time gives you a shield bash. Holding attack 2 gives you a charged sword slash - your character slowly pulls the sword backward, and after a slight flash, letting go of attack 2 gives you the most sword charge in a single attack. With the evade button, you can sidestep after every attack, positioning around the monster to evade attacks and continue slashing. However, you do have a shield. R2 is your block, and on its own, the shield's blocking power is akin to a greatsword. Once your sword glows red (your phials will glow red, too), hitting R2 and attack 2 simultaneously will store the sword's charge in your shield's phials. A red charge stores 5 phials. A yellow charge stores 3. Overcharging your sword will cause you to bounce, indicated by a glowing sword. 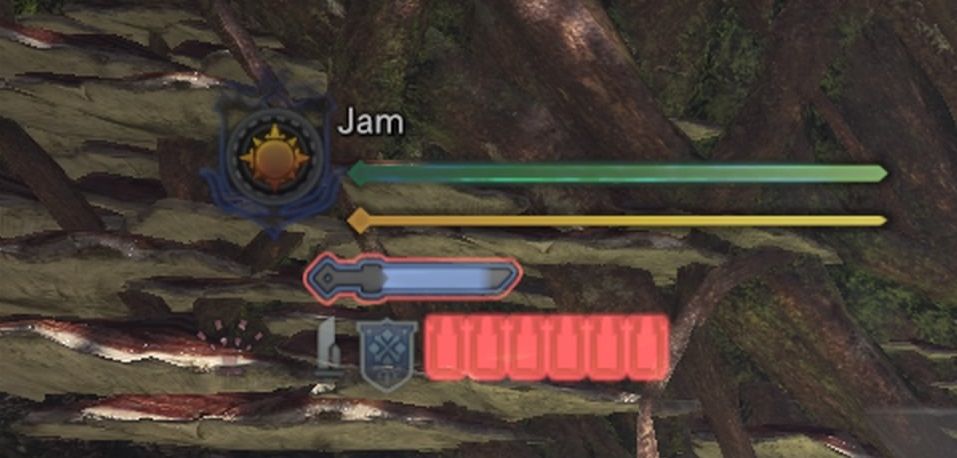 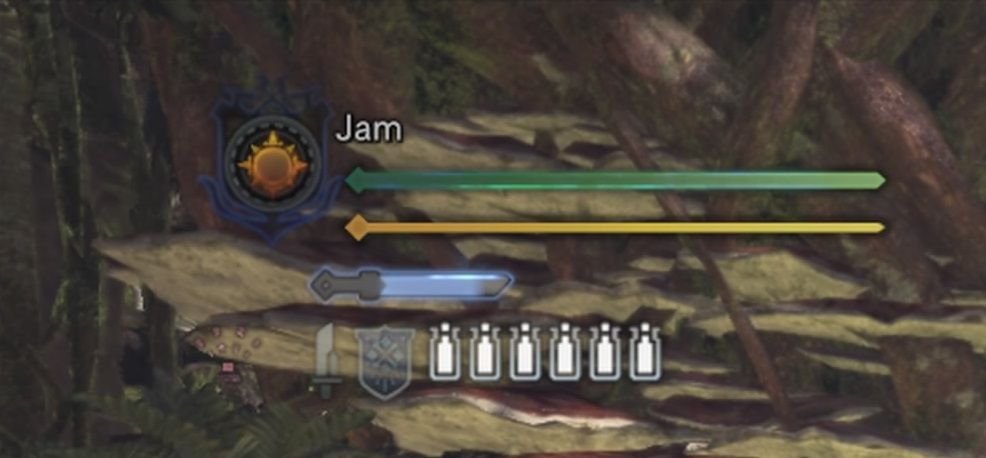 In theory, this is where you morph to axe mode and start discharging the energy in your phials. But this is inefficient. Never use an unboosted axe. ### Red Shield Instead, while in sword and shield mode, give the air a whack with attack 1, then hit attack 1 and 2 simultaenously for a shield bash, then hit that combination again to go into an Amped Elemental Discharge. That's: Attack 1 > Attack 1+2 > Attack 1+2 Your AED is usually locked behind an axe combo, but this is the fastest way to get to it, and allows you to keep your phials. But instead of running its course, cancel the animation with R2. It might take a few tries to get the button combination right, but after some time you should be able to cancel an Amped Elemental Discharge into an Elemental Roundhouse. Not only will this deal a little bit of phial damage (impact damage), but you will also use up all your stored phials to charge your shield. It's red now. This effect lasts 30 seconds per phial, for a total of two and a half minutes with five phials.  A red shield does several things for you. First, it improves your block significantly, bringing it up to par with a lance. Second, it changes your AED into an SAED, which is a slightly longer animation but deals a significant amount of damage, while dispersing all your phials in a single straight line. 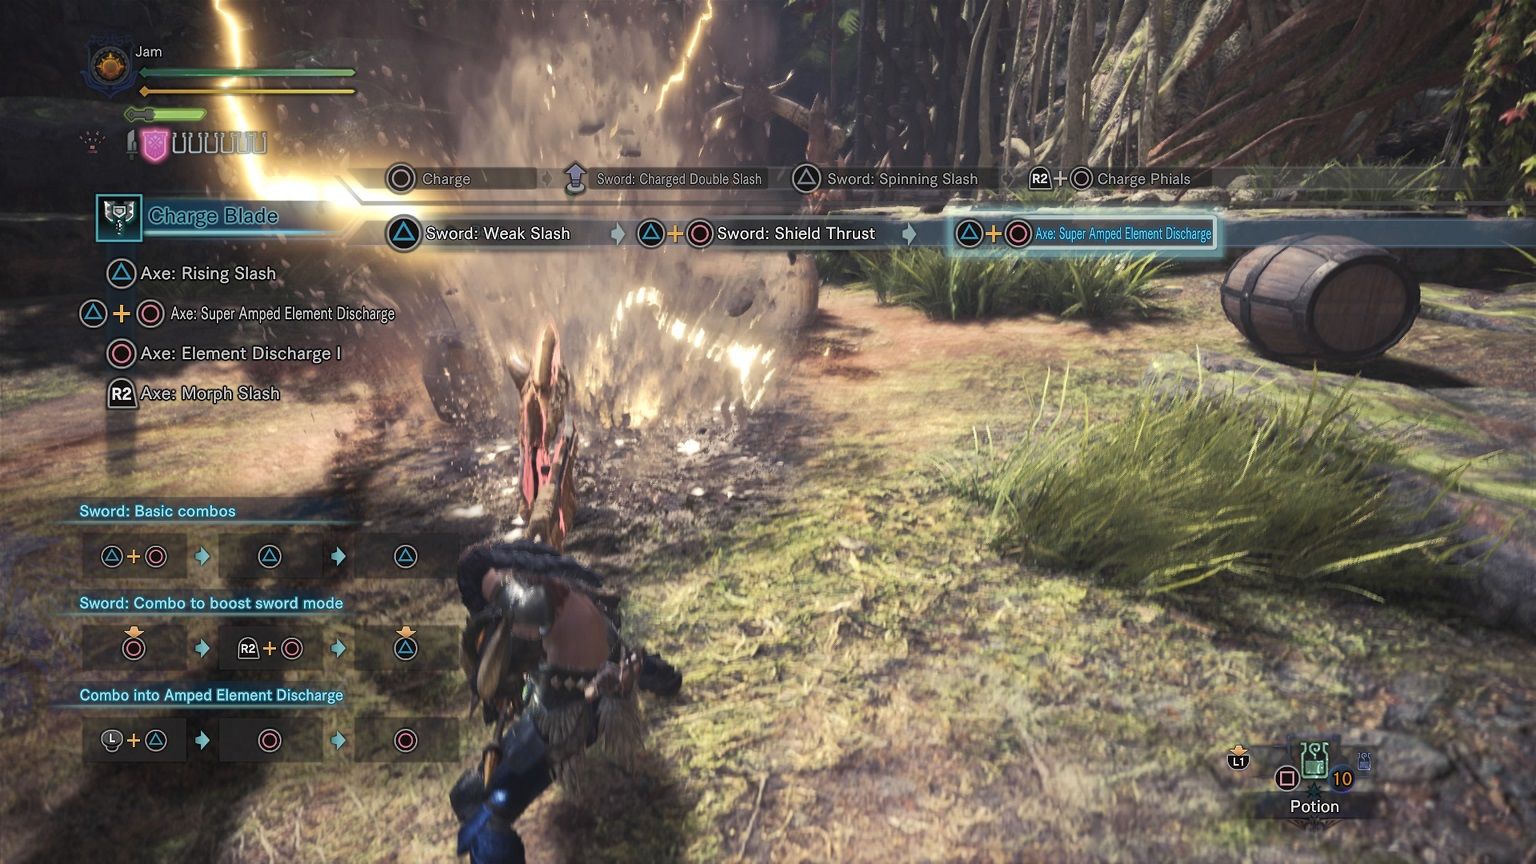 To reiterate. Now that you have a red shield, attack your target to recharge your sword. Use the prolonged attack 2, the charged sword slash. From there, store your charge in your shield as phials. Repeat the shortcut combo: Attack 1 > Attack 1+2 > Attack 1+2 This time, your sword and shield will morph directly into an SAED, discharging everything. In 4U, this uses up your red shield charge, making it an ineffective attack for general gameplay, usually only useful for waking up a sleeping target, or finishing off a monster close to death. For World, however, this would be your bread-and-butter, as SAEDs no longer consume your shield charge. You can cancel an SAED in two ways. Hitting R2 at the start of the animation consumes your phials and reups your shield charge. Hitting attack 1 while pulling back on the analog stick (in the opposite direction of your hunter) will turn your SAED into an AED. This is invaluable in 4U, for keeping your red shield while making use of the Charge Blade's best attack. ### Axe Mode Aside from these finisher moves, the Charge Blade has other tools in its arsenal. While in sword and shield mode, hit guard and attack 1 to morph into axe mode. Attack 1 gives you a straightforward axe combo, relatively useless aside from checking your distance - for example, while in axe mode, you can hold the analog stick forward and hit attack 1 to do an overhead axe chop, allowing you to gauge the distance between yourself and the monster for an aimed finisher. Attack 2 lets you go into elemental discharge 1, then elemental discharge 2, and finally, the third hit is your AED/SAED. In 4U, this is a viable mode of attack, as it deals a decent amount of axe damage and KO damage while taking relatively little time. In World, the motion values for these axe attacks have been significantly nerfed, making it much better to simply stay in sword and shield mode until you're ready for a finisher. All phial attacks, including the ED combo, AED/SAED, elemental roundhouse (shield charge slash) and shield bash deal impact damage, and never bounce. ### Positioning Tools In 4U, positioning was limited to rolling in axe mode, and utilizing a sidestep + roundhouse slash after an attack. For example, you could use attack 1 + 2 from idle to do an advancing slash, then go into a shield bash, then sidestep to get to a better position, and hit attack 1 for a quick roundhouse. World greatly expands the mobility of the Charge Blade, namely with a single new attack in the form of a sliding slash. Moving the analog stick and hitting attack 2 repositions your character with a stylish slide-and-slash - this does pitiful damage, but allows you to easily slide away from a monster in order to get a better hit with a finisher. A common scenario is charging up on a downed monster with attack 2, using the sliding slash to get away from the head, storing your phials, then shield bashing into an SAED. The slide is just enough distance to typically get back in range with a shield bash to hit the monster's head with the axe during the SAED, for massive damage. ### Guard Points One constant within both games is the importance of taking proper advantage of the Charge Blade's guarding capabilities for offense. The shield is not there to block - it's there to counter. Any attack that deals minimal knockback can be countered with a number of things. Hitting attack 1 right after a blocked attack with minimal knockback will let you morph into axe mode. Hitting evade gives you a roll/sidestep. Hitting and holding attack 2 lets you combo into the charged slash. Hitting attack 1 and 2, however, lets you immediately combo into the SAED. This is how the Charge Blade counters attacks, by blocking and immediately launching into a finisher. 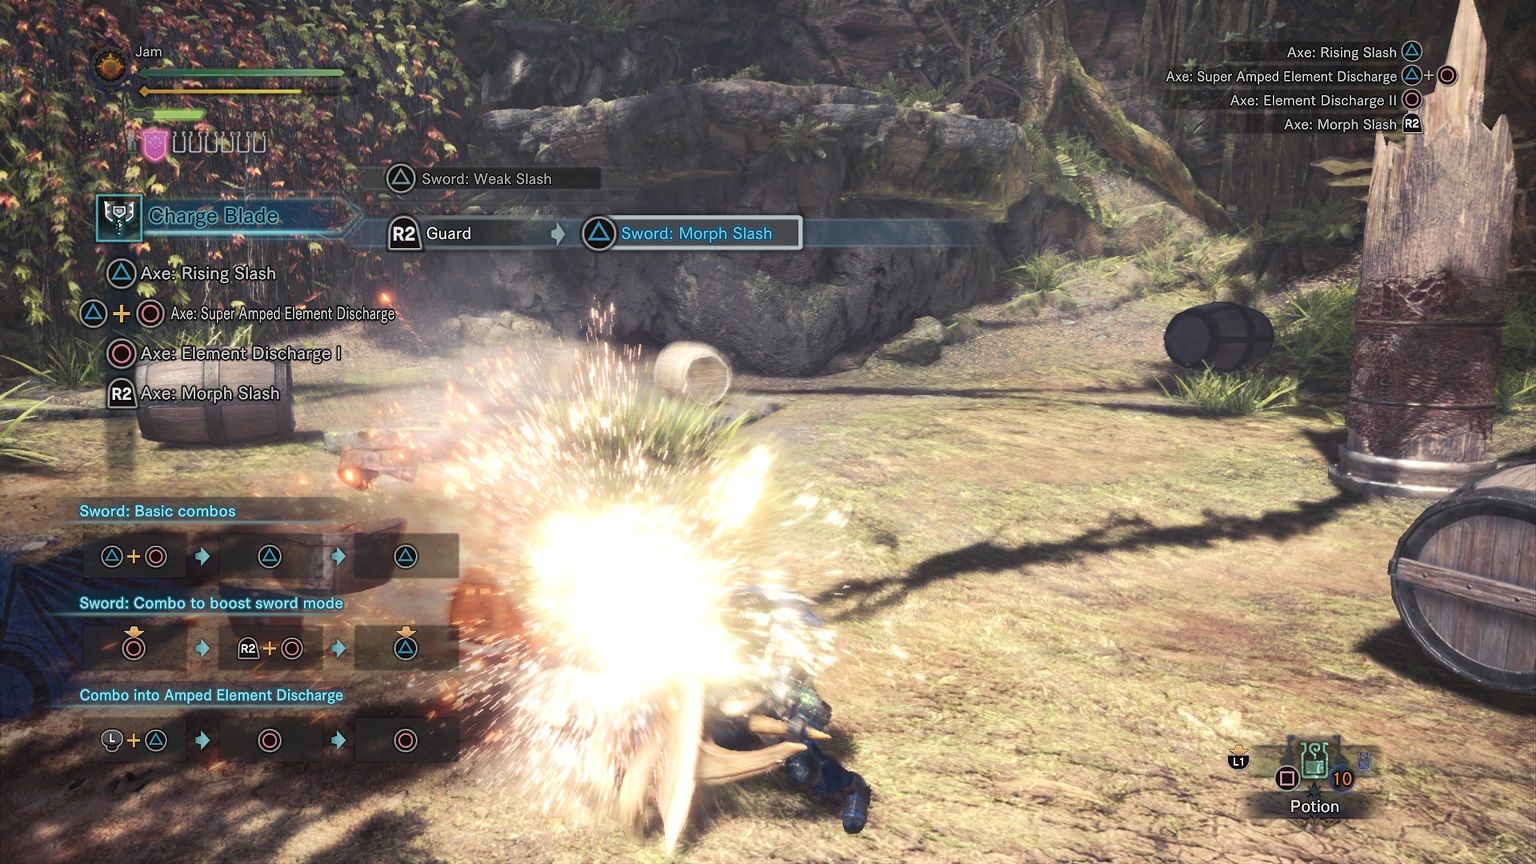 Guard Points allow you to effectively increase the guarding power of the Charge Blade, but unlike a regular block, they have a limited window. While most attacks deal some knockback even with a red shield, some deal a much more significant amount - a guard point allows you to mitigate a large amount of that knockback, thus creating more openings to counter. The Guard Point is simply guard + attack 1. The axe morph. The beginning of this animation causes your hunter to put their shield in front of them while sheathing their sword into it for the morph, creating a small guarding window. Once an attack connects with this guard, you can counter into a full morph with attack 1 or a finisher with attack 1 and 2. There is another guard point at the end of the elemental roundslash, or whenever you morph back from axe mode into sword and shield. This is a longer guard window, but it's harder to time because it takes more foresight. In MH4U, inputting the axe morph incorrectly will result in a different morphing animation without a guard point. To avoid this, set your kick button to start in the options menu, and use start to axe morph. This will result in a guaranteed guard point. Axe morphing after a sword slash always results in a guard point. ### AEDs vs SAEDs Between 4U and World, the primary difference is the addition of a change in how the shield charge works. In 4U, an SAED consumes the shield charge. In World, it does not. Thus, the gameplay changes significantly. 4U Charge Blade users must prioritize using attacks as openings to guard point and AED on the head. Two consecutive AEDs cause a KO in most monsters, giving a large opening for more phial charging and extra damage, through the ED > AED combo. It's imperative to learn to guard point roars and charges, as these typically offer the greatest openings for an AED to the head. By moving the analog stick during the AED animation, you can minimally adjust how the AED will land. This is called headsniping. In World, you only need to ensure that your axe lands on the monster during an SAED, and that preferably most of your phials hit the monster. Aiming for the head is no longer necessary, as most SAEDs cause a significant flinch or trip. That being said, it is a nice extra for some KO damage. AEDs still have their use, especially on smaller monsters like Kirin, where it is much more effective to concentrate axe and phial damage on the monster's head exclusively, and where its small size makes an SAED of more than three phials mostly useless. ### Charged Sword World adds a new move to the Charge Blade's arsenal, allowing for more impact damage and natural mind's eye (no bouncing) on sword and shield mode. Holding attack 1 immediately after storing your phials while in red shield will charge your sword. You need a charged shield to charge your sword, and the effect lasts 30 seconds, taking 30 seconds away from your shield's charge. It's useful on monsters that cause tremendous bouncing (and on monsters with special armor mechanics, like Lavasioth/Kirin/Radobaan, but be mindful that you should focus on monster weakzones (that never bounce) anyway.  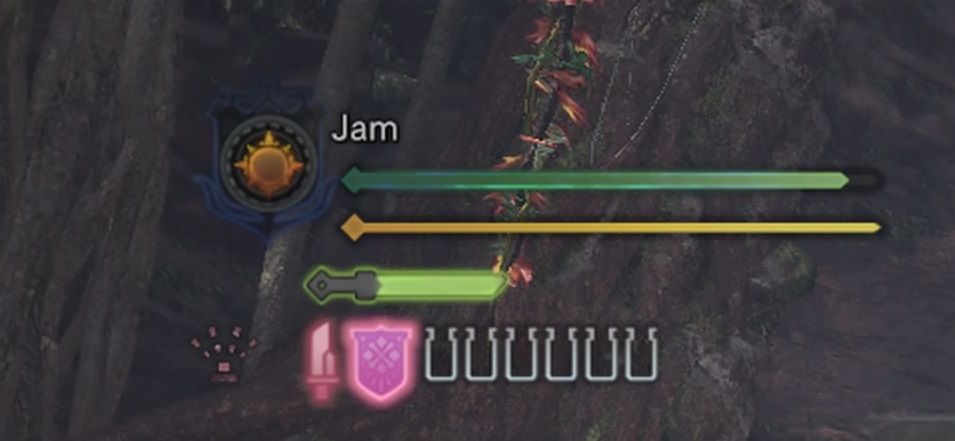 ## Impact Phials vs. Element Phials Charge Blades come in two flavors: impact phials and element phials. In all games with this weapon (including Monster Hunter Generations), impact phial Charge Blades are superior. In World, this is more true than ever due to capped elemental damage values and the existence of several raw-boosting armor skills. Impact phials ignore hitzones, dealing a set amount of damage dependant on a weapon's total raw, the Felyne Bombardier food skill and the Artillery armor skill. Affinity and sharpness are ignored. Phials deal about 40-50% of an SAED's total attack, making them incredibly significant, and making raw the single most important thing in choosing a Charge Blade. This is why the Akantor Severance is best in most situations in 4U, losing out to the Ceadeus Regalia only against monsters with water weakness. In World, the Diablos Tyrannis II is the best Charge Blade, despite negative affinity and very little blue sharpness. There are times when an element phial Charge Blade can be viable, but these times are hard to come by. Element phials are more effective in 4U, specifically against larger monsters with high elemental weaknesses, like Ukanlos, Akantor, Gravios and Basarios. With perfect play and a very specific build, an element phial Charge Blade can tear through other monsters with weak hitzones. But the versatility of impact phials makes them better in most cases, while the Diablos Charge Blade is flat-out unchallenged in World. That being said, an elemental SAED is quite the sight. 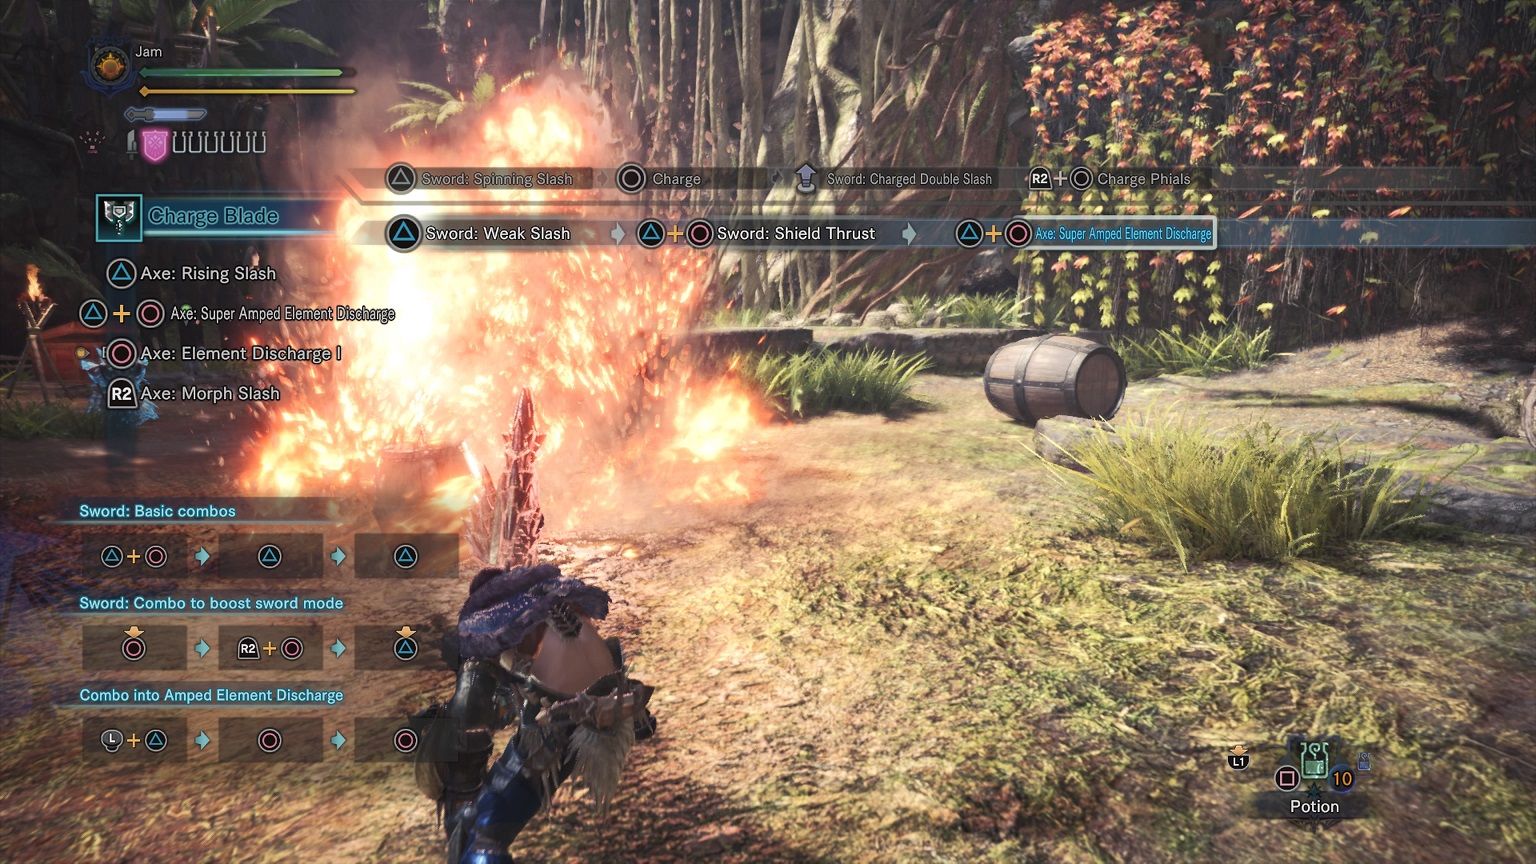 ## Using a Charge Blade in Solo Play The Charge Blade revolves around quickly getting a red shield, then unloading phials. In both games, it's best to aim for the head as it is the most common weakzone, but the importance of headsniping is greater in 4U. Guard points are a key in solo play, as is learning a monster's behavior - sometimes, you need to know when to guard point twice in quick succession due to an attack combo, rather than guarding once, then getting caught in the middle of your counter. A good example is Diablos' zig zag in World. It always attacks twice, in two diagonal patterns. It's important to get close enough to block the first hit, then block the second. The knockback is enough to give you a clean shot on the head. Tail swipes are another great opening, especially for Rathalos, Rathian, Pukei-Pukei and Paolumu. Roars from all monsters give you a free counter, but some require at least Guard 1/Guard +1 to effectively punish. All Tigrex variants in MH4U require Guard +2 for effective Charge Blade play. Brachydios requires Guard +2 for his headon attacks, which always give a clean opening for an AED to the head. Pay attention to your shield. Once it starts glowing yellow, it's time to recharge before you lose charge. Always keep your shield charged. Everything else is a matter of practice. Start by getting your shield charge and phials, then find your openings to counterattack. Know when you can counter, and when to not be greedy. Make mistakes, learn from them, and improve. ## Charge Blade Armor Skills Due to its versatility and guarding power, most evasion skills are useless on the Charge Blade. There are very few exceptions - Evade Extender is useful on monsters with wide hitboxes and instant charges, where guarding reveals no openings, like GQ Teostra, while Tremor Res becomes invaluable for GQ Rajang and Deviljho - but in general, the defensive capabilities of the Charge Blade means you can go for full offense while ignoring evasion skills, tremor resistance, and earplugs, in exchange for using tremors, roars and attacks as opportunities to guard and attack. Phial damage means affinity means less for the Charge Blade than most other weapons, and even in MH4U, the only time Razor Sharp is truly valuable is against monsters with aggressive charging patterns and constant heavy roaring, like Tigrex and Diablos. Below are a few important armor skills, giving you an idea of what to build for a Charge Blade, what skills to prioritize, and why. ## MH4U Skill | Description | Priority ------------ | ------------- | ----------- Artillery Novice | Increases phial power. Cheap skill. | High Sharpness +1 | Increases sharpness. | High Honed Blade | Increases sharpness and raw. | High Challenger +2 | Massively increases raw and affinity when monster is enraged. | High Weakness Exploit | Decreases weakzone defense. | High Attack Up (S/M/L/XL) | Increases weapon raw. | Medium Guard +2 | Reduces knockback, useful for Tigrex and Brachydios. | Low Razor Sharp | Halves the rate at which sharpness drops. Useful for guarding. | Low Load Up | Gives you an extra phial, useful for SAEDs. | Low Guard Boost | Lets you guard beams and previously unguardable attacks. | Low Tremor Res | Cancels tremors. Useful for Rajang. | Low Earplugs | Cancels roars. HG Earplugs for greater roars. | Low Evade Extender | Useful for Lv. 140 Teostra, instant charges and novas. | Low Focus | Charges phials faster. | Low ### Artillery Artillery is a 10, 15 and 20 point skill, that begins with Artillery Novice. The reason this skill is so important is because it is incredibly cheap, and you should never invest more than 10 points into it. This is because the Charge Blade has a cap for phial damage, which is reached by combining Artillery Novice with the food skill Felyne Bombardier, which can easily be applied on every quest in the end-game without much RNG. ### Handicraft/Edgemaster Depending on where you are in the game and what Charge Blade you use, there are very few skills that give as much of a boost as Sharpness +1. Armor pieces, charms and jewels with Handicraft are thus very valuable, because while sharpness does not affect your phials, it does affect everything else, including the axe chop. A jump from green to blue is a change from 1.05 damage to 1.2, and white is even more significant, at 1.32. Going from white to purple is 1.44. Edgemaster, while only accessible in late High Rank and late G-Rank, is Sharpness +1 and Attack Up (L) (20 extra true raw) rolled together. ### Challenger With a 15 point investment, Challenger +2 is more expensive than most of the other skills on this list, but gives you a whopping 25 extra raw and 20% affinity once a monster is enraged. Once you're comfortable with a monster's enraged state, this skill gives you a massive amount of extra damage for a lower skill point investment than Attack Up or Critical Eye. ### Weakness Exploit Weakness Exploit in 4U adds an additional 5 points to a weakzone over 45, essentially increasing your attack by 5% on a weakzone of 45, and a diminishing percentage the higher the weakzone. Weakness Exploit is useful on all monsters with a weakzone under 60, especially if you're prone to hitting the head. Some monsters with weakzones over 60 or just under 45 cannot make good use of Weakness Exploit. This is especially useful when deciding whether to take Attack Up L or Weakness Exploit, or deciding between a build with Sharpness +1 and Weakness Exploit, or just Honed Blade (Edgemaster). On monsters like Rajang, Weakness Exploit offers an immense damage boost. On monsters like Tigrex with a very high weakzone on the head and hitzones under 45 on the rest of its body, WE is not as useful. Same goes for Deviljho, which has small weakzones. Here's [a chart](https://drive.google.com/file/d/0B2VuMyfpCIiucXlSeFY3TWg1U0k/view) to help you decide. ### Attack Attack in 4U is a skill with a 10, 15, 20 and 25 point investment, giving you AuS, AuM, AuL and AuXL respectively. Because it takes so many points, it's not worth prioritizing unless you've got Challenger, Artillery and Handicraft on your set already, and you can't make better use of Weakness Exploit. ### Guard It's important to make a dedicated Guard +2 set for select monsters, particularly all Tigrexes and Brachydios. This gives you the ability to block any and all roars and headon attacks without significant knockback, assuming red shield and a guard point. ### Optional Skills Tremor Res, Earplugs, Evade Extender and Focus all have their uses, depending on the matchup. Tremor Res is useful on Rajang, allowing you to punish his attacks with a very narrow dodge without having to time it perfectly. It is less useful on Deviljho, but can save you from a few dire situations in Guild Quests. Evade Extender is mandatory for Guild Quest Teostra, and can be useful for getting out of geysers when fighting G-rank Shagaru Magala. Focus is great on an Apex Zinogre set, alongside Load Up, because spamming SAEDs is the best way to knock it out of Apex and Charged states. ### Element Skills The basic elemental set in 4U is Sharpness +1/Honed Blade, Elemental Atk Up, (Element) Up +1/+2/+3, and Load Up. The strategy is to get a red shield and six phials and immediately unload them into the monster, one SAED after the other. The extent to which you can build the set above depends on your charms. ## MHW Skill | Description | Priority ------------ | ------------- | ----------- Artillery (3) | Increases phial power by up to 30%. | High Capacity Boost (1) | Gives an extra phial. | High Non-Elemental Boost (1) | Increases raw of non-elemental weapons by 10%. | High Weakness Exploit (3) | Increases weapon affinity by 50% when hitting weakzones. | High Attack Boost (7) | Increases weapon raw. | High Focus (3) | Charges phials faster. | High Handicraft (5) | Increases sharpness. | Low Agitator (5) | Increases raw and affinity when monster is enraged. | Medium Guard (5) | Reduces knockback. Useful for some roars. | Low Earplugs (5) | Cancels roars. | Low Flinch Free (3) | Reduces your character's flinches. Useful for multiplayer. | Low Maximum Might (3) | Increases affinity at full stamina by up to 30%. | Low Protective Polish (1) | No sharpness loss for a limited time. | Low Slugger (3) | Increases KO power by up to 30%. | Low ### Artillery Skills work very differently in World - instead of requiring a set number of points to activate, any point in a skill gives you some effect, while hitting the cap is possible with certain armor, deco and charm combinations. In terms of effectiveness, Artillery is arguably your cheapest and most important skill. Until you get three artillery decorations, utilize the Artillery Charm III. ### Capacity Boost This is World's equivalent of Load Up, giving you an extra phial and an extra 20% damage on the phial portion of your SAEDs. The cheapest way to get this is the Dodogama Greaves, but a magazine jewel (if you're lucky enough to have one) is just as good. ### Non-Elemental Boost A flat-out 10% extra true raw before all other calculations for the cost of one skill point is slightly broken, but too good to pass up. This is just as important as Artillery, but nowhere near as cheap at first. Wait until you get an elementless jewel, rather than utiziling Diablos armor for the set bonus. ### Weakness Exploit Increases your weapon's affinity by 50% when hitting a weakzone. This allows you to instantly and quickly eliminate the Diablos CB's low affinity. When combined with Attack Boost 4+, you're effectively getting 25% affinity whenever you attack a weakzone. With the Affinity Booster present, that increases to 75%. Maximum Might and Agitator further increase that number - two levels in Maximum Might bring your affinity up to almost 100% for a solid minute. ### Attack Boost This is an easy pick for Charge Blade due to the usefulness of raw damage in boosting both general damage and phial damage. However, you don't have to max out on it, unless you've got your other skills maxed out. A minimum of 4 points to unlock the 5% bonus affinity can make a big difference. ### Focus This is a skill that does not seem to affect your sword's charging rate much, but you'll notice it allow you to cycle to SAEDs much quicker over the course of a hunt. Think of it as an accumulative bonus. This skill requires you to know how to efficiently and quickly drop SAEDs on the monster, otherwise, you might find yourself wasting it by charging phials faster than you can use them. ### Handicraft Handicraft 4 is required to get the Diablos Charge Blade to white sharpness, but keeping that requires a Protective Polish jewel - which, even if you have it, oftentimes means dropping a magazine or elementless jewel. It's typically not worth it, despite the extra damage you get by staying in white sharpness. Opt for a quick Handicraft 2 from the Death Stench Boots instead, once you have a magazine jewel to replace the Dodogama legs. That should allow you to stay in blue sharpness for the majority of any hunt. ### Agitator An easy pick for early sets, Agitator maxes out at 5 but is usually much easier to fit in at 2 utilizing the Nergigante Arms. This is MHW's equivalent of Challenger +2, giving you extra raw and affinity whenever a monster is enraged. ### Optional Skills Guard 1, Earplugs 5, Flinch Free, Maximum Might, Protective Polish. These are just a few skills that have room in a Charge Blade's arsenal. Due to the removal of the charm system and a revamp of how armor skills work, you can fit a lot more skills and play around with sets to suit different purposes and monsters. For example, Capacity Boost is useless against smaller monsters like Kirin, or monsters that are tricky to pin down length-wise like Odogaron. You are better off going for more sharpness, or more KO through Slugger 3. If you have trouble blocking certain roars, Earplugs can be a wise investment, and if online play gets too chaotic for you, then Flinch Free keeps you from tripping due to Dual Blade or Longsword users. There are lots of monsters and many ways to hunt them - play around with your decorations and see what you can build. ## Using a Charge Blade Online In both 4U and World, a lot of the magic of efficient, stylish Charge Blade play is lost because of erratic and unpredictable monster behavior. This, combined with burst damage, makes the Charge Blade less useful, unless in teams capable of efficiently stun-locking a monster with paralysis, mounting and KO damage. You can still be of great use to a team by being more conservative with your play, keeping SAEDs for sure knockdowns or certain monster attacks with long recovery (after Rathian's tail flip, or during Teostra's tail swipes for example). Be mindful of where you aim your bursts. In 4U, your job is to apply as many AEDs to the head as possible, to get at least two or three KOs, thus creating windows for a crapton of extra damage. When playing with a Greatsword user, let them wake the monster up. Otherwise, your SAED takes priority as long as you land the axe on the head. This goes for both games. Otherwise, the most important thing is to have fun - and not ruin other people's fun. The Charge Blade is a weapon with quite a bit of range, especially in axe mode, so be mindful of how your attacks will affect other hunters. If there is another Charge Blade user, or a Hunting Horn or Hammer user, try and share the head rather than hogging the space for yourself. Angle your attacks to hit the monster and not other players, and don't SAED a teammate out of their own big attack. |
| json metadata | {"tags":["monsterhunter","gaming","games","ps4","xbox"],"image":["https://steemitimages.com/DQmX8NDUmLVrQAvvpaBnpnSVUWVxiCvEZspjLcWeM6vDv3F/Monster%20Hunter_%20World_20180312234104.jpg","https://steemitimages.com/DQmNZi3EW5FV5vUGmGQWXXE8G7VxiNjVNPiSTch9XSpaFeX/Monster%20Hunter_%20World_20180312234125.jpg","https://steemitimages.com/DQmPX4zCNYpecMJKHY2pGmuHsVVmsg2h3aAN1R7ZJ3JTUEf/Monster%20Hunter_%20World_20180312234257.jpg","https://steemitimages.com/DQmZwvuLDFMRmuRnskuk4X22QBCrhmAn5XgtHRFpX1qp6ib/Monster%20Hunter_%20World_20180312234316.jpg","https://steemitimages.com/DQmZsteSQ9ra78XxHo3tQ2zMKRFbxirw5xaaMFqXTn52YHN/Monster%20Hunter_%20World_20180312234408.jpg","https://steemitimages.com/DQmcwXB5DEBxKh6oAWDkDZTxBNP7PdK4sVBeHXmUx4CioQJ/Monster%20Hunter_%20World_20180312234420.jpg","https://steemitimages.com/DQmZNFBg6vmq6j5dtQCF59qEApDaWUS8NB9jxQQftM3ARcF/Monster%20Hunter_%20World_20180312234437.jpg","https://steemitimages.com/DQmdisQinswjdjGs1yruduejPReV4u9qjyAAqvCwYhsJ2YJ/Monster%20Hunter_%20World_20180312234541.jpg"],"links":["https://drive.google.com/file/d/0B2VuMyfpCIiucXlSeFY3TWg1U0k/view"],"app":"steemit/0.1","format":"markdown"} |
| Transaction Info | Block #20631991/Trx 0f2670f850a2ea2700932fdc73cb42b36e64490a |
View Raw JSON Data
{
"trx_id": "0f2670f850a2ea2700932fdc73cb42b36e64490a",
"block": 20631991,
"trx_in_block": 16,
"op_in_trx": 0,
"virtual_op": 0,
"timestamp": "2018-03-13T06:27:54",
"op": [
"comment",
{
"parent_author": "",
"parent_permlink": "monsterhunter",
"author": "jamthewriter",
"permlink": "how-to-charge-blade-in-mh4u-and-mhw",
"title": "How to Charge Blade (in MH4U and MHW)",
"body": "When I first picked up a copy of Monster Hunter 4 Ultimate, I gave the game a shot without any previous knowledge or tutorials. I tried a handful of weapons, eventually landing on the Insect Glaive, and after bumbling my way through a few quests, I hit a wall and gave up. \n\nIt took a few months until I was reminded of the game again when looking for something to play with a friend. This time, I prepared. I read up and watched videos, and took the time to go through each individual weapon to find something I liked to play. I eventually landed on the greatsword, because of its simplicity and sheer killing power. But when I began to get bored of it, I decided to dabble with some of the more complicated weapons. \n\nIn MH4U, there are few melee weapons more complicated than the Charge Blade. It's an over-sized sword and shield, with the ability to morph into a giant double-sided axe, the shield serving as an axe-head. It's mechanic revolves around charging energy in the sword through attacks, then storing that energy into the shield, and using the axe mode to discharge said energy back into the monster. It's a fluid, cyclical weapon with outstanding damage potential and incredible defense, alongside a very high skill ceiling for beginning players. \n\nAfter a hundred hours and several hundred uses of the Charge Blade, it clicked with me. And nearly a thousand hours of gameplay later, not one of the other weapons in Monster Hunter gives me as much satisfaction to use effectively. \n\nBut therein lies the key. Efficiency. Without much of an explanation, the Charge Blade starts off as a clunky and needlessly complicated weapon. There's much to play with, but no clear sign of how, or when. Understanding the Charge Blade can turn you into a freakish killing machine, effectively stun-locking monsters and eviscerating them in minutes, in both MH4U and MHW. While the weapon has been made much stronger due to a simple change in mechanics, it still takes some skill to use effectively - and today, we'll go through all the ins and outs of using the Charge Blade. \n\n## Controlling the Charge Blade\n\n_For the sake of this guide, I'll refer to X (3DS)/Triangle (PS4) as the primary attack button, or attack 1, and A/Circle as the secondary attack button, or attack 2._\n\nThe Charge Blade starts off as a sword and shield. Hitting attack 1 thrice gives you the basic combo - two sword slashes, and a roundhouse slash. In-between every attack, hitting attack 1 and 2 at the same time gives you a shield bash. Holding attack 2 gives you a charged sword slash - your character slowly pulls the sword backward, and after a slight flash, letting go of attack 2 gives you the most sword charge in a single attack. \n\nWith the evade button, you can sidestep after every attack, positioning around the monster to evade attacks and continue slashing. However, you do have a shield. R2 is your block, and on its own, the shield's blocking power is akin to a greatsword. Once your sword glows red (your phials will glow red, too), hitting R2 and attack 2 simultaneously will store the sword's charge in your shield's phials. A red charge stores 5 phials. A yellow charge stores 3. Overcharging your sword will cause you to bounce, indicated by a glowing sword.\n\n\n\n\n\nIn theory, this is where you morph to axe mode and start discharging the energy in your phials. But this is inefficient. Never use an unboosted axe. \n\n### Red Shield\n\nInstead, while in sword and shield mode, give the air a whack with attack 1, then hit attack 1 and 2 simultaenously for a shield bash, then hit that combination again to go into an Amped Elemental Discharge. \n\nThat's: Attack 1 > Attack 1+2 > Attack 1+2\n\nYour AED is usually locked behind an axe combo, but this is the fastest way to get to it, and allows you to keep your phials. But instead of running its course, cancel the animation with R2. \n\nIt might take a few tries to get the button combination right, but after some time you should be able to cancel an Amped Elemental Discharge into an Elemental Roundhouse. Not only will this deal a little bit of phial damage (impact damage), but you will also use up all your stored phials to charge your shield. It's red now. This effect lasts 30 seconds per phial, for a total of two and a half minutes with five phials. \n\n\n\nA red shield does several things for you. First, it improves your block significantly, bringing it up to par with a lance. Second, it changes your AED into an SAED, which is a slightly longer animation but deals a significant amount of damage, while dispersing all your phials in a single straight line. \n\n\n\nTo reiterate. Now that you have a red shield, attack your target to recharge your sword. Use the prolonged attack 2, the charged sword slash. From there, store your charge in your shield as phials. Repeat the shortcut combo: \n\nAttack 1 > Attack 1+2 > Attack 1+2\n\nThis time, your sword and shield will morph directly into an SAED, discharging everything. In 4U, this uses up your red shield charge, making it an ineffective attack for general gameplay, usually only useful for waking up a sleeping target, or finishing off a monster close to death. For World, however, this would be your bread-and-butter, as SAEDs no longer consume your shield charge. \n\nYou can cancel an SAED in two ways. Hitting R2 at the start of the animation consumes your phials and reups your shield charge. Hitting attack 1 while pulling back on the analog stick (in the opposite direction of your hunter) will turn your SAED into an AED. This is invaluable in 4U, for keeping your red shield while making use of the Charge Blade's best attack. \n\n### Axe Mode\n\nAside from these finisher moves, the Charge Blade has other tools in its arsenal. While in sword and shield mode, hit guard and attack 1 to morph into axe mode. Attack 1 gives you a straightforward axe combo, relatively useless aside from checking your distance - for example, while in axe mode, you can hold the analog stick forward and hit attack 1 to do an overhead axe chop, allowing you to gauge the distance between yourself and the monster for an aimed finisher. \n\nAttack 2 lets you go into elemental discharge 1, then elemental discharge 2, and finally, the third hit is your AED/SAED. In 4U, this is a viable mode of attack, as it deals a decent amount of axe damage and KO damage while taking relatively little time. In World, the motion values for these axe attacks have been significantly nerfed, making it much better to simply stay in sword and shield mode until you're ready for a finisher. All phial attacks, including the ED combo, AED/SAED, elemental roundhouse (shield charge slash) and shield bash deal impact damage, and never bounce.\n\n### Positioning Tools\n\nIn 4U, positioning was limited to rolling in axe mode, and utilizing a sidestep + roundhouse slash after an attack. For example, you could use attack 1 + 2 from idle to do an advancing slash, then go into a shield bash, then sidestep to get to a better position, and hit attack 1 for a quick roundhouse. \n\nWorld greatly expands the mobility of the Charge Blade, namely with a single new attack in the form of a sliding slash. Moving the analog stick and hitting attack 2 repositions your character with a stylish slide-and-slash - this does pitiful damage, but allows you to easily slide away from a monster in order to get a better hit with a finisher. A common scenario is charging up on a downed monster with attack 2, using the sliding slash to get away from the head, storing your phials, then shield bashing into an SAED. The slide is just enough distance to typically get back in range with a shield bash to hit the monster's head with the axe during the SAED, for massive damage. \n\n### Guard Points\n\nOne constant within both games is the importance of taking proper advantage of the Charge Blade's guarding capabilities for offense. The shield is not there to block - it's there to counter. Any attack that deals minimal knockback can be countered with a number of things. Hitting attack 1 right after a blocked attack with minimal knockback will let you morph into axe mode. Hitting evade gives you a roll/sidestep. Hitting and holding attack 2 lets you combo into the charged slash. Hitting attack 1 and 2, however, lets you immediately combo into the SAED. This is how the Charge Blade counters attacks, by blocking and immediately launching into a finisher. \n\n\n\nGuard Points allow you to effectively increase the guarding power of the Charge Blade, but unlike a regular block, they have a limited window. While most attacks deal some knockback even with a red shield, some deal a much more significant amount - a guard point allows you to mitigate a large amount of that knockback, thus creating more openings to counter. The Guard Point is simply guard + attack 1. The axe morph. The beginning of this animation causes your hunter to put their shield in front of them while sheathing their sword into it for the morph, creating a small guarding window. Once an attack connects with this guard, you can counter into a full morph with attack 1 or a finisher with attack 1 and 2. \n\nThere is another guard point at the end of the elemental roundslash, or whenever you morph back from axe mode into sword and shield. This is a longer guard window, but it's harder to time because it takes more foresight. \n\nIn MH4U, inputting the axe morph incorrectly will result in a different morphing animation without a guard point. To avoid this, set your kick button to start in the options menu, and use start to axe morph. This will result in a guaranteed guard point. Axe morphing after a sword slash always results in a guard point. \n\n### AEDs vs SAEDs\n\nBetween 4U and World, the primary difference is the addition of a change in how the shield charge works. In 4U, an SAED consumes the shield charge. In World, it does not. Thus, the gameplay changes significantly. \n\n4U Charge Blade users must prioritize using attacks as openings to guard point and AED on the head. Two consecutive AEDs cause a KO in most monsters, giving a large opening for more phial charging and extra damage, through the ED > AED combo. It's imperative to learn to guard point roars and charges, as these typically offer the greatest openings for an AED to the head. By moving the analog stick during the AED animation, you can minimally adjust how the AED will land. This is called headsniping. \n\nIn World, you only need to ensure that your axe lands on the monster during an SAED, and that preferably most of your phials hit the monster. Aiming for the head is no longer necessary, as most SAEDs cause a significant flinch or trip. That being said, it is a nice extra for some KO damage. AEDs still have their use, especially on smaller monsters like Kirin, where it is much more effective to concentrate axe and phial damage on the monster's head exclusively, and where its small size makes an SAED of more than three phials mostly useless. \n\n### Charged Sword\n\nWorld adds a new move to the Charge Blade's arsenal, allowing for more impact damage and natural mind's eye (no bouncing) on sword and shield mode. Holding attack 1 immediately after storing your phials while in red shield will charge your sword. You need a charged shield to charge your sword, and the effect lasts 30 seconds, taking 30 seconds away from your shield's charge. It's useful on monsters that cause tremendous bouncing (and on monsters with special armor mechanics, like Lavasioth/Kirin/Radobaan, but be mindful that you should focus on monster weakzones (that never bounce) anyway. \n\n\n\n\n\n## Impact Phials vs. Element Phials \n\nCharge Blades come in two flavors: impact phials and element phials. In all games with this weapon (including Monster Hunter Generations), impact phial Charge Blades are superior. In World, this is more true than ever due to capped elemental damage values and the existence of several raw-boosting armor skills. Impact phials ignore hitzones, dealing a set amount of damage dependant on a weapon's total raw, the Felyne Bombardier food skill and the Artillery armor skill. Affinity and sharpness are ignored. \n\nPhials deal about 40-50% of an SAED's total attack, making them incredibly significant, and making raw the single most important thing in choosing a Charge Blade. This is why the Akantor Severance is best in most situations in 4U, losing out to the Ceadeus Regalia only against monsters with water weakness. In World, the Diablos Tyrannis II is the best Charge Blade, despite negative affinity and very little blue sharpness. \n\nThere are times when an element phial Charge Blade can be viable, but these times are hard to come by. Element phials are more effective in 4U, specifically against larger monsters with high elemental weaknesses, like Ukanlos, Akantor, Gravios and Basarios. With perfect play and a very specific build, an element phial Charge Blade can tear through other monsters with weak hitzones. But the versatility of impact phials makes them better in most cases, while the Diablos Charge Blade is flat-out unchallenged in World. That being said, an elemental SAED is quite the sight.\n\n\n\n## Using a Charge Blade in Solo Play\n\nThe Charge Blade revolves around quickly getting a red shield, then unloading phials. In both games, it's best to aim for the head as it is the most common weakzone, but the importance of headsniping is greater in 4U. Guard points are a key in solo play, as is learning a monster's behavior - sometimes, you need to know when to guard point twice in quick succession due to an attack combo, rather than guarding once, then getting caught in the middle of your counter. \n\nA good example is Diablos' zig zag in World. It always attacks twice, in two diagonal patterns. It's important to get close enough to block the first hit, then block the second. The knockback is enough to give you a clean shot on the head. \n\nTail swipes are another great opening, especially for Rathalos, Rathian, Pukei-Pukei and Paolumu. Roars from all monsters give you a free counter, but some require at least Guard 1/Guard +1 to effectively punish. All Tigrex variants in MH4U require Guard +2 for effective Charge Blade play. Brachydios requires Guard +2 for his headon attacks, which always give a clean opening for an AED to the head. \n\nPay attention to your shield. Once it starts glowing yellow, it's time to recharge before you lose charge. Always keep your shield charged. \n\nEverything else is a matter of practice. Start by getting your shield charge and phials, then find your openings to counterattack. Know when you can counter, and when to not be greedy. Make mistakes, learn from them, and improve. \n\n## Charge Blade Armor Skills\n\nDue to its versatility and guarding power, most evasion skills are useless on the Charge Blade. There are very few exceptions - Evade Extender is useful on monsters with wide hitboxes and instant charges, where guarding reveals no openings, like GQ Teostra, while Tremor Res becomes invaluable for GQ Rajang and Deviljho - but in general, the defensive capabilities of the Charge Blade means you can go for full offense while ignoring evasion skills, tremor resistance, and earplugs, in exchange for using tremors, roars and attacks as opportunities to guard and attack. \n\nPhial damage means affinity means less for the Charge Blade than most other weapons, and even in MH4U, the only time Razor Sharp is truly valuable is against monsters with aggressive charging patterns and constant heavy roaring, like Tigrex and Diablos. \n\nBelow are a few important armor skills, giving you an idea of what to build for a Charge Blade, what skills to prioritize, and why. \n\n## MH4U\n\nSkill | Description | Priority\n------------ | ------------- | -----------\nArtillery Novice | Increases phial power. Cheap skill. | High\nSharpness +1 | Increases sharpness. | High\nHoned Blade | Increases sharpness and raw. | High\nChallenger +2 | Massively increases raw and affinity when monster is enraged. | High\nWeakness Exploit | Decreases weakzone defense. | High\nAttack Up (S/M/L/XL) | Increases weapon raw. | Medium\nGuard +2 | Reduces knockback, useful for Tigrex and Brachydios. | Low\nRazor Sharp | Halves the rate at which sharpness drops. Useful for guarding. | Low\nLoad Up | Gives you an extra phial, useful for SAEDs. | Low\nGuard Boost | Lets you guard beams and previously unguardable attacks. | Low\nTremor Res | Cancels tremors. Useful for Rajang. | Low\nEarplugs | Cancels roars. HG Earplugs for greater roars. | Low\nEvade Extender | Useful for Lv. 140 Teostra, instant charges and novas. | Low\nFocus | Charges phials faster. | Low\n\n### Artillery\nArtillery is a 10, 15 and 20 point skill, that begins with Artillery Novice. The reason this skill is so important is because it is incredibly cheap, and you should never invest more than 10 points into it. This is because the Charge Blade has a cap for phial damage, which is reached by combining Artillery Novice with the food skill Felyne Bombardier, which can easily be applied on every quest in the end-game without much RNG. \n### Handicraft/Edgemaster\nDepending on where you are in the game and what Charge Blade you use, there are very few skills that give as much of a boost as Sharpness +1. Armor pieces, charms and jewels with Handicraft are thus very valuable, because while sharpness does not affect your phials, it does affect everything else, including the axe chop. A jump from green to blue is a change from 1.05 damage to 1.2, and white is even more significant, at 1.32. Going from white to purple is 1.44. Edgemaster, while only accessible in late High Rank and late G-Rank, is Sharpness +1 and Attack Up (L) (20 extra true raw) rolled together. \n### Challenger\nWith a 15 point investment, Challenger +2 is more expensive than most of the other skills on this list, but gives you a whopping 25 extra raw and 20% affinity once a monster is enraged. Once you're comfortable with a monster's enraged state, this skill gives you a massive amount of extra damage for a lower skill point investment than Attack Up or Critical Eye. \n### Weakness Exploit\nWeakness Exploit in 4U adds an additional 5 points to a weakzone over 45, essentially increasing your attack by 5% on a weakzone of 45, and a diminishing percentage the higher the weakzone. Weakness Exploit is useful on all monsters with a weakzone under 60, especially if you're prone to hitting the head. Some monsters with weakzones over 60 or just under 45 cannot make good use of Weakness Exploit. \n\nThis is especially useful when deciding whether to take Attack Up L or Weakness Exploit, or deciding between a build with Sharpness +1 and Weakness Exploit, or just Honed Blade (Edgemaster). On monsters like Rajang, Weakness Exploit offers an immense damage boost. On monsters like Tigrex with a very high weakzone on the head and hitzones under 45 on the rest of its body, WE is not as useful. Same goes for Deviljho, which has small weakzones. Here's [a chart](https://drive.google.com/file/d/0B2VuMyfpCIiucXlSeFY3TWg1U0k/view) to help you decide. \n### Attack\nAttack in 4U is a skill with a 10, 15, 20 and 25 point investment, giving you AuS, AuM, AuL and AuXL respectively. Because it takes so many points, it's not worth prioritizing unless you've got Challenger, Artillery and Handicraft on your set already, and you can't make better use of Weakness Exploit. \n### Guard\nIt's important to make a dedicated Guard +2 set for select monsters, particularly all Tigrexes and Brachydios. This gives you the ability to block any and all roars and headon attacks without significant knockback, assuming red shield and a guard point. \n### Optional Skills\nTremor Res, Earplugs, Evade Extender and Focus all have their uses, depending on the matchup. Tremor Res is useful on Rajang, allowing you to punish his attacks with a very narrow dodge without having to time it perfectly. It is less useful on Deviljho, but can save you from a few dire situations in Guild Quests. Evade Extender is mandatory for Guild Quest Teostra, and can be useful for getting out of geysers when fighting G-rank Shagaru Magala. Focus is great on an Apex Zinogre set, alongside Load Up, because spamming SAEDs is the best way to knock it out of Apex and Charged states. \n### Element Skills\nThe basic elemental set in 4U is Sharpness +1/Honed Blade, Elemental Atk Up, (Element) Up +1/+2/+3, and Load Up. The strategy is to get a red shield and six phials and immediately unload them into the monster, one SAED after the other. The extent to which you can build the set above depends on your charms. \n## MHW\n\nSkill | Description | Priority\n------------ | ------------- | -----------\nArtillery (3) | Increases phial power by up to 30%. | High\nCapacity Boost (1) | Gives an extra phial. | High\nNon-Elemental Boost (1) | Increases raw of non-elemental weapons by 10%. | High\nWeakness Exploit (3) | Increases weapon affinity by 50% when hitting weakzones. | High\nAttack Boost (7) | Increases weapon raw. | High\nFocus (3) | Charges phials faster. | High\nHandicraft (5) | Increases sharpness. | Low\nAgitator (5) | Increases raw and affinity when monster is enraged. | Medium\nGuard (5) | Reduces knockback. Useful for some roars. | Low\nEarplugs (5) | Cancels roars. | Low\nFlinch Free (3) | Reduces your character's flinches. Useful for multiplayer. | Low\nMaximum Might (3) | Increases affinity at full stamina by up to 30%. | Low\nProtective Polish (1) | No sharpness loss for a limited time. | Low\nSlugger (3) | Increases KO power by up to 30%. | Low\n\n### Artillery\nSkills work very differently in World - instead of requiring a set number of points to activate, any point in a skill gives you some effect, while hitting the cap is possible with certain armor, deco and charm combinations. In terms of effectiveness, Artillery is arguably your cheapest and most important skill. Until you get three artillery decorations, utilize the Artillery Charm III. \n### Capacity Boost\nThis is World's equivalent of Load Up, giving you an extra phial and an extra 20% damage on the phial portion of your SAEDs. The cheapest way to get this is the Dodogama Greaves, but a magazine jewel (if you're lucky enough to have one) is just as good. \n### Non-Elemental Boost\nA flat-out 10% extra true raw before all other calculations for the cost of one skill point is slightly broken, but too good to pass up. This is just as important as Artillery, but nowhere near as cheap at first. Wait until you get an elementless jewel, rather than utiziling Diablos armor for the set bonus. \n### Weakness Exploit\nIncreases your weapon's affinity by 50% when hitting a weakzone. This allows you to instantly and quickly eliminate the Diablos CB's low affinity. When combined with Attack Boost 4+, you're effectively getting 25% affinity whenever you attack a weakzone. With the Affinity Booster present, that increases to 75%. Maximum Might and Agitator further increase that number - two levels in Maximum Might bring your affinity up to almost 100% for a solid minute. \n### Attack Boost\nThis is an easy pick for Charge Blade due to the usefulness of raw damage in boosting both general damage and phial damage. However, you don't have to max out on it, unless you've got your other skills maxed out. A minimum of 4 points to unlock the 5% bonus affinity can make a big difference. \n### Focus\nThis is a skill that does not seem to affect your sword's charging rate much, but you'll notice it allow you to cycle to SAEDs much quicker over the course of a hunt. Think of it as an accumulative bonus. This skill requires you to know how to efficiently and quickly drop SAEDs on the monster, otherwise, you might find yourself wasting it by charging phials faster than you can use them. \n### Handicraft\nHandicraft 4 is required to get the Diablos Charge Blade to white sharpness, but keeping that requires a Protective Polish jewel - which, even if you have it, oftentimes means dropping a magazine or elementless jewel. It's typically not worth it, despite the extra damage you get by staying in white sharpness. Opt for a quick Handicraft 2 from the Death Stench Boots instead, once you have a magazine jewel to replace the Dodogama legs. That should allow you to stay in blue sharpness for the majority of any hunt. \n### Agitator\nAn easy pick for early sets, Agitator maxes out at 5 but is usually much easier to fit in at 2 utilizing the Nergigante Arms. This is MHW's equivalent of Challenger +2, giving you extra raw and affinity whenever a monster is enraged. \n### Optional Skills\nGuard 1, Earplugs 5, Flinch Free, Maximum Might, Protective Polish. These are just a few skills that have room in a Charge Blade's arsenal. Due to the removal of the charm system and a revamp of how armor skills work, you can fit a lot more skills and play around with sets to suit different purposes and monsters. For example, Capacity Boost is useless against smaller monsters like Kirin, or monsters that are tricky to pin down length-wise like Odogaron. You are better off going for more sharpness, or more KO through Slugger 3. If you have trouble blocking certain roars, Earplugs can be a wise investment, and if online play gets too chaotic for you, then Flinch Free keeps you from tripping due to Dual Blade or Longsword users. There are lots of monsters and many ways to hunt them - play around with your decorations and see what you can build. \n## Using a Charge Blade Online\nIn both 4U and World, a lot of the magic of efficient, stylish Charge Blade play is lost because of erratic and unpredictable monster behavior. This, combined with burst damage, makes the Charge Blade less useful, unless in teams capable of efficiently stun-locking a monster with paralysis, mounting and KO damage. \n\nYou can still be of great use to a team by being more conservative with your play, keeping SAEDs for sure knockdowns or certain monster attacks with long recovery (after Rathian's tail flip, or during Teostra's tail swipes for example). Be mindful of where you aim your bursts. In 4U, your job is to apply as many AEDs to the head as possible, to get at least two or three KOs, thus creating windows for a crapton of extra damage. \n\nWhen playing with a Greatsword user, let them wake the monster up. Otherwise, your SAED takes priority as long as you land the axe on the head. This goes for both games. \n\nOtherwise, the most important thing is to have fun - and not ruin other people's fun. The Charge Blade is a weapon with quite a bit of range, especially in axe mode, so be mindful of how your attacks will affect other hunters. If there is another Charge Blade user, or a Hunting Horn or Hammer user, try and share the head rather than hogging the space for yourself. Angle your attacks to hit the monster and not other players, and don't SAED a teammate out of their own big attack.",
"json_metadata": "{\"tags\":[\"monsterhunter\",\"gaming\",\"games\",\"ps4\",\"xbox\"],\"image\":[\"https://steemitimages.com/DQmX8NDUmLVrQAvvpaBnpnSVUWVxiCvEZspjLcWeM6vDv3F/Monster%20Hunter_%20World_20180312234104.jpg\",\"https://steemitimages.com/DQmNZi3EW5FV5vUGmGQWXXE8G7VxiNjVNPiSTch9XSpaFeX/Monster%20Hunter_%20World_20180312234125.jpg\",\"https://steemitimages.com/DQmPX4zCNYpecMJKHY2pGmuHsVVmsg2h3aAN1R7ZJ3JTUEf/Monster%20Hunter_%20World_20180312234257.jpg\",\"https://steemitimages.com/DQmZwvuLDFMRmuRnskuk4X22QBCrhmAn5XgtHRFpX1qp6ib/Monster%20Hunter_%20World_20180312234316.jpg\",\"https://steemitimages.com/DQmZsteSQ9ra78XxHo3tQ2zMKRFbxirw5xaaMFqXTn52YHN/Monster%20Hunter_%20World_20180312234408.jpg\",\"https://steemitimages.com/DQmcwXB5DEBxKh6oAWDkDZTxBNP7PdK4sVBeHXmUx4CioQJ/Monster%20Hunter_%20World_20180312234420.jpg\",\"https://steemitimages.com/DQmZNFBg6vmq6j5dtQCF59qEApDaWUS8NB9jxQQftM3ARcF/Monster%20Hunter_%20World_20180312234437.jpg\",\"https://steemitimages.com/DQmdisQinswjdjGs1yruduejPReV4u9qjyAAqvCwYhsJ2YJ/Monster%20Hunter_%20World_20180312234541.jpg\"],\"links\":[\"https://drive.google.com/file/d/0B2VuMyfpCIiucXlSeFY3TWg1U0k/view\"],\"app\":\"steemit/0.1\",\"format\":\"markdown\"}"
}
]
}jamthewriterclaimed reward balance: 0.378 SBD, 0.144 SP2018/03/08 03:39:48
jamthewriterclaimed reward balance: 0.378 SBD, 0.144 SP
2018/03/08 03:39:48
| account | jamthewriter |
| reward steem | 0.000 STEEM |
| reward sbd | 0.378 SBD |
| reward vests | 234.953062 VESTS |
| Transaction Info | Block #20484831/Trx 8e2d3e8350ee74248b0a6174a9839b753411d590 |
View Raw JSON Data
{
  "trx_id": "8e2d3e8350ee74248b0a6174a9839b753411d590",
  "block": 20484831,
  "trx_in_block": 1,
  "op_in_trx": 0,
  "virtual_op": 0,
  "timestamp": "2018-03-08T03:39:48",
  "op": [
    "claim_reward_balance",
    {
      "account": "jamthewriter",
      "reward_steem": "0.000 STEEM",
      "reward_sbd": "0.378 SBD",
      "reward_vests": "234.953062 VESTS"
    }
  ]
}jamthewriterreceived 0.157 SBD, 0.060 SP author reward for @jamthewriter / dealing-the-most-damage-in-monster-hunter-world2018/03/01 09:35:39
jamthewriterreceived 0.157 SBD, 0.060 SP author reward for @jamthewriter / dealing-the-most-damage-in-monster-hunter-world
2018/03/01 09:35:39
| author | jamthewriter |
| permlink | dealing-the-most-damage-in-monster-hunter-world |
| sbd payout | 0.157 SBD |
| steem payout | 0.000 STEEM |
| vesting payout | 98.064426 VESTS |
| Transaction Info | Block #20290531/Virtual Operation #8 |
View Raw JSON Data
{
  "trx_id": "0000000000000000000000000000000000000000",
  "block": 20290531,
  "trx_in_block": 4294967295,
  "op_in_trx": 0,
  "virtual_op": 8,
  "timestamp": "2018-03-01T09:35:39",
  "op": [
    "author_reward",
    {
      "author": "jamthewriter",
      "permlink": "dealing-the-most-damage-in-monster-hunter-world",
      "sbd_payout": "0.157 SBD",
      "steem_payout": "0.000 STEEM",
      "vesting_payout": "98.064426 VESTS"
    }
  ]
}jamthewriterreceived 0.221 SBD, 0.084 SP author reward for @jamthewriter / how-to-capture-a-monster-in-monster-hunter-world2018/02/28 10:11:09
jamthewriterreceived 0.221 SBD, 0.084 SP author reward for @jamthewriter / how-to-capture-a-monster-in-monster-hunter-world
2018/02/28 10:11:09
| author | jamthewriter |
| permlink | how-to-capture-a-monster-in-monster-hunter-world |
| sbd payout | 0.221 SBD |
| steem payout | 0.000 STEEM |
| vesting payout | 136.888636 VESTS |
| Transaction Info | Block #20262460/Virtual Operation #16 |
View Raw JSON Data
{
  "trx_id": "0000000000000000000000000000000000000000",
  "block": 20262460,
  "trx_in_block": 4294967295,
  "op_in_trx": 0,
  "virtual_op": 16,
  "timestamp": "2018-02-28T10:11:09",
  "op": [
    "author_reward",
    {
      "author": "jamthewriter",
      "permlink": "how-to-capture-a-monster-in-monster-hunter-world",
      "sbd_payout": "0.221 SBD",
      "steem_payout": "0.000 STEEM",
      "vesting_payout": "136.888636 VESTS"
    }
  ]
}socialupvoted (100.00%) @jamthewriter / how-to-capture-a-monster-in-monster-hunter-world2018/02/25 20:48:18
socialupvoted (100.00%) @jamthewriter / how-to-capture-a-monster-in-monster-hunter-world
2018/02/25 20:48:18
| voter | social |
| author | jamthewriter |
| permlink | how-to-capture-a-monster-in-monster-hunter-world |
| weight | 10000 (100.00%) |
| Transaction Info | Block #20188975/Trx e307839950b63f83bc65237c8ec0bb0904d02f0a |
View Raw JSON Data
{
  "trx_id": "e307839950b63f83bc65237c8ec0bb0904d02f0a",
  "block": 20188975,
  "trx_in_block": 5,
  "op_in_trx": 0,
  "virtual_op": 0,
  "timestamp": "2018-02-25T20:48:18",
  "op": [
    "vote",
    {
      "voter": "social",
      "author": "jamthewriter",
      "permlink": "how-to-capture-a-monster-in-monster-hunter-world",
      "weight": 10000
    }
  ]
}lastditchupvoted (100.00%) @jamthewriter / how-to-capture-a-monster-in-monster-hunter-world2018/02/25 20:48:15
lastditchupvoted (100.00%) @jamthewriter / how-to-capture-a-monster-in-monster-hunter-world
2018/02/25 20:48:15
| voter | lastditch |
| author | jamthewriter |
| permlink | how-to-capture-a-monster-in-monster-hunter-world |
| weight | 10000 (100.00%) |
| Transaction Info | Block #20188974/Trx 732330ceda19fcf49943268369c2c0ca1df88116 |
View Raw JSON Data
{
  "trx_id": "732330ceda19fcf49943268369c2c0ca1df88116",
  "block": 20188974,
  "trx_in_block": 16,
  "op_in_trx": 0,
  "virtual_op": 0,
  "timestamp": "2018-02-25T20:48:15",
  "op": [
    "vote",
    {
      "voter": "lastditch",
      "author": "jamthewriter",
      "permlink": "how-to-capture-a-monster-in-monster-hunter-world",
      "weight": 10000
    }
  ]
}2018/02/23 15:55:57
2018/02/23 15:55:57
| parent author | luckypower |
| parent permlink | re-jamthewriter-dealing-the-most-damage-in-monster-hunter-world-20180222t093637184z |
| author | jamthewriter |
| permlink | re-luckypower-re-jamthewriter-dealing-the-most-damage-in-monster-hunter-world-20180223t155601142z |
| title | |
| body | @luckypower Thank you so much! |
| json metadata | {"tags":["monsterhunter"],"users":["luckypower"],"app":"steemit/0.1"} |
| Transaction Info | Block #20125542/Trx 86b3b20ae4ba7df4b6a87f9531dcb3f56649450e |
View Raw JSON Data
{
  "trx_id": "86b3b20ae4ba7df4b6a87f9531dcb3f56649450e",
  "block": 20125542,
  "trx_in_block": 33,
  "op_in_trx": 0,
  "virtual_op": 0,
  "timestamp": "2018-02-23T15:55:57",
  "op": [
    "comment",
    {
      "parent_author": "luckypower",
      "parent_permlink": "re-jamthewriter-dealing-the-most-damage-in-monster-hunter-world-20180222t093637184z",
      "author": "jamthewriter",
      "permlink": "re-luckypower-re-jamthewriter-dealing-the-most-damage-in-monster-hunter-world-20180223t155601142z",
      "title": "",
      "body": "@luckypower Thank you so much!",
      "json_metadata": "{\"tags\":[\"monsterhunter\"],\"users\":[\"luckypower\"],\"app\":\"steemit/0.1\"}"
    }
  ]
}sayitloudupvoted (100.00%) @jamthewriter / how-to-capture-a-monster-in-monster-hunter-world2018/02/22 13:02:39
sayitloudupvoted (100.00%) @jamthewriter / how-to-capture-a-monster-in-monster-hunter-world
2018/02/22 13:02:39
| voter | sayitloud |
| author | jamthewriter |
| permlink | how-to-capture-a-monster-in-monster-hunter-world |
| weight | 10000 (100.00%) |
| Transaction Info | Block #20093281/Trx e5fc4178c60a30a7b57be5bb5fbd18904550b984 |
View Raw JSON Data
{
  "trx_id": "e5fc4178c60a30a7b57be5bb5fbd18904550b984",
  "block": 20093281,
  "trx_in_block": 62,
  "op_in_trx": 0,
  "virtual_op": 0,
  "timestamp": "2018-02-22T13:02:39",
  "op": [
    "vote",
    {
      "voter": "sayitloud",
      "author": "jamthewriter",
      "permlink": "how-to-capture-a-monster-in-monster-hunter-world",
      "weight": 10000
    }
  ]
}sayitloudupvoted (100.00%) @jamthewriter / dealing-the-most-damage-in-monster-hunter-world2018/02/22 13:02:12
sayitloudupvoted (100.00%) @jamthewriter / dealing-the-most-damage-in-monster-hunter-world
2018/02/22 13:02:12
| voter | sayitloud |
| author | jamthewriter |
| permlink | dealing-the-most-damage-in-monster-hunter-world |
| weight | 10000 (100.00%) |
| Transaction Info | Block #20093272/Trx d7a8b67c0880961070fe33b57319ca14c65ca6e1 |
View Raw JSON Data
{
  "trx_id": "d7a8b67c0880961070fe33b57319ca14c65ca6e1",
  "block": 20093272,
  "trx_in_block": 9,
  "op_in_trx": 0,
  "virtual_op": 0,
  "timestamp": "2018-02-22T13:02:12",
  "op": [
    "vote",
    {
      "voter": "sayitloud",
      "author": "jamthewriter",
      "permlink": "dealing-the-most-damage-in-monster-hunter-world",
      "weight": 10000
    }
  ]
}sensationupvoted (100.00%) @jamthewriter / dealing-the-most-damage-in-monster-hunter-world2018/02/22 10:55:42
sensationupvoted (100.00%) @jamthewriter / dealing-the-most-damage-in-monster-hunter-world
2018/02/22 10:55:42
| voter | sensation |
| author | jamthewriter |
| permlink | dealing-the-most-damage-in-monster-hunter-world |
| weight | 10000 (100.00%) |
| Transaction Info | Block #20090742/Trx 10d8bd95cf3567ed71deffa648a8f41c7256ff65 |
View Raw JSON Data
{
  "trx_id": "10d8bd95cf3567ed71deffa648a8f41c7256ff65",
  "block": 20090742,
  "trx_in_block": 7,
  "op_in_trx": 0,
  "virtual_op": 0,
  "timestamp": "2018-02-22T10:55:42",
  "op": [
    "vote",
    {
      "voter": "sensation",
      "author": "jamthewriter",
      "permlink": "dealing-the-most-damage-in-monster-hunter-world",
      "weight": 10000
    }
  ]
}learnandteach01upvoted (50.00%) @jamthewriter / dealing-the-most-damage-in-monster-hunter-world2018/02/22 10:51:15
learnandteach01upvoted (50.00%) @jamthewriter / dealing-the-most-damage-in-monster-hunter-world
2018/02/22 10:51:15
| voter | learnandteach01 |
| author | jamthewriter |
| permlink | dealing-the-most-damage-in-monster-hunter-world |
| weight | 5000 (50.00%) |
| Transaction Info | Block #20090653/Trx 4c462acac31165f1bfe7f9bd6f49e4a4ea1bea97 |
View Raw JSON Data
{
  "trx_id": "4c462acac31165f1bfe7f9bd6f49e4a4ea1bea97",
  "block": 20090653,
  "trx_in_block": 45,
  "op_in_trx": 0,
  "virtual_op": 0,
  "timestamp": "2018-02-22T10:51:15",
  "op": [
    "vote",
    {
      "voter": "learnandteach01",
      "author": "jamthewriter",
      "permlink": "dealing-the-most-damage-in-monster-hunter-world",
      "weight": 5000
    }
  ]
}umar97upvoted (10.00%) @jamthewriter / dealing-the-most-damage-in-monster-hunter-world2018/02/22 10:46:27
umar97upvoted (10.00%) @jamthewriter / dealing-the-most-damage-in-monster-hunter-world
2018/02/22 10:46:27
| voter | umar97 |
| author | jamthewriter |
| permlink | dealing-the-most-damage-in-monster-hunter-world |
| weight | 1000 (10.00%) |
| Transaction Info | Block #20090557/Trx 4b073ddba5228e29e5aaa58e8a0b09670ad947b0 |
View Raw JSON Data
{
  "trx_id": "4b073ddba5228e29e5aaa58e8a0b09670ad947b0",
  "block": 20090557,
  "trx_in_block": 55,
  "op_in_trx": 0,
  "virtual_op": 0,
  "timestamp": "2018-02-22T10:46:27",
  "op": [
    "vote",
    {
      "voter": "umar97",
      "author": "jamthewriter",
      "permlink": "dealing-the-most-damage-in-monster-hunter-world",
      "weight": 1000
    }
  ]
}zuulupvoted (100.00%) @jamthewriter / dealing-the-most-damage-in-monster-hunter-world2018/02/22 10:46:27
zuulupvoted (100.00%) @jamthewriter / dealing-the-most-damage-in-monster-hunter-world
2018/02/22 10:46:27
| voter | zuul |
| author | jamthewriter |
| permlink | dealing-the-most-damage-in-monster-hunter-world |
| weight | 10000 (100.00%) |
| Transaction Info | Block #20090557/Trx 839ff40021d909723599c16882b8ca181b944008 |
View Raw JSON Data
{
  "trx_id": "839ff40021d909723599c16882b8ca181b944008",
  "block": 20090557,
  "trx_in_block": 53,
  "op_in_trx": 0,
  "virtual_op": 0,
  "timestamp": "2018-02-22T10:46:27",
  "op": [
    "vote",
    {
      "voter": "zuul",
      "author": "jamthewriter",
      "permlink": "dealing-the-most-damage-in-monster-hunter-world",
      "weight": 10000
    }
  ]
}aamonupvoted (100.00%) @jamthewriter / dealing-the-most-damage-in-monster-hunter-world2018/02/22 10:46:27
aamonupvoted (100.00%) @jamthewriter / dealing-the-most-damage-in-monster-hunter-world
2018/02/22 10:46:27
| voter | aamon |
| author | jamthewriter |
| permlink | dealing-the-most-damage-in-monster-hunter-world |
| weight | 10000 (100.00%) |
| Transaction Info | Block #20090557/Trx 1524e51b5205fbe533869b0e06084706e7a38e3e |
View Raw JSON Data
{
  "trx_id": "1524e51b5205fbe533869b0e06084706e7a38e3e",
  "block": 20090557,
  "trx_in_block": 52,
  "op_in_trx": 0,
  "virtual_op": 0,
  "timestamp": "2018-02-22T10:46:27",
  "op": [
    "vote",
    {
      "voter": "aamon",
      "author": "jamthewriter",
      "permlink": "dealing-the-most-damage-in-monster-hunter-world",
      "weight": 10000
    }
  ]
}belialupvoted (100.00%) @jamthewriter / dealing-the-most-damage-in-monster-hunter-world2018/02/22 10:46:27
belialupvoted (100.00%) @jamthewriter / dealing-the-most-damage-in-monster-hunter-world
2018/02/22 10:46:27
| voter | belial |
| author | jamthewriter |
| permlink | dealing-the-most-damage-in-monster-hunter-world |
| weight | 10000 (100.00%) |
| Transaction Info | Block #20090557/Trx f670c0974e23054069681181b946e4fe170e475f |
View Raw JSON Data
{
  "trx_id": "f670c0974e23054069681181b946e4fe170e475f",
  "block": 20090557,
  "trx_in_block": 37,
  "op_in_trx": 0,
  "virtual_op": 0,
  "timestamp": "2018-02-22T10:46:27",
  "op": [
    "vote",
    {
      "voter": "belial",
      "author": "jamthewriter",
      "permlink": "dealing-the-most-damage-in-monster-hunter-world",
      "weight": 10000
    }
  ]
}demogorgonupvoted (100.00%) @jamthewriter / dealing-the-most-damage-in-monster-hunter-world2018/02/22 10:46:27
demogorgonupvoted (100.00%) @jamthewriter / dealing-the-most-damage-in-monster-hunter-world
2018/02/22 10:46:27
| voter | demogorgon |
| author | jamthewriter |
| permlink | dealing-the-most-damage-in-monster-hunter-world |
| weight | 10000 (100.00%) |
| Transaction Info | Block #20090557/Trx 6d63ad264297d0ddc4884697926ea9170ee79631 |
View Raw JSON Data
{
  "trx_id": "6d63ad264297d0ddc4884697926ea9170ee79631",
  "block": 20090557,
  "trx_in_block": 33,
  "op_in_trx": 0,
  "virtual_op": 0,
  "timestamp": "2018-02-22T10:46:27",
  "op": [
    "vote",
    {
      "voter": "demogorgon",
      "author": "jamthewriter",
      "permlink": "dealing-the-most-damage-in-monster-hunter-world",
      "weight": 10000
    }
  ]
}beelzebubupvoted (100.00%) @jamthewriter / dealing-the-most-damage-in-monster-hunter-world2018/02/22 10:46:21
beelzebubupvoted (100.00%) @jamthewriter / dealing-the-most-damage-in-monster-hunter-world
2018/02/22 10:46:21
| voter | beelzebub |
| author | jamthewriter |
| permlink | dealing-the-most-damage-in-monster-hunter-world |
| weight | 10000 (100.00%) |
| Transaction Info | Block #20090555/Trx bc540cf0b082dffc12cef07619c3f0c56a0a089d |
View Raw JSON Data
{
  "trx_id": "bc540cf0b082dffc12cef07619c3f0c56a0a089d",
  "block": 20090555,
  "trx_in_block": 53,
  "op_in_trx": 0,
  "virtual_op": 0,
  "timestamp": "2018-02-22T10:46:21",
  "op": [
    "vote",
    {
      "voter": "beelzebub",
      "author": "jamthewriter",
      "permlink": "dealing-the-most-damage-in-monster-hunter-world",
      "weight": 10000
    }
  ]
}buckydurddleupvoted (1.00%) @jamthewriter / dealing-the-most-damage-in-monster-hunter-world2018/02/22 10:46:21
buckydurddleupvoted (1.00%) @jamthewriter / dealing-the-most-damage-in-monster-hunter-world
2018/02/22 10:46:21
| voter | buckydurddle |
| author | jamthewriter |
| permlink | dealing-the-most-damage-in-monster-hunter-world |
| weight | 100 (1.00%) |
| Transaction Info | Block #20090555/Trx 1f238f45995c9363d874515d94453cb91a73522b |
View Raw JSON Data
{
  "trx_id": "1f238f45995c9363d874515d94453cb91a73522b",
  "block": 20090555,
  "trx_in_block": 50,
  "op_in_trx": 0,
  "virtual_op": 0,
  "timestamp": "2018-02-22T10:46:21",
  "op": [
    "vote",
    {
      "voter": "buckydurddle",
      "author": "jamthewriter",
      "permlink": "dealing-the-most-damage-in-monster-hunter-world",
      "weight": 100
    }
  ]
}thatdamiguyupvoted (60.00%) @jamthewriter / dealing-the-most-damage-in-monster-hunter-world2018/02/22 10:46:21
thatdamiguyupvoted (60.00%) @jamthewriter / dealing-the-most-damage-in-monster-hunter-world
2018/02/22 10:46:21
| voter | thatdamiguy |
| author | jamthewriter |
| permlink | dealing-the-most-damage-in-monster-hunter-world |
| weight | 6000 (60.00%) |
| Transaction Info | Block #20090555/Trx 451410b396c43abfbea75c9da0c379e1cd280fbd |
View Raw JSON Data
{
  "trx_id": "451410b396c43abfbea75c9da0c379e1cd280fbd",
  "block": 20090555,
  "trx_in_block": 14,
  "op_in_trx": 0,
  "virtual_op": 0,
  "timestamp": "2018-02-22T10:46:21",
  "op": [
    "vote",
    {
      "voter": "thatdamiguy",
      "author": "jamthewriter",
      "permlink": "dealing-the-most-damage-in-monster-hunter-world",
      "weight": 6000
    }
  ]
}dillemmaupvoted (100.00%) @jamthewriter / dealing-the-most-damage-in-monster-hunter-world2018/02/22 10:46:21
dillemmaupvoted (100.00%) @jamthewriter / dealing-the-most-damage-in-monster-hunter-world
2018/02/22 10:46:21
| voter | dillemma |
| author | jamthewriter |
| permlink | dealing-the-most-damage-in-monster-hunter-world |
| weight | 10000 (100.00%) |
| Transaction Info | Block #20090555/Trx 041df7794558ac8a730e3a1937793762275b61ee |
View Raw JSON Data
{
  "trx_id": "041df7794558ac8a730e3a1937793762275b61ee",
  "block": 20090555,
  "trx_in_block": 11,
  "op_in_trx": 0,
  "virtual_op": 0,
  "timestamp": "2018-02-22T10:46:21",
  "op": [
    "vote",
    {
      "voter": "dillemma",
      "author": "jamthewriter",
      "permlink": "dealing-the-most-damage-in-monster-hunter-world",
      "weight": 10000
    }
  ]
}papaudemeupvoted (100.00%) @jamthewriter / dealing-the-most-damage-in-monster-hunter-world2018/02/22 10:46:21
papaudemeupvoted (100.00%) @jamthewriter / dealing-the-most-damage-in-monster-hunter-world
2018/02/22 10:46:21
| voter | papaudeme |
| author | jamthewriter |
| permlink | dealing-the-most-damage-in-monster-hunter-world |
| weight | 10000 (100.00%) |
| Transaction Info | Block #20090555/Trx 01644a0e505fd514cbc76fe1148d83dfccac95fa |
View Raw JSON Data
{
  "trx_id": "01644a0e505fd514cbc76fe1148d83dfccac95fa",
  "block": 20090555,
  "trx_in_block": 10,
  "op_in_trx": 0,
  "virtual_op": 0,
  "timestamp": "2018-02-22T10:46:21",
  "op": [
    "vote",
    {
      "voter": "papaudeme",
      "author": "jamthewriter",
      "permlink": "dealing-the-most-damage-in-monster-hunter-world",
      "weight": 10000
    }
  ]
}misterakpanupvoted (100.00%) @jamthewriter / dealing-the-most-damage-in-monster-hunter-world2018/02/22 10:46:06
misterakpanupvoted (100.00%) @jamthewriter / dealing-the-most-damage-in-monster-hunter-world
2018/02/22 10:46:06
| voter | misterakpan |
| author | jamthewriter |
| permlink | dealing-the-most-damage-in-monster-hunter-world |
| weight | 10000 (100.00%) |
| Transaction Info | Block #20090550/Trx 3c538d5a17d6dd661d940ba56628ceb6d8282e80 |
View Raw JSON Data
{
  "trx_id": "3c538d5a17d6dd661d940ba56628ceb6d8282e80",
  "block": 20090550,
  "trx_in_block": 79,
  "op_in_trx": 0,
  "virtual_op": 0,
  "timestamp": "2018-02-22T10:46:06",
  "op": [
    "vote",
    {
      "voter": "misterakpan",
      "author": "jamthewriter",
      "permlink": "dealing-the-most-damage-in-monster-hunter-world",
      "weight": 10000
    }
  ]
}michelnillesupvoted (100.00%) @jamthewriter / dealing-the-most-damage-in-monster-hunter-world2018/02/22 10:19:36
michelnillesupvoted (100.00%) @jamthewriter / dealing-the-most-damage-in-monster-hunter-world
2018/02/22 10:19:36
| voter | michelnilles |
| author | jamthewriter |
| permlink | dealing-the-most-damage-in-monster-hunter-world |
| weight | 10000 (100.00%) |
| Transaction Info | Block #20090020/Trx 67b9eb5862e40f46d312565ec42272689f51a38d |
View Raw JSON Data
{
  "trx_id": "67b9eb5862e40f46d312565ec42272689f51a38d",
  "block": 20090020,
  "trx_in_block": 41,
  "op_in_trx": 0,
  "virtual_op": 0,
  "timestamp": "2018-02-22T10:19:36",
  "op": [
    "vote",
    {
      "voter": "michelnilles",
      "author": "jamthewriter",
      "permlink": "dealing-the-most-damage-in-monster-hunter-world",
      "weight": 10000
    }
  ]
}2018/02/22 10:06:54
2018/02/22 10:06:54
| voter | jamthewriter |
| author | luckypower |
| permlink | re-jamthewriter-dealing-the-most-damage-in-monster-hunter-world-20180222t093637184z |
| weight | 10000 (100.00%) |
| Transaction Info | Block #20089766/Trx 5c953dfd9152605f25a78632e4ddb6cdf2819e9e |
View Raw JSON Data
{
  "trx_id": "5c953dfd9152605f25a78632e4ddb6cdf2819e9e",
  "block": 20089766,
  "trx_in_block": 12,
  "op_in_trx": 0,
  "virtual_op": 0,
  "timestamp": "2018-02-22T10:06:54",
  "op": [
    "vote",
    {
      "voter": "jamthewriter",
      "author": "luckypower",
      "permlink": "re-jamthewriter-dealing-the-most-damage-in-monster-hunter-world-20180222t093637184z",
      "weight": 10000
    }
  ]
}safamarwaupvoted (100.00%) @jamthewriter / dealing-the-most-damage-in-monster-hunter-world2018/02/22 09:42:06
safamarwaupvoted (100.00%) @jamthewriter / dealing-the-most-damage-in-monster-hunter-world
2018/02/22 09:42:06
| voter | safamarwa |
| author | jamthewriter |
| permlink | dealing-the-most-damage-in-monster-hunter-world |
| weight | 10000 (100.00%) |
| Transaction Info | Block #20089270/Trx 76130684580500734694b4448a973be3d25d6e48 |
View Raw JSON Data
{
  "trx_id": "76130684580500734694b4448a973be3d25d6e48",
  "block": 20089270,
  "trx_in_block": 25,
  "op_in_trx": 0,
  "virtual_op": 0,
  "timestamp": "2018-02-22T09:42:06",
  "op": [
    "vote",
    {
      "voter": "safamarwa",
      "author": "jamthewriter",
      "permlink": "dealing-the-most-damage-in-monster-hunter-world",
      "weight": 10000
    }
  ]
}2018/02/22 09:36:42
2018/02/22 09:36:42
| parent author | jamthewriter |
| parent permlink | dealing-the-most-damage-in-monster-hunter-world |
| author | luckypower |
| permlink | re-jamthewriter-dealing-the-most-damage-in-monster-hunter-world-20180222t093637184z |
| title | |
| body | Your post is always helpful and its really fun to read it <3 |
| json metadata | {"tags":["monsterhunter"],"app":"steemit/0.1"} |
| Transaction Info | Block #20089162/Trx c86ce585c5c4dd30de53037702a1cc0f12716ee0 |
View Raw JSON Data
{
  "trx_id": "c86ce585c5c4dd30de53037702a1cc0f12716ee0",
  "block": 20089162,
  "trx_in_block": 56,
  "op_in_trx": 0,
  "virtual_op": 0,
  "timestamp": "2018-02-22T09:36:42",
  "op": [
    "comment",
    {
      "parent_author": "jamthewriter",
      "parent_permlink": "dealing-the-most-damage-in-monster-hunter-world",
      "author": "luckypower",
      "permlink": "re-jamthewriter-dealing-the-most-damage-in-monster-hunter-world-20180222t093637184z",
      "title": "",
      "body": "Your post is always helpful and its really fun to read it <3",
      "json_metadata": "{\"tags\":[\"monsterhunter\"],\"app\":\"steemit/0.1\"}"
    }
  ]
}luckypowerupvoted (100.00%) @jamthewriter / dealing-the-most-damage-in-monster-hunter-world2018/02/22 09:36:30
luckypowerupvoted (100.00%) @jamthewriter / dealing-the-most-damage-in-monster-hunter-world
2018/02/22 09:36:30
| voter | luckypower |
| author | jamthewriter |
| permlink | dealing-the-most-damage-in-monster-hunter-world |
| weight | 10000 (100.00%) |
| Transaction Info | Block #20089158/Trx a8d4a05ee97701d4121e6dfe3747b826edec45bf |
View Raw JSON Data
{
  "trx_id": "a8d4a05ee97701d4121e6dfe3747b826edec45bf",
  "block": 20089158,
  "trx_in_block": 23,
  "op_in_trx": 0,
  "virtual_op": 0,
  "timestamp": "2018-02-22T09:36:30",
  "op": [
    "vote",
    {
      "voter": "luckypower",
      "author": "jamthewriter",
      "permlink": "dealing-the-most-damage-in-monster-hunter-world",
      "weight": 10000
    }
  ]
}jake46upvoted (100.00%) @jamthewriter / dealing-the-most-damage-in-monster-hunter-world2018/02/22 09:36:03
jake46upvoted (100.00%) @jamthewriter / dealing-the-most-damage-in-monster-hunter-world
2018/02/22 09:36:03
| voter | jake46 |
| author | jamthewriter |
| permlink | dealing-the-most-damage-in-monster-hunter-world |
| weight | 10000 (100.00%) |
| Transaction Info | Block #20089149/Trx 21b26699cc7b223e4bfb697f3ee6a6e1c7520afe |
View Raw JSON Data
{
  "trx_id": "21b26699cc7b223e4bfb697f3ee6a6e1c7520afe",
  "block": 20089149,
  "trx_in_block": 44,
  "op_in_trx": 0,
  "virtual_op": 0,
  "timestamp": "2018-02-22T09:36:03",
  "op": [
    "vote",
    {
      "voter": "jake46",
      "author": "jamthewriter",
      "permlink": "dealing-the-most-damage-in-monster-hunter-world",
      "weight": 10000
    }
  ]
}khabirul02upvoted (100.00%) @jamthewriter / dealing-the-most-damage-in-monster-hunter-world2018/02/22 09:35:57
khabirul02upvoted (100.00%) @jamthewriter / dealing-the-most-damage-in-monster-hunter-world
2018/02/22 09:35:57
| voter | khabirul02 |
| author | jamthewriter |
| permlink | dealing-the-most-damage-in-monster-hunter-world |
| weight | 10000 (100.00%) |
| Transaction Info | Block #20089147/Trx 9bf35b694ae63b73863d2ff3ffb73d12b75e071b |
View Raw JSON Data
{
  "trx_id": "9bf35b694ae63b73863d2ff3ffb73d12b75e071b",
  "block": 20089147,
  "trx_in_block": 6,
  "op_in_trx": 0,
  "virtual_op": 0,
  "timestamp": "2018-02-22T09:35:57",
  "op": [
    "vote",
    {
      "voter": "khabirul02",
      "author": "jamthewriter",
      "permlink": "dealing-the-most-damage-in-monster-hunter-world",
      "weight": 10000
    }
  ]
}jamthewriterpublished a new post: dealing-the-most-damage-in-monster-hunter-world2018/02/22 09:35:39
jamthewriterpublished a new post: dealing-the-most-damage-in-monster-hunter-world
2018/02/22 09:35:39
| parent author | |
| parent permlink | monsterhunter |
| author | jamthewriter |
| permlink | dealing-the-most-damage-in-monster-hunter-world |
| title | Dealing The Most Damage in Monster Hunter: World |
| body | The core gameplay of Monster Hunter, regardless of what iteration of the series you're playing, is the act of hunting powerful monsters. You go in all geared up and decked out, and go ham. https://i.imgur.com/I4I46bn.jpg To simplify any guide written for Monster Hunter's complex combat, simply refer to the two tenets of skilled MonHun gameplay: 1. hit things until they die 2. don't get hit And that, ladies and gentlemen, is all there is to it. Of course, it's not quite that simple. Monster Hunter: World is the latest in a series of modern video games built around challenging and satisfying gameplay - it's not about creating artificial challenge through inflated health values and low player damage, or through paywalls and microtransactions. In Monster Hunter, the game has a simple and fair premise, gives you the tools to succeed, and forces you to rely entirely on your skill as a player to complete the objective, and improve in the long-run. Half the fun in Monster Hunter is beating a monster that was giving you hell - and it is often those moments that turn a frustrated, alienated player into a new life-long fan. But where many find fun in going toe-to-toe against monsters again and again, some of us are compulsive nerds who need to pick apart a game's every mechanic until we turn on our consoles and see the inner workings of the game with our third eye. If you are a fellow minmaxer (someone who wants maximum performance gear-wise), then strap in, because this is the guide you were looking for. Today, we'll discuss how damage works in Monster Hunter, and how you can calculate and compare builds for maximum DPS. ## What Is Attack Power and True Raw? When you check your equipment info in-game, you will see that you've got an attack power indicated on your general hunter info screen, next to your affinity, health, stamina, defense and elemental resistances. This is your displayed raw. Raw indicates "raw damage", disregarding affinity or elemental/status damage, which is calculated after the raw attack power of your weapon. 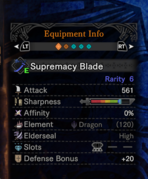 However, your displayed attack power - in your equipment screen - already takes into account several different things. We need to dig deeper to the basics of Monster Hunter damage values - and for that, we need to understand what true raw is. Every weapon in the game has a true raw value, and in the end-game of Monster Hunter World this typically ranges from 180 to 230. G-rank weapons go even higher with their true raw, but are absent in this game. When you go to craft a hammer, the number you see in the Attack Value slot is the weapon's true raw modified by its weapon modifier. These bloated attack numbers honestly just complicate things, but they do a good job of indicating the overall speed of a weapon - weapons with bigger numbers tend to have slower swing speeds, while weapons that hit very quickly and very often have smaller Attack Values. That is a consequence of their respective weapon modifiers. When calculating between different options of a single weapon type (choosing between hammer A and hammer B), you can basically leave weapon modifiers out of the equation. Instead, take the weapon's true raw and any raw modifiers. Raw modifiers come in the form of armor skills, items, kitchen buffs and horn buffs. We'll take the Diablos Shatterer II as an example here. It is a hammer with 230 true raw and -25% affinity. ### Armor Skills If your armor skills include Attack Boost 6 and Agitator 5 (a common duo in hammer mixed sets), then you have a total additional raw of 38 (18 from Attack, 20 from Agitator) when a monster is enraged, which is common. This boosts your weapon's true raw to 268. Other armor skills affect raw as well. Here are a few, not counting the two mentioned above: Armor Skill | Effect -------------------------|------------------------------------------------------ Peak Performance | 3 Levels. Adds 20 true raw to your weapon if your health is full. Heroics | 5 Levels. Activates when your health is low, takes your weapon's true raw and adds a total 30% - a huge boost. Fortify | 1 Level. Adds 10% after two faints. Non-Elemental Boost | 1 Level. Adds another 10% for weapons without active status/element (includes unawakened weapons). Resentment | 5 Levels. Adds up to 25 true raw whenever you take damage and are still recovering with red HP. ### Food and Item Buffs Given Attack 6 and Agitator 5, factor in the Attack Up kitchen skill (5/10/15 raw), and a few booster items, you can take the Diablos hammer and pump its raw up to a relatively consistent 310. Here are the item buffs that stack: - Might Seed (lasts 3 minutes, adds 10 raw) - Might Pill (lasts 20 seconds, adds 20 raw) - Mega Demondrug (lasts until fainting, adds 7 raw) - Demon Powder (lasts three minutes, adds 10 raw) The Might Pill is highly situational due to its low duration, but allows you to get that raw up to 330 for a short time. However, raw alone is not the key to victory. ## Affinity And Why It Matters Affinity is basically a weapon's crit chance. However, critical hits are not as important in Monster Hunter as they may be in many other games. A [crit](https://mhworld.kiranico.com/guide/damage#critical-hit) in Monster Hunter takes your raw damage and multiplies it by 1.25. A negative crit (for negative affinity) deals x0.75 damage. https://mhworld.kiranico.com/storage/assets/guide/images/combat_critical_hit.png _Credits to Kiranico_ Because it's a percentage chance to get a crit (for example, 20% affinity represents a 20% chance to hit 25% harder), there is a formula for calculating crit and true raw to get to calculated raw. The formula is: > True Raw x (1 + 0.Affinity x (25/100)) = Calculated Raw Critical Boost modifies crit damage, changing it to 1.30, 1.35, and 1.40 for each level. If your set uses Critical Boost, simply replace 25/100 with your critical hit damage (i.e. 40/100). If you're not using Critical Boost, you can further simplify this for easy usage: > True Raw x (1 + 0.Affinity x 0.25) = Calculated Raw Negative raw works much the same way - simply amend your formula. For example, the Diablos Shatterer II without any armor skills, augmentations or buff items would have a calculated raw of: > 230 x (1 - 0.25 x 0.25) = 215 But for our Diablos hammer build, assuming we're using our buffs and taking into consideration our armor, we're looking at 310 raw and 10% affinity (due to Agitator 5, and two Affinity [augmentations](https://mhworld.kiranico.com/guide/augmentation) adding 20% affinity): > 310 x (1 + 0.10 x 0.25) = 317 Always round down. But what if we add Weakness Exploit into the mix? It's another very common armor skill for damage, and assuming we're hitting heads here (which we should be doing), we effectively have 50 extra affinity. Thus: > 310 x (1 + 0.60 x 0.25) = 356 This isn't how much damage we're doing on a crit, rather, it's an approximation of how much damage we're doing in general/on average. You can take the formula and adapt it for yourself. Throw in Critical Eye for more affinity, or Critical Boost to change 1.25 to higher, better values. But of course, we're not done. What do we do with this calculated raw? We determine the weapon's sharpness. ## Sharpness Modifiers Sharpness modifiers are the extra damage a weapon deals when in a certain level of sharpness. The modifiers are as follows: 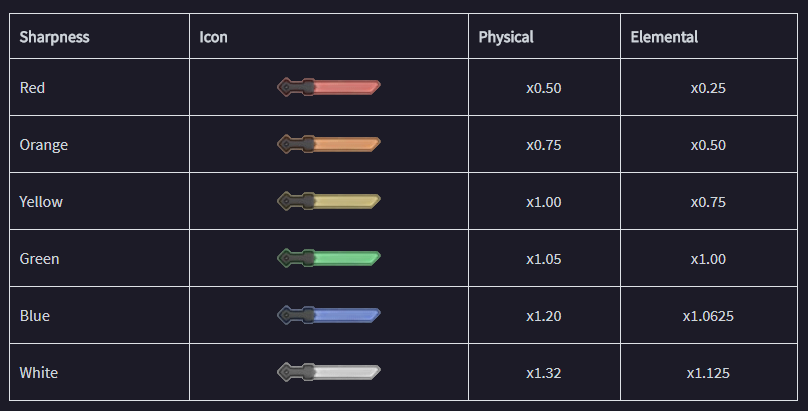 _Credits to Kiranico_ Because of the jump from blue to white (1.2 to 1.32) it's easy to see why some weapons with decent raw but amazing white sharpness outperform weapons with high raw but low sharpness.Similarly, hitting yellow is such a steep drop (35%) that it must be avoided at all costs. Higher sharpness also prevents bouncing from some monster hides, making it doubly useful. Sharpness modifiers are typically thrown in before affinity, but the end result is the same. You can easily test this (always round down). > 310 x (1 + 0.60 x 0.25) x 1.2 = 427 > 310 x 1.2 x (1 + 0.60 x 0.25) = 427 Our Diablos Shatterer II has blue sharpness. However, there are builds that allow you to sacrifice raw for massively improved sharpness. For example, by combining a Handicraft Charm III with the Kushala Alpha mail and Xeno'Jiiva gear, you can attain Handicraft 5 and the Razor Sharp effect from Xeno'Jiiva' set bonus, consistently giving you white sharpness at the cost of raw from Attack Boost and Agitator. Do your own calculations to see if the sharpness to raw tradeoff is worth it for you. ## Weapon Modifiers and Motion Values Once we have our calculated raw, including raw boosts, affinity, and sharpness. This is all you need when comparing options within weapon types. It's not possible to compare between weapons, because of the variables in performance and DPS, but using the formulas above you can decide which hammer to take with you, and which set to craft for it. But what if you want to know how much damage you can deal in a single hit? It's time to take into consideration three crucial things: weapon modifiers, damage types, and motion values. Weapon modifiers are the cause of bloated attack values, as mentioned previously. Aside from giving you a sense of how "big" the weapon is, they don't do much. An attack's actual power is determined by its motion value. The bigger the motion value, the more powerful the attack. Weapons like hammers have on average much higher motion values than weapons like dual blades, but they still have some attacks with far greater motion values than others. For example, the motion value for the last hit in the hammer's Big Bang combo has a much larger motion value than the rest of the combo. When calculating the damage of a specific hit, rather than the weapon itself, the motion value is the first thing you take into consideration after raw, affinity and sharpness. It's a simple modifier - a motion value of 40 means 40% of your total calculated attack. ## Hitzones So we've got attack power and motion values down - what's next? Hitzones. Hitzones are where the monster actually comes into play - they determine the amount of damage you're actually landing, and subtracting off the monster's hidden HP value. Hitzones above 45 are considered weakzones - hitting these activates Weakness Exploit, giving you an additional 50% affinity. Much like motion values, hitzones are modifiers - a hitzone of 50 means 50% of your attack is landing. This is where damage types also come into play. Hitzones change depending on the damage type you use to hit that hitzone. Rathalos' head has a cutting hitzone of 50, but an impact hitzone of 70. In other words, he hates hammers. If you're gunning, his head also has a hitzone of 50. So say you hit a crit with 310 raw and blue sharpness hammer, on a 91 MV move (final hit of the stationary power charge combo) on Rathalos' head (70 hitzone for impact damage). That's: > 310 x 1.2 x 0.91 x 0.70 = 236 ## Elemental & Status Weapons I'm predominantly a hammer and charge blade user, so when it comes to elemental weaponry, I basically don't care much at all given the usefulness of the Non-Elemental Boost skill. But other people do care - so it's important to educate them on how to calc for elemental damage. Much like how different damage types get different hitzones, elemental damage is also hitzone-dependent. For an elemental blademaster weapon, you'll want to calculate your elemental damage and raw damage separately. Keep in mind everything I've written about raw damage, and now create a separate calc for the elemental damage to add the two. Only faster weapons are viable for both elemental and status application, as these are per hit, and motion values do not matter. First, refer to the sharpness modifiers above. Then, take your weapon's elemental damage number, multiply it by the sharpness modifier, and check the monster's elemental weakzone. Rathalos' head has a dragon weakness of 25. We'll take the Enduring Schism as an example, with 270 Dragon element and 140 true raw. We know how to calc for raw. But what about elemental? 270 Dragon actually translates to 27. Elemental attacks land 33% of the time. Assuming you do not crit, that's 27 damage dealt to a hitzone of 25 - so a quarter of that damage applies. Rounded down, taking blue sharpness into account, that is 7 extra damage for every third hit on average. Because of this, it is not strictly a good idea to focus entirely on elemental damage when picking dual blades. Choose something middle-of-the-road, like Nergigante's dual blades, or Xeno'Jiivas. Status damage works differently. Status damage again only deals 10% of the displayed status stat, and this still happens only 33% of the time, but hitzones do not matter. A status weapon will deal status no matter where it hits, and this status builds up until a monster's initial threshold is reached. Then, it falls asleep/gets paralyzed/is poisoned. When the status wears off, the threshold is increased slightly, until it reaches a maximum. This makes it harder and harder to achieve the next instance of poison/sleep/paralysis. ## Fixed Damage Some weapons deal additional fixed damage. This is damage dealt regardless of hitzones, affinity or sharpness. The two most note-worthy weapons with fixed damage are the charge blade and the gunlance. Both weapons have explosive phials that can be made more powerful through the Artillery skill, which increases shelling/impact phial damage by 30% at Level 3. Like elemental damage, this can simply be added onto the attack itself. For example, an SAED has a massive motion value in the axe strike, alongside 1-6 phial explosions based on the weapon's raw, Artillery, and how many phials are loaded into the blade (Capacity Boost skill adds an additional phial). The same goes for the gunlance's full-burst, which unloads the entire magazine. Additionally, a charge blade's phial damage is tied to the weapon's raw, rather than being truly "fixed" ## Do You Like Big Numbers? This is a lot of technical information, but it helps when comparing weapons and testing sets. Maybe you'd like to swap out your Tenderizer jewel for that Attack jewel you just got. But is the jump from 18 raw and 5% affinity to 21 raw and 5% affinity worth the drop from 50% affinity to 30% affinity? Is it better to prioritize white sharpness on a heavy-hitting Diablos weapon, or stack raw? Give it a go and see what you come up with. |
| json metadata | {"tags":["monsterhunter","gaming","games","ps4","xbox"],"image":["https://i.imgur.com/I4I46bn.jpg","https://steemitimages.com/DQmWXW81fK8DvKkawEe6zBsG3PaPeX9N9qhzxFUeoxR8oZ8/Fq74cLhg.png","https://mhworld.kiranico.com/storage/assets/guide/images/combat_critical_hit.png","https://steemitimages.com/DQmQmKDb982dy95muQoq8NU3hXPGCAm32CbiXgaEY8Tcx5W/mspaint_2018-02-22_17-12-51.png"],"links":["https://mhworld.kiranico.com/guide/damage#critical-hit","https://mhworld.kiranico.com/guide/augmentation"],"app":"steemit/0.1","format":"markdown"} |
| Transaction Info | Block #20089141/Trx 5e33482093c2d0ea2bce68902b1bb70c122e3b7f |
View Raw JSON Data
{
"trx_id": "5e33482093c2d0ea2bce68902b1bb70c122e3b7f",
"block": 20089141,
"trx_in_block": 14,
"op_in_trx": 0,
"virtual_op": 0,
"timestamp": "2018-02-22T09:35:39",
"op": [
"comment",
{
"parent_author": "",
"parent_permlink": "monsterhunter",
"author": "jamthewriter",
"permlink": "dealing-the-most-damage-in-monster-hunter-world",
"title": "Dealing The Most Damage in Monster Hunter: World",
"body": "The core gameplay of Monster Hunter, regardless of what iteration of the series you're playing, is the act of hunting powerful monsters. You go in all geared up and decked out, and go ham. \n\nhttps://i.imgur.com/I4I46bn.jpg\n\nTo simplify any guide written for Monster Hunter's complex combat, simply refer to the two tenets of skilled MonHun gameplay:\n\n1. hit things until they die \n2. don't get hit\n\nAnd that, ladies and gentlemen, is all there is to it. \n\nOf course, it's not quite that simple. Monster Hunter: World is the latest in a series of modern video games built around challenging and satisfying gameplay - it's not about creating artificial challenge through inflated health values and low player damage, or through paywalls and microtransactions. In Monster Hunter, the game has a simple and fair premise, gives you the tools to succeed, and forces you to rely entirely on your skill as a player to complete the objective, and improve in the long-run. \n\nHalf the fun in Monster Hunter is beating a monster that was giving you hell - and it is often those moments that turn a frustrated, alienated player into a new life-long fan. \n\nBut where many find fun in going toe-to-toe against monsters again and again, some of us are compulsive nerds who need to pick apart a game's every mechanic until we turn on our consoles and see the inner workings of the game with our third eye. If you are a fellow minmaxer (someone who wants maximum performance gear-wise), then strap in, because this is the guide you were looking for. Today, we'll discuss how damage works in Monster Hunter, and how you can calculate and compare builds for maximum DPS. \n\n## What Is Attack Power and True Raw?\nWhen you check your equipment info in-game, you will see that you've got an attack power indicated on your general hunter info screen, next to your affinity, health, stamina, defense and elemental resistances. This is your displayed raw. Raw indicates \"raw damage\", disregarding affinity or elemental/status damage, which is calculated after the raw attack power of your weapon. \n\n\n\nHowever, your displayed attack power - in your equipment screen - already takes into account several different things. We need to dig deeper to the basics of Monster Hunter damage values - and for that, we need to understand what true raw is. \n\nEvery weapon in the game has a true raw value, and in the end-game of Monster Hunter World this typically ranges from 180 to 230. G-rank weapons go even higher with their true raw, but are absent in this game. When you go to craft a hammer, the number you see in the Attack Value slot is the weapon's true raw modified by its weapon modifier. These bloated attack numbers honestly just complicate things, but they do a good job of indicating the overall speed of a weapon - weapons with bigger numbers tend to have slower swing speeds, while weapons that hit very quickly and very often have smaller Attack Values. That is a consequence of their respective weapon modifiers. \n\nWhen calculating between different options of a single weapon type (choosing between hammer A and hammer B), you can basically leave weapon modifiers out of the equation. Instead, take the weapon's true raw and any raw modifiers. \n\nRaw modifiers come in the form of armor skills, items, kitchen buffs and horn buffs. We'll take the Diablos Shatterer II as an example here. It is a hammer with 230 true raw and -25% affinity.\n\n### Armor Skills\n\nIf your armor skills include Attack Boost 6 and Agitator 5 (a common duo in hammer mixed sets), then you have a total additional raw of 38 (18 from Attack, 20 from Agitator) when a monster is enraged, which is common. This boosts your weapon's true raw to 268. \n\nOther armor skills affect raw as well. Here are a few, not counting the two mentioned above: \nArmor Skill | Effect\n-------------------------|------------------------------------------------------\nPeak Performance | 3 Levels. Adds 20 true raw to your weapon if your health is full. \nHeroics | 5 Levels. Activates when your health is low, takes your weapon's true raw and adds a total 30% - a huge boost. \nFortify | 1 Level. Adds 10% after two faints. \nNon-Elemental Boost | 1 Level. Adds another 10% for weapons without active status/element (includes unawakened weapons).\nResentment | 5 Levels. Adds up to 25 true raw whenever you take damage and are still recovering with red HP. \n\n### Food and Item Buffs\n\nGiven Attack 6 and Agitator 5, factor in the Attack Up kitchen skill (5/10/15 raw), and a few booster items, you can take the Diablos hammer and pump its raw up to a relatively consistent 310. Here are the item buffs that stack: \n- Might Seed (lasts 3 minutes, adds 10 raw)\n- Might Pill (lasts 20 seconds, adds 20 raw)\n- Mega Demondrug (lasts until fainting, adds 7 raw)\n- Demon Powder (lasts three minutes, adds 10 raw)\n\nThe Might Pill is highly situational due to its low duration, but allows you to get that raw up to 330 for a short time. However, raw alone is not the key to victory. \n\n## Affinity And Why It Matters\nAffinity is basically a weapon's crit chance. However, critical hits are not as important in Monster Hunter as they may be in many other games. A [crit](https://mhworld.kiranico.com/guide/damage#critical-hit) in Monster Hunter takes your raw damage and multiplies it by 1.25. A negative crit (for negative affinity) deals x0.75 damage.\n\nhttps://mhworld.kiranico.com/storage/assets/guide/images/combat_critical_hit.png\n_Credits to Kiranico_\n\nBecause it's a percentage chance to get a crit (for example, 20% affinity represents a 20% chance to hit 25% harder), there is a formula for calculating crit and true raw to get to calculated raw. The formula is: \n\n> True Raw x (1 + 0.Affinity x (25/100)) = Calculated Raw\n\nCritical Boost modifies crit damage, changing it to 1.30, 1.35, and 1.40 for each level. If your set uses Critical Boost, simply replace 25/100 with your critical hit damage (i.e. 40/100). If you're not using Critical Boost, you can further simplify this for easy usage: \n\n> True Raw x (1 + 0.Affinity x 0.25) = Calculated Raw\n\nNegative raw works much the same way - simply amend your formula. For example, the Diablos Shatterer II without any armor skills, augmentations or buff items would have a calculated raw of: \n\n> 230 x (1 - 0.25 x 0.25) = 215\n\nBut for our Diablos hammer build, assuming we're using our buffs and taking into consideration our armor, we're looking at 310 raw and 10% affinity (due to Agitator 5, and two Affinity [augmentations](https://mhworld.kiranico.com/guide/augmentation) adding 20% affinity): \n\n> 310 x (1 + 0.10 x 0.25) = 317 \n\nAlways round down. But what if we add Weakness Exploit into the mix? It's another very common armor skill for damage, and assuming we're hitting heads here (which we should be doing), we effectively have 50 extra affinity. Thus: \n\n> 310 x (1 + 0.60 x 0.25) = 356\n\nThis isn't how much damage we're doing on a crit, rather, it's an approximation of how much damage we're doing in general/on average. You can take the formula and adapt it for yourself. Throw in Critical Eye for more affinity, or Critical Boost to change 1.25 to higher, better values. \n\nBut of course, we're not done. What do we do with this calculated raw? We determine the weapon's sharpness. \n\n## Sharpness Modifiers\n\nSharpness modifiers are the extra damage a weapon deals when in a certain level of sharpness. The modifiers are as follows: \n\n\n_Credits to Kiranico_\n\nBecause of the jump from blue to white (1.2 to 1.32) it's easy to see why some weapons with decent raw but amazing white sharpness outperform weapons with high raw but low sharpness.Similarly, hitting yellow is such a steep drop (35%) that it must be avoided at all costs. Higher sharpness also prevents bouncing from some monster hides, making it doubly useful. Sharpness modifiers are typically thrown in before affinity, but the end result is the same. You can easily test this (always round down). \n\n> 310 x (1 + 0.60 x 0.25) x 1.2 = 427\n> 310 x 1.2 x (1 + 0.60 x 0.25) = 427\n\nOur Diablos Shatterer II has blue sharpness. However, there are builds that allow you to sacrifice raw for massively improved sharpness. For example, by combining a Handicraft Charm III with the Kushala Alpha mail and Xeno'Jiiva gear, you can attain Handicraft 5 and the Razor Sharp effect from Xeno'Jiiva' set bonus, consistently giving you white sharpness at the cost of raw from Attack Boost and Agitator. Do your own calculations to see if the sharpness to raw tradeoff is worth it for you. \n\n## Weapon Modifiers and Motion Values\n\nOnce we have our calculated raw, including raw boosts, affinity, and sharpness. This is all you need when comparing options within weapon types. It's not possible to compare between weapons, because of the variables in performance and DPS, but using the formulas above you can decide which hammer to take with you, and which set to craft for it. \n\nBut what if you want to know how much damage you can deal in a single hit? It's time to take into consideration three crucial things: weapon modifiers, damage types, and motion values. \n\nWeapon modifiers are the cause of bloated attack values, as mentioned previously. Aside from giving you a sense of how \"big\" the weapon is, they don't do much. An attack's actual power is determined by its motion value. The bigger the motion value, the more powerful the attack. Weapons like hammers have on average much higher motion values than weapons like dual blades, but they still have some attacks with far greater motion values than others. For example, the motion value for the last hit in the hammer's Big Bang combo has a much larger motion value than the rest of the combo. \n\nWhen calculating the damage of a specific hit, rather than the weapon itself, the motion value is the first thing you take into consideration after raw, affinity and sharpness. It's a simple modifier - a motion value of 40 means 40% of your total calculated attack. \n\n## Hitzones\n\nSo we've got attack power and motion values down - what's next? Hitzones. Hitzones are where the monster actually comes into play - they determine the amount of damage you're actually landing, and subtracting off the monster's hidden HP value. Hitzones above 45 are considered weakzones - hitting these activates Weakness Exploit, giving you an additional 50% affinity. Much like motion values, hitzones are modifiers - a hitzone of 50 means 50% of your attack is landing. \n\nThis is where damage types also come into play. Hitzones change depending on the damage type you use to hit that hitzone. Rathalos' head has a cutting hitzone of 50, but an impact hitzone of 70. In other words, he hates hammers. If you're gunning, his head also has a hitzone of 50. \n\nSo say you hit a crit with 310 raw and blue sharpness hammer, on a 91 MV move (final hit of the stationary power charge combo) on Rathalos' head (70 hitzone for impact damage). That's: \n\n> 310 x 1.2 x 0.91 x 0.70 = 236\n\n## Elemental & Status Weapons\n\nI'm predominantly a hammer and charge blade user, so when it comes to elemental weaponry, I basically don't care much at all given the usefulness of the Non-Elemental Boost skill. But other people do care - so it's important to educate them on how to calc for elemental damage. \n\nMuch like how different damage types get different hitzones, elemental damage is also hitzone-dependent. For an elemental blademaster weapon, you'll want to calculate your elemental damage and raw damage separately. Keep in mind everything I've written about raw damage, and now create a separate calc for the elemental damage to add the two. Only faster weapons are viable for both elemental and status application, as these are per hit, and motion values do not matter. \n\nFirst, refer to the sharpness modifiers above. Then, take your weapon's elemental damage number, multiply it by the sharpness modifier, and check the monster's elemental weakzone. \n\nRathalos' head has a dragon weakness of 25. We'll take the Enduring Schism as an example, with 270 Dragon element and 140 true raw. We know how to calc for raw. But what about elemental? \n\n270 Dragon actually translates to 27. Elemental attacks land 33% of the time. Assuming you do not crit, that's 27 damage dealt to a hitzone of 25 - so a quarter of that damage applies. Rounded down, taking blue sharpness into account, that is 7 extra damage for every third hit on average. Because of this, it is not strictly a good idea to focus entirely on elemental damage when picking dual blades. Choose something middle-of-the-road, like Nergigante's dual blades, or Xeno'Jiivas. \n\nStatus damage works differently. Status damage again only deals 10% of the displayed status stat, and this still happens only 33% of the time, but hitzones do not matter. A status weapon will deal status no matter where it hits, and this status builds up until a monster's initial threshold is reached. Then, it falls asleep/gets paralyzed/is poisoned. \n\nWhen the status wears off, the threshold is increased slightly, until it reaches a maximum. This makes it harder and harder to achieve the next instance of poison/sleep/paralysis. \n\n## Fixed Damage\n\nSome weapons deal additional fixed damage. This is damage dealt regardless of hitzones, affinity or sharpness. The two most note-worthy weapons with fixed damage are the charge blade and the gunlance. Both weapons have explosive phials that can be made more powerful through the Artillery skill, which increases shelling/impact phial damage by 30% at Level 3. Like elemental damage, this can simply be added onto the attack itself. \n\nFor example, an SAED has a massive motion value in the axe strike, alongside 1-6 phial explosions based on the weapon's raw, Artillery, and how many phials are loaded into the blade (Capacity Boost skill adds an additional phial). The same goes for the gunlance's full-burst, which unloads the entire magazine. Additionally, a charge blade's phial damage is tied to the weapon's raw, rather than being truly \"fixed\"\n\n## Do You Like Big Numbers? \n\nThis is a lot of technical information, but it helps when comparing weapons and testing sets. Maybe you'd like to swap out your Tenderizer jewel for that Attack jewel you just got. But is the jump from 18 raw and 5% affinity to 21 raw and 5% affinity worth the drop from 50% affinity to 30% affinity? Is it better to prioritize white sharpness on a heavy-hitting Diablos weapon, or stack raw? Give it a go and see what you come up with.",
"json_metadata": "{\"tags\":[\"monsterhunter\",\"gaming\",\"games\",\"ps4\",\"xbox\"],\"image\":[\"https://i.imgur.com/I4I46bn.jpg\",\"https://steemitimages.com/DQmWXW81fK8DvKkawEe6zBsG3PaPeX9N9qhzxFUeoxR8oZ8/Fq74cLhg.png\",\"https://mhworld.kiranico.com/storage/assets/guide/images/combat_critical_hit.png\",\"https://steemitimages.com/DQmQmKDb982dy95muQoq8NU3hXPGCAm32CbiXgaEY8Tcx5W/mspaint_2018-02-22_17-12-51.png\"],\"links\":[\"https://mhworld.kiranico.com/guide/damage#critical-hit\",\"https://mhworld.kiranico.com/guide/augmentation\"],\"app\":\"steemit/0.1\",\"format\":\"markdown\"}"
}
]
}michelnillesupvoted (100.00%) @jamthewriter / how-to-capture-a-monster-in-monster-hunter-world2018/02/22 02:21:30
michelnillesupvoted (100.00%) @jamthewriter / how-to-capture-a-monster-in-monster-hunter-world
2018/02/22 02:21:30
| voter | michelnilles |
| author | jamthewriter |
| permlink | how-to-capture-a-monster-in-monster-hunter-world |
| weight | 10000 (100.00%) |
| Transaction Info | Block #20080460/Trx 2d55319518011ef1947c7dd8a36ba2b7fa1d0f1e |
View Raw JSON Data
{
  "trx_id": "2d55319518011ef1947c7dd8a36ba2b7fa1d0f1e",
  "block": 20080460,
  "trx_in_block": 61,
  "op_in_trx": 0,
  "virtual_op": 0,
  "timestamp": "2018-02-22T02:21:30",
  "op": [
    "vote",
    {
      "voter": "michelnilles",
      "author": "jamthewriter",
      "permlink": "how-to-capture-a-monster-in-monster-hunter-world",
      "weight": 10000
    }
  ]
}jamthewriterclaimed reward balance: 0.527 SBD, 0.154 SP2018/02/22 02:18:00
jamthewriterclaimed reward balance: 0.527 SBD, 0.154 SP
2018/02/22 02:18:00
| account | jamthewriter |
| reward steem | 0.000 STEEM |
| reward sbd | 0.527 SBD |
| reward vests | 251.424304 VESTS |
| Transaction Info | Block #20080390/Trx 6a948da95dffa1943c57131c349dcaba1e6324df |
View Raw JSON Data
{
  "trx_id": "6a948da95dffa1943c57131c349dcaba1e6324df",
  "block": 20080390,
  "trx_in_block": 35,
  "op_in_trx": 0,
  "virtual_op": 0,
  "timestamp": "2018-02-22T02:18:00",
  "op": [
    "claim_reward_balance",
    {
      "account": "jamthewriter",
      "reward_steem": "0.000 STEEM",
      "reward_sbd": "0.527 SBD",
      "reward_vests": "251.424304 VESTS"
    }
  ]
}cbjarzupvoted (100.00%) @jamthewriter / how-to-capture-a-monster-in-monster-hunter-world2018/02/21 15:19:18
cbjarzupvoted (100.00%) @jamthewriter / how-to-capture-a-monster-in-monster-hunter-world
2018/02/21 15:19:18
| voter | cbjarz |
| author | jamthewriter |
| permlink | how-to-capture-a-monster-in-monster-hunter-world |
| weight | 10000 (100.00%) |
| Transaction Info | Block #20067221/Trx c5603193012c64d3b0e016911c6678e329e1c046 |
View Raw JSON Data
{
  "trx_id": "c5603193012c64d3b0e016911c6678e329e1c046",
  "block": 20067221,
  "trx_in_block": 33,
  "op_in_trx": 0,
  "virtual_op": 0,
  "timestamp": "2018-02-21T15:19:18",
  "op": [
    "vote",
    {
      "voter": "cbjarz",
      "author": "jamthewriter",
      "permlink": "how-to-capture-a-monster-in-monster-hunter-world",
      "weight": 10000
    }
  ]
}sensationupvoted (100.00%) @jamthewriter / how-to-capture-a-monster-in-monster-hunter-world2018/02/21 10:54:30
sensationupvoted (100.00%) @jamthewriter / how-to-capture-a-monster-in-monster-hunter-world
2018/02/21 10:54:30
| voter | sensation |
| author | jamthewriter |
| permlink | how-to-capture-a-monster-in-monster-hunter-world |
| weight | 10000 (100.00%) |
| Transaction Info | Block #20061925/Trx a1a9061b6a371ec16432476be86d9461ee3a6507 |
View Raw JSON Data
{
  "trx_id": "a1a9061b6a371ec16432476be86d9461ee3a6507",
  "block": 20061925,
  "trx_in_block": 6,
  "op_in_trx": 0,
  "virtual_op": 0,
  "timestamp": "2018-02-21T10:54:30",
  "op": [
    "vote",
    {
      "voter": "sensation",
      "author": "jamthewriter",
      "permlink": "how-to-capture-a-monster-in-monster-hunter-world",
      "weight": 10000
    }
  ]
}teamupvoted (10.00%) @jamthewriter / how-to-capture-a-monster-in-monster-hunter-world2018/02/21 10:29:48
teamupvoted (10.00%) @jamthewriter / how-to-capture-a-monster-in-monster-hunter-world
2018/02/21 10:29:48
| voter | team |
| author | jamthewriter |
| permlink | how-to-capture-a-monster-in-monster-hunter-world |
| weight | 1000 (10.00%) |
| Transaction Info | Block #20061431/Trx 9970285c93782ba017fcd25a85452850796da5a2 |
View Raw JSON Data
{
  "trx_id": "9970285c93782ba017fcd25a85452850796da5a2",
  "block": 20061431,
  "trx_in_block": 3,
  "op_in_trx": 0,
  "virtual_op": 0,
  "timestamp": "2018-02-21T10:29:48",
  "op": [
    "vote",
    {
      "voter": "team",
      "author": "jamthewriter",
      "permlink": "how-to-capture-a-monster-in-monster-hunter-world",
      "weight": 1000
    }
  ]
}jamthewriterpublished a new post: how-to-capture-a-monster-in-monster-hunter-world2018/02/21 10:11:09
jamthewriterpublished a new post: how-to-capture-a-monster-in-monster-hunter-world
2018/02/21 10:11:09
| parent author | |
| parent permlink | monsterhunter |
| author | jamthewriter |
| permlink | how-to-capture-a-monster-in-monster-hunter-world |
| title | How to Capture a Monster in Monster Hunter: World |
| body | One of the more complicated mechanics introduced early in Monster Hunter: World is the ability to capture monsters instead of slaying them. Any monster can be captured in any mission, as long as that monster is not an Elder Dragon, and the mission objective is to hunt/capture the monster, rather than explicitly slay it. There are two components to a successful capture: trapping the monster and tranquilizing the monster. But the tricky part comes from knowing exactly when to trap a monster, where to trap it, and how to capture it. ## All About Traps There are two traps in the game: the shock trap and the pitfall trap. A hunter can carry one of each at a time, together with any traps that the guild provides on missions (these are prefixed with EZ, i.e. EZ Shock Trap, and are available from the supply box during certain quests). Shock traps and pitfall traps currently work for any non-Elder Dragon monster, although there were exceptions in the past. While shock traps temporarily paralyze a monster, pitfall traps trap them in a hole, often obscuring the monster's tail, giving you slightly more time to tranquilize them/attack them, but hiding the lower portion of their body. 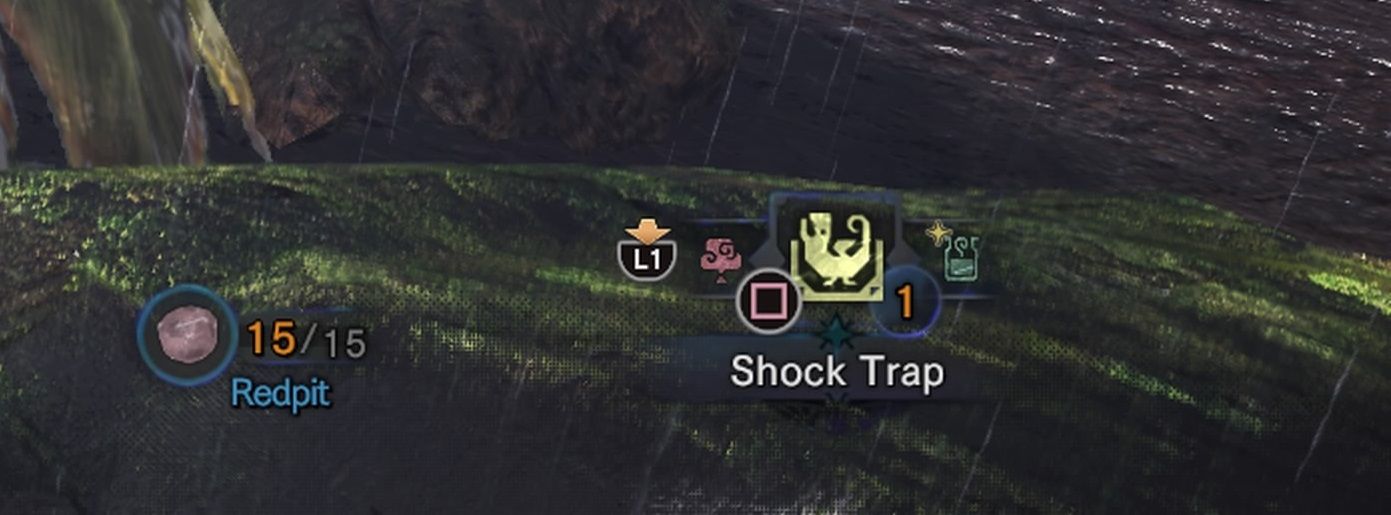 Shock traps are crafted with trap tools (available from the provisions market in Astera early on), and thunderbugs, which can easily be found in every map in the game. They can also be requisitioned from the botanists in Astera, harvested from the Ancient Tree sapling (unlocked through story quests). Pitfall traps are crafted through a combination of trap tools and nets. Nets are made with spider webs and ivy, both of which can be found in the Ancient Forest and Wildspire Waste. Spider webs are hidden in small passageways throughout various maps, close to a vapornid (giant yellow spiders). Capture the vapornid with your capture net to add it to your collection of pets, and harvest the sticky web behind it. Ivy can be found hanging nearby the ivy hunters use to climb up walls. It's easily found around the Ancient Forest camp near the Rathalos nest. Traps are not just useful for capturing. Like status effects such as sleep and paralysis, they give you a small window to deal more damage to the monster by keeping them immobilized. However, traps lose effectiveness the more you use them, and you can usually only hold 4 at a time (One pre-made shock trap, one pre-made pitfall trap, and two trap tools with materials to craft more traps). If you have a four-man team, that makes for a total of sixteen traps, easily allowing you to completely immobilize a monster for most of the hunt in combination with status weapons and bombs. Given the massive material cost and the inability to trap the game's most challenging monsters (elder dragons), it's typically not worth the trouble. Do keep in mind, however, that if you're having a lot of trouble with a certain monster, you have the option of trapping it a few times. ## Tranq Bombs So, you've laid down your trap, ensnared the monster/paralyzed it, and now it's time to actually get it to go to sleep. But wait - where are your tranq bombs? 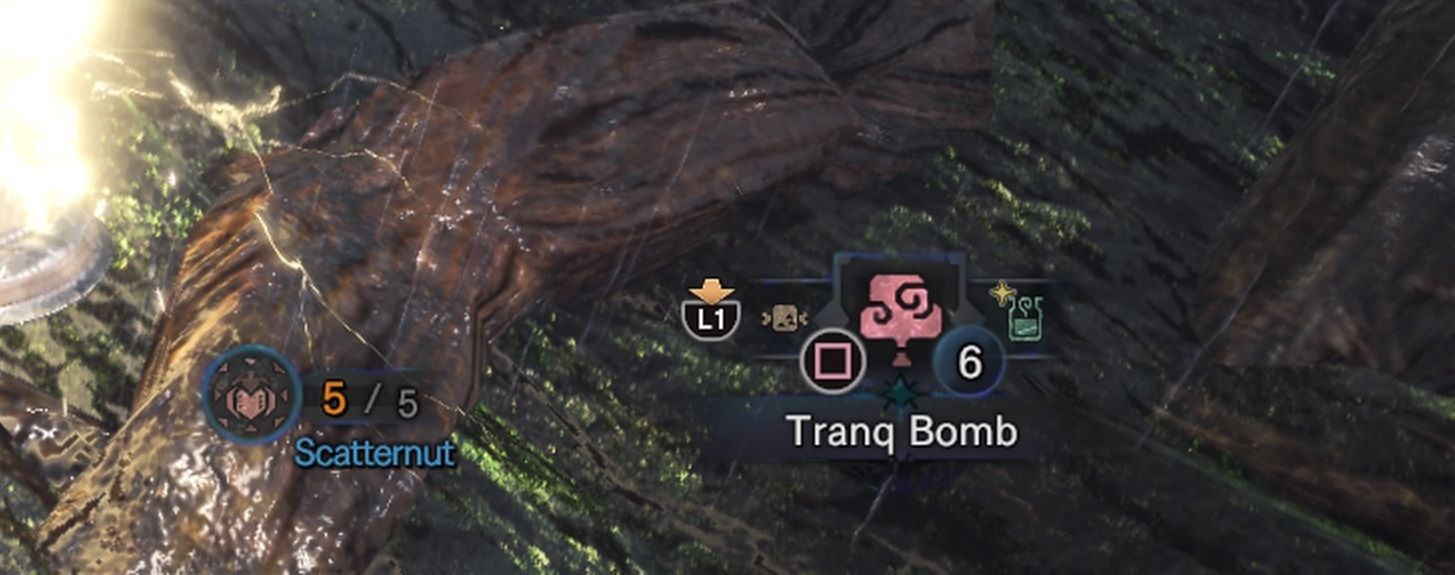 Tranq bombs are provided in every capture hunt as EZ Tranq Bombs in the supply box, but can also be crafted if you ever want to trap a monster in regular hunts. They're made from sleep herbs and parashrooms, both of which are available in the Ancient Forest and in the Wildspire Waste. Simply keep a look-out for them, especially near Pukei-Pukei's hideout, and on the way up to Rathalos' nest. You need to hit a monster with two tranq bombs to trigger the capture. Not one, not three or more. Just two. The final touch to capturing a monster is making sure it's ready to be captured. You cannot just jump into a quest, lay down a trap, and slam a few tranq bombs. First, you have to prepare the monster - with a massive beating. A monster's health value is hidden in Monster Hunter, but you can tell how far along a hunt you are by the frequency of a monster's enraged state, their exhaustion, and limping. A monster will hurriedly limp away from you when it has reached a critical health state - checking your minimap when a monster isn't enraged will show you a little skull over their minimap icon to indicate that they are ready for capture. In previous games, you had to equip a special armor skill to make this blatantly visible, or simply slow down your assault and give the AI the option to snap out of rage and go on to limping. 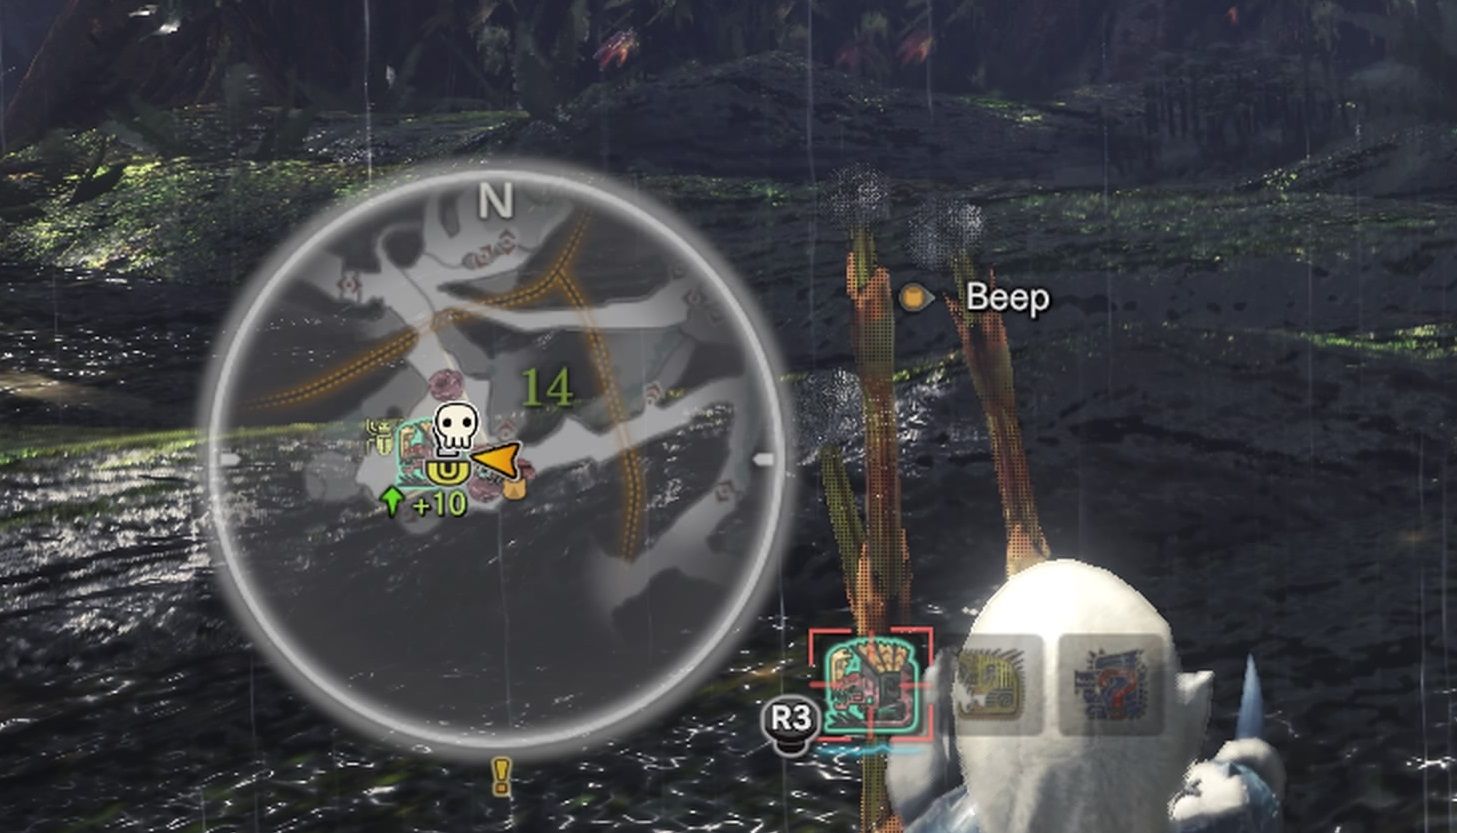 A safe way to ensure a capture is to follow a limping monster back to its lair, where it will go to sleep, allowing you to trap it and throw down your tranqs. ## The Order Doesn't Matter The one thing about trapping new hunters are guaranteed not to know is that the monster needs to be trapped, tranqed, and limping - but not necessarily in that order. For example, you can tranq a monster towards the end of a fight, if you feel like they are getting close to limping, and then proceed to lure them into a trap. If their HP has already been lowered enough without them trying to get away, they might immediately get captured upon hitting the trap. Otherwise, this gives you the opportunity to wail at them with your biggest attacks for a few seconds, potentially hitting that HP threshold that tips the scales and gets them captured. 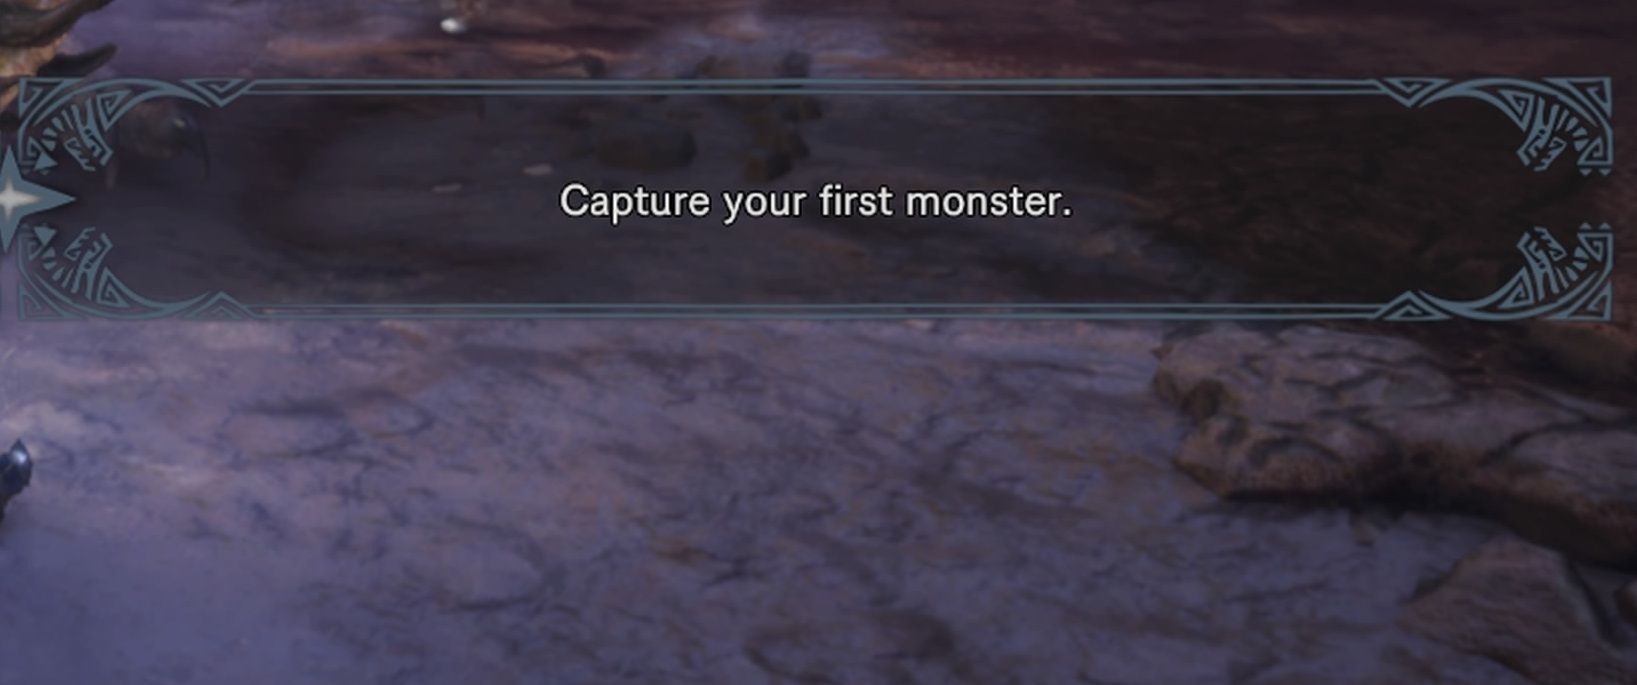 Fight the monster. Get close to them and tranq them twice. Get them in a trap, and unleash your biggest damage-dealing combo. Soon, you'll be a capture master. ## Don't Go Ham Nothing is worse than being on a capture quest, and then accidentally killing the monster. It is a massive waste of time and one that was caused not by struggling with a monster but because of simply not paying attention or taking advantage of a flinch-fest. Attack the monster, but watch out for its mouth. When a monster is near its critical HP state, they tend to get very tired, causing them to slow down, give bigger openings, and occasionally trip before going back into an enraged state. When this is happening and you have a big damage combo lined up, it may be worth it to tone down your assault. Two things clearly indicate a monster is close to death: limping and exhaustion. Learn to watch out for both. Take note that weapons that inflict a lot of exhaust damage (impact phial charge blade, hammer, and hunting horn) will tire a monster out faster, so it is more reliable to gauge a monster's health by the rate at which they are tripping and going in and out of rage. |
| json metadata | {"tags":["monsterhunter","gaming","new","ps4","xbox"],"image":["https://steemitimages.com/DQmYCdY7Zi4GWhptfAht1YeX1qHmeytj1uyfZ5gma5DTyLn/Monster%20Hunter_%20World_20180216215930%20trap%20.jpg","https://steemitimages.com/DQmUx1wVC9Hw6KQp3GL87UPh26nMdREDKqTfUdhni8bCAFW/Monster%20Hunter_%20World_20180216221042%20tranq%20bomb.jpg","https://steemitimages.com/DQmXYvqqf4f6ZkGe3gwkHr5jqJhH9YJfCyjm4s7hA5dVag3/Monster%20Hunter_%20World_20180216220955%20death%20icon.jpg","https://steemitimages.com/DQmZvQWXhdB7oq7eJUB38KPBXRV9tuYj5fNce4JEDc7ai1w/Monster%20Hunter_%20World_20180214221805%20capture%20master.jpg"],"app":"steemit/0.1","format":"markdown"} |
| Transaction Info | Block #20061058/Trx 5a0185697e09f9119fe3bc80bd5a78e361e3583e |
View Raw JSON Data
{
"trx_id": "5a0185697e09f9119fe3bc80bd5a78e361e3583e",
"block": 20061058,
"trx_in_block": 98,
"op_in_trx": 0,
"virtual_op": 0,
"timestamp": "2018-02-21T10:11:09",
"op": [
"comment",
{
"parent_author": "",
"parent_permlink": "monsterhunter",
"author": "jamthewriter",
"permlink": "how-to-capture-a-monster-in-monster-hunter-world",
"title": "How to Capture a Monster in Monster Hunter: World",
"body": "One of the more complicated mechanics introduced early in Monster Hunter: World is the ability to capture monsters instead of slaying them. Any monster can be captured in any mission, as long as that monster is not an Elder Dragon, and the mission objective is to hunt/capture the monster, rather than explicitly slay it. \n\nThere are two components to a successful capture: trapping the monster and tranquilizing the monster. But the tricky part comes from knowing exactly when to trap a monster, where to trap it, and how to capture it. \n\n## All About Traps\n\nThere are two traps in the game: the shock trap and the pitfall trap. A hunter can carry one of each at a time, together with any traps that the guild provides on missions (these are prefixed with EZ, i.e. EZ Shock Trap, and are available from the supply box during certain quests). Shock traps and pitfall traps currently work for any non-Elder Dragon monster, although there were exceptions in the past. While shock traps temporarily paralyze a monster, pitfall traps trap them in a hole, often obscuring the monster's tail, giving you slightly more time to tranquilize them/attack them, but hiding the lower portion of their body. \n\n\n\nShock traps are crafted with trap tools (available from the provisions market in Astera early on), and thunderbugs, which can easily be found in every map in the game. They can also be requisitioned from the botanists in Astera, harvested from the Ancient Tree sapling (unlocked through story quests). \n\nPitfall traps are crafted through a combination of trap tools and nets. Nets are made with spider webs and ivy, both of which can be found in the Ancient Forest and Wildspire Waste. Spider webs are hidden in small passageways throughout various maps, close to a vapornid (giant yellow spiders). Capture the vapornid with your capture net to add it to your collection of pets, and harvest the sticky web behind it. Ivy can be found hanging nearby the ivy hunters use to climb up walls. It's easily found around the Ancient Forest camp near the Rathalos nest. \n\nTraps are not just useful for capturing. Like status effects such as sleep and paralysis, they give you a small window to deal more damage to the monster by keeping them immobilized. However, traps lose effectiveness the more you use them, and you can usually only hold 4 at a time (One pre-made shock trap, one pre-made pitfall trap, and two trap tools with materials to craft more traps). If you have a four-man team, that makes for a total of sixteen traps, easily allowing you to completely immobilize a monster for most of the hunt in combination with status weapons and bombs. \n\nGiven the massive material cost and the inability to trap the game's most challenging monsters (elder dragons), it's typically not worth the trouble. Do keep in mind, however, that if you're having a lot of trouble with a certain monster, you have the option of trapping it a few times. \n\n## Tranq Bombs\n\nSo, you've laid down your trap, ensnared the monster/paralyzed it, and now it's time to actually get it to go to sleep. But wait - where are your tranq bombs? \n\n\n\nTranq bombs are provided in every capture hunt as EZ Tranq Bombs in the supply box, but can also be crafted if you ever want to trap a monster in regular hunts. They're made from sleep herbs and parashrooms, both of which are available in the Ancient Forest and in the Wildspire Waste. Simply keep a look-out for them, especially near Pukei-Pukei's hideout, and on the way up to Rathalos' nest. You need to hit a monster with two tranq bombs to trigger the capture. Not one, not three or more. Just two. \n\nThe final touch to capturing a monster is making sure it's ready to be captured. You cannot just jump into a quest, lay down a trap, and slam a few tranq bombs. First, you have to prepare the monster - with a massive beating. \n\nA monster's health value is hidden in Monster Hunter, but you can tell how far along a hunt you are by the frequency of a monster's enraged state, their exhaustion, and limping. A monster will hurriedly limp away from you when it has reached a critical health state - checking your minimap when a monster isn't enraged will show you a little skull over their minimap icon to indicate that they are ready for capture. In previous games, you had to equip a special armor skill to make this blatantly visible, or simply slow down your assault and give the AI the option to snap out of rage and go on to limping. \n\n\n\nA safe way to ensure a capture is to follow a limping monster back to its lair, where it will go to sleep, allowing you to trap it and throw down your tranqs. \n\n## The Order Doesn't Matter\n\nThe one thing about trapping new hunters are guaranteed not to know is that the monster needs to be trapped, tranqed, and limping - but not necessarily in that order. \n\nFor example, you can tranq a monster towards the end of a fight, if you feel like they are getting close to limping, and then proceed to lure them into a trap. If their HP has already been lowered enough without them trying to get away, they might immediately get captured upon hitting the trap. Otherwise, this gives you the opportunity to wail at them with your biggest attacks for a few seconds, potentially hitting that HP threshold that tips the scales and gets them captured. \n\n\n\nFight the monster. Get close to them and tranq them twice. Get them in a trap, and unleash your biggest damage-dealing combo. Soon, you'll be a capture master. \n\n## Don't Go Ham\n\nNothing is worse than being on a capture quest, and then accidentally killing the monster. It is a massive waste of time and one that was caused not by struggling with a monster but because of simply not paying attention or taking advantage of a flinch-fest. \n\nAttack the monster, but watch out for its mouth. When a monster is near its critical HP state, they tend to get very tired, causing them to slow down, give bigger openings, and occasionally trip before going back into an enraged state. When this is happening and you have a big damage combo lined up, it may be worth it to tone down your assault. \n\nTwo things clearly indicate a monster is close to death: limping and exhaustion. Learn to watch out for both. Take note that weapons that inflict a lot of exhaust damage (impact phial charge blade, hammer, and hunting horn) will tire a monster out faster, so it is more reliable to gauge a monster's health by the rate at which they are tripping and going in and out of rage.",
"json_metadata": "{\"tags\":[\"monsterhunter\",\"gaming\",\"new\",\"ps4\",\"xbox\"],\"image\":[\"https://steemitimages.com/DQmYCdY7Zi4GWhptfAht1YeX1qHmeytj1uyfZ5gma5DTyLn/Monster%20Hunter_%20World_20180216215930%20trap%20.jpg\",\"https://steemitimages.com/DQmUx1wVC9Hw6KQp3GL87UPh26nMdREDKqTfUdhni8bCAFW/Monster%20Hunter_%20World_20180216221042%20tranq%20bomb.jpg\",\"https://steemitimages.com/DQmXYvqqf4f6ZkGe3gwkHr5jqJhH9YJfCyjm4s7hA5dVag3/Monster%20Hunter_%20World_20180216220955%20death%20icon.jpg\",\"https://steemitimages.com/DQmZvQWXhdB7oq7eJUB38KPBXRV9tuYj5fNce4JEDc7ai1w/Monster%20Hunter_%20World_20180214221805%20capture%20master.jpg\"],\"app\":\"steemit/0.1\",\"format\":\"markdown\"}"
}
]
}jamthewriterreceived 0.527 SBD, 0.154 SP author reward for @jamthewriter / here-s-how-to-hunt-in-monster-hunter-world2018/02/19 06:49:18
jamthewriterreceived 0.527 SBD, 0.154 SP author reward for @jamthewriter / here-s-how-to-hunt-in-monster-hunter-world
2018/02/19 06:49:18
| author | jamthewriter |
| permlink | here-s-how-to-hunt-in-monster-hunter-world |
| sbd payout | 0.527 SBD |
| steem payout | 0.000 STEEM |
| vesting payout | 251.424304 VESTS |
| Transaction Info | Block #19999448/Virtual Operation #6 |
View Raw JSON Data
{
  "trx_id": "0000000000000000000000000000000000000000",
  "block": 19999448,
  "trx_in_block": 4294967295,
  "op_in_trx": 0,
  "virtual_op": 6,
  "timestamp": "2018-02-19T06:49:18",
  "op": [
    "author_reward",
    {
      "author": "jamthewriter",
      "permlink": "here-s-how-to-hunt-in-monster-hunter-world",
      "sbd_payout": "0.527 SBD",
      "steem_payout": "0.000 STEEM",
      "vesting_payout": "251.424304 VESTS"
    }
  ]
}tangleblockchainupvoted (100.00%) @jamthewriter / here-s-how-to-hunt-in-monster-hunter-world2018/02/16 18:13:30
tangleblockchainupvoted (100.00%) @jamthewriter / here-s-how-to-hunt-in-monster-hunter-world
2018/02/16 18:13:30
| voter | tangleblockchain |
| author | jamthewriter |
| permlink | here-s-how-to-hunt-in-monster-hunter-world |
| weight | 10000 (100.00%) |
| Transaction Info | Block #19926754/Trx e4219a4e4f499ab738022d0b3daa6218fcec95a4 |
View Raw JSON Data
{
  "trx_id": "e4219a4e4f499ab738022d0b3daa6218fcec95a4",
  "block": 19926754,
  "trx_in_block": 8,
  "op_in_trx": 0,
  "virtual_op": 0,
  "timestamp": "2018-02-16T18:13:30",
  "op": [
    "vote",
    {
      "voter": "tangleblockchain",
      "author": "jamthewriter",
      "permlink": "here-s-how-to-hunt-in-monster-hunter-world",
      "weight": 10000
    }
  ]
}2018/02/16 16:33:27
2018/02/16 16:33:27
| voter | tangleblockchain |
| author | jamthewriter |
| permlink | choose-your-weapon-2-ranged-weapons-in-monster-hunter-world |
| weight | 10000 (100.00%) |
| Transaction Info | Block #19924753/Trx e2d3270ae833e0ac7f136e8f41bec2050a01dbf9 |
View Raw JSON Data
{
  "trx_id": "e2d3270ae833e0ac7f136e8f41bec2050a01dbf9",
  "block": 19924753,
  "trx_in_block": 50,
  "op_in_trx": 0,
  "virtual_op": 0,
  "timestamp": "2018-02-16T16:33:27",
  "op": [
    "vote",
    {
      "voter": "tangleblockchain",
      "author": "jamthewriter",
      "permlink": "choose-your-weapon-2-ranged-weapons-in-monster-hunter-world",
      "weight": 10000
    }
  ]
}corycoinzupvoted (100.00%) @jamthewriter / choose-your-weapon-2-ranged-weapons-in-monster-hunter-world2018/02/15 02:30:18
corycoinzupvoted (100.00%) @jamthewriter / choose-your-weapon-2-ranged-weapons-in-monster-hunter-world
2018/02/15 02:30:18
| voter | corycoinz |
| author | jamthewriter |
| permlink | choose-your-weapon-2-ranged-weapons-in-monster-hunter-world |
| weight | 10000 (100.00%) |
| Transaction Info | Block #19879127/Trx 7a45d076a116cd85ca20e969c35d01beba2ae5af |
View Raw JSON Data
{
  "trx_id": "7a45d076a116cd85ca20e969c35d01beba2ae5af",
  "block": 19879127,
  "trx_in_block": 8,
  "op_in_trx": 0,
  "virtual_op": 0,
  "timestamp": "2018-02-15T02:30:18",
  "op": [
    "vote",
    {
      "voter": "corycoinz",
      "author": "jamthewriter",
      "permlink": "choose-your-weapon-2-ranged-weapons-in-monster-hunter-world",
      "weight": 10000
    }
  ]
}lazygamezupvoted (100.00%) @jamthewriter / here-s-how-to-hunt-in-monster-hunter-world2018/02/13 14:58:27
lazygamezupvoted (100.00%) @jamthewriter / here-s-how-to-hunt-in-monster-hunter-world
2018/02/13 14:58:27
| voter | lazygamez |
| author | jamthewriter |
| permlink | here-s-how-to-hunt-in-monster-hunter-world |
| weight | 10000 (100.00%) |
| Transaction Info | Block #19836547/Trx 4e0d2463d04b6ad650c2837ba9e7e9060d1c7954 |
View Raw JSON Data
{
  "trx_id": "4e0d2463d04b6ad650c2837ba9e7e9060d1c7954",
  "block": 19836547,
  "trx_in_block": 44,
  "op_in_trx": 0,
  "virtual_op": 0,
  "timestamp": "2018-02-13T14:58:27",
  "op": [
    "vote",
    {
      "voter": "lazygamez",
      "author": "jamthewriter",
      "permlink": "here-s-how-to-hunt-in-monster-hunter-world",
      "weight": 10000
    }
  ]
}2018/02/13 02:12:09
2018/02/13 02:12:09
| parent author | jamthewriter |
| parent permlink | here-s-how-to-hunt-in-monster-hunter-world |
| author | whalebuilder |
| permlink | re-jamthewriter-here-s-how-to-hunt-in-monster-hunter-world-20180213t021203140z |
| title | re-jamthewriter-here-s-how-to-hunt-in-monster-hunter-world-20180213t021203140z |
| body | You got a 51.50% upvote from @whalebuilder courtesy of @michelnilles. Join @whalebuilder family at our [Discord Channel](https://discord.gg/heYnjCf). Don't let your precious stake(SP) go stale...Make it do more so you have to do less. Deligate it to @whalebuilder by clicking on one of the ready to delegate links: [50SP](https://v2.steemconnect.com/sign/delegateVestingShares?delegator=&delegatee=whalebuilder&vesting_shares=102530.639667%20VESTS) | [100SP](https://v2.steemconnect.com/sign/delegateVestingShares?delegator=&delegatee=whalebuilder&vesting_shares=205303.639667%20VESTS) | [250SP](https://v2.steemconnect.com/sign/delegateVestingShares?delegator=&delegatee=whalebuilder&vesting_shares=514303.639667%20VESTS) | [500SP](https://v2.steemconnect.com/sign/delegateVestingShares?delegator=&delegatee=whalebuilder&vesting_shares=1025303.639667%20VESTS) | [1000SP](https://v2.steemconnect.com/sign/delegateVestingShares?delegator=&delegatee=whalebuilder&vesting_shares=2053030.639667%20VESTS) | [5000SP](https://v2.steemconnect.com/sign/delegateVestingShares?delegator=&delegatee=whalebuilder&vesting_shares=10253030.639667%20VESTS) | [custom amount](https://helloacm.com/tools/steemit/sp-delegate-form/). |
| json metadata | {"app":"postpromoter/1.7.4"} |
| Transaction Info | Block #19821234/Trx 38b34805e5597b9e7f0ed8082523455284a7de60 |
View Raw JSON Data
{
  "trx_id": "38b34805e5597b9e7f0ed8082523455284a7de60",
  "block": 19821234,
  "trx_in_block": 3,
  "op_in_trx": 0,
  "virtual_op": 0,
  "timestamp": "2018-02-13T02:12:09",
  "op": [
    "comment",
    {
      "parent_author": "jamthewriter",
      "parent_permlink": "here-s-how-to-hunt-in-monster-hunter-world",
      "author": "whalebuilder",
      "permlink": "re-jamthewriter-here-s-how-to-hunt-in-monster-hunter-world-20180213t021203140z",
      "title": "re-jamthewriter-here-s-how-to-hunt-in-monster-hunter-world-20180213t021203140z",
      "body": "You got a 51.50% upvote from @whalebuilder courtesy of @michelnilles. Join @whalebuilder family at our [Discord Channel](https://discord.gg/heYnjCf). Don't let your precious stake(SP) go stale...Make it do more so you have to do less. Deligate it to @whalebuilder by clicking on one of the ready to delegate links: [50SP](https://v2.steemconnect.com/sign/delegateVestingShares?delegator=&delegatee=whalebuilder&vesting_shares=102530.639667%20VESTS) | [100SP](https://v2.steemconnect.com/sign/delegateVestingShares?delegator=&delegatee=whalebuilder&vesting_shares=205303.639667%20VESTS) | [250SP](https://v2.steemconnect.com/sign/delegateVestingShares?delegator=&delegatee=whalebuilder&vesting_shares=514303.639667%20VESTS) | [500SP](https://v2.steemconnect.com/sign/delegateVestingShares?delegator=&delegatee=whalebuilder&vesting_shares=1025303.639667%20VESTS) | [1000SP](https://v2.steemconnect.com/sign/delegateVestingShares?delegator=&delegatee=whalebuilder&vesting_shares=2053030.639667%20VESTS) | [5000SP](https://v2.steemconnect.com/sign/delegateVestingShares?delegator=&delegatee=whalebuilder&vesting_shares=10253030.639667%20VESTS) |  [custom amount](https://helloacm.com/tools/steemit/sp-delegate-form/).",
      "json_metadata": "{\"app\":\"postpromoter/1.7.4\"}"
    }
  ]
}whalebuilderupvoted (51.50%) @jamthewriter / here-s-how-to-hunt-in-monster-hunter-world2018/02/13 02:10:00
whalebuilderupvoted (51.50%) @jamthewriter / here-s-how-to-hunt-in-monster-hunter-world
2018/02/13 02:10:00
| voter | whalebuilder |
| author | jamthewriter |
| permlink | here-s-how-to-hunt-in-monster-hunter-world |
| weight | 5150 (51.50%) |
| Transaction Info | Block #19821191/Trx f826aad32bdc7fef125273a0ca532d5599b136c3 |
View Raw JSON Data
{
  "trx_id": "f826aad32bdc7fef125273a0ca532d5599b136c3",
  "block": 19821191,
  "trx_in_block": 8,
  "op_in_trx": 0,
  "virtual_op": 0,
  "timestamp": "2018-02-13T02:10:00",
  "op": [
    "vote",
    {
      "voter": "whalebuilder",
      "author": "jamthewriter",
      "permlink": "here-s-how-to-hunt-in-monster-hunter-world",
      "weight": 5150
    }
  ]
}michelnillesupvoted (100.00%) @jamthewriter / here-s-how-to-hunt-in-monster-hunter-world2018/02/13 01:21:15
michelnillesupvoted (100.00%) @jamthewriter / here-s-how-to-hunt-in-monster-hunter-world
2018/02/13 01:21:15
| voter | michelnilles |
| author | jamthewriter |
| permlink | here-s-how-to-hunt-in-monster-hunter-world |
| weight | 10000 (100.00%) |
| Transaction Info | Block #19820217/Trx 33e14107584c0918f88632165e014b3b8712063a |
View Raw JSON Data
{
  "trx_id": "33e14107584c0918f88632165e014b3b8712063a",
  "block": 19820217,
  "trx_in_block": 30,
  "op_in_trx": 0,
  "virtual_op": 0,
  "timestamp": "2018-02-13T01:21:15",
  "op": [
    "vote",
    {
      "voter": "michelnilles",
      "author": "jamthewriter",
      "permlink": "here-s-how-to-hunt-in-monster-hunter-world",
      "weight": 10000
    }
  ]
}sayitloudupvoted (100.00%) @jamthewriter / here-s-how-to-hunt-in-monster-hunter-world2018/02/12 22:24:09
sayitloudupvoted (100.00%) @jamthewriter / here-s-how-to-hunt-in-monster-hunter-world
2018/02/12 22:24:09
| voter | sayitloud |
| author | jamthewriter |
| permlink | here-s-how-to-hunt-in-monster-hunter-world |
| weight | 10000 (100.00%) |
| Transaction Info | Block #19816678/Trx f7d25c4ed86622b63011bf50315511aa8b97fba5 |
View Raw JSON Data
{
  "trx_id": "f7d25c4ed86622b63011bf50315511aa8b97fba5",
  "block": 19816678,
  "trx_in_block": 41,
  "op_in_trx": 0,
  "virtual_op": 0,
  "timestamp": "2018-02-12T22:24:09",
  "op": [
    "vote",
    {
      "voter": "sayitloud",
      "author": "jamthewriter",
      "permlink": "here-s-how-to-hunt-in-monster-hunter-world",
      "weight": 10000
    }
  ]
}jamthewriterclaimed reward balance: 2.073 SBD, 0.731 SP2018/02/12 10:48:36
jamthewriterclaimed reward balance: 2.073 SBD, 0.731 SP
2018/02/12 10:48:36
| account | jamthewriter |
| reward steem | 0.000 STEEM |
| reward sbd | 2.073 SBD |
| reward vests | 1190.377884 VESTS |
| Transaction Info | Block #19802778/Trx cb62ab3c1cd5aba9108ea22fd3800224c9f0cc6f |
View Raw JSON Data
{
  "trx_id": "cb62ab3c1cd5aba9108ea22fd3800224c9f0cc6f",
  "block": 19802778,
  "trx_in_block": 29,
  "op_in_trx": 0,
  "virtual_op": 0,
  "timestamp": "2018-02-12T10:48:36",
  "op": [
    "claim_reward_balance",
    {
      "account": "jamthewriter",
      "reward_steem": "0.000 STEEM",
      "reward_sbd": "2.073 SBD",
      "reward_vests": "1190.377884 VESTS"
    }
  ]
}sensationupvoted (100.00%) @jamthewriter / here-s-how-to-hunt-in-monster-hunter-world2018/02/12 08:53:48
sensationupvoted (100.00%) @jamthewriter / here-s-how-to-hunt-in-monster-hunter-world
2018/02/12 08:53:48
| voter | sensation |
| author | jamthewriter |
| permlink | here-s-how-to-hunt-in-monster-hunter-world |
| weight | 10000 (100.00%) |
| Transaction Info | Block #19800483/Trx 1ddf6ab4c768223d12bddaec7f675b0ce89e520c |
View Raw JSON Data
{
  "trx_id": "1ddf6ab4c768223d12bddaec7f675b0ce89e520c",
  "block": 19800483,
  "trx_in_block": 30,
  "op_in_trx": 0,
  "virtual_op": 0,
  "timestamp": "2018-02-12T08:53:48",
  "op": [
    "vote",
    {
      "voter": "sensation",
      "author": "jamthewriter",
      "permlink": "here-s-how-to-hunt-in-monster-hunter-world",
      "weight": 10000
    }
  ]
}jamthewriterpublished a new post: here-s-how-to-hunt-in-monster-hunter-world2018/02/12 06:49:18
jamthewriterpublished a new post: here-s-how-to-hunt-in-monster-hunter-world
2018/02/12 06:49:18
| parent author | |
| parent permlink | monsterhunter |
| author | jamthewriter |
| permlink | here-s-how-to-hunt-in-monster-hunter-world |
| title | Here's How to Hunt in Monster Hunter: World |
| body | Monster Hunter games are packed with gameplay, and there's a ton to do besides hunting - especially in [World](https://steemit.com/monsterhunter/@jamthewriter/what-is-monster-hunter), with its extremely rich flora and fauna. But the bread-and-butter of these games is the hunt. Getting used to hunting in Monster Hunter takes a little time, especially because of the game's unique combat and refined hunting system. To summarize hunting, you're sent after a monster into a map, tasked to comb it area by area until you come across the monster, and then your job is to deal enough damage to the monster to kill it/capture it, in order to fulfill your mission. It sounds simple enough, but there's a lot to consider and a lot to learn if you want to get good enough to unlock the more difficult challenges and more interesting monsters the game has to offer. Before we get into the hunt itself, it's important to talk about progression. In MH:W, there are two experiences. The first is Low Rank, a series of monsters and miscellaneous quests designed to get you acquainted to the game, its mechanics, and the act of tracking and hunting monsters with all the tools the game has to offer. http://game.capcom.com/manual/MHW/locale/en/img/page/42_4_2.jpg The second is High Rank. This is where the game proper begins, as you're pitted against tougher foes, many familiar monsters (with upgraded stats and a wider movepool), and a more complex list of gear choices and considerations. When High Rank begins, the game stops babying you, and it expects you to know what you're doing. https://s3-us-west-1.amazonaws.com/shacknews/assets/editorial/2018/02/Monster-Hunter-World-How-to-Unlock-High-Rank-Quests.jpg If you're new to Monster Hunter, Low Rank does a good job of getting you used to the game - but the game itself does not do the best job of explaining everything to you. This is good, because there is a lot to explain, and it would bog down the action if it pulled you away from combat every two minutes to introduce a new mechanic. But if you're stuck on a particularly tough monster, and aren't sure what you're doing wrong, it's time to take a step back and do some reading. Today, we'll go over the basics of hunting in Monster Hunter, and I'll make sure you're equipped with all the knowledge you need to make it through the game. ## The Rules First, the basics. Monsters in Monster Hunter all have a hidden health value and hidden defensive values for each of their body's segments. Every segment, or hitzone, has different defenses for every type of damage in the game ([impact](https://steemit.com/monsterhunter/@jamthewriter/choose-your-weapon-1-melee-weapons-in-monster-hunter-world), [shot](https://steemit.com/monsterhunter/@jamthewriter/choose-your-weapon-2-ranged-weapons-in-monster-hunter-world), cutting). Some types of damage, like barrel bombs, charge blade phials or a gunlance's shell, ignore hitzone defenses entirely. https://i.imgur.com/yuSpZZC.jpg Monsters also have stamina. This stamina wears down naturally over the course of a fight, or can be worn down faster with exhaust damage, which is dealt by blunt/impact weaponry (hammers, charge blades, SnS shield bashes). When a monster's stamina has dropped considerably, they get sluggish and struggle to attack. You, on the other hand, also have health and stamina, clearly visible at the top-left of the screen. Stamina is consumed by running and blocking. Your stamina meter naturally replenishes if you stop running or blocking, although certain circumstances can slow its recovery, or increase the rate at which it is consumed. After some time, your stamina bar will decrease. This is meant to represent your hunter slowly getting hungry over the course of a hunt. Eating cooked meat or a ration will replenish your stamina capacity. Health is reduced through monster attacks, barrel bombs, and the consumption of bitterbugs. The health bar is at a minimum a total value of 100, increased to a maximum of 150 through eating a meal before a hunt. The bar itself does not decrease, unlike the stamina bar. You can replenish your health with potions, med kits, herbs, and vigorwasps. When your health drops down to 0, your hunter will faint, costing you one cart and a portion of your reward for the quest. Fainting thrice fails the quest, ending it and forcing you to restart. In short, keep your hunter healthy, or else you'll risk failing the quest. Carts are shared - so even if you've only fainted twice, if anyone else faints it counts towards the total cart count of the quest. Your palico also has a health value, but if they take too much damage, they simply take a break from the hunt for a while, rather than contributing to the quest failing. Every quest starts off with a total reward, awarded to every participating hunter and divided according to the number of participating hunters (a maximum of 4) and the number of carts used (a maximum of 3). One cart costs you a third of the total reward, meaning the quest technically fails when the reward hits zero. Doing quests alone nets you the most money, but if you aren't skilled enough, it will also cost you the most carts. ## Monster Behavior and Why It Matters In Monster Hunter, monsters have more than just a series of attacks and movement. They have behavior. They stagger, grow tired, take a nap, hunt other monsters, protect their offspring, get enraged, and react according to a wide variety of environmental factors and circumstances. Monsters taunt and roar, and they feel alive in every sense. https://vignette.wikia.nocookie.net/monsterhunter/images/f/f3/MHW-Anjanath_Screenshot_001.jpg/revision/latest?cb=20170822215241 At first, this can be incredibly overwhelming. Your first time against a monster will be against an unknown foe, whose movements are organic yet seemingly unpredictable, whose speed might almost make it feel like any effort to attack will ultimately be punished with a counterattack. But with time, they become predictable, and their movements and behaviors become a part of you. Our brains are made to see patterns in things, and we survived as long as we have because we learn, very quickly. We instinctively avoid mistakes once they've been made, and we develop and shed habits as they're needed. It takes longer for some than others, and motivation is a big factor of how long it takes, but our ability to learn is nearly unprecedented in the animal kingdom. As a new hunter, your ability to read monsters relies simply on one thing: how many you've hunted. And even after the first hundred hours, there will still be monsters you aren't comfortable with, nuances you haven't picked up on, movements and behaviors that happen without you realizing what cue the monster uses to announce them. Learning to hunt in Monster Hunter means understanding the concept of cues and tells - every action a monster does is foretold by a repeated behavior, no matter how subtle. A Teostra that stops and stares for just a while too long after releasing a blast cloud is going to click and set it off, before stretching its neck for a window of opportunity. Molten and Brute Tigrex inhale just half a second longer before roaring twice in a row. Silver Rathalos will dive in with its talons, then back up, inhale, and throw a fireball. But beyond the simple cues, all monsters share a few different behaviors that help you understand how the hunt is going, how far along you are, and how much further you've got to go. ### Rage Every monster gets enraged, and in some cases it's more obvious than in others. Most monsters become more energetic, and their movements are coupled with furious attacks that typically deal more damage. Some monsters have tell-tale signs, such as wreathe of flame around Rathalos' mouth, enraged slime on a Brachydios, or glowing veins on a Molten Tigrex. Enraged monsters not only deal more damage, but take a little more as well. They're aggressive, but it's an opportunity for skilled hunters to finish the fight faster. In addition, a certain armor skill gives hunters a massive boost to overall power during rage mode (Challenger in previous games, Agitator in World). ### Exhaustion Monsters become naturally exhausted over the course of the hunt, and as their stamina depletes faster and faster, they become sluggish and trip often. Some monsters simply drool and stop to "catch their breath" every now and again, while others downright fail to execute certain attacks: a tired Rathalos will try to breathe a fireball and will instead only cough up a few sparks of flame, while a Tigrex will attempt to charge you across the map, only to trip and fall in exhaustion afterwards. This gives you a sense that the hunt is slowly coming to an end, as the monster is having trouble. Another telltale sign of a tired monster near death is the continuous switching between an exhausted state and an enraged state. As their hidden health value drops into the lower percentages, monsters will constantly get angry and tired. Certain weapons deal impact damage to make monsters tired faster, speeding up the rate at which they grow sluggish and making them easier to fight. ### Limping When a monster starts limping away, they're near the end of their life. This is the only time at which you can successfully capture a monster (more on that later), and it also means the hunt is almost over. Often enough, a limping monster can be easily finished off with a little patience and preparation, which leads us to the next tip. ### Sleep Sleep is a state a monster naturally goes into when they've taken massive amounts of damage and need to "sleep it off". A sleeping monster will replenish their stamina, and regenerate minute amounts of health, effectively providing a little bit of a challenge in the monster's final moments, but nothing substantial. They also do not regenerate a lot of their health. Sleeping monsters won't react to sound - so you can freely kill small monsters around them - but they do wake up when hit. Any damage dealt to the sleeping monster is doubled if it hits first, but only if it hits first. This counts even if multiple sources of damage go off at once - only the "first" is registered as a double hit. To capitalize this, place large barrel bombs around the monster (it does not matter where) and wake it up with powerful single hit, such as a greatsword's true charged slash. Sleep is also a status applied by some weapons. While difficult to coordinate properly in multiplayer, with a skilled group of hunters you can easily put a monster to sleep several times and utilize a number of bombs and strong hits to dispatch it efficiently. ### Turf Wars Monster Hunter: World introduced a new mechanic regarding monster interaction - the ability for monsters to engage in a unique battle with one another. In the past, two monsters in the same area would both focus their attention on the hunter. Their attacks would deal damage to the other monster, but they would not actively fight against each other. https://i.ytimg.com/vi/E_2KEkXfOTE/maxresdefault.jpg In Monster Hunter: World, there is a unique interaction between every monster, a particular display of strength or prowess. It seems to follow the rules of the food chain - a Great Jagras won't have the strength to fight an Anjanath, and Anjanath can't hope to kill a Rathalos without help. So they pick each other up, fling each other around, stomp and chomp and slash their way through the area until one monster flees, or dies. Do not get into the middle of a turf war. It is not a good opportunity for you to look for cheap shots - while ranged hunters might have a chance to dish out a little extra damage between bouts, it's not a good idea for a single melee hunter to draw the ire of two enraged monsters at once, without a solid escape plan. Instead, let the monsters do the hunting for you, and pick off the winner. ### How Not to Get Hit Evading in Monster Hunter is as simple as pulling your analog stick in a certain direction, and tapping the evade button (cross on the PS4). However, unlike Dark Souls, the invincibility frames on the dodge roll are miniscule. You're invincible as long as you're in the air, which isn't very long - a few frames at most. This isn't enough to roll through attacks, but it is enough to roll through the stagger from most roars in the game, and to roll through tremor/some attacks in previous games. However, dodge rolling through roars/tremors and certain attacks without evasion skills (which boost your invincibility frames) is very, very tough. Evasion skills and the inclusion of a late-game item vastly improve your invincibility frames, but they are not necessary for skilled or efficient play. So for most people, the advice is to use the evade roll for spacing/dodging away from attacks, rather than through. When a monster is about to tackle you, don't think of rolling through its face - get away from it. You don't need to spam your rolls either, most attacks can safely be avoided simply by circling around the monster. It's a good idea to learn which side you're more comfortable with when it comes to circling. For example, some monsters are safer when only fought on their right side, rather than the left, due to how they attack. Over the long term, the key to not getting hit is to play cautiously, and take risks only to learn from them. Start by watching a monster, and moving around it to see how it reacts to your spacing. What moves does it use? Does it have projectiles? Flips? Wild cards? Then, dive in and take risks, learning from faints and adapting accordingly. At first, you'll have a good idea of when to stay away and wait. With time, you'll be able to perfect your timing, attacking a monster even as it is attacking you due to proper spacing. ## Every Monster is Soloable Monster Hunter: World is unique in the series for many reasons, yet one of its biggest changes is that all missions can be done either solo or with a party, scaling to those two. In the past, you could go through the entire game alone, but there were quests geared towards single-player and quests geared towards multiplayer, available only through the gathering hall. But with World, you can do every single quest without requiring a considerable amount of skill to essentially solo what is designed for several players. There is no challenge in the game that cannot be completed alone, even in clothing without armor or defenses. As long as you have a good weapon and know it well, you can hunt a monster without taking much damage. It's all about patience. You have about 45 minutes for each quest. While speedrunners dispatch even end-game monsters in 1-3 minutes, there is nothing wrong with taking half an hour to hunt an elder dragon alone. Don't rush in and get carted, because there is no rush. Take your time to learn the monster, and don't overextend yourself. |
| json metadata | {"tags":["monsterhunter","gaming","games","ps4","xbox"],"image":["http://game.capcom.com/manual/MHW/locale/en/img/page/42_4_2.jpg","https://s3-us-west-1.amazonaws.com/shacknews/assets/editorial/2018/02/Monster-Hunter-World-How-to-Unlock-High-Rank-Quests.jpg","https://i.imgur.com/yuSpZZC.jpg","https://vignette.wikia.nocookie.net/monsterhunter/images/f/f3/MHW-Anjanath_Screenshot_001.jpg/revision/latest?cb=20170822215241","https://i.ytimg.com/vi/E_2KEkXfOTE/maxresdefault.jpg"],"links":["https://steemit.com/monsterhunter/@jamthewriter/what-is-monster-hunter","https://steemit.com/monsterhunter/@jamthewriter/choose-your-weapon-1-melee-weapons-in-monster-hunter-world","https://steemit.com/monsterhunter/@jamthewriter/choose-your-weapon-2-ranged-weapons-in-monster-hunter-world"],"app":"steemit/0.1","format":"markdown"} |
| Transaction Info | Block #19797994/Trx c42f72a7aa09163d43dd81433f7a17bb3eafd33d |
View Raw JSON Data
{
  "trx_id": "c42f72a7aa09163d43dd81433f7a17bb3eafd33d",
  "block": 19797994,
  "trx_in_block": 1,
  "op_in_trx": 0,
  "virtual_op": 0,
  "timestamp": "2018-02-12T06:49:18",
  "op": [
    "comment",
    {
      "parent_author": "",
      "parent_permlink": "monsterhunter",
      "author": "jamthewriter",
      "permlink": "here-s-how-to-hunt-in-monster-hunter-world",
      "title": "Here's How to Hunt in Monster Hunter: World",
      "body": "Monster Hunter games are packed with gameplay, and there's a ton to do besides hunting - especially in [World](https://steemit.com/monsterhunter/@jamthewriter/what-is-monster-hunter), with its extremely rich flora and fauna. But the bread-and-butter of these games is the hunt. Getting used to hunting in Monster Hunter takes a little time, especially because of the game's unique combat and refined hunting system. \n\nTo summarize hunting, you're sent after a monster into a map, tasked to comb it area by area until you come across the monster, and then your job is to deal enough damage to the monster to kill it/capture it, in order to fulfill your mission. \n\nIt sounds simple enough, but there's a lot to consider and a lot to learn if you want to get good enough to unlock the more difficult challenges and more interesting monsters the game has to offer. Before we get into the hunt itself, it's important to talk about progression. \n\nIn MH:W, there are two experiences. The first is Low Rank, a series of monsters and miscellaneous quests designed to get you acquainted to the game, its mechanics, and the act of tracking and hunting monsters with all the tools the game has to offer. \n\nhttp://game.capcom.com/manual/MHW/locale/en/img/page/42_4_2.jpg\n\nThe second is High Rank. This is where the game proper begins, as you're pitted against tougher foes, many familiar monsters (with upgraded stats and a wider movepool), and a more complex list of gear choices and considerations. When High Rank begins, the game stops babying you, and it expects you to know what you're doing. \n\nhttps://s3-us-west-1.amazonaws.com/shacknews/assets/editorial/2018/02/Monster-Hunter-World-How-to-Unlock-High-Rank-Quests.jpg\n\nIf you're new to Monster Hunter, Low Rank does a good job of getting you used to the game - but the game itself does not do the best job of explaining everything to you. This is good, because there is a lot to explain, and it would bog down the action if it pulled you away from combat every two minutes to introduce a new mechanic. But if you're stuck on a particularly tough monster, and aren't sure what you're doing wrong, it's time to take a step back and do some reading. Today, we'll go over the basics of hunting in Monster Hunter, and I'll make sure you're equipped with all the knowledge you need to make it through the game. \n## The Rules \nFirst, the basics. Monsters in Monster Hunter all have a hidden health value and hidden defensive values for each of their body's segments. Every segment, or hitzone, has different defenses for every type of damage in the game ([impact](https://steemit.com/monsterhunter/@jamthewriter/choose-your-weapon-1-melee-weapons-in-monster-hunter-world), [shot](https://steemit.com/monsterhunter/@jamthewriter/choose-your-weapon-2-ranged-weapons-in-monster-hunter-world), cutting). Some types of damage, like barrel bombs, charge blade phials or a gunlance's shell, ignore hitzone defenses entirely. \n\nhttps://i.imgur.com/yuSpZZC.jpg\n\nMonsters also have stamina. This stamina wears down naturally over the course of a fight, or can be worn down faster with exhaust damage, which is dealt by blunt/impact weaponry (hammers, charge blades, SnS shield bashes). When a monster's stamina has dropped considerably, they get sluggish and struggle to attack. \n\nYou, on the other hand, also have health and stamina, clearly visible at the top-left of the screen. Stamina is consumed by running and blocking. Your stamina meter naturally replenishes if you stop running or blocking, although certain circumstances can slow its recovery, or increase the rate at which it is consumed. After some time, your stamina bar will decrease. This is meant to represent your hunter slowly getting hungry over the course of a hunt. Eating cooked meat or a ration will replenish your stamina capacity. \n\nHealth is reduced through monster attacks, barrel bombs, and the consumption of bitterbugs. The health bar is at a minimum a total value of 100, increased to a maximum of 150 through eating a meal before a hunt. The bar itself does not decrease, unlike the stamina bar. You can replenish your health with potions, med kits, herbs, and vigorwasps. \n\nWhen your health drops down to 0, your hunter will faint, costing you one cart and a portion of your reward for the quest. Fainting thrice fails the quest, ending it and forcing you to restart. In short, keep your hunter healthy, or else you'll risk failing the quest. Carts are shared - so even if you've only fainted twice, if anyone else faints it counts towards the total cart count of the quest. \n\nYour palico also has a health value, but if they take too much damage, they simply take a break from the hunt for a while, rather than contributing to the quest failing. \n\nEvery quest starts off with a total reward, awarded to every participating hunter and divided according to the number of participating hunters (a maximum of 4) and the number of carts used (a maximum of 3). One cart costs you a third of the total reward, meaning the quest technically fails when the reward hits zero. Doing quests alone nets you the most money, but if you aren't skilled enough, it will also cost you the most carts. \n## Monster Behavior and Why It Matters\nIn Monster Hunter, monsters have more than just a series of attacks and movement. They have behavior. They stagger, grow tired, take a nap, hunt other monsters, protect their offspring, get enraged, and react according to a wide variety of environmental factors and circumstances. Monsters taunt and roar, and they feel alive in every sense. \n\nhttps://vignette.wikia.nocookie.net/monsterhunter/images/f/f3/MHW-Anjanath_Screenshot_001.jpg/revision/latest?cb=20170822215241\n\nAt first, this can be incredibly overwhelming. Your first time against a monster will be against an unknown foe, whose movements are organic yet seemingly unpredictable, whose speed might almost make it feel like any effort to attack will ultimately be punished with a counterattack. \n\nBut with time, they become predictable, and their movements and behaviors become a part of you. Our brains are made to see patterns in things, and we survived as long as we have because we learn, very quickly. We instinctively avoid mistakes once they've been made, and we develop and shed habits as they're needed. It takes longer for some than others, and motivation is a big factor of how long it takes, but our ability to learn is nearly unprecedented in the animal kingdom. \n\nAs a new hunter, your ability to read monsters relies simply on one thing: how many you've hunted. And even after the first hundred hours, there will still be monsters you aren't comfortable with, nuances you haven't picked up on, movements and behaviors that happen without you realizing what cue the monster uses to announce them. \n\nLearning to hunt in Monster Hunter means understanding the concept of cues and tells - every action a monster does is foretold by a repeated behavior, no matter how subtle. A Teostra that stops and stares for just a while too long after releasing a blast cloud is going to click and set it off, before stretching its neck for a window of opportunity. Molten and Brute Tigrex inhale just half a second longer before roaring twice in a row. Silver Rathalos will dive in with its talons, then back up, inhale, and throw a fireball. \n\nBut beyond the simple cues, all monsters share a few different behaviors that help you understand how the hunt is going, how far along you are, and how much further you've got to go. \n### Rage\nEvery monster gets enraged, and in some cases it's more obvious than in others. Most monsters become more energetic, and their movements are coupled with furious attacks that typically deal more damage. Some monsters have tell-tale signs, such as wreathe of flame around Rathalos' mouth, enraged slime on a Brachydios, or glowing veins on a Molten Tigrex. \n\nEnraged monsters not only deal more damage, but take a little more as well. They're aggressive, but it's an opportunity for skilled hunters to finish the fight faster. In addition, a certain armor skill gives hunters a massive boost to overall power during rage mode (Challenger in previous games, Agitator in World). \n### Exhaustion\nMonsters become naturally exhausted over the course of the hunt, and as their stamina depletes faster and faster, they become sluggish and trip often. Some monsters simply drool and stop to \"catch their breath\" every now and again, while others downright fail to execute certain attacks: a tired Rathalos will try to breathe a fireball and will instead only cough up a few sparks of flame, while a Tigrex will attempt to charge you across the map, only to trip and fall in exhaustion afterwards. This gives you a sense that the hunt is slowly coming to an end, as the monster is having trouble. \n\nAnother telltale sign of a tired monster near death is the continuous switching between an exhausted state and an enraged state. As their hidden health value drops into the lower percentages, monsters will constantly get angry and tired. \n\nCertain weapons deal impact damage to make monsters tired faster, speeding up the rate at which they grow sluggish and making them easier to fight.\n### Limping\nWhen a monster starts limping away, they're near the end of their life. This is the only time at which you can successfully capture a monster (more on that later), and it also means the hunt is almost over. Often enough, a limping monster can be easily finished off with a little patience and preparation, which leads us to the next tip. \n### Sleep\nSleep is a state a monster naturally goes into when they've taken massive amounts of damage and need to \"sleep it off\". A sleeping monster will replenish their stamina, and regenerate minute amounts of health, effectively providing a little bit of a challenge in the monster's final moments, but nothing substantial. They also do not regenerate a lot of their health.\n\nSleeping monsters won't react to sound - so you can freely kill small monsters around them - but they do wake up when hit. Any damage dealt to the sleeping monster is doubled if it hits first, but only if it hits first. This counts even if multiple sources of damage go off at once - only the \"first\" is registered as a double hit. To capitalize this, place large barrel bombs around the monster (it does not matter where) and wake it up with powerful single hit, such as a greatsword's true charged slash. \n\nSleep is also a status applied by some weapons. While difficult to coordinate properly in multiplayer, with a skilled group of hunters you can easily put a monster to sleep several times and utilize a number of bombs and strong hits to dispatch it efficiently. \n### Turf Wars\nMonster Hunter: World introduced a new mechanic regarding monster interaction - the ability for monsters to engage in a unique battle with one another. In the past, two monsters in the same area would both focus their attention on the hunter. Their attacks would deal damage to the other monster, but they would not actively fight against each other. \n\nhttps://i.ytimg.com/vi/E_2KEkXfOTE/maxresdefault.jpg\n\nIn Monster Hunter: World, there is a unique interaction between every monster, a particular display of strength or prowess. It seems to follow the rules of the food chain - a Great Jagras won't have the strength to fight an Anjanath, and Anjanath can't hope to kill a Rathalos without help. So they pick each other up, fling each other around, stomp and chomp and slash their way through the area until one monster flees, or dies. \n\nDo not get into the middle of a turf war. It is not a good opportunity for you to look for cheap shots - while ranged hunters might have a chance to dish out a little extra damage between bouts, it's not a good idea for a single melee hunter to draw the ire of two enraged monsters at once, without a solid escape plan. Instead, let the monsters do the hunting for you, and pick off the winner. \n### How Not to Get Hit\nEvading in Monster Hunter is as simple as pulling your analog stick in a certain direction, and tapping the evade button (cross on the PS4). However, unlike Dark Souls, the invincibility frames on the dodge roll are miniscule. You're invincible as long as you're in the air, which isn't very long - a few frames at most. This isn't enough to roll through attacks, but it is enough to roll through the stagger from most roars in the game, and to roll through tremor/some attacks in previous games. However, dodge rolling through roars/tremors and certain attacks without evasion skills (which boost your invincibility frames) is very, very tough. Evasion skills and the inclusion of a late-game item vastly improve your invincibility frames, but they are not necessary for skilled or efficient play. \n\nSo for most people, the advice is to use the evade roll for spacing/dodging away from attacks, rather than through. When a monster is about to tackle you, don't think of rolling through its face - get away from it. You don't need to spam your rolls either, most attacks can safely be avoided simply by circling around the monster. It's a good idea to learn which side you're more comfortable with when it comes to circling. For example, some monsters are safer when only fought on their right side, rather than the left, due to how they attack.\n\nOver the long term, the key to not getting hit is to play cautiously, and take risks only to learn from them. Start by watching a monster, and moving around it to see how it reacts to your spacing. What moves does it use? Does it have projectiles? Flips? Wild cards? Then, dive in and take risks, learning from faints and adapting accordingly. At first, you'll have a good idea of when to stay away and wait. With time, you'll be able to perfect your timing, attacking a monster even as it is attacking you due to proper spacing. \n## Every Monster is Soloable \nMonster Hunter: World is unique in the series for many reasons, yet one of its biggest changes is that all missions can be done either solo or with a party, scaling to those two. In the past, you could go through the entire game alone, but there were quests geared towards single-player and quests geared towards multiplayer, available only through the gathering hall. But with World, you can do every single quest without requiring a considerable amount of skill to essentially solo what is designed for several players. \n\nThere is no challenge in the game that cannot be completed alone, even in clothing without armor or defenses. As long as you have a good weapon and know it well, you can hunt a monster without taking much damage. It's all about patience. You have about 45 minutes for each quest. While speedrunners dispatch even end-game monsters in 1-3 minutes, there is nothing wrong with taking half an hour to hunt an elder dragon alone. Don't rush in and get carted, because there is no rush. Take your time to learn the monster, and don't overextend yourself.",
      "json_metadata": "{\"tags\":[\"monsterhunter\",\"gaming\",\"games\",\"ps4\",\"xbox\"],\"image\":[\"http://game.capcom.com/manual/MHW/locale/en/img/page/42_4_2.jpg\",\"https://s3-us-west-1.amazonaws.com/shacknews/assets/editorial/2018/02/Monster-Hunter-World-How-to-Unlock-High-Rank-Quests.jpg\",\"https://i.imgur.com/yuSpZZC.jpg\",\"https://vignette.wikia.nocookie.net/monsterhunter/images/f/f3/MHW-Anjanath_Screenshot_001.jpg/revision/latest?cb=20170822215241\",\"https://i.ytimg.com/vi/E_2KEkXfOTE/maxresdefault.jpg\"],\"links\":[\"https://steemit.com/monsterhunter/@jamthewriter/what-is-monster-hunter\",\"https://steemit.com/monsterhunter/@jamthewriter/choose-your-weapon-1-melee-weapons-in-monster-hunter-world\",\"https://steemit.com/monsterhunter/@jamthewriter/choose-your-weapon-2-ranged-weapons-in-monster-hunter-world\"],\"app\":\"steemit/0.1\",\"format\":\"markdown\"}"
    }
  ]
}jamthewriterreceived 0.134 SBD, 0.048 SP author reward for @jamthewriter / re-curie-curie-author-showcase-february-1st-2018-20180201t120853259z2018/02/08 12:08:54
jamthewriterreceived 0.134 SBD, 0.048 SP author reward for @jamthewriter / re-curie-curie-author-showcase-february-1st-2018-20180201t120853259z
2018/02/08 12:08:54
| author | jamthewriter |
| permlink | re-curie-curie-author-showcase-february-1st-2018-20180201t120853259z |
| sbd payout | 0.134 SBD |
| steem payout | 0.000 STEEM |
| vesting payout | 77.719568 VESTS |
| Transaction Info | Block #19689312/Virtual Operation #12 |
View Raw JSON Data
{
  "trx_id": "0000000000000000000000000000000000000000",
  "block": 19689312,
  "trx_in_block": 4294967295,
  "op_in_trx": 0,
  "virtual_op": 12,
  "timestamp": "2018-02-08T12:08:54",
  "op": [
    "author_reward",
    {
      "author": "jamthewriter",
      "permlink": "re-curie-curie-author-showcase-february-1st-2018-20180201t120853259z",
      "sbd_payout": "0.134 SBD",
      "steem_payout": "0.000 STEEM",
      "vesting_payout": "77.719568 VESTS"
    }
  ]
}jamthewriterreceived 0.092 SBD, 0.033 SP author reward for @jamthewriter / re-ericrumor-re-jamthewriter-what-is-monster-hunter-20180201t040355203z2018/02/08 04:03:54
jamthewriterreceived 0.092 SBD, 0.033 SP author reward for @jamthewriter / re-ericrumor-re-jamthewriter-what-is-monster-hunter-20180201t040355203z
2018/02/08 04:03:54
| author | jamthewriter |
| permlink | re-ericrumor-re-jamthewriter-what-is-monster-hunter-20180201t040355203z |
| sbd payout | 0.092 SBD |
| steem payout | 0.000 STEEM |
| vesting payout | 53.177461 VESTS |
| Transaction Info | Block #19679691/Virtual Operation #14 |
View Raw JSON Data
{
  "trx_id": "0000000000000000000000000000000000000000",
  "block": 19679691,
  "trx_in_block": 4294967295,
  "op_in_trx": 0,
  "virtual_op": 14,
  "timestamp": "2018-02-08T04:03:54",
  "op": [
    "author_reward",
    {
      "author": "jamthewriter",
      "permlink": "re-ericrumor-re-jamthewriter-what-is-monster-hunter-20180201t040355203z",
      "sbd_payout": "0.092 SBD",
      "steem_payout": "0.000 STEEM",
      "vesting_payout": "53.177461 VESTS"
    }
  ]
}jamthewriterreceived 0.964 SBD, 0.342 SP author reward for @jamthewriter / gaming-and-lifting-an-unlikely-pair2018/02/08 03:52:54
jamthewriterreceived 0.964 SBD, 0.342 SP author reward for @jamthewriter / gaming-and-lifting-an-unlikely-pair
2018/02/08 03:52:54
| author | jamthewriter |
| permlink | gaming-and-lifting-an-unlikely-pair |
| sbd payout | 0.964 SBD |
| steem payout | 0.000 STEEM |
| vesting payout | 556.318280 VESTS |
| Transaction Info | Block #19679473/Virtual Operation #16 |
View Raw JSON Data
{
  "trx_id": "0000000000000000000000000000000000000000",
  "block": 19679473,
  "trx_in_block": 4294967295,
  "op_in_trx": 0,
  "virtual_op": 16,
  "timestamp": "2018-02-08T03:52:54",
  "op": [
    "author_reward",
    {
      "author": "jamthewriter",
      "permlink": "gaming-and-lifting-an-unlikely-pair",
      "sbd_payout": "0.964 SBD",
      "steem_payout": "0.000 STEEM",
      "vesting_payout": "556.318280 VESTS"
    }
  ]
}jamthewriterreceived 0.074 SBD, 0.028 SP author reward for @jamthewriter / re-johnrel-re-jamthewriter-what-is-monster-hunter-20180201t002747501z2018/02/08 00:27:48
jamthewriterreceived 0.074 SBD, 0.028 SP author reward for @jamthewriter / re-johnrel-re-jamthewriter-what-is-monster-hunter-20180201t002747501z
2018/02/08 00:27:48
| author | jamthewriter |
| permlink | re-johnrel-re-jamthewriter-what-is-monster-hunter-20180201t002747501z |
| sbd payout | 0.074 SBD |
| steem payout | 0.000 STEEM |
| vesting payout | 44.996658 VESTS |
| Transaction Info | Block #19675407/Virtual Operation #7 |
View Raw JSON Data
{
  "trx_id": "0000000000000000000000000000000000000000",
  "block": 19675407,
  "trx_in_block": 4294967295,
  "op_in_trx": 0,
  "virtual_op": 7,
  "timestamp": "2018-02-08T00:27:48",
  "op": [
    "author_reward",
    {
      "author": "jamthewriter",
      "permlink": "re-johnrel-re-jamthewriter-what-is-monster-hunter-20180201t002747501z",
      "sbd_payout": "0.074 SBD",
      "steem_payout": "0.000 STEEM",
      "vesting_payout": "44.996658 VESTS"
    }
  ]
}jamthewriterreceived 0.081 SBD, 0.029 SP author reward for @jamthewriter / re-rinelight-re-jamthewriter-what-is-monster-hunter-20180201t002656559z2018/02/08 00:26:57
jamthewriterreceived 0.081 SBD, 0.029 SP author reward for @jamthewriter / re-rinelight-re-jamthewriter-what-is-monster-hunter-20180201t002656559z
2018/02/08 00:26:57
| author | jamthewriter |
| permlink | re-rinelight-re-jamthewriter-what-is-monster-hunter-20180201t002656559z |
| sbd payout | 0.081 SBD |
| steem payout | 0.000 STEEM |
| vesting payout | 47.041963 VESTS |
| Transaction Info | Block #19675390/Virtual Operation #12 |
View Raw JSON Data
{
  "trx_id": "0000000000000000000000000000000000000000",
  "block": 19675390,
  "trx_in_block": 4294967295,
  "op_in_trx": 0,
  "virtual_op": 12,
  "timestamp": "2018-02-08T00:26:57",
  "op": [
    "author_reward",
    {
      "author": "jamthewriter",
      "permlink": "re-rinelight-re-jamthewriter-what-is-monster-hunter-20180201t002656559z",
      "sbd_payout": "0.081 SBD",
      "steem_payout": "0.000 STEEM",
      "vesting_payout": "47.041963 VESTS"
    }
  ]
}jamthewriterreceived 0.562 SBD, 0.198 SP author reward for @jamthewriter / choose-your-weapon-2-ranged-weapons-in-monster-hunter-world2018/02/07 08:50:21
jamthewriterreceived 0.562 SBD, 0.198 SP author reward for @jamthewriter / choose-your-weapon-2-ranged-weapons-in-monster-hunter-world
2018/02/07 08:50:21
| author | jamthewriter |
| permlink | choose-your-weapon-2-ranged-weapons-in-monster-hunter-world |
| sbd payout | 0.562 SBD |
| steem payout | 0.000 STEEM |
| vesting payout | 323.168630 VESTS |
| Transaction Info | Block #19656721/Virtual Operation #17 |
View Raw JSON Data
{
  "trx_id": "0000000000000000000000000000000000000000",
  "block": 19656721,
  "trx_in_block": 4294967295,
  "op_in_trx": 0,
  "virtual_op": 17,
  "timestamp": "2018-02-07T08:50:21",
  "op": [
    "author_reward",
    {
      "author": "jamthewriter",
      "permlink": "choose-your-weapon-2-ranged-weapons-in-monster-hunter-world",
      "sbd_payout": "0.562 SBD",
      "steem_payout": "0.000 STEEM",
      "vesting_payout": "323.168630 VESTS"
    }
  ]
}jamthewriterreceived 0.082 SBD, 0.028 SP author reward for @jamthewriter / re-grimmyx-re-jamthewriter-choose-your-weapon-1-melee-weapons-in-monster-hunter-world-20180130t115021585z2018/02/06 11:50:24
jamthewriterreceived 0.082 SBD, 0.028 SP author reward for @jamthewriter / re-grimmyx-re-jamthewriter-choose-your-weapon-1-melee-weapons-in-monster-hunter-world-20180130t115021585z
2018/02/06 11:50:24
| author | jamthewriter |
| permlink | re-grimmyx-re-jamthewriter-choose-your-weapon-1-melee-weapons-in-monster-hunter-world-20180130t115021585z |
| sbd payout | 0.082 SBD |
| steem payout | 0.000 STEEM |
| vesting payout | 45.000189 VESTS |
| Transaction Info | Block #19631547/Virtual Operation #3 |
View Raw JSON Data
{
  "trx_id": "0000000000000000000000000000000000000000",
  "block": 19631547,
  "trx_in_block": 4294967295,
  "op_in_trx": 0,
  "virtual_op": 3,
  "timestamp": "2018-02-06T11:50:24",
  "op": [
    "author_reward",
    {
      "author": "jamthewriter",
      "permlink": "re-grimmyx-re-jamthewriter-choose-your-weapon-1-melee-weapons-in-monster-hunter-world-20180130t115021585z",
      "sbd_payout": "0.082 SBD",
      "steem_payout": "0.000 STEEM",
      "vesting_payout": "45.000189 VESTS"
    }
  ]
}2018/02/06 09:34:45
2018/02/06 09:34:45
| parent author | jamthewriter |
| parent permlink | gaming-and-lifting-an-unlikely-pair |
| author | redlambo |
| permlink | re-jamthewriter-gaming-and-lifting-an-unlikely-pair-20180206t093446074z |
| title | re-jamthewriter-gaming-and-lifting-an-unlikely-pair-20180206t093446074z |
| body | You got a 38.32% upvote from @redlambo courtesy of @michelnilles! |
| json metadata | {"app":"postpromoter/1.8.3"} |
| Transaction Info | Block #19628836/Trx d1df7e33e2aeef7bd93e442131e911022916cf81 |
View Raw JSON Data
{
  "trx_id": "d1df7e33e2aeef7bd93e442131e911022916cf81",
  "block": 19628836,
  "trx_in_block": 40,
  "op_in_trx": 0,
  "virtual_op": 0,
  "timestamp": "2018-02-06T09:34:45",
  "op": [
    "comment",
    {
      "parent_author": "jamthewriter",
      "parent_permlink": "gaming-and-lifting-an-unlikely-pair",
      "author": "redlambo",
      "permlink": "re-jamthewriter-gaming-and-lifting-an-unlikely-pair-20180206t093446074z",
      "title": "re-jamthewriter-gaming-and-lifting-an-unlikely-pair-20180206t093446074z",
      "body": "You got a 38.32% upvote from @redlambo courtesy of @michelnilles!\n",
      "json_metadata": "{\"app\":\"postpromoter/1.8.3\"}"
    }
  ]
}redlamboupvoted (38.32%) @jamthewriter / gaming-and-lifting-an-unlikely-pair2018/02/06 09:32:09
redlamboupvoted (38.32%) @jamthewriter / gaming-and-lifting-an-unlikely-pair
2018/02/06 09:32:09
| voter | redlambo |
| author | jamthewriter |
| permlink | gaming-and-lifting-an-unlikely-pair |
| weight | 3832 (38.32%) |
| Transaction Info | Block #19628784/Trx b03594131e9c0280e5efbdb384a818d76592b39c |
View Raw JSON Data
{
  "trx_id": "b03594131e9c0280e5efbdb384a818d76592b39c",
  "block": 19628784,
  "trx_in_block": 26,
  "op_in_trx": 0,
  "virtual_op": 0,
  "timestamp": "2018-02-06T09:32:09",
  "op": [
    "vote",
    {
      "voter": "redlambo",
      "author": "jamthewriter",
      "permlink": "gaming-and-lifting-an-unlikely-pair",
      "weight": 3832
    }
  ]
}jamthewriterreceived 0.084 SBD, 0.026 SP author reward for @jamthewriter / re-horstmaster-re-jamthewriter-what-is-monster-hunter-20180130t072420807z2018/02/06 07:24:24
jamthewriterreceived 0.084 SBD, 0.026 SP author reward for @jamthewriter / re-horstmaster-re-jamthewriter-what-is-monster-hunter-20180130t072420807z
2018/02/06 07:24:24
| author | jamthewriter |
| permlink | re-horstmaster-re-jamthewriter-what-is-monster-hunter-20180130t072420807z |
| sbd payout | 0.084 SBD |
| steem payout | 0.000 STEEM |
| vesting payout | 42.955135 VESTS |
| Transaction Info | Block #19626228/Virtual Operation #9 |
View Raw JSON Data
{
  "trx_id": "0000000000000000000000000000000000000000",
  "block": 19626228,
  "trx_in_block": 4294967295,
  "op_in_trx": 0,
  "virtual_op": 9,
  "timestamp": "2018-02-06T07:24:24",
  "op": [
    "author_reward",
    {
      "author": "jamthewriter",
      "permlink": "re-horstmaster-re-jamthewriter-what-is-monster-hunter-20180130t072420807z",
      "sbd_payout": "0.084 SBD",
      "steem_payout": "0.000 STEEM",
      "vesting_payout": "42.955135 VESTS"
    }
  ]
}jamthewriterclaimed reward balance: 6.472 SBD, 1.963 SP2018/02/06 06:45:06
jamthewriterclaimed reward balance: 6.472 SBD, 1.963 SP
2018/02/06 06:45:06
| account | jamthewriter |
| reward steem | 0.000 STEEM |
| reward sbd | 6.472 SBD |
| reward vests | 3197.100783 VESTS |
| Transaction Info | Block #19625443/Trx 0d4207fd734e1e89d74c45cfa5214a49cf74a7a1 |
View Raw JSON Data
{
  "trx_id": "0d4207fd734e1e89d74c45cfa5214a49cf74a7a1",
  "block": 19625443,
  "trx_in_block": 54,
  "op_in_trx": 0,
  "virtual_op": 0,
  "timestamp": "2018-02-06T06:45:06",
  "op": [
    "claim_reward_balance",
    {
      "account": "jamthewriter",
      "reward_steem": "0.000 STEEM",
      "reward_sbd": "6.472 SBD",
      "reward_vests": "3197.100783 VESTS"
    }
  ]
}jamthewriterreceived 6.472 SBD, 1.963 SP author reward for @jamthewriter / choose-your-weapon-1-melee-weapons-in-monster-hunter-world2018/02/06 05:44:39
jamthewriterreceived 6.472 SBD, 1.963 SP author reward for @jamthewriter / choose-your-weapon-1-melee-weapons-in-monster-hunter-world
2018/02/06 05:44:39
| author | jamthewriter |
| permlink | choose-your-weapon-1-melee-weapons-in-monster-hunter-world |
| sbd payout | 6.472 SBD |
| steem payout | 0.000 STEEM |
| vesting payout | 3197.100783 VESTS |
| Transaction Info | Block #19624233/Virtual Operation #15 |
View Raw JSON Data
{
  "trx_id": "0000000000000000000000000000000000000000",
  "block": 19624233,
  "trx_in_block": 4294967295,
  "op_in_trx": 0,
  "virtual_op": 15,
  "timestamp": "2018-02-06T05:44:39",
  "op": [
    "author_reward",
    {
      "author": "jamthewriter",
      "permlink": "choose-your-weapon-1-melee-weapons-in-monster-hunter-world",
      "sbd_payout": "6.472 SBD",
      "steem_payout": "0.000 STEEM",
      "vesting_payout": "3197.100783 VESTS"
    }
  ]
}jamthewriterclaimed reward balance: 0.306 SBD, 0.094 SP2018/02/06 01:59:57
jamthewriterclaimed reward balance: 0.306 SBD, 0.094 SP
2018/02/06 01:59:57
| account | jamthewriter |
| reward steem | 0.000 STEEM |
| reward sbd | 0.306 SBD |
| reward vests | 153.418776 VESTS |
| Transaction Info | Block #19619740/Trx e091b2a3a560d87af610d7dbf6d182c66687d9bc |
View Raw JSON Data
{
  "trx_id": "e091b2a3a560d87af610d7dbf6d182c66687d9bc",
  "block": 19619740,
  "trx_in_block": 23,
  "op_in_trx": 0,
  "virtual_op": 0,
  "timestamp": "2018-02-06T01:59:57",
  "op": [
    "claim_reward_balance",
    {
      "account": "jamthewriter",
      "reward_steem": "0.000 STEEM",
      "reward_sbd": "0.306 SBD",
      "reward_vests": "153.418776 VESTS"
    }
  ]
}jamthewriterreceived 0.024 SBD, 0.009 SP author reward for @jamthewriter / re-misterakpan-re-jamthewriter-what-is-monster-hunter-20180130t011744310z2018/02/06 01:17:48
jamthewriterreceived 0.024 SBD, 0.009 SP author reward for @jamthewriter / re-misterakpan-re-jamthewriter-what-is-monster-hunter-20180130t011744310z
2018/02/06 01:17:48
| author | jamthewriter |
| permlink | re-misterakpan-re-jamthewriter-what-is-monster-hunter-20180130t011744310z |
| sbd payout | 0.024 SBD |
| steem payout | 0.000 STEEM |
| vesting payout | 14.318563 VESTS |
| Transaction Info | Block #19618896/Virtual Operation #5 |
View Raw JSON Data
{
  "trx_id": "0000000000000000000000000000000000000000",
  "block": 19618896,
  "trx_in_block": 4294967295,
  "op_in_trx": 0,
  "virtual_op": 5,
  "timestamp": "2018-02-06T01:17:48",
  "op": [
    "author_reward",
    {
      "author": "jamthewriter",
      "permlink": "re-misterakpan-re-jamthewriter-what-is-monster-hunter-20180130t011744310z",
      "sbd_payout": "0.024 SBD",
      "steem_payout": "0.000 STEEM",
      "vesting_payout": "14.318563 VESTS"
    }
  ]
}jamthewriterreceived 0.021 SBD, 0.008 SP author reward for @jamthewriter / re-misterakpan-re-jamthewriter-what-is-monster-hunter-20180129t104405666z2018/02/05 10:44:09
jamthewriterreceived 0.021 SBD, 0.008 SP author reward for @jamthewriter / re-misterakpan-re-jamthewriter-what-is-monster-hunter-20180129t104405666z
2018/02/05 10:44:09
| author | jamthewriter |
| permlink | re-misterakpan-re-jamthewriter-what-is-monster-hunter-20180129t104405666z |
| sbd payout | 0.021 SBD |
| steem payout | 0.000 STEEM |
| vesting payout | 12.273426 VESTS |
| Transaction Info | Block #19601430/Virtual Operation #20 |
View Raw JSON Data
{
  "trx_id": "0000000000000000000000000000000000000000",
  "block": 19601430,
  "trx_in_block": 4294967295,
  "op_in_trx": 0,
  "virtual_op": 20,
  "timestamp": "2018-02-05T10:44:09",
  "op": [
    "author_reward",
    {
      "author": "jamthewriter",
      "permlink": "re-misterakpan-re-jamthewriter-what-is-monster-hunter-20180129t104405666z",
      "sbd_payout": "0.021 SBD",
      "steem_payout": "0.000 STEEM",
      "vesting_payout": "12.273426 VESTS"
    }
  ]
}2018/02/05 06:53:27
2018/02/05 06:53:27
| voter | jamthewriter |
| author | michelnilles |
| permlink | lunch-time-pasta-time-with-this-plate-of-all-arrabbiata-pepper-pasta-for-steemian-food-lovers |
| weight | 10000 (100.00%) |
| Transaction Info | Block #19596820/Trx 812ea36760e6808589e22a8a72365fd44faf02aa |
View Raw JSON Data
{
  "trx_id": "812ea36760e6808589e22a8a72365fd44faf02aa",
  "block": 19596820,
  "trx_in_block": 53,
  "op_in_trx": 0,
  "virtual_op": 0,
  "timestamp": "2018-02-05T06:53:27",
  "op": [
    "vote",
    {
      "voter": "jamthewriter",
      "author": "michelnilles",
      "permlink": "lunch-time-pasta-time-with-this-plate-of-all-arrabbiata-pepper-pasta-for-steemian-food-lovers",
      "weight": 10000
    }
  ]
}Manabar
Voting Power100.00%
Downvote Power100.00%
Resource Credits100.00%
Reputation Progress15.64%
{
  "voting_manabar": {
    "current_mana": 9800,
    "last_update_time": 1519294014
  },
  "downvote_manabar": {
    "current_mana": 0,
    "last_update_time": 1470061107
  },
  "rc_account": {
    "account": "jamthewriter",
    "rc_manabar": {
      "current_mana": "47080699503",
      "last_update_time": 1537887600
    },
    "max_rc_creation_adjustment": {
      "amount": "2020748973",
      "precision": 6,
      "nai": "@@000000037"
    },
    "max_rc": "47080699503"
  }
}
Account Metadata
| POSTING JSON METADATA | |
| profile | {"profile_image":"https://i.imgur.com/z7CFLQR.jpg","cover_image":"https://assets.rpgsite.net/images/images/000/057/297/original/MHW-170828-022.jpg","name":"Jam","about":"Writing, lifting, playing, writing. ","location":"Lapu-Lapu City, Philippines","website":"http://jamalpollok.com"} |
| JSON METADATA | |
| profile | {"profile_image":"https://i.imgur.com/z7CFLQR.jpg","cover_image":"https://assets.rpgsite.net/images/images/000/057/297/original/MHW-170828-022.jpg","name":"Jam","about":"Writing, lifting, playing, writing. ","location":"Lapu-Lapu City, Philippines","website":"http://jamalpollok.com"} |
{
  "posting_json_metadata": {
    "profile": {
      "profile_image": "https://i.imgur.com/z7CFLQR.jpg",
      "cover_image": "https://assets.rpgsite.net/images/images/000/057/297/original/MHW-170828-022.jpg",
      "name": "Jam",
      "about": "Writing, lifting, playing, writing. ",
      "location": "Lapu-Lapu City, Philippines",
      "website": "http://jamalpollok.com"
    }
  },
  "json_metadata": {
    "profile": {
      "profile_image": "https://i.imgur.com/z7CFLQR.jpg",
      "cover_image": "https://assets.rpgsite.net/images/images/000/057/297/original/MHW-170828-022.jpg",
      "name": "Jam",
      "about": "Writing, lifting, playing, writing. ",
      "location": "Lapu-Lapu City, Philippines",
      "website": "http://jamalpollok.com"
    }
  }
}
Auth Keys
Owner
Single Signature
Public Keys
STM8ewiCZkzjrn1vod2PrzEjNabUwgFeJt2ihbetj1HQVGhtu9Qzs1/1
Active
Single Signature
Public Keys
STM5jvyQvHXhgFEDMfcYiZD78fKavfdX5iSHubgUa9GkF9ADGc9tT1/1
Posting
Single Signature
Public Keys
STM84cWGTYdguKr79SbyRzQT3qVUmQvHXropQxjHYTKRBKuRxUfDP1/1
Memo
STM8BHgKzNAvZaqYS8WZkXooBvLhxrjNNrVhupBwCXsrEd6LgVAFB
{
  "owner": {
    "weight_threshold": 1,
    "account_auths": [],
    "key_auths": [
      [
        "STM8ewiCZkzjrn1vod2PrzEjNabUwgFeJt2ihbetj1HQVGhtu9Qzs",
        1
      ]
    ]
  },
  "active": {
    "weight_threshold": 1,
    "account_auths": [],
    "key_auths": [
      [
        "STM5jvyQvHXhgFEDMfcYiZD78fKavfdX5iSHubgUa9GkF9ADGc9tT",
        1
      ]
    ]
  },
  "posting": {
    "weight_threshold": 1,
    "account_auths": [],
    "key_auths": [
      [
        "STM84cWGTYdguKr79SbyRzQT3qVUmQvHXropQxjHYTKRBKuRxUfDP",
        1
      ]
    ]
  },
  "memo": "STM8BHgKzNAvZaqYS8WZkXooBvLhxrjNNrVhupBwCXsrEd6LgVAFB"
}
Witness Votes
0 / 30
No active witness votes.
[]