VOTING POWER100.00%
DOWNVOTE POWER100.00%
RESOURCE CREDITS100.00%
REPUTATION PROGRESS0.00%
Net Worth
0.037USD
STEEM
0.000STEEM
SBD
0.000SBD
Effective Power
5.008SP
├── Own SP
0.630SP
└── Incoming DelegationsDeleg
+4.378SP
Detailed Balance
| STEEM | ||
| balance | 0.000STEEM | STEEM |
| market_balance | 0.000STEEM | STEEM |
| savings_balance | 0.000STEEM | STEEM |
| reward_steem_balance | 0.000STEEM | STEEM |
| STEEM POWER | ||
| Own SP | 0.630SP | SP |
| Delegated Out | 0.000SP | SP |
| Delegation In | 4.378SP | SP |
| Effective Power | 5.008SP | SP |
| Reward SP (pending) | 0.000SP | SP |
| SBD | ||
| sbd_balance | 0.000SBD | SBD |
| sbd_conversions | 0.000SBD | SBD |
| sbd_market_balance | 0.000SBD | SBD |
| savings_sbd_balance | 0.000SBD | SBD |
| reward_sbd_balance | 0.000SBD | SBD |
{
  "balance": "0.000 STEEM",
  "savings_balance": "0.000 STEEM",
  "reward_steem_balance": "0.000 STEEM",
  "vesting_shares": "1024.408278 VESTS",
  "delegated_vesting_shares": "0.000000 VESTS",
  "received_vesting_shares": "7119.251528 VESTS",
  "sbd_balance": "0.000 SBD",
  "savings_sbd_balance": "0.000 SBD",
  "reward_sbd_balance": "0.000 SBD",
  "conversions": []
}
Account Info
| name | faderstudio |
| id | 560006 |
| rank | 1,428,236 |
| reputation | 58574518 |
| created | 2018-01-04T14:34:33 |
| recovery_account | steem |
| proxy | None |
| post_count | 25 |
| comment_count | 0 |
| lifetime_vote_count | 0 |
| witnesses_voted_for | 0 |
| last_post | 2018-06-16T13:39:42 |
| last_root_post | 2018-06-16T13:39:42 |
| last_vote_time | 1970-01-01T00:00:00 |
| proxied_vsf_votes | 0, 0, 0, 0 |
| can_vote | 1 |
| voting_power | 0 |
| delayed_votes | 0 |
| balance | 0.000 STEEM |
| savings_balance | 0.000 STEEM |
| sbd_balance | 0.000 SBD |
| savings_sbd_balance | 0.000 SBD |
| vesting_shares | 1024.408278 VESTS |
| delegated_vesting_shares | 0.000000 VESTS |
| received_vesting_shares | 7119.251528 VESTS |
| reward_vesting_balance | 0.000000 VESTS |
| vesting_balance | 0.000 STEEM |
| vesting_withdraw_rate | 0.000000 VESTS |
| next_vesting_withdrawal | 1969-12-31T23:59:59 |
| withdrawn | 0 |
| to_withdraw | 0 |
| withdraw_routes | 0 |
| savings_withdraw_requests | 0 |
| last_account_recovery | 1970-01-01T00:00:00 |
| reset_account | null |
| last_owner_update | 1970-01-01T00:00:00 |
| last_account_update | 2018-01-04T15:49:00 |
| mined | No |
| sbd_seconds | 0 |
| sbd_last_interest_payment | 1970-01-01T00:00:00 |
| savings_sbd_last_interest_payment | 1970-01-01T00:00:00 |
{
  "id": 560006,
  "name": "faderstudio",
  "owner": {
    "weight_threshold": 1,
    "account_auths": [],
    "key_auths": [
      [
        "STM74Jag87S3iz2eAvj1D9M6LUX3JtHnpj2daR4KxMy8gyDn57Q5p",
        1
      ]
    ]
  },
  "active": {
    "weight_threshold": 1,
    "account_auths": [],
    "key_auths": [
      [
        "STM7gPY1WTYXq9NvGDatfVXzLwKqRn8AaioQ2hxTDgy97YnJz8iq6",
        1
      ]
    ]
  },
  "posting": {
    "weight_threshold": 1,
    "account_auths": [],
    "key_auths": [
      [
        "STM7PYKjsTGs1Y3eHxQV99KGjh1LWUyHofuSrcdvccN124mWTZFQ4",
        1
      ]
    ]
  },
  "memo_key": "STM7Za1SX4X9h1huDhP3X64E5HsGvg8tiPE5g5ELbhqrxfkkizwu7",
  "json_metadata": "{\"profile\":{\"location\":\"Reggio Emilia (Italy)\",\"profile_image\":\"https://scontent-mxp1-1.xx.fbcdn.net/v/t1.0-9/25445974_1817390561666327_4337046672469838200_n.jpg?oh=7fb3581ff57c86321f0f7c1bb47778ab&oe=5ABC6DC9\",\"cover_image\":\"https://scontent-mxp1-1.xx.fbcdn.net/v/t31.0-8/25586829_1817415348330515_8588053028680241690_o.jpg?oh=2adf7c51d1f2186cdd2b5827bfe1a8cf&oe=5AFEA162\",\"website\":\"https://www.youtube.com/user/faderservizi\",\"about\":\"Tecnology, Music, Audio and Video solutions\",\"name\":\"Fader Studio\"}}",
  "posting_json_metadata": "{\"profile\":{\"location\":\"Reggio Emilia (Italy)\",\"profile_image\":\"https://scontent-mxp1-1.xx.fbcdn.net/v/t1.0-9/25445974_1817390561666327_4337046672469838200_n.jpg?oh=7fb3581ff57c86321f0f7c1bb47778ab&oe=5ABC6DC9\",\"cover_image\":\"https://scontent-mxp1-1.xx.fbcdn.net/v/t31.0-8/25586829_1817415348330515_8588053028680241690_o.jpg?oh=2adf7c51d1f2186cdd2b5827bfe1a8cf&oe=5AFEA162\",\"website\":\"https://www.youtube.com/user/faderservizi\",\"about\":\"Tecnology, Music, Audio and Video solutions\",\"name\":\"Fader Studio\"}}",
  "proxy": "",
  "last_owner_update": "1970-01-01T00:00:00",
  "last_account_update": "2018-01-04T15:49:00",
  "created": "2018-01-04T14:34:33",
  "mined": false,
  "recovery_account": "steem",
  "last_account_recovery": "1970-01-01T00:00:00",
  "reset_account": "null",
  "comment_count": 0,
  "lifetime_vote_count": 0,
  "post_count": 25,
  "can_vote": true,
  "voting_manabar": {
    "current_mana": "8143659806",
    "last_update_time": 1779063018
  },
  "downvote_manabar": {
    "current_mana": 2035914951,
    "last_update_time": 1779063018
  },
  "voting_power": 0,
  "balance": "0.000 STEEM",
  "savings_balance": "0.000 STEEM",
  "sbd_balance": "0.000 SBD",
  "sbd_seconds": "0",
  "sbd_seconds_last_update": "1970-01-01T00:00:00",
  "sbd_last_interest_payment": "1970-01-01T00:00:00",
  "savings_sbd_balance": "0.000 SBD",
  "savings_sbd_seconds": "0",
  "savings_sbd_seconds_last_update": "1970-01-01T00:00:00",
  "savings_sbd_last_interest_payment": "1970-01-01T00:00:00",
  "savings_withdraw_requests": 0,
  "reward_sbd_balance": "0.000 SBD",
  "reward_steem_balance": "0.000 STEEM",
  "reward_vesting_balance": "0.000000 VESTS",
  "reward_vesting_steem": "0.000 STEEM",
  "vesting_shares": "1024.408278 VESTS",
  "delegated_vesting_shares": "0.000000 VESTS",
  "received_vesting_shares": "7119.251528 VESTS",
  "vesting_withdraw_rate": "0.000000 VESTS",
  "next_vesting_withdrawal": "1969-12-31T23:59:59",
  "withdrawn": 0,
  "to_withdraw": 0,
  "withdraw_routes": 0,
  "curation_rewards": 0,
  "posting_rewards": 0,
  "proxied_vsf_votes": [
    0,
    0,
    0,
    0
  ],
  "witnesses_voted_for": 0,
  "last_post": "2018-06-16T13:39:42",
  "last_root_post": "2018-06-16T13:39:42",
  "last_vote_time": "1970-01-01T00:00:00",
  "post_bandwidth": 0,
  "pending_claimed_accounts": 0,
  "vesting_balance": "0.000 STEEM",
  "reputation": 58574518,
  "transfer_history": [],
  "market_history": [],
  "post_history": [],
  "vote_history": [],
  "other_history": [],
  "witness_votes": [],
  "tags_usage": [],
  "guest_bloggers": [],
  "rank": 1428236
}
Withdraw Routes
| Incoming | Outgoing |
|---|---|
Empty | Empty |
{
  "incoming": [],
  "outgoing": []
}From Date
To Date
steemdelegated 4.378 SP to @faderstudio2026/05/18 00:10:18
steemdelegated 4.378 SP to @faderstudio
2026/05/18 00:10:18
| delegator | steem |
| delegatee | faderstudio |
| vesting shares | 7119.251528 VESTS |
| Transaction Info | Block #106143352/Trx 3c04c80a69fd7e131a50784c02493da5975ceb44 |
View Raw JSON Data
{
  "trx_id": "3c04c80a69fd7e131a50784c02493da5975ceb44",
  "block": 106143352,
  "trx_in_block": 1,
  "op_in_trx": 0,
  "virtual_op": 0,
  "timestamp": "2026-05-18T00:10:18",
  "op": [
    "delegate_vesting_shares",
    {
      "delegator": "steem",
      "delegatee": "faderstudio",
      "vesting_shares": "7119.251528 VESTS"
    }
  ]
}steemdelegated 2.710 SP to @faderstudio2026/05/12 03:30:39
steemdelegated 2.710 SP to @faderstudio
2026/05/12 03:30:39
| delegator | steem |
| delegatee | faderstudio |
| vesting shares | 4407.041123 VESTS |
| Transaction Info | Block #105975315/Trx 490b5869881b34732a7435d09c33b6a95cbeda90 |
View Raw JSON Data
{
  "trx_id": "490b5869881b34732a7435d09c33b6a95cbeda90",
  "block": 105975315,
  "trx_in_block": 0,
  "op_in_trx": 0,
  "virtual_op": 0,
  "timestamp": "2026-05-12T03:30:39",
  "op": [
    "delegate_vesting_shares",
    {
      "delegator": "steem",
      "delegatee": "faderstudio",
      "vesting_shares": "4407.041123 VESTS"
    }
  ]
}steemdelegated 4.386 SP to @faderstudio2026/04/25 23:31:21
steemdelegated 4.386 SP to @faderstudio
2026/04/25 23:31:21
| delegator | steem |
| delegatee | faderstudio |
| vesting shares | 7131.767284 VESTS |
| Transaction Info | Block #105511005/Trx 9966d01e285272f3fe2a1ddeccd7f6a4edc6a288 |
View Raw JSON Data
{
  "trx_id": "9966d01e285272f3fe2a1ddeccd7f6a4edc6a288",
  "block": 105511005,
  "trx_in_block": 0,
  "op_in_trx": 0,
  "virtual_op": 0,
  "timestamp": "2026-04-25T23:31:21",
  "op": [
    "delegate_vesting_shares",
    {
      "delegator": "steem",
      "delegatee": "faderstudio",
      "vesting_shares": "7131.767284 VESTS"
    }
  ]
}steemdelegated 2.736 SP to @faderstudio2026/01/23 07:34:36
steemdelegated 2.736 SP to @faderstudio
2026/01/23 07:34:36
| delegator | steem |
| delegatee | faderstudio |
| vesting shares | 4448.587942 VESTS |
| Transaction Info | Block #102851539/Trx d31b7cb45c2fff5a4679558978dc3f2ced128f3b |
View Raw JSON Data
{
  "trx_id": "d31b7cb45c2fff5a4679558978dc3f2ced128f3b",
  "block": 102851539,
  "trx_in_block": 0,
  "op_in_trx": 0,
  "virtual_op": 0,
  "timestamp": "2026-01-23T07:34:36",
  "op": [
    "delegate_vesting_shares",
    {
      "delegator": "steem",
      "delegatee": "faderstudio",
      "vesting_shares": "4448.587942 VESTS"
    }
  ]
}steemdelegated 2.837 SP to @faderstudio2024/12/17 02:54:00
steemdelegated 2.837 SP to @faderstudio
2024/12/17 02:54:00
| delegator | steem |
| delegatee | faderstudio |
| vesting shares | 4612.807139 VESTS |
| Transaction Info | Block #91297955/Trx 91ae253c0e444c1bd4f2bc4db33b985dcc6c4dee |
View Raw JSON Data
{
  "trx_id": "91ae253c0e444c1bd4f2bc4db33b985dcc6c4dee",
  "block": 91297955,
  "trx_in_block": 0,
  "op_in_trx": 0,
  "virtual_op": 0,
  "timestamp": "2024-12-17T02:54:00",
  "op": [
    "delegate_vesting_shares",
    {
      "delegator": "steem",
      "delegatee": "faderstudio",
      "vesting_shares": "4612.807139 VESTS"
    }
  ]
}steemdelegated 2.941 SP to @faderstudio2023/11/13 18:36:42
steemdelegated 2.941 SP to @faderstudio
2023/11/13 18:36:42
| delegator | steem |
| delegatee | faderstudio |
| vesting shares | 4781.940671 VESTS |
| Transaction Info | Block #79852154/Trx e58f29078c69d8545af6d3afcf5a174d96336030 |
View Raw JSON Data
{
  "trx_id": "e58f29078c69d8545af6d3afcf5a174d96336030",
  "block": 79852154,
  "trx_in_block": 8,
  "op_in_trx": 0,
  "virtual_op": 0,
  "timestamp": "2023-11-13T18:36:42",
  "op": [
    "delegate_vesting_shares",
    {
      "delegator": "steem",
      "delegatee": "faderstudio",
      "vesting_shares": "4781.940671 VESTS"
    }
  ]
}steemdelegated 4.747 SP to @faderstudio2023/09/21 21:43:42
steemdelegated 4.747 SP to @faderstudio
2023/09/21 21:43:42
| delegator | steem |
| delegatee | faderstudio |
| vesting shares | 7719.219457 VESTS |
| Transaction Info | Block #78347705/Trx 628536c69b6eaafc3f6c988bb6649cdd7dc0c433 |
View Raw JSON Data
{
  "trx_id": "628536c69b6eaafc3f6c988bb6649cdd7dc0c433",
  "block": 78347705,
  "trx_in_block": 9,
  "op_in_trx": 0,
  "virtual_op": 0,
  "timestamp": "2023-09-21T21:43:42",
  "op": [
    "delegate_vesting_shares",
    {
      "delegator": "steem",
      "delegatee": "faderstudio",
      "vesting_shares": "7719.219457 VESTS"
    }
  ]
}steemdelegated 4.883 SP to @faderstudio2022/11/03 11:32:27
steemdelegated 4.883 SP to @faderstudio
2022/11/03 11:32:27
| delegator | steem |
| delegatee | faderstudio |
| vesting shares | 7940.900895 VESTS |
| Transaction Info | Block #69113066/Trx 1afc074178bed20051f42e612e7cadc9b2013167 |
View Raw JSON Data
{
  "trx_id": "1afc074178bed20051f42e612e7cadc9b2013167",
  "block": 69113066,
  "trx_in_block": 5,
  "op_in_trx": 0,
  "virtual_op": 0,
  "timestamp": "2022-11-03T11:32:27",
  "op": [
    "delegate_vesting_shares",
    {
      "delegator": "steem",
      "delegatee": "faderstudio",
      "vesting_shares": "7940.900895 VESTS"
    }
  ]
}steemdelegated 5.019 SP to @faderstudio2022/01/17 10:49:12
steemdelegated 5.019 SP to @faderstudio
2022/01/17 10:49:12
| delegator | steem |
| delegatee | faderstudio |
| vesting shares | 8161.434126 VESTS |
| Transaction Info | Block #60809249/Trx b25d580ee8c5ff205c2c333621212988947d83bf |
View Raw JSON Data
{
  "trx_id": "b25d580ee8c5ff205c2c333621212988947d83bf",
  "block": 60809249,
  "trx_in_block": 4,
  "op_in_trx": 0,
  "virtual_op": 0,
  "timestamp": "2022-01-17T10:49:12",
  "op": [
    "delegate_vesting_shares",
    {
      "delegator": "steem",
      "delegatee": "faderstudio",
      "vesting_shares": "8161.434126 VESTS"
    }
  ]
}steemdelegated 5.132 SP to @faderstudio2021/06/14 00:44:54
steemdelegated 5.132 SP to @faderstudio
2021/06/14 00:44:54
| delegator | steem |
| delegatee | faderstudio |
| vesting shares | 8345.202784 VESTS |
| Transaction Info | Block #54607646/Trx 47d58b1e5b0f6796026db372c4e3ad86b51055c5 |
View Raw JSON Data
{
  "trx_id": "47d58b1e5b0f6796026db372c4e3ad86b51055c5",
  "block": 54607646,
  "trx_in_block": 3,
  "op_in_trx": 0,
  "virtual_op": 0,
  "timestamp": "2021-06-14T00:44:54",
  "op": [
    "delegate_vesting_shares",
    {
      "delegator": "steem",
      "delegatee": "faderstudio",
      "vesting_shares": "8345.202784 VESTS"
    }
  ]
}steemdelegated 5.247 SP to @faderstudio2020/12/11 11:03:39
steemdelegated 5.247 SP to @faderstudio
2020/12/11 11:03:39
| delegator | steem |
| delegatee | faderstudio |
| vesting shares | 8532.624758 VESTS |
| Transaction Info | Block #49355104/Trx 03d5c4d70af82056fdeb88181a5b04c2d3fd8cd7 |
View Raw JSON Data
{
  "trx_id": "03d5c4d70af82056fdeb88181a5b04c2d3fd8cd7",
  "block": 49355104,
  "trx_in_block": 4,
  "op_in_trx": 0,
  "virtual_op": 0,
  "timestamp": "2020-12-11T11:03:39",
  "op": [
    "delegate_vesting_shares",
    {
      "delegator": "steem",
      "delegatee": "faderstudio",
      "vesting_shares": "8532.624758 VESTS"
    }
  ]
}steemdelegated 1.176 SP to @faderstudio2020/12/06 04:41:00
steemdelegated 1.176 SP to @faderstudio
2020/12/06 04:41:00
| delegator | steem |
| delegatee | faderstudio |
| vesting shares | 1912.543513 VESTS |
| Transaction Info | Block #49206671/Trx 24ebcc1c977477f5a225be715a6aa6544c5b9576 |
View Raw JSON Data
{
  "trx_id": "24ebcc1c977477f5a225be715a6aa6544c5b9576",
  "block": 49206671,
  "trx_in_block": 1,
  "op_in_trx": 0,
  "virtual_op": 0,
  "timestamp": "2020-12-06T04:41:00",
  "op": [
    "delegate_vesting_shares",
    {
      "delegator": "steem",
      "delegatee": "faderstudio",
      "vesting_shares": "1912.543513 VESTS"
    }
  ]
}steemdelegated 5.251 SP to @faderstudio2020/12/05 14:41:51
steemdelegated 5.251 SP to @faderstudio
2020/12/05 14:41:51
| delegator | steem |
| delegatee | faderstudio |
| vesting shares | 8538.832612 VESTS |
| Transaction Info | Block #49190203/Trx 9561562eb5d2f85b1b41928d431e344501f6af40 |
View Raw JSON Data
{
  "trx_id": "9561562eb5d2f85b1b41928d431e344501f6af40",
  "block": 49190203,
  "trx_in_block": 1,
  "op_in_trx": 0,
  "virtual_op": 0,
  "timestamp": "2020-12-05T14:41:51",
  "op": [
    "delegate_vesting_shares",
    {
      "delegator": "steem",
      "delegatee": "faderstudio",
      "vesting_shares": "8538.832612 VESTS"
    }
  ]
}steemdelegated 1.181 SP to @faderstudio2020/11/02 15:25:51
steemdelegated 1.181 SP to @faderstudio
2020/11/02 15:25:51
| delegator | steem |
| delegatee | faderstudio |
| vesting shares | 1920.017158 VESTS |
| Transaction Info | Block #48257555/Trx 9a2696c53836ac67866c1a7758fb9d714038a3fc |
View Raw JSON Data
{
  "trx_id": "9a2696c53836ac67866c1a7758fb9d714038a3fc",
  "block": 48257555,
  "trx_in_block": 0,
  "op_in_trx": 0,
  "virtual_op": 0,
  "timestamp": "2020-11-02T15:25:51",
  "op": [
    "delegate_vesting_shares",
    {
      "delegator": "steem",
      "delegatee": "faderstudio",
      "vesting_shares": "1920.017158 VESTS"
    }
  ]
}steemdelegated 5.376 SP to @faderstudio2020/05/09 05:38:06
steemdelegated 5.376 SP to @faderstudio
2020/05/09 05:38:06
| delegator | steem |
| delegatee | faderstudio |
| vesting shares | 8741.637971 VESTS |
| Transaction Info | Block #43216913/Trx ca9f320aed7d561b8b08f8d3f936ff8cb122aa04 |
View Raw JSON Data
{
  "trx_id": "ca9f320aed7d561b8b08f8d3f936ff8cb122aa04",
  "block": 43216913,
  "trx_in_block": 6,
  "op_in_trx": 0,
  "virtual_op": 0,
  "timestamp": "2020-05-09T05:38:06",
  "op": [
    "delegate_vesting_shares",
    {
      "delegator": "steem",
      "delegatee": "faderstudio",
      "vesting_shares": "8741.637971 VESTS"
    }
  ]
}steemdelegated 1.201 SP to @faderstudio2020/05/08 09:13:39
steemdelegated 1.201 SP to @faderstudio
2020/05/08 09:13:39
| delegator | steem |
| delegatee | faderstudio |
| vesting shares | 1953.311140 VESTS |
| Transaction Info | Block #43193001/Trx b8443a2702fd1dd78de57f4a219ba7c39ff2c4cc |
View Raw JSON Data
{
  "trx_id": "b8443a2702fd1dd78de57f4a219ba7c39ff2c4cc",
  "block": 43193001,
  "trx_in_block": 19,
  "op_in_trx": 0,
  "virtual_op": 0,
  "timestamp": "2020-05-08T09:13:39",
  "op": [
    "delegate_vesting_shares",
    {
      "delegator": "steem",
      "delegatee": "faderstudio",
      "vesting_shares": "1953.311140 VESTS"
    }
  ]
}2020/01/04 15:19:39
2020/01/04 15:19:39
| parent author | faderstudio |
| parent permlink | tutorial-daw-4-pc-windows-optimisation-for-daw-digital-audio-workstation |
| author | steemitboard |
| permlink | steemitboard-notify-faderstudio-20200104t151938000z |
| title | |
| body | Congratulations @faderstudio! You received a personal award! <table><tr><td>https://steemitimages.com/70x70/http://steemitboard.com/@faderstudio/birthday2.png</td><td>Happy Birthday! - You are on the Steem blockchain for 2 years!</td></tr></table> <sub>_You can view [your badges on your Steem Board](https://steemitboard.com/@faderstudio) and compare to others on the [Steem Ranking](https://steemitboard.com/ranking/index.php?name=faderstudio)_</sub> ###### [Vote for @Steemitboard as a witness](https://v2.steemconnect.com/sign/account-witness-vote?witness=steemitboard&approve=1) to get one more award and increased upvotes! |
| json metadata | {"image":["https://steemitboard.com/img/notify.png"]} |
| Transaction Info | Block #39636938/Trx 62c7ffb747793a319d77607abe2d9d6151c6c0e6 |
View Raw JSON Data
{
  "trx_id": "62c7ffb747793a319d77607abe2d9d6151c6c0e6",
  "block": 39636938,
  "trx_in_block": 5,
  "op_in_trx": 0,
  "virtual_op": 0,
  "timestamp": "2020-01-04T15:19:39",
  "op": [
    "comment",
    {
      "parent_author": "faderstudio",
      "parent_permlink": "tutorial-daw-4-pc-windows-optimisation-for-daw-digital-audio-workstation",
      "author": "steemitboard",
      "permlink": "steemitboard-notify-faderstudio-20200104t151938000z",
      "title": "",
      "body": "Congratulations @faderstudio! You received a personal award!\n\n<table><tr><td>https://steemitimages.com/70x70/http://steemitboard.com/@faderstudio/birthday2.png</td><td>Happy Birthday! - You are on the Steem blockchain for 2 years!</td></tr></table>\n\n<sub>_You can view [your badges on your Steem Board](https://steemitboard.com/@faderstudio) and compare to others on the [Steem Ranking](https://steemitboard.com/ranking/index.php?name=faderstudio)_</sub>\n\n\n###### [Vote for @Steemitboard as a witness](https://v2.steemconnect.com/sign/account-witness-vote?witness=steemitboard&approve=1) to get one more award and increased upvotes!",
      "json_metadata": "{\"image\":[\"https://steemitboard.com/img/notify.png\"]}"
    }
  ]
}steemdelegated 5.454 SP to @faderstudio2019/09/27 18:19:33
steemdelegated 5.454 SP to @faderstudio
2019/09/27 18:19:33
| delegator | steem |
| delegatee | faderstudio |
| vesting shares | 8868.506025 VESTS |
| Transaction Info | Block #36794792/Trx fcc9392d6d07bdb2d26119b423ef5d6704cc9ed6 |
View Raw JSON Data
{
  "trx_id": "fcc9392d6d07bdb2d26119b423ef5d6704cc9ed6",
  "block": 36794792,
  "trx_in_block": 44,
  "op_in_trx": 0,
  "virtual_op": 0,
  "timestamp": "2019-09-27T18:19:33",
  "op": [
    "delegate_vesting_shares",
    {
      "delegator": "steem",
      "delegatee": "faderstudio",
      "vesting_shares": "8868.506025 VESTS"
    }
  ]
}2019/01/04 16:09:15
2019/01/04 16:09:15
| parent author | faderstudio |
| parent permlink | tutorial-daw-4-pc-windows-optimisation-for-daw-digital-audio-workstation |
| author | steemitboard |
| permlink | steemitboard-notify-faderstudio-20190104t160914000z |
| title | |
| body | Congratulations @faderstudio! You received a personal award! <table><tr><td>https://steemitimages.com/70x70/http://steemitboard.com/@faderstudio/birthday1.png</td><td>1 Year on Steemit</td></tr></table> <sub>_[Click here to view your Board](https://steemitboard.com/@faderstudio)_</sub> > Support [SteemitBoard's project](https://steemit.com/@steemitboard)! **[Vote for its witness](https://v2.steemconnect.com/sign/account-witness-vote?witness=steemitboard&approve=1)** and **get one more award**! |
| json metadata | {"image":["https://steemitboard.com/img/notify.png"]} |
| Transaction Info | Block #29164825/Trx 24d20857333b5ebb20f7c63ff3bc334222290bef |
View Raw JSON Data
{
  "trx_id": "24d20857333b5ebb20f7c63ff3bc334222290bef",
  "block": 29164825,
  "trx_in_block": 8,
  "op_in_trx": 0,
  "virtual_op": 0,
  "timestamp": "2019-01-04T16:09:15",
  "op": [
    "comment",
    {
      "parent_author": "faderstudio",
      "parent_permlink": "tutorial-daw-4-pc-windows-optimisation-for-daw-digital-audio-workstation",
      "author": "steemitboard",
      "permlink": "steemitboard-notify-faderstudio-20190104t160914000z",
      "title": "",
      "body": "Congratulations @faderstudio! You received a personal award!\n\n<table><tr><td>https://steemitimages.com/70x70/http://steemitboard.com/@faderstudio/birthday1.png</td><td>1 Year on Steemit</td></tr></table>\n\n<sub>_[Click here to view your Board](https://steemitboard.com/@faderstudio)_</sub>\n\n\n> Support [SteemitBoard's project](https://steemit.com/@steemitboard)! **[Vote for its witness](https://v2.steemconnect.com/sign/account-witness-vote?witness=steemitboard&approve=1)** and **get one more award**!",
      "json_metadata": "{\"image\":[\"https://steemitboard.com/img/notify.png\"]}"
    }
  ]
}steemdelegated 5.575 SP to @faderstudio2018/10/19 11:04:57
steemdelegated 5.575 SP to @faderstudio
2018/10/19 11:04:57
| delegator | steem |
| delegatee | faderstudio |
| vesting shares | 9066.392021 VESTS |
| Transaction Info | Block #26942586/Trx 404dcea0d001fe5fd2e8914fdb84ac6ef56a1696 |
View Raw JSON Data
{
  "trx_id": "404dcea0d001fe5fd2e8914fdb84ac6ef56a1696",
  "block": 26942586,
  "trx_in_block": 14,
  "op_in_trx": 0,
  "virtual_op": 0,
  "timestamp": "2018-10-19T11:04:57",
  "op": [
    "delegate_vesting_shares",
    {
      "delegator": "steem",
      "delegatee": "faderstudio",
      "vesting_shares": "9066.392021 VESTS"
    }
  ]
}steemdelegated 17.988 SP to @faderstudio2018/10/18 05:46:57
steemdelegated 17.988 SP to @faderstudio
2018/10/18 05:46:57
| delegator | steem |
| delegatee | faderstudio |
| vesting shares | 29249.983616 VESTS |
| Transaction Info | Block #26907442/Trx 413b54bf67b70a69724f4cc4faf54bb4fb84dd94 |
View Raw JSON Data
{
  "trx_id": "413b54bf67b70a69724f4cc4faf54bb4fb84dd94",
  "block": 26907442,
  "trx_in_block": 35,
  "op_in_trx": 0,
  "virtual_op": 0,
  "timestamp": "2018-10-18T05:46:57",
  "op": [
    "delegate_vesting_shares",
    {
      "delegator": "steem",
      "delegatee": "faderstudio",
      "vesting_shares": "29249.983616 VESTS"
    }
  ]
}faderstudiofollowed @atfslab2018/07/20 09:03:54
faderstudiofollowed @atfslab
2018/07/20 09:03:54
| required auths | [] |
| required posting auths | ["faderstudio"] |
| id | follow |
| json | ["follow",{"follower":"faderstudio","following":"atfslab","what":["blog"]}] |
| Transaction Info | Block #24337008/Trx 4776d134da80145d6b9ab47331a79b383c829420 |
View Raw JSON Data
{
  "trx_id": "4776d134da80145d6b9ab47331a79b383c829420",
  "block": 24337008,
  "trx_in_block": 28,
  "op_in_trx": 0,
  "virtual_op": 0,
  "timestamp": "2018-07-20T09:03:54",
  "op": [
    "custom_json",
    {
      "required_auths": [],
      "required_posting_auths": [
        "faderstudio"
      ],
      "id": "follow",
      "json": "[\"follow\",{\"follower\":\"faderstudio\",\"following\":\"atfslab\",\"what\":[\"blog\"]}]"
    }
  ]
}2018/06/20 19:08:42
2018/06/20 19:08:42
| voter | fstateaudio |
| author | faderstudio |
| permlink | tutorial-daw-4-pc-windows-optimisation-for-daw-digital-audio-workstation |
| weight | 10000 (100.00%) |
| Transaction Info | Block #23495281/Trx 3a0c0d37ee01e09904546e78e9a82d4c69f3d549 |
View Raw JSON Data
{
  "trx_id": "3a0c0d37ee01e09904546e78e9a82d4c69f3d549",
  "block": 23495281,
  "trx_in_block": 26,
  "op_in_trx": 0,
  "virtual_op": 0,
  "timestamp": "2018-06-20T19:08:42",
  "op": [
    "vote",
    {
      "voter": "fstateaudio",
      "author": "faderstudio",
      "permlink": "tutorial-daw-4-pc-windows-optimisation-for-daw-digital-audio-workstation",
      "weight": 10000
    }
  ]
}2018/06/16 15:55:09
2018/06/16 15:55:09
| voter | sensation |
| author | faderstudio |
| permlink | tutorial-daw-4-pc-windows-optimisation-for-daw-digital-audio-workstation |
| weight | 10000 (100.00%) |
| Transaction Info | Block #23376261/Trx b9661f4befc884193ade7c976638d169604470a4 |
View Raw JSON Data
{
  "trx_id": "b9661f4befc884193ade7c976638d169604470a4",
  "block": 23376261,
  "trx_in_block": 1,
  "op_in_trx": 0,
  "virtual_op": 0,
  "timestamp": "2018-06-16T15:55:09",
  "op": [
    "vote",
    {
      "voter": "sensation",
      "author": "faderstudio",
      "permlink": "tutorial-daw-4-pc-windows-optimisation-for-daw-digital-audio-workstation",
      "weight": 10000
    }
  ]
}faderstudiopublished a new post: tutorial-daw-4-pc-windows-optimisation-for-daw-digital-audio-workstation2018/06/16 13:39:42
faderstudiopublished a new post: tutorial-daw-4-pc-windows-optimisation-for-daw-digital-audio-workstation
2018/06/16 13:39:42
| parent author | |
| parent permlink | daw |
| author | faderstudio |
| permlink | tutorial-daw-4-pc-windows-optimisation-for-daw-digital-audio-workstation |
| title | Tutorial DAW # 4 - PC Windows Optimisation for DAW ( Digital Audio Workstation ) |
| body | This is the Windows Optimisation and we're going to be going through how to get the most out of your window system when using it for audio. This might allow you to reduce your buffer size which will in turn reduce your latency and it also just make sure that everything is running smoothly and it will minimize any issues that you might have during a session caused by your computer. So firstly we just have a couple of settings that you can change on your computer which will help optimize it So if you go to Control Panel and then go over to Hardware and Sound and then Device Manager, it will bring up a list of all of your devices. 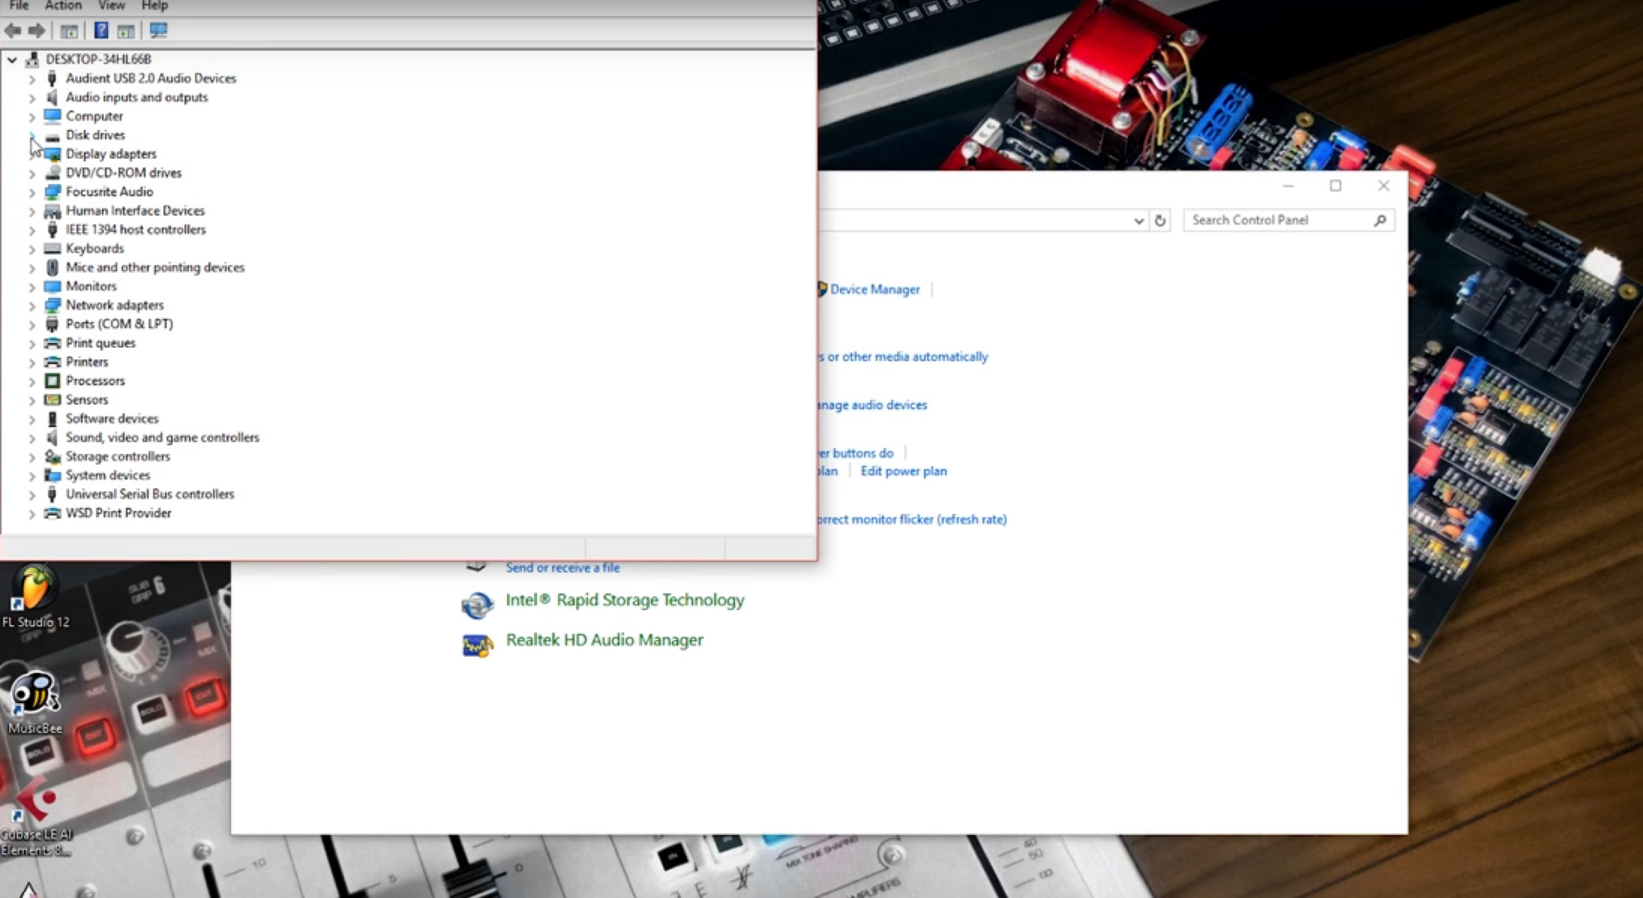 For this one you you want to go onto your disk drive and then right-click and select Properties on your disk drive. In the window that pops up, you want to go across to the Policies Tab and then enable both the settings. Now if we close all that down, and get out of device manager. If we head over to Power Options and then what we want to do is click on High Performance and then Change Plan Settings. This is where we can check that everything's sorted. Go on Change Advanced Power Settings and then just make sure that High Performance is selected in that little drop down menu. Just hit OK and then we hit Save Changes. Now we go back to Control Panel and back into Hardware and Sound and now we go to Change System Sounds. We're just going to make sure that these are turned off as these can cause annoying sound in the middle of recording but also have been known to sometimes cause some problems. One thing that can sometimes degrade the audio performance of your computer is actually graphics drivers. 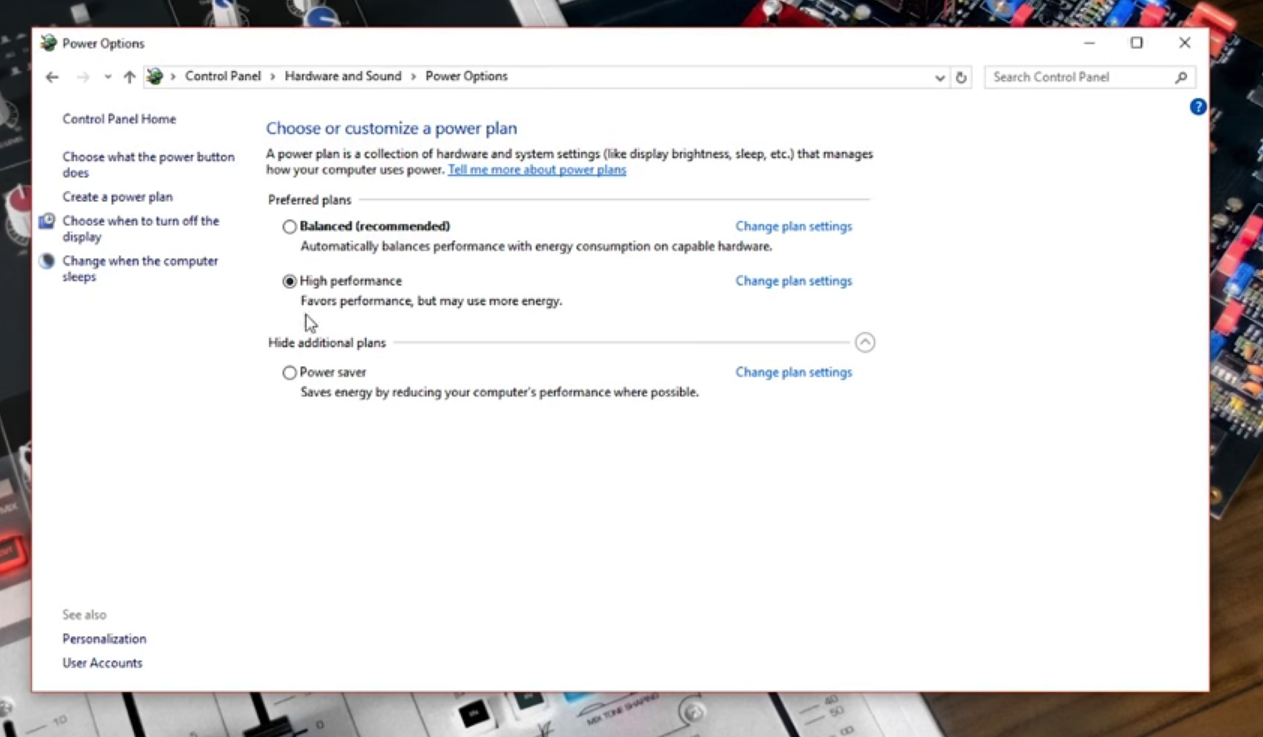 Now that's not to say that the graphics drivers are bad, it's just that they cause the computer to prioritise video or the graphics over the audio. If you're just recording or doing some mixing or something and you don't need the video performance then it's usually a good idea just to disable your graphics driver temporarily to get the most out of your system. This is a bit more in depth than what we were doing previously but if you are having issues with audio dropouts and performance issues and then this could really help you. There is this program called Latency Mon which lets you analyze your system's drivers and it'll show you how long they're taking to complete their processes. If they are taking longer than they should then it will cause the computer to not be able to perform as well and will result in these audio samples being dropped. If you download LatencyMon from the website and then open it up you'll see that it comes up with a blank window to make sure you get the most out of this test you'll need to connect your audio interface and open your DAW and start playing audio through your audio interface. Once you've got all this set up you can just hit the green play symbol and it will start the test. 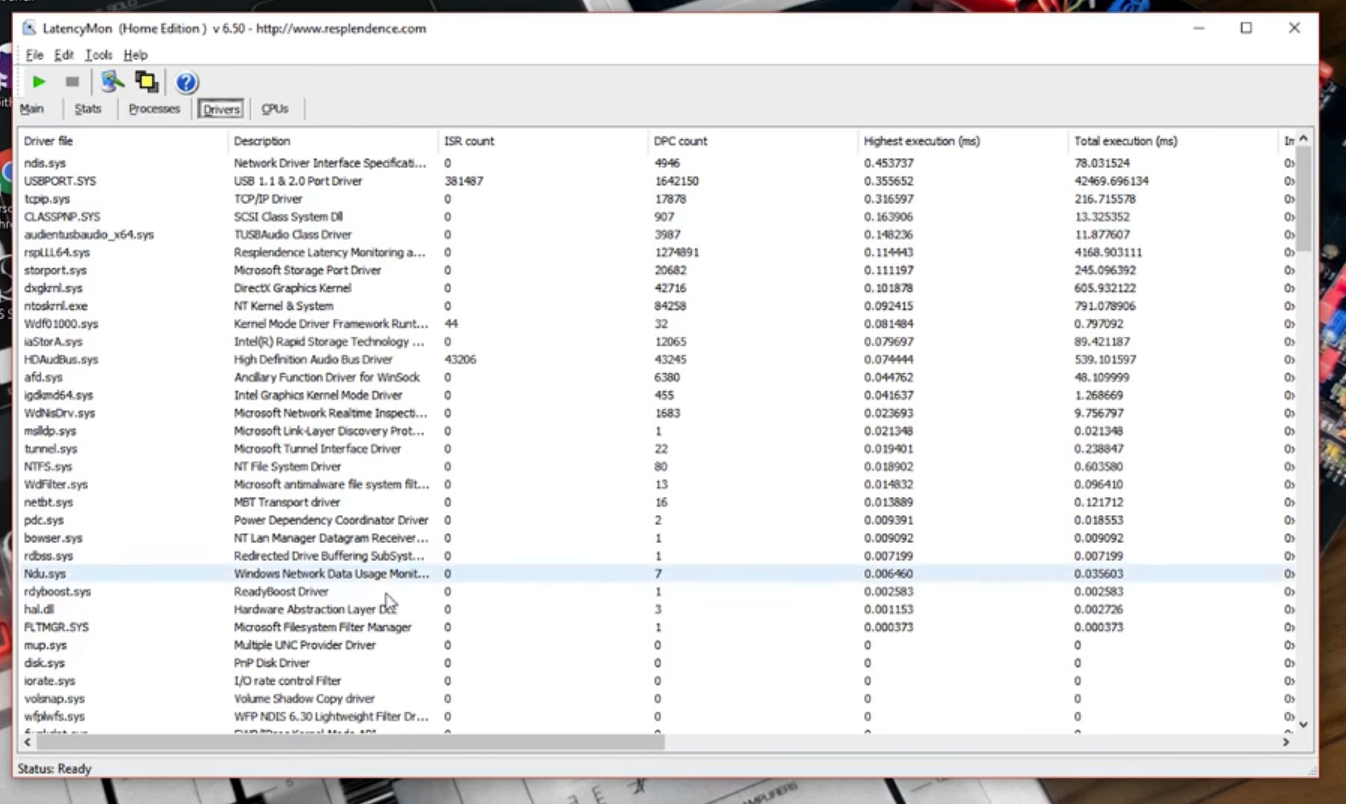 We recommend that you leave it for about 10 minutes still with audio playing from your DAW Once you've waited 10 minutes for the test run if you go to the Drivers Tab it will give you a big long list of drivers. What we want to be looking at is the highest execution time and it shows you how long the drivers are taking to execute. We want to try and keep that below 0.1ms for each driver. As you can see in this example we have the "ndis.sys" driver which is above 0.1ms which means that this could be a driver that is causing us issues or that could cause us issues in the future. Now that we've identified that the "ndis.sys" is a problem driver for us and could be causing issues we have three options: we can deactivate it, we can update it or we can reconfigure it. When you find one of these you need to be very very careful not to just deactivate it because you might find that you ruin something on the computer you stop it from being able to boot. Some serious stuff! So it's worth a quick search to just check that the driver that you're going to be altering is not something very key like that. So after a quick search we found that the "ndis.sys" comes from the ethernet. So if we disable that, if we go on to Control Panel and Network Connections right-click on Ethernet and disable, now if we go back into LatencyMon and run the test again ,we can see that the "ndis.sys" is no longer taking more than 0.1ms We do actually have a list of common drivers that have been known to cause problems. So if you head over to the link in the description that will give you a list of all the different things that could be worth just checking to see if they're on your system. If you want more information head over to support section of our website where there's lots of articles and useful things to help get you up and running with your product. I hope this has been useful and that it will help you get the most out of your recording experience. |
| json metadata | {"tags":["daw","windows","audio","plugins","recording"],"image":["https://cdn.steemitimages.com/DQmToEBA8sXfM3vRMbkA8Cox5UZEDJaqHxsYAbYLjVtqtXT/Schermata%202018-06-15%20alle%2012.01.23.png","https://cdn.steemitimages.com/DQmPvgwcR8XWnCzpoS2wdU3TfAkJUaYhitTV8ADw9jBvQ9A/Schermata%202018-06-15%20alle%2012.01.38.png","https://cdn.steemitimages.com/DQmW9WA4Tn8uBwWfWVQxM6SMAom8aUTF41dnwQ3uQfrMVCC/Schermata%202018-06-15%20alle%2012.01.59.png"],"app":"steemit/0.1","format":"markdown"} |
| Transaction Info | Block #23373552/Trx a588993b5ee6cb2ec1e1b6407264cfa55fbc01ea |
View Raw JSON Data
{
"trx_id": "a588993b5ee6cb2ec1e1b6407264cfa55fbc01ea",
"block": 23373552,
"trx_in_block": 23,
"op_in_trx": 0,
"virtual_op": 0,
"timestamp": "2018-06-16T13:39:42",
"op": [
"comment",
{
"parent_author": "",
"parent_permlink": "daw",
"author": "faderstudio",
"permlink": "tutorial-daw-4-pc-windows-optimisation-for-daw-digital-audio-workstation",
"title": "Tutorial DAW # 4 - PC Windows Optimisation for DAW ( Digital Audio Workstation )",
"body": "This is the Windows Optimisation and we're going to be going through how to get the most out of your window system when using it for audio. This might allow you to reduce your buffer size which will in turn reduce your latency and it also just make sure that everything is running smoothly and it will minimize any issues that you might have during a session caused by your computer. So firstly we just have a couple of settings that you can change on your computer which will help optimize it So if you go to Control Panel and then go over to Hardware and Sound and then Device Manager, it will bring up a list of all of your devices. \n\n\n\nFor this one you you want to go onto your disk drive and then right-click and select Properties on your disk drive. In the window that pops up, you want to go across to the Policies Tab and then enable both the settings. Now if we close all that down, and get out of device manager. If we head over to Power Options and then what we want to do is click on High Performance and then Change Plan Settings. This is where we can check that everything's sorted. Go on Change Advanced Power Settings and then just make sure that High Performance is selected in that little drop down menu. Just hit OK and then we hit Save Changes. Now we go back to Control Panel and back into Hardware and Sound and now we go to Change System Sounds. We're just going to make sure that these are turned off as these can cause annoying sound in the middle of recording but also have been known to sometimes cause some problems. One thing that can sometimes degrade the audio performance of your computer is actually graphics drivers. \n\n\n\nNow that's not to say that the graphics drivers are bad, it's just that they cause the computer to prioritise video or the graphics over the audio. If you're just recording or doing some mixing or something and you don't need the video performance then it's usually a good idea just to disable your graphics driver temporarily to get the most out of your system. This is a bit more in depth than what we were doing previously but if you are having issues with audio dropouts and performance issues and then this could really help you. There is this program called Latency Mon which lets you analyze your system's drivers and it'll show you how long they're taking to complete their processes. If they are taking longer than they should then it will cause the computer to not be able to perform as well and will result in these audio samples being dropped. If you download LatencyMon from the website and then open it up you'll see that it comes up with a blank window to make sure you get the most out of this test you'll need to connect your audio interface and open your DAW and start playing audio through your audio interface. Once you've got all this set up you can just hit the green play symbol and it will start the test.\n\n\n\nWe recommend that you leave it for about 10 minutes still with audio playing from your DAW Once you've waited 10 minutes for the test run if you go to the Drivers Tab it will give you a big long list of drivers. What we want to be looking at is the highest execution time and it shows you how long the drivers are taking to execute. We want to try and keep that below 0.1ms for each driver. As you can see in this example we have the \"ndis.sys\" driver which is above 0.1ms which means that this could be a driver that is causing us issues or that could cause us issues in the future. Now that we've identified that the \"ndis.sys\" is a problem driver for us and could be causing issues we have three options: we can deactivate it, we can update it or we can reconfigure it. When you find one of these you need to be very very careful not to just deactivate it because you might find that you ruin something on the computer you stop it from being able to boot. Some serious stuff! So it's worth a quick search to just check that the driver that you're going to be altering is not something very key like that. So after a quick search we found that the \"ndis.sys\" comes from the ethernet.\nSo if we disable that, if we go on to Control Panel and Network Connections right-click on Ethernet and disable, now if we go back into LatencyMon and run the test again ,we can see that the \"ndis.sys\" is no longer taking more than 0.1ms We do actually have a list of common drivers that have been known to cause problems. So if you head over to the link in the description that will give you a list of all the different things that could be worth just checking to see if they're on your system. If you want more information head over to support section of our website where there's lots of articles and useful things to help get you up and running with your product. I hope this has been useful and that it will help you get the most out of your recording experience.",
"json_metadata": "{\"tags\":[\"daw\",\"windows\",\"audio\",\"plugins\",\"recording\"],\"image\":[\"https://cdn.steemitimages.com/DQmToEBA8sXfM3vRMbkA8Cox5UZEDJaqHxsYAbYLjVtqtXT/Schermata%202018-06-15%20alle%2012.01.23.png\",\"https://cdn.steemitimages.com/DQmPvgwcR8XWnCzpoS2wdU3TfAkJUaYhitTV8ADw9jBvQ9A/Schermata%202018-06-15%20alle%2012.01.38.png\",\"https://cdn.steemitimages.com/DQmW9WA4Tn8uBwWfWVQxM6SMAom8aUTF41dnwQ3uQfrMVCC/Schermata%202018-06-15%20alle%2012.01.59.png\"],\"app\":\"steemit/0.1\",\"format\":\"markdown\"}"
}
]
}sensationupvoted (100.00%) @faderstudio / tutorial-daw-2-eq-tutorial-the-basics2018/06/15 10:52:54
sensationupvoted (100.00%) @faderstudio / tutorial-daw-2-eq-tutorial-the-basics
2018/06/15 10:52:54
| voter | sensation |
| author | faderstudio |
| permlink | tutorial-daw-2-eq-tutorial-the-basics |
| weight | 10000 (100.00%) |
| Transaction Info | Block #23341420/Trx 3106ca1bd02df100a5696b0a62929f74c781313f |
View Raw JSON Data
{
  "trx_id": "3106ca1bd02df100a5696b0a62929f74c781313f",
  "block": 23341420,
  "trx_in_block": 22,
  "op_in_trx": 0,
  "virtual_op": 0,
  "timestamp": "2018-06-15T10:52:54",
  "op": [
    "vote",
    {
      "voter": "sensation",
      "author": "faderstudio",
      "permlink": "tutorial-daw-2-eq-tutorial-the-basics",
      "weight": 10000
    }
  ]
}faderstudiopublished a new post: tutorial-daw-2-eq-tutorial-the-basics2018/06/15 09:48:03
faderstudiopublished a new post: tutorial-daw-2-eq-tutorial-the-basics
2018/06/15 09:48:03
| parent author | |
| parent permlink | daw |
| author | faderstudio |
| permlink | tutorial-daw-2-eq-tutorial-the-basics |
| title | Tutorial DAW # 3 - EQ Tutorial the basics ( Digital Audio Workstation ) |
| body | Welcome to the EQ tutorial by the end of you should have a strong foundation on what EQ is how to use it properly and why it's an essential tool in your projects for the purposes. I want to be using my favourite equalizer plug-in and that is the fruity parametric EQ - however the knowledge that you learn can be applied to any equalizer within any DAW of your choice every single sound that you hear is made up of frequencies and a frequency is a cycle per second the range that the human ear can detect in audio frequencies is roughly 20 Hertz all the way up to 20,000 Hertz or 20 kilohertz this is called the frequency spectrum so every single sound that you can perceive falls within this range and this range is the typical range of most equalizers 20 Hertz all the way up to 20,000 Hertz 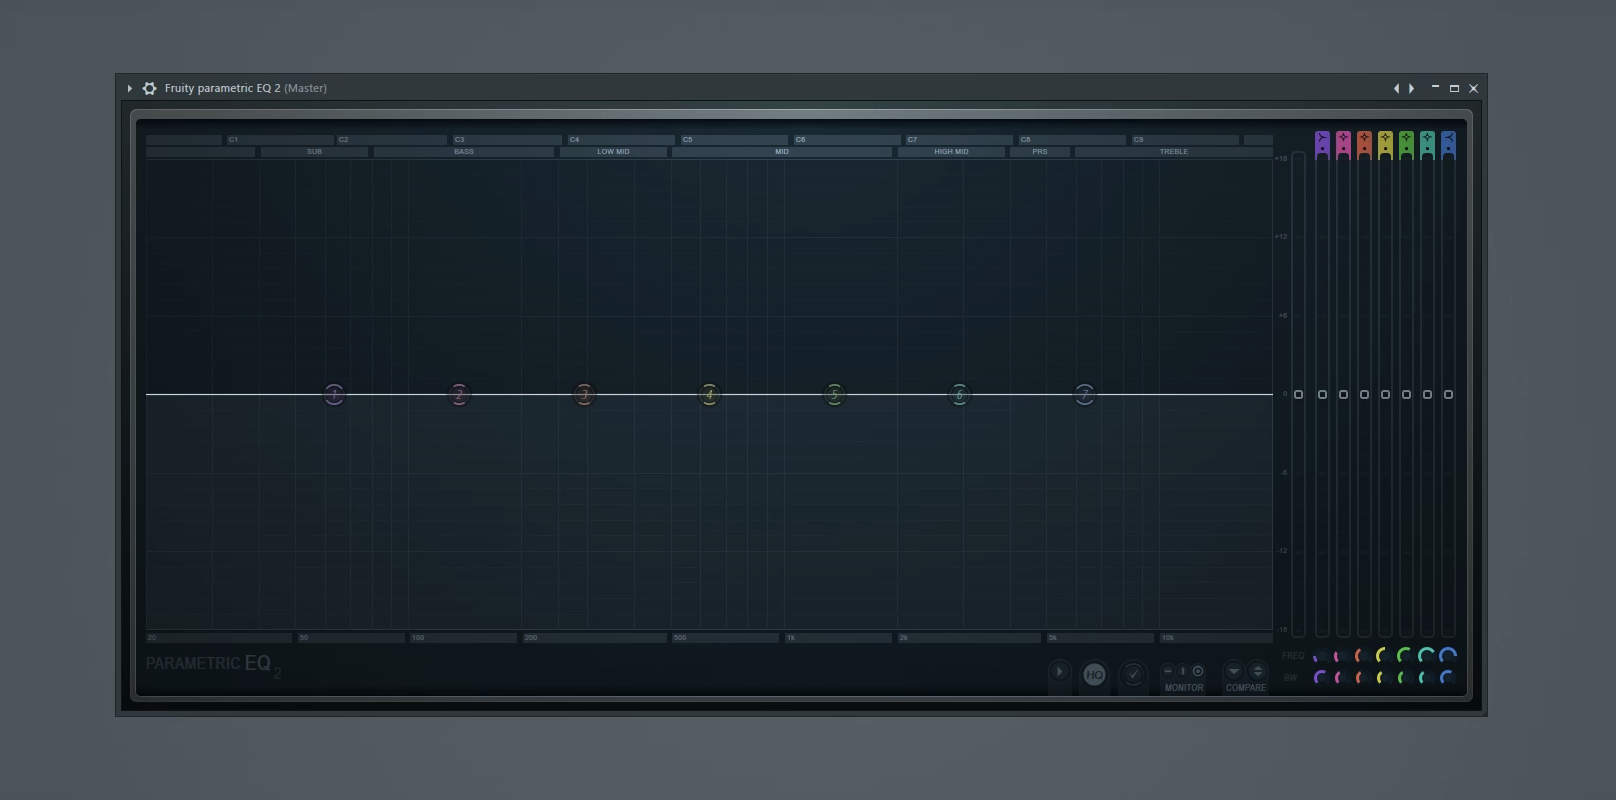 Animals like dogs are known to be able to detect frequencies upwards of 50 kilohertz so if dogs were making music they'd have a lot more frequencies to worry about than us so no excuse humans different types of sounds and instruments tend to live in certain regions on the frequency spectrum for example drum sounds or percussive sounds like your high hats your snares your claps those tend to live up here in the treble and high mid region sounds like your leads your pads or vocals or guitars stuff like that those tend to live in this mid region right here low mid to high mid and sounds like bass lines and your kick drums tend to predominantly live down here in the sub and bass regions of course all these sounds can bleed over into surrounding regions but the regions that I just outlined are kind of where most of the frequency content of these particular sounds resides let's look at some examples here's a kick drum 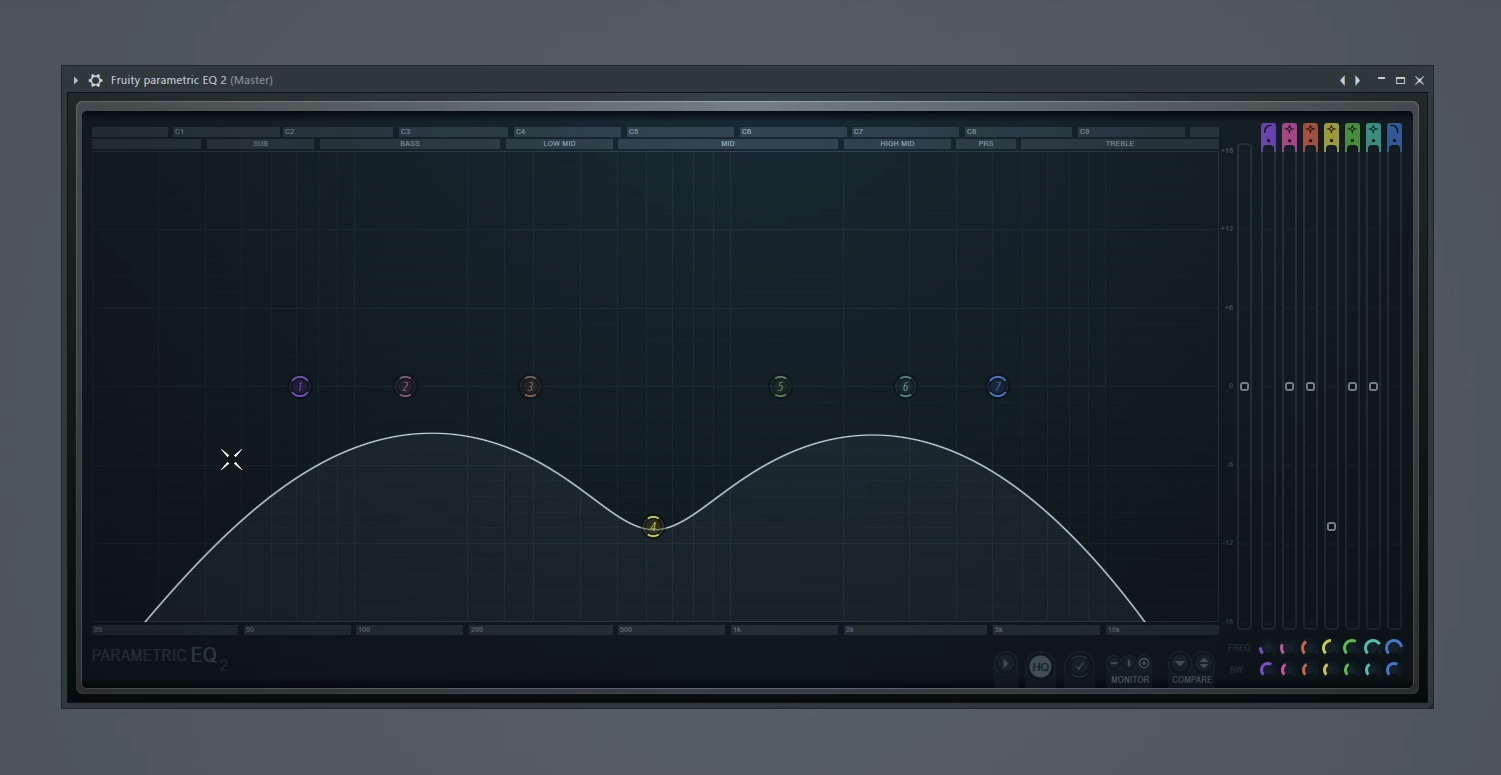 Now kick drums are one of the few instruments that actually does have frequency content pretty much throughout the whole spectrum as you can see when it comes in it sort of comes in strongly around the mid region and then sort of drifts down into the sub region there's a little bit of treble as well take a look now the initial part of the kick the transient or the snap that's the stuff that's happening from the treble all the way down to the low mid region the part of the kick that you feel in your chest or in the ground or if you have a good enough sound system the with the subwoofer outputs that's down here in this region around 150 Hertz and below here's a clap now as you can see there's a lot more stuff going on in this upper mid to treble region there's also a little bit happening down here in about the one hundred and sixty Hertz region and this is kind of giving it a little bit of low-end as well here's the hi-hat as you can see it's much more predominantly high mid to treble and it sort of just fades out as it gets lower than that there's really not much going on below the low mid region and even the mid to low mid there's just not too much happening there as well here's the baseline Now this particular bass line has a good amount of mid to low mid stuff going on in addition to the sub and bass frequencies here's a pluck as you can see lots of mid good amount of highs treble and really no bass so sound like this would actually mix really well with your bass stuff since it kind of gets out of the way right here at the low mid section by now you should be somewhat familiar and comfortable with the frequency spectrum so let's talk about EQ what is EQ EQ is a tool technique and an art for shaping or carving your sounds it can help eliminate or tame unwanted or resonating frequencies or it can accentuate the ones that you want it can help clear up your mix by preventing different sounds from fighting over the same frequency region and when using conjunction with compression it's a very powerful way of processing your sounds to your liking and by the way if you haven't seen my tutorial on compression yet I highly recommend you check that out I'll give a link to it right here now what we have here is what's called a seven band equalizer one two three four five six seven these seven bands serve as control points along the frequency spectrum that let you manipulate the sound each of these bands have properties associated with them these properties are frequency or where along the frequency spectrum you want the sound to be affected amount so this is set in decibels if you look in the top left as I move this up you see the decibel count so a positive number means you're boosting or accentuating the decibels and a negative number means you're cutting or eliminating certain frequencies at this point the next property 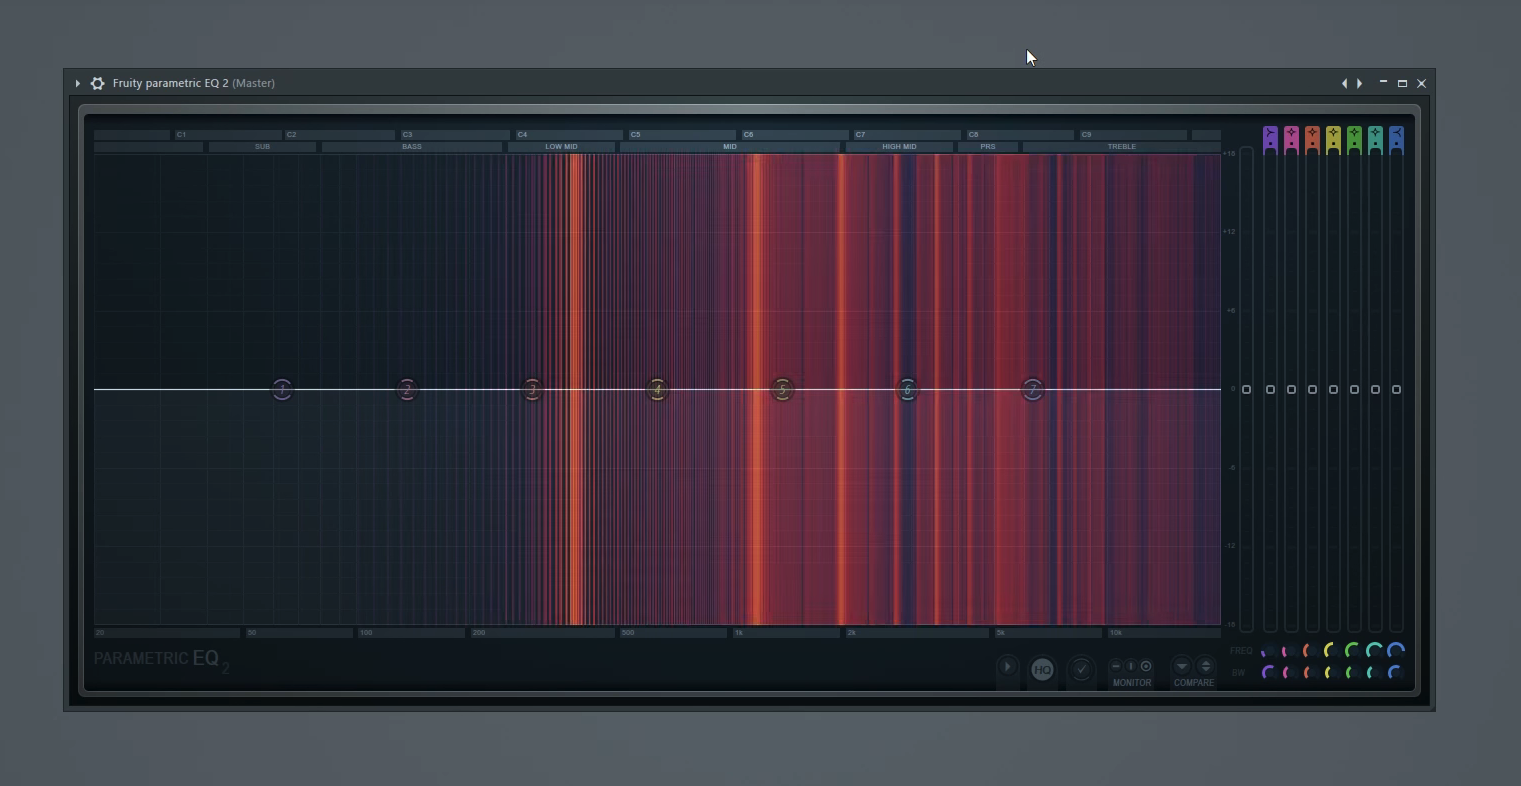s shape or type so by default with this equaliser bands two through six are set as peaking type so that just means that they look like this sort of bell curve type shape bands one and seven are set to shelves Oh banned one is a low shelf so as you can see it looks a little different from band four then four kind of sweeps down on both sides as I bring it down whereas band one sweeps down on one side and then stays down for the entire rest of the spectrum that's called a shelf and then band seven is the opposite of band one it's a high shelf so when I bring this down you'll see that it has the opposite effect of a low shelf it stays down to the right of the spectrum as it's going down and by no coincidence at all that I create a pair of breasts any of these bands can have their shape or type changed at any time and to do that you can right-click on the band and go to type and it will show you the list of all the available types let's look at some of these so right now by default band one is a low shelf if we change it to a high pass we'll see that it's a little different from a low shelf a high pass basically states that any frequencies above where this band is are allowed to pass hence the name high pass the opposite of a high pass which we're going to set to number seven is a low pass any frequencies lower than where the band is set are allowed to pass so basically again one and seven are opposite in that one is a high pass seven is now a low pass so what's different from a high pass and a low shelf is that a low shelf goes down and then stays at a certain value a high pass cuts off completely at a certain value so a high pass which band one is set to currently will allow less frequencies to come through because it's completely cutting off the ones that fall to the left of this band feel free to go through and play with all the other shapes there's not too many other ones but you'll see how they affect the shape of your EQ curve and you can also play with them with audio obviously to see the kind of effect they have in your sound the next property that each band has has like three names but they all mean the same thing bandwidths resonance or cue literally the letter Q this determines how wide or narrow your band is affecting the sound in this equalizer there are two ways of affecting this value if you come down here to the speed W knob and move it up and down you can see it changing the width of this band my preferred method is to come over to the band itself and mouse over and just use the mouse wheel so something like this is a much narrower band and will affect only a certain limited number of frequencies versus something like this which is a much wider band this will affect a lot more surrounding frequencies at a exponentially less rate as it moves further away from this band another parameter that this equalizer gives you per band is how steep you want each slope to be so for example with band number seven I'm going to come down and go to order and you'll see that it's on two by default two is the gentlest slope that you can have in this equalizer so if I change it to something like steep eight you'll see that it creates a very steep slope and basically any treble that comes to this point is really not going to pass this equalizer band so this band is going to sharply cut anything right at the 5000 Hertz range if I change it to something like gentle 4 you'll see that it's a much gentler slope closer to 2 but not quite as gentle and this is just one of the many ways you can sort of shape each of these bands and of course in conjunction with that steep setting you can play with the bandwidth as well to really hone in on a customized slope for your liking now just to quickly recap we've got shape or type which can be set up here as well we've got a mount and this is in decibels again lower means you're cutting higher means you're boosting we've got frequency so this is where along the spectrum you want the and to affect and then you have bandwidth aka cue or resonance the narrowness or width of the band and then finally if you right-click and come to order you also have the Steep option using these five parameters across up to seven bands can really help you shape and carve sounds to your liking now just remember that EQ e is absolutely an art there is no right or wrong way to EQ a sound everything you do in an equalizer similar to how it's done in a compressor is done to taste it all depends on what you're trying to accomplish or what sound you're going for now before I have done in this equalizer to the unaltered state so let's do thatevery single sound has its own special requirements or needs of Equalization depending on the situation or project that you're working in so there's really no way that I or anyone else can tell you how to equalize every single sound so what I recommend you do is you get comfortable with Equalization get good at using the tools that I've shown you and the techniques and before you know it equal izing will become second nature to you and you'll start equalizing things exactly to your liking combined with compression it's a very powerful way of processing sounds and making them sound really good in the mix. 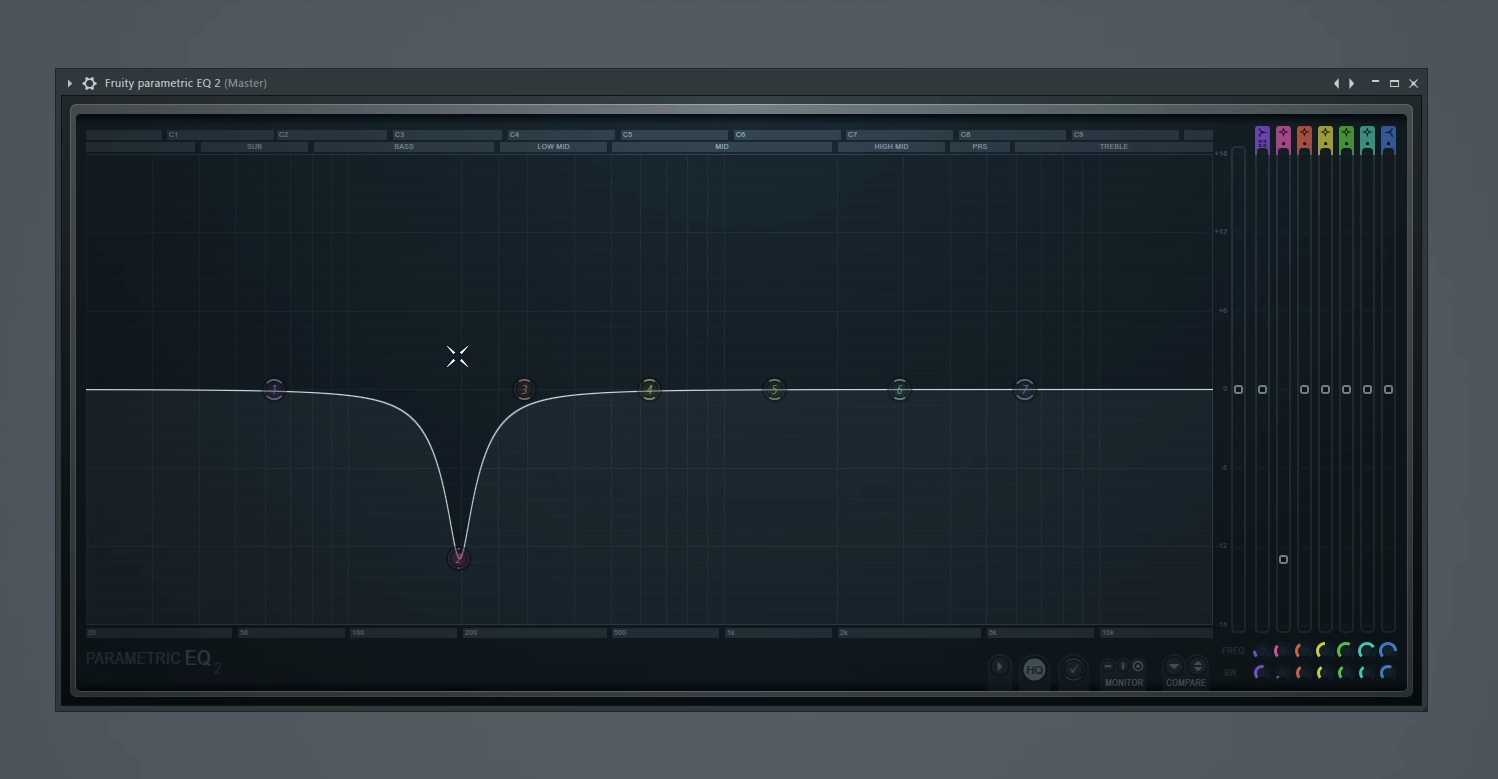 |
| json metadata | {"tags":["daw","tutorial","equalizer","audio","plugins"],"image":["https://cdn.steemitimages.com/DQmcuiYouiW6SrDJYR7bs1asyQ4uC3JuPGN6XUPFMKRqLSP/Schermata%202018-06-15%20alle%2011.43.04.png","https://cdn.steemitimages.com/DQmVeDuUfoncDiBfA6Y1uJWBbbocmyiT3HL5QVBaemS3jio/Schermata%202018-06-15%20alle%2011.43.23.png","https://cdn.steemitimages.com/DQmcacxC1CHByj22Cx2sJwQdirKEgmDT9QyKHE3n472e54S/Schermata%202018-06-15%20alle%2011.43.12.png","https://cdn.steemitimages.com/DQmXPow16UjtRkcf7j1RQGzApRqAwRhpGGqDD3g3oCein2a/Schermata%202018-06-15%20alle%2011.43.34.png"],"app":"steemit/0.1","format":"markdown"} |
| Transaction Info | Block #23340123/Trx 12669ffebaa41dab5ee377822574a55932431826 |
View Raw JSON Data
{
"trx_id": "12669ffebaa41dab5ee377822574a55932431826",
"block": 23340123,
"trx_in_block": 3,
"op_in_trx": 0,
"virtual_op": 0,
"timestamp": "2018-06-15T09:48:03",
"op": [
"comment",
{
"parent_author": "",
"parent_permlink": "daw",
"author": "faderstudio",
"permlink": "tutorial-daw-2-eq-tutorial-the-basics",
"title": "Tutorial DAW # 3 - EQ Tutorial the basics ( Digital Audio Workstation )",
"body": "Welcome to the EQ tutorial by the end of you should have a strong foundation on what EQ is how to use it properly and why it's an essential tool in your projects for the purposes. I want to be using my favourite equalizer plug-in and that is the fruity parametric EQ - however the knowledge that you learn can be applied to any equalizer within any DAW of your choice every single sound that you hear is made up of frequencies and a frequency is a cycle per second the range that the human ear can detect in audio frequencies is roughly 20 Hertz all the way up to 20,000 Hertz or 20 kilohertz this is called the frequency spectrum so every single sound that you can perceive falls within this range and this range is the typical range of most equalizers 20 Hertz all the way up to 20,000 Hertz\n\n\n\nAnimals like dogs are known to be able to detect frequencies upwards of 50 kilohertz so if dogs were making music they'd have a lot more frequencies to worry about than us so no excuse humans different types of sounds and instruments tend to live in certain regions on the frequency spectrum for example drum sounds or percussive sounds like your high hats your snares your claps those tend to live up here in the treble and high mid region sounds like your leads your pads or vocals or guitars stuff like that those tend to live in this mid region right here low mid to high mid and sounds like bass lines and your kick drums tend to predominantly live down here in the sub and bass regions of course all these sounds can bleed over into surrounding regions but the regions that I just outlined are kind of where most of the frequency content of these particular sounds resides let's look at some examples here's a kick drum \n\n\n\nNow kick drums are one of the few instruments that actually does have frequency content pretty much throughout the whole spectrum as you can see when it comes in it sort of comes in strongly around the mid region and then sort of drifts down into the sub region there's a little bit of treble as well take a look now the initial part of the kick the transient or the snap that's the stuff that's happening from the treble all the way down to the low mid region the part of the kick that you feel in your chest or in the ground or if you have a good enough sound system the with the subwoofer outputs that's down here in this region around 150 Hertz and below here's a clap now as you can see there's a lot more stuff going on in this upper mid to treble region there's also a little bit happening down here in about the one hundred and sixty Hertz region and this is kind of giving it a little bit of low-end as well here's the hi-hat as you can see it's much more predominantly high mid to treble and it sort of just fades out as it gets lower than that there's really not much going on below the low mid region and even the mid to low mid there's just not too much happening there as well here's the baseline \n\n\n\nNow this particular bass line has a good amount of mid to low mid stuff going on in addition to the sub and bass frequencies here's a pluck as you can see lots of mid good amount of highs treble and really no bass so sound like this would actually mix really well with your bass stuff since it kind of gets out of the way right here at the low mid section by now you should be somewhat familiar and comfortable with the frequency spectrum so let's talk about EQ what is EQ EQ is a tool technique and an art for shaping or carving your sounds it can help eliminate or tame unwanted or resonating frequencies or it can accentuate the ones that you want it can help clear up your mix by preventing different sounds from fighting over the same frequency region and when using conjunction with compression it's a very powerful way of processing your sounds to your liking and by the way if you haven't seen my tutorial on compression yet I highly recommend you check that out I'll give a link to it right here now what we have here is what's called a seven band equalizer one two three four five six seven these seven bands serve as control points along the frequency spectrum that let you manipulate the sound each of these bands have properties associated with them these properties are frequency or where along the frequency spectrum you want the sound to be affected amount so this is set in decibels if you look in the top left as I move this up you see the decibel count so a positive number means you're boosting or accentuating the decibels and a negative number means you're cutting or eliminating certain frequencies at this point the next property \n\n\n\ns shape or type so by default with this equaliser bands two through six are set as peaking type so that just means that they look like this sort of bell curve type shape bands one and seven are set to shelves Oh banned one is a low shelf so as you can see it looks a little different from band four then four kind of sweeps down on both sides as I bring it down whereas band one sweeps down on one side and then stays down for the entire rest of the spectrum that's called a shelf and then band seven is the opposite of band one it's a high shelf so when I bring this down you'll see that it has the opposite effect of a low shelf it stays down to the right of the spectrum as it's going down and by no coincidence at all that I create a pair of breasts any of these bands can have their shape or type changed at any time and to do that you can right-click on the band and go to type and it will show you the list of all the available types let's look at some of these so right now by default band one is a low shelf if we change it to a high pass we'll see that it's a little different from a low shelf a high pass basically states that any frequencies above where this band is are allowed to pass hence the name high pass the opposite of a high pass which we're going to set to number seven is a low pass any frequencies lower than where the band is set are allowed to pass so basically again one and seven are opposite in that one is a high pass seven is now a low pass so what's different from a high pass and a low shelf is that a low shelf goes down and then stays at a certain value a high pass cuts off completely at a certain value so a high pass which band one is set to currently will allow less frequencies to come through because it's completely cutting off the ones that fall to the left of this band feel free to go through and play with all the other shapes there's not too many other ones but you'll see how they affect the shape of your EQ curve and you can also play with them with audio obviously to see the kind of effect they have in your sound the next property that each band has has like three names but they all mean the same thing bandwidths resonance or cue literally the letter Q this determines how wide or narrow your band is affecting the sound in this equalizer there are two ways of affecting this value if you come down here to the speed W knob and move it up and down you can see it changing the width of this band my preferred method is to come over to the band itself and mouse over and just use the mouse wheel so something like this is a much narrower band and will affect only a certain limited number of frequencies versus something like this which is a much wider band this will affect a lot more surrounding frequencies at a exponentially less rate as it moves further away from this band another parameter that this equalizer gives you per band is how steep you want each slope to be so for example with band number seven I'm going to come down and go to order and you'll see that it's on two by default two is the gentlest slope that you can have in this equalizer so if I change it to something like steep eight you'll see that it creates a very steep slope and basically any treble that comes to this point is really not going to pass this equalizer band so this band is going to sharply cut anything right at the 5000 Hertz range if I change it to something like gentle 4 you'll see that it's a much gentler slope closer to 2 but not quite as gentle and this is just one of the many ways you can sort of shape each of these bands and of course in conjunction with that steep setting you can play with the bandwidth as well to really hone in on a customized slope for your liking now just to quickly recap we've got shape or type which can be set up here as well we've got a mount and this is in decibels again lower means you're cutting higher means you're boosting we've got frequency so this is where along the spectrum you want the and to affect and then you have bandwidth aka cue or resonance the narrowness or width of the band and then finally if you right-click and come to order you also have the Steep option using these five parameters across up to seven bands can really help you shape and carve sounds to your liking now just remember that EQ e is absolutely an art there is no right or wrong way to EQ a sound everything you do in an equalizer similar to how it's done in a compressor is done to taste it all depends on what you're trying to accomplish or what sound you're going for now before I have done in this equalizer to the unaltered state so let's do thatevery single sound has its own special requirements or needs of Equalization depending on the situation or project that you're working in so there's really no way that I or anyone else can tell you how to equalize every single sound so what I recommend you do is you get comfortable with Equalization get good at using the tools that I've shown you and the techniques and before you know it equal izing will become second nature to you and you'll start equalizing things exactly to your liking combined with compression it's a very powerful way of processing sounds and making them sound really good in the mix.\n\n",
"json_metadata": "{\"tags\":[\"daw\",\"tutorial\",\"equalizer\",\"audio\",\"plugins\"],\"image\":[\"https://cdn.steemitimages.com/DQmcuiYouiW6SrDJYR7bs1asyQ4uC3JuPGN6XUPFMKRqLSP/Schermata%202018-06-15%20alle%2011.43.04.png\",\"https://cdn.steemitimages.com/DQmVeDuUfoncDiBfA6Y1uJWBbbocmyiT3HL5QVBaemS3jio/Schermata%202018-06-15%20alle%2011.43.23.png\",\"https://cdn.steemitimages.com/DQmcacxC1CHByj22Cx2sJwQdirKEgmDT9QyKHE3n472e54S/Schermata%202018-06-15%20alle%2011.43.12.png\",\"https://cdn.steemitimages.com/DQmXPow16UjtRkcf7j1RQGzApRqAwRhpGGqDD3g3oCein2a/Schermata%202018-06-15%20alle%2011.43.34.png\"],\"app\":\"steemit/0.1\",\"format\":\"markdown\"}"
}
]
}faderstudiopublished a new post: tutorial-daw-2-eq-tutorial-the-basics2018/06/15 09:47:33
faderstudiopublished a new post: tutorial-daw-2-eq-tutorial-the-basics
2018/06/15 09:47:33
| parent author | |
| parent permlink | daw |
| author | faderstudio |
| permlink | tutorial-daw-2-eq-tutorial-the-basics |
| title | Tutorial DAW # 3 - EQ Tutorial the basics |
| body | Welcome to the EQ tutorial by the end of you should have a strong foundation on what EQ is how to use it properly and why it's an essential tool in your projects for the purposes. I want to be using my favourite equalizer plug-in and that is the fruity parametric EQ - however the knowledge that you learn can be applied to any equalizer within any DAW of your choice every single sound that you hear is made up of frequencies and a frequency is a cycle per second the range that the human ear can detect in audio frequencies is roughly 20 Hertz all the way up to 20,000 Hertz or 20 kilohertz this is called the frequency spectrum so every single sound that you can perceive falls within this range and this range is the typical range of most equalizers 20 Hertz all the way up to 20,000 Hertz  Animals like dogs are known to be able to detect frequencies upwards of 50 kilohertz so if dogs were making music they'd have a lot more frequencies to worry about than us so no excuse humans different types of sounds and instruments tend to live in certain regions on the frequency spectrum for example drum sounds or percussive sounds like your high hats your snares your claps those tend to live up here in the treble and high mid region sounds like your leads your pads or vocals or guitars stuff like that those tend to live in this mid region right here low mid to high mid and sounds like bass lines and your kick drums tend to predominantly live down here in the sub and bass regions of course all these sounds can bleed over into surrounding regions but the regions that I just outlined are kind of where most of the frequency content of these particular sounds resides let's look at some examples here's a kick drum  Now kick drums are one of the few instruments that actually does have frequency content pretty much throughout the whole spectrum as you can see when it comes in it sort of comes in strongly around the mid region and then sort of drifts down into the sub region there's a little bit of treble as well take a look now the initial part of the kick the transient or the snap that's the stuff that's happening from the treble all the way down to the low mid region the part of the kick that you feel in your chest or in the ground or if you have a good enough sound system the with the subwoofer outputs that's down here in this region around 150 Hertz and below here's a clap now as you can see there's a lot more stuff going on in this upper mid to treble region there's also a little bit happening down here in about the one hundred and sixty Hertz region and this is kind of giving it a little bit of low-end as well here's the hi-hat as you can see it's much more predominantly high mid to treble and it sort of just fades out as it gets lower than that there's really not much going on below the low mid region and even the mid to low mid there's just not too much happening there as well here's the baseline Now this particular bass line has a good amount of mid to low mid stuff going on in addition to the sub and bass frequencies here's a pluck as you can see lots of mid good amount of highs treble and really no bass so sound like this would actually mix really well with your bass stuff since it kind of gets out of the way right here at the low mid section by now you should be somewhat familiar and comfortable with the frequency spectrum so let's talk about EQ what is EQ EQ is a tool technique and an art for shaping or carving your sounds it can help eliminate or tame unwanted or resonating frequencies or it can accentuate the ones that you want it can help clear up your mix by preventing different sounds from fighting over the same frequency region and when using conjunction with compression it's a very powerful way of processing your sounds to your liking and by the way if you haven't seen my tutorial on compression yet I highly recommend you check that out I'll give a link to it right here now what we have here is what's called a seven band equalizer one two three four five six seven these seven bands serve as control points along the frequency spectrum that let you manipulate the sound each of these bands have properties associated with them these properties are frequency or where along the frequency spectrum you want the sound to be affected amount so this is set in decibels if you look in the top left as I move this up you see the decibel count so a positive number means you're boosting or accentuating the decibels and a negative number means you're cutting or eliminating certain frequencies at this point the next property s shape or type so by default with this equaliser bands two through six are set as peaking type so that just means that they look like this sort of bell curve type shape bands one and seven are set to shelves Oh banned one is a low shelf so as you can see it looks a little different from band four then four kind of sweeps down on both sides as I bring it down whereas band one sweeps down on one side and then stays down for the entire rest of the spectrum that's called a shelf and then band seven is the opposite of band one it's a high shelf so when I bring this down you'll see that it has the opposite effect of a low shelf it stays down to the right of the spectrum as it's going down and by no coincidence at all that I create a pair of breasts any of these bands can have their shape or type changed at any time and to do that you can right-click on the band and go to type and it will show you the list of all the available types let's look at some of these so right now by default band one is a low shelf if we change it to a high pass we'll see that it's a little different from a low shelf a high pass basically states that any frequencies above where this band is are allowed to pass hence the name high pass the opposite of a high pass which we're going to set to number seven is a low pass any frequencies lower than where the band is set are allowed to pass so basically again one and seven are opposite in that one is a high pass seven is now a low pass so what's different from a high pass and a low shelf is that a low shelf goes down and then stays at a certain value a high pass cuts off completely at a certain value so a high pass which band one is set to currently will allow less frequencies to come through because it's completely cutting off the ones that fall to the left of this band feel free to go through and play with all the other shapes there's not too many other ones but you'll see how they affect the shape of your EQ curve and you can also play with them with audio obviously to see the kind of effect they have in your sound the next property that each band has has like three names but they all mean the same thing bandwidths resonance or cue literally the letter Q this determines how wide or narrow your band is affecting the sound in this equalizer there are two ways of affecting this value if you come down here to the speed W knob and move it up and down you can see it changing the width of this band my preferred method is to come over to the band itself and mouse over and just use the mouse wheel so something like this is a much narrower band and will affect only a certain limited number of frequencies versus something like this which is a much wider band this will affect a lot more surrounding frequencies at a exponentially less rate as it moves further away from this band another parameter that this equalizer gives you per band is how steep you want each slope to be so for example with band number seven I'm going to come down and go to order and you'll see that it's on two by default two is the gentlest slope that you can have in this equalizer so if I change it to something like steep eight you'll see that it creates a very steep slope and basically any treble that comes to this point is really not going to pass this equalizer band so this band is going to sharply cut anything right at the 5000 Hertz range if I change it to something like gentle 4 you'll see that it's a much gentler slope closer to 2 but not quite as gentle and this is just one of the many ways you can sort of shape each of these bands and of course in conjunction with that steep setting you can play with the bandwidth as well to really hone in on a customized slope for your liking now just to quickly recap we've got shape or type which can be set up here as well we've got a mount and this is in decibels again lower means you're cutting higher means you're boosting we've got frequency so this is where along the spectrum you want the and to affect and then you have bandwidth aka cue or resonance the narrowness or width of the band and then finally if you right-click and come to order you also have the Steep option using these five parameters across up to seven bands can really help you shape and carve sounds to your liking now just remember that EQ e is absolutely an art there is no right or wrong way to EQ a sound everything you do in an equalizer similar to how it's done in a compressor is done to taste it all depends on what you're trying to accomplish or what sound you're going for now before I have done in this equalizer to the unaltered state so let's do thatevery single sound has its own special requirements or needs of Equalization depending on the situation or project that you're working in so there's really no way that I or anyone else can tell you how to equalize every single sound so what I recommend you do is you get comfortable with Equalization get good at using the tools that I've shown you and the techniques and before you know it equal izing will become second nature to you and you'll start equalizing things exactly to your liking combined with compression it's a very powerful way of processing sounds and making them sound really good in the mix.  |
| json metadata | {"tags":["daw","tutorial","equalizer","audio","plugins"],"image":["https://cdn.steemitimages.com/DQmcuiYouiW6SrDJYR7bs1asyQ4uC3JuPGN6XUPFMKRqLSP/Schermata%202018-06-15%20alle%2011.43.04.png","https://cdn.steemitimages.com/DQmVeDuUfoncDiBfA6Y1uJWBbbocmyiT3HL5QVBaemS3jio/Schermata%202018-06-15%20alle%2011.43.23.png","https://cdn.steemitimages.com/DQmcacxC1CHByj22Cx2sJwQdirKEgmDT9QyKHE3n472e54S/Schermata%202018-06-15%20alle%2011.43.12.png","https://cdn.steemitimages.com/DQmXPow16UjtRkcf7j1RQGzApRqAwRhpGGqDD3g3oCein2a/Schermata%202018-06-15%20alle%2011.43.34.png"],"app":"steemit/0.1","format":"markdown"} |
| Transaction Info | Block #23340113/Trx 36ce3f1208975ad50e4f27fd85b5d8bb944e6e10 |
View Raw JSON Data
{
"trx_id": "36ce3f1208975ad50e4f27fd85b5d8bb944e6e10",
"block": 23340113,
"trx_in_block": 50,
"op_in_trx": 0,
"virtual_op": 0,
"timestamp": "2018-06-15T09:47:33",
"op": [
"comment",
{
"parent_author": "",
"parent_permlink": "daw",
"author": "faderstudio",
"permlink": "tutorial-daw-2-eq-tutorial-the-basics",
"title": "Tutorial DAW # 3 - EQ Tutorial the basics",
"body": "Welcome to the EQ tutorial by the end of you should have a strong foundation on what EQ is how to use it properly and why it's an essential tool in your projects for the purposes. I want to be using my favourite equalizer plug-in and that is the fruity parametric EQ - however the knowledge that you learn can be applied to any equalizer within any DAW of your choice every single sound that you hear is made up of frequencies and a frequency is a cycle per second the range that the human ear can detect in audio frequencies is roughly 20 Hertz all the way up to 20,000 Hertz or 20 kilohertz this is called the frequency spectrum so every single sound that you can perceive falls within this range and this range is the typical range of most equalizers 20 Hertz all the way up to 20,000 Hertz\n\n\n\nAnimals like dogs are known to be able to detect frequencies upwards of 50 kilohertz so if dogs were making music they'd have a lot more frequencies to worry about than us so no excuse humans different types of sounds and instruments tend to live in certain regions on the frequency spectrum for example drum sounds or percussive sounds like your high hats your snares your claps those tend to live up here in the treble and high mid region sounds like your leads your pads or vocals or guitars stuff like that those tend to live in this mid region right here low mid to high mid and sounds like bass lines and your kick drums tend to predominantly live down here in the sub and bass regions of course all these sounds can bleed over into surrounding regions but the regions that I just outlined are kind of where most of the frequency content of these particular sounds resides let's look at some examples here's a kick drum \n\n\n\nNow kick drums are one of the few instruments that actually does have frequency content pretty much throughout the whole spectrum as you can see when it comes in it sort of comes in strongly around the mid region and then sort of drifts down into the sub region there's a little bit of treble as well take a look now the initial part of the kick the transient or the snap that's the stuff that's happening from the treble all the way down to the low mid region the part of the kick that you feel in your chest or in the ground or if you have a good enough sound system the with the subwoofer outputs that's down here in this region around 150 Hertz and below here's a clap now as you can see there's a lot more stuff going on in this upper mid to treble region there's also a little bit happening down here in about the one hundred and sixty Hertz region and this is kind of giving it a little bit of low-end as well here's the hi-hat as you can see it's much more predominantly high mid to treble and it sort of just fades out as it gets lower than that there's really not much going on below the low mid region and even the mid to low mid there's just not too much happening there as well here's the baseline \n\n\n\nNow this particular bass line has a good amount of mid to low mid stuff going on in addition to the sub and bass frequencies here's a pluck as you can see lots of mid good amount of highs treble and really no bass so sound like this would actually mix really well with your bass stuff since it kind of gets out of the way right here at the low mid section by now you should be somewhat familiar and comfortable with the frequency spectrum so let's talk about EQ what is EQ EQ is a tool technique and an art for shaping or carving your sounds it can help eliminate or tame unwanted or resonating frequencies or it can accentuate the ones that you want it can help clear up your mix by preventing different sounds from fighting over the same frequency region and when using conjunction with compression it's a very powerful way of processing your sounds to your liking and by the way if you haven't seen my tutorial on compression yet I highly recommend you check that out I'll give a link to it right here now what we have here is what's called a seven band equalizer one two three four five six seven these seven bands serve as control points along the frequency spectrum that let you manipulate the sound each of these bands have properties associated with them these properties are frequency or where along the frequency spectrum you want the sound to be affected amount so this is set in decibels if you look in the top left as I move this up you see the decibel count so a positive number means you're boosting or accentuating the decibels and a negative number means you're cutting or eliminating certain frequencies at this point the next property \n\n\n\ns shape or type so by default with this equaliser bands two through six are set as peaking type so that just means that they look like this sort of bell curve type shape bands one and seven are set to shelves Oh banned one is a low shelf so as you can see it looks a little different from band four then four kind of sweeps down on both sides as I bring it down whereas band one sweeps down on one side and then stays down for the entire rest of the spectrum that's called a shelf and then band seven is the opposite of band one it's a high shelf so when I bring this down you'll see that it has the opposite effect of a low shelf it stays down to the right of the spectrum as it's going down and by no coincidence at all that I create a pair of breasts any of these bands can have their shape or type changed at any time and to do that you can right-click on the band and go to type and it will show you the list of all the available types let's look at some of these so right now by default band one is a low shelf if we change it to a high pass we'll see that it's a little different from a low shelf a high pass basically states that any frequencies above where this band is are allowed to pass hence the name high pass the opposite of a high pass which we're going to set to number seven is a low pass any frequencies lower than where the band is set are allowed to pass so basically again one and seven are opposite in that one is a high pass seven is now a low pass so what's different from a high pass and a low shelf is that a low shelf goes down and then stays at a certain value a high pass cuts off completely at a certain value so a high pass which band one is set to currently will allow less frequencies to come through because it's completely cutting off the ones that fall to the left of this band feel free to go through and play with all the other shapes there's not too many other ones but you'll see how they affect the shape of your EQ curve and you can also play with them with audio obviously to see the kind of effect they have in your sound the next property that each band has has like three names but they all mean the same thing bandwidths resonance or cue literally the letter Q this determines how wide or narrow your band is affecting the sound in this equalizer there are two ways of affecting this value if you come down here to the speed W knob and move it up and down you can see it changing the width of this band my preferred method is to come over to the band itself and mouse over and just use the mouse wheel so something like this is a much narrower band and will affect only a certain limited number of frequencies versus something like this which is a much wider band this will affect a lot more surrounding frequencies at a exponentially less rate as it moves further away from this band another parameter that this equalizer gives you per band is how steep you want each slope to be so for example with band number seven I'm going to come down and go to order and you'll see that it's on two by default two is the gentlest slope that you can have in this equalizer so if I change it to something like steep eight you'll see that it creates a very steep slope and basically any treble that comes to this point is really not going to pass this equalizer band so this band is going to sharply cut anything right at the 5000 Hertz range if I change it to something like gentle 4 you'll see that it's a much gentler slope closer to 2 but not quite as gentle and this is just one of the many ways you can sort of shape each of these bands and of course in conjunction with that steep setting you can play with the bandwidth as well to really hone in on a customized slope for your liking now just to quickly recap we've got shape or type which can be set up here as well we've got a mount and this is in decibels again lower means you're cutting higher means you're boosting we've got frequency so this is where along the spectrum you want the and to affect and then you have bandwidth aka cue or resonance the narrowness or width of the band and then finally if you right-click and come to order you also have the Steep option using these five parameters across up to seven bands can really help you shape and carve sounds to your liking now just remember that EQ e is absolutely an art there is no right or wrong way to EQ a sound everything you do in an equalizer similar to how it's done in a compressor is done to taste it all depends on what you're trying to accomplish or what sound you're going for now before I have done in this equalizer to the unaltered state so let's do thatevery single sound has its own special requirements or needs of Equalization depending on the situation or project that you're working in so there's really no way that I or anyone else can tell you how to equalize every single sound so what I recommend you do is you get comfortable with Equalization get good at using the tools that I've shown you and the techniques and before you know it equal izing will become second nature to you and you'll start equalizing things exactly to your liking combined with compression it's a very powerful way of processing sounds and making them sound really good in the mix.\n\n",
"json_metadata": "{\"tags\":[\"daw\",\"tutorial\",\"equalizer\",\"audio\",\"plugins\"],\"image\":[\"https://cdn.steemitimages.com/DQmcuiYouiW6SrDJYR7bs1asyQ4uC3JuPGN6XUPFMKRqLSP/Schermata%202018-06-15%20alle%2011.43.04.png\",\"https://cdn.steemitimages.com/DQmVeDuUfoncDiBfA6Y1uJWBbbocmyiT3HL5QVBaemS3jio/Schermata%202018-06-15%20alle%2011.43.23.png\",\"https://cdn.steemitimages.com/DQmcacxC1CHByj22Cx2sJwQdirKEgmDT9QyKHE3n472e54S/Schermata%202018-06-15%20alle%2011.43.12.png\",\"https://cdn.steemitimages.com/DQmXPow16UjtRkcf7j1RQGzApRqAwRhpGGqDD3g3oCein2a/Schermata%202018-06-15%20alle%2011.43.34.png\"],\"app\":\"steemit/0.1\",\"format\":\"markdown\"}"
}
]
}2018/06/15 09:47:24
2018/06/15 09:47:24
| parent author | faderstudio |
| parent permlink | tutorial-daw-2-eq-tutorial-the-basics |
| author | biblegateway |
| permlink | re-faderstudio-tutorial-daw-2-eq-tutorial-the-basics-20180615t094723138z |
| title | |
| body | God bless you. https://steemit.com/@biblegateway |
| json metadata | {"tags":["daw"],"links":["https://steemit.com/@biblegateway"],"app":"steemit/0.1"} |
| Transaction Info | Block #23340110/Trx 66fcde1034c4ac580438f1747cfb927d810c8ac8 |
View Raw JSON Data
{
  "trx_id": "66fcde1034c4ac580438f1747cfb927d810c8ac8",
  "block": 23340110,
  "trx_in_block": 17,
  "op_in_trx": 0,
  "virtual_op": 0,
  "timestamp": "2018-06-15T09:47:24",
  "op": [
    "comment",
    {
      "parent_author": "faderstudio",
      "parent_permlink": "tutorial-daw-2-eq-tutorial-the-basics",
      "author": "biblegateway",
      "permlink": "re-faderstudio-tutorial-daw-2-eq-tutorial-the-basics-20180615t094723138z",
      "title": "",
      "body": "God bless you. https://steemit.com/@biblegateway",
      "json_metadata": "{\"tags\":[\"daw\"],\"links\":[\"https://steemit.com/@biblegateway\"],\"app\":\"steemit/0.1\"}"
    }
  ]
}faderstudiopublished a new post: tutorial-daw-2-eq-tutorial-the-basics2018/06/15 09:47:12
faderstudiopublished a new post: tutorial-daw-2-eq-tutorial-the-basics
2018/06/15 09:47:12
| parent author | |
| parent permlink | daw |
| author | faderstudio |
| permlink | tutorial-daw-2-eq-tutorial-the-basics |
| title | Tutorial DAW # 2 - EQ Tutorial the basics |
| body | Welcome to the EQ tutorial by the end of you should have a strong foundation on what EQ is how to use it properly and why it's an essential tool in your projects for the purposes. I want to be using my favourite equalizer plug-in and that is the fruity parametric EQ - however the knowledge that you learn can be applied to any equalizer within any DAW of your choice every single sound that you hear is made up of frequencies and a frequency is a cycle per second the range that the human ear can detect in audio frequencies is roughly 20 Hertz all the way up to 20,000 Hertz or 20 kilohertz this is called the frequency spectrum so every single sound that you can perceive falls within this range and this range is the typical range of most equalizers 20 Hertz all the way up to 20,000 Hertz  Animals like dogs are known to be able to detect frequencies upwards of 50 kilohertz so if dogs were making music they'd have a lot more frequencies to worry about than us so no excuse humans different types of sounds and instruments tend to live in certain regions on the frequency spectrum for example drum sounds or percussive sounds like your high hats your snares your claps those tend to live up here in the treble and high mid region sounds like your leads your pads or vocals or guitars stuff like that those tend to live in this mid region right here low mid to high mid and sounds like bass lines and your kick drums tend to predominantly live down here in the sub and bass regions of course all these sounds can bleed over into surrounding regions but the regions that I just outlined are kind of where most of the frequency content of these particular sounds resides let's look at some examples here's a kick drum  Now kick drums are one of the few instruments that actually does have frequency content pretty much throughout the whole spectrum as you can see when it comes in it sort of comes in strongly around the mid region and then sort of drifts down into the sub region there's a little bit of treble as well take a look now the initial part of the kick the transient or the snap that's the stuff that's happening from the treble all the way down to the low mid region the part of the kick that you feel in your chest or in the ground or if you have a good enough sound system the with the subwoofer outputs that's down here in this region around 150 Hertz and below here's a clap now as you can see there's a lot more stuff going on in this upper mid to treble region there's also a little bit happening down here in about the one hundred and sixty Hertz region and this is kind of giving it a little bit of low-end as well here's the hi-hat as you can see it's much more predominantly high mid to treble and it sort of just fades out as it gets lower than that there's really not much going on below the low mid region and even the mid to low mid there's just not too much happening there as well here's the baseline Now this particular bass line has a good amount of mid to low mid stuff going on in addition to the sub and bass frequencies here's a pluck as you can see lots of mid good amount of highs treble and really no bass so sound like this would actually mix really well with your bass stuff since it kind of gets out of the way right here at the low mid section by now you should be somewhat familiar and comfortable with the frequency spectrum so let's talk about EQ what is EQ EQ is a tool technique and an art for shaping or carving your sounds it can help eliminate or tame unwanted or resonating frequencies or it can accentuate the ones that you want it can help clear up your mix by preventing different sounds from fighting over the same frequency region and when using conjunction with compression it's a very powerful way of processing your sounds to your liking and by the way if you haven't seen my tutorial on compression yet I highly recommend you check that out I'll give a link to it right here now what we have here is what's called a seven band equalizer one two three four five six seven these seven bands serve as control points along the frequency spectrum that let you manipulate the sound each of these bands have properties associated with them these properties are frequency or where along the frequency spectrum you want the sound to be affected amount so this is set in decibels if you look in the top left as I move this up you see the decibel count so a positive number means you're boosting or accentuating the decibels and a negative number means you're cutting or eliminating certain frequencies at this point the next property s shape or type so by default with this equaliser bands two through six are set as peaking type so that just means that they look like this sort of bell curve type shape bands one and seven are set to shelves Oh banned one is a low shelf so as you can see it looks a little different from band four then four kind of sweeps down on both sides as I bring it down whereas band one sweeps down on one side and then stays down for the entire rest of the spectrum that's called a shelf and then band seven is the opposite of band one it's a high shelf so when I bring this down you'll see that it has the opposite effect of a low shelf it stays down to the right of the spectrum as it's going down and by no coincidence at all that I create a pair of breasts any of these bands can have their shape or type changed at any time and to do that you can right-click on the band and go to type and it will show you the list of all the available types let's look at some of these so right now by default band one is a low shelf if we change it to a high pass we'll see that it's a little different from a low shelf a high pass basically states that any frequencies above where this band is are allowed to pass hence the name high pass the opposite of a high pass which we're going to set to number seven is a low pass any frequencies lower than where the band is set are allowed to pass so basically again one and seven are opposite in that one is a high pass seven is now a low pass so what's different from a high pass and a low shelf is that a low shelf goes down and then stays at a certain value a high pass cuts off completely at a certain value so a high pass which band one is set to currently will allow less frequencies to come through because it's completely cutting off the ones that fall to the left of this band feel free to go through and play with all the other shapes there's not too many other ones but you'll see how they affect the shape of your EQ curve and you can also play with them with audio obviously to see the kind of effect they have in your sound the next property that each band has has like three names but they all mean the same thing bandwidths resonance or cue literally the letter Q this determines how wide or narrow your band is affecting the sound in this equalizer there are two ways of affecting this value if you come down here to the speed W knob and move it up and down you can see it changing the width of this band my preferred method is to come over to the band itself and mouse over and just use the mouse wheel so something like this is a much narrower band and will affect only a certain limited number of frequencies versus something like this which is a much wider band this will affect a lot more surrounding frequencies at a exponentially less rate as it moves further away from this band another parameter that this equalizer gives you per band is how steep you want each slope to be so for example with band number seven I'm going to come down and go to order and you'll see that it's on two by default two is the gentlest slope that you can have in this equalizer so if I change it to something like steep eight you'll see that it creates a very steep slope and basically any treble that comes to this point is really not going to pass this equalizer band so this band is going to sharply cut anything right at the 5000 Hertz range if I change it to something like gentle 4 you'll see that it's a much gentler slope closer to 2 but not quite as gentle and this is just one of the many ways you can sort of shape each of these bands and of course in conjunction with that steep setting you can play with the bandwidth as well to really hone in on a customized slope for your liking now just to quickly recap we've got shape or type which can be set up here as well we've got a mount and this is in decibels again lower means you're cutting higher means you're boosting we've got frequency so this is where along the spectrum you want the and to affect and then you have bandwidth aka cue or resonance the narrowness or width of the band and then finally if you right-click and come to order you also have the Steep option using these five parameters across up to seven bands can really help you shape and carve sounds to your liking now just remember that EQ e is absolutely an art there is no right or wrong way to EQ a sound everything you do in an equalizer similar to how it's done in a compressor is done to taste it all depends on what you're trying to accomplish or what sound you're going for now before I have done in this equalizer to the unaltered state so let's do thatevery single sound has its own special requirements or needs of Equalization depending on the situation or project that you're working in so there's really no way that I or anyone else can tell you how to equalize every single sound so what I recommend you do is you get comfortable with Equalization get good at using the tools that I've shown you and the techniques and before you know it equal izing will become second nature to you and you'll start equalizing things exactly to your liking combined with compression it's a very powerful way of processing sounds and making them sound really good in the mix.  |
| json metadata | {"tags":["daw","tutorial","equalizer","audio","plugins"],"image":["https://cdn.steemitimages.com/DQmcuiYouiW6SrDJYR7bs1asyQ4uC3JuPGN6XUPFMKRqLSP/Schermata%202018-06-15%20alle%2011.43.04.png","https://cdn.steemitimages.com/DQmVeDuUfoncDiBfA6Y1uJWBbbocmyiT3HL5QVBaemS3jio/Schermata%202018-06-15%20alle%2011.43.23.png","https://cdn.steemitimages.com/DQmcacxC1CHByj22Cx2sJwQdirKEgmDT9QyKHE3n472e54S/Schermata%202018-06-15%20alle%2011.43.12.png","https://cdn.steemitimages.com/DQmXPow16UjtRkcf7j1RQGzApRqAwRhpGGqDD3g3oCein2a/Schermata%202018-06-15%20alle%2011.43.34.png"],"app":"steemit/0.1","format":"markdown"} |
| Transaction Info | Block #23340106/Trx 86a26995f1ec8eb82ca021729acc3562e0e9eee7 |
View Raw JSON Data
{
"trx_id": "86a26995f1ec8eb82ca021729acc3562e0e9eee7",
"block": 23340106,
"trx_in_block": 43,
"op_in_trx": 0,
"virtual_op": 0,
"timestamp": "2018-06-15T09:47:12",
"op": [
"comment",
{
"parent_author": "",
"parent_permlink": "daw",
"author": "faderstudio",
"permlink": "tutorial-daw-2-eq-tutorial-the-basics",
"title": "Tutorial DAW # 2 - EQ Tutorial the basics",
"body": "Welcome to the EQ tutorial by the end of you should have a strong foundation on what EQ is how to use it properly and why it's an essential tool in your projects for the purposes. I want to be using my favourite equalizer plug-in and that is the fruity parametric EQ - however the knowledge that you learn can be applied to any equalizer within any DAW of your choice every single sound that you hear is made up of frequencies and a frequency is a cycle per second the range that the human ear can detect in audio frequencies is roughly 20 Hertz all the way up to 20,000 Hertz or 20 kilohertz this is called the frequency spectrum so every single sound that you can perceive falls within this range and this range is the typical range of most equalizers 20 Hertz all the way up to 20,000 Hertz\n\n\n\nAnimals like dogs are known to be able to detect frequencies upwards of 50 kilohertz so if dogs were making music they'd have a lot more frequencies to worry about than us so no excuse humans different types of sounds and instruments tend to live in certain regions on the frequency spectrum for example drum sounds or percussive sounds like your high hats your snares your claps those tend to live up here in the treble and high mid region sounds like your leads your pads or vocals or guitars stuff like that those tend to live in this mid region right here low mid to high mid and sounds like bass lines and your kick drums tend to predominantly live down here in the sub and bass regions of course all these sounds can bleed over into surrounding regions but the regions that I just outlined are kind of where most of the frequency content of these particular sounds resides let's look at some examples here's a kick drum \n\n\n\nNow kick drums are one of the few instruments that actually does have frequency content pretty much throughout the whole spectrum as you can see when it comes in it sort of comes in strongly around the mid region and then sort of drifts down into the sub region there's a little bit of treble as well take a look now the initial part of the kick the transient or the snap that's the stuff that's happening from the treble all the way down to the low mid region the part of the kick that you feel in your chest or in the ground or if you have a good enough sound system the with the subwoofer outputs that's down here in this region around 150 Hertz and below here's a clap now as you can see there's a lot more stuff going on in this upper mid to treble region there's also a little bit happening down here in about the one hundred and sixty Hertz region and this is kind of giving it a little bit of low-end as well here's the hi-hat as you can see it's much more predominantly high mid to treble and it sort of just fades out as it gets lower than that there's really not much going on below the low mid region and even the mid to low mid there's just not too much happening there as well here's the baseline \n\n\n\nNow this particular bass line has a good amount of mid to low mid stuff going on in addition to the sub and bass frequencies here's a pluck as you can see lots of mid good amount of highs treble and really no bass so sound like this would actually mix really well with your bass stuff since it kind of gets out of the way right here at the low mid section by now you should be somewhat familiar and comfortable with the frequency spectrum so let's talk about EQ what is EQ EQ is a tool technique and an art for shaping or carving your sounds it can help eliminate or tame unwanted or resonating frequencies or it can accentuate the ones that you want it can help clear up your mix by preventing different sounds from fighting over the same frequency region and when using conjunction with compression it's a very powerful way of processing your sounds to your liking and by the way if you haven't seen my tutorial on compression yet I highly recommend you check that out I'll give a link to it right here now what we have here is what's called a seven band equalizer one two three four five six seven these seven bands serve as control points along the frequency spectrum that let you manipulate the sound each of these bands have properties associated with them these properties are frequency or where along the frequency spectrum you want the sound to be affected amount so this is set in decibels if you look in the top left as I move this up you see the decibel count so a positive number means you're boosting or accentuating the decibels and a negative number means you're cutting or eliminating certain frequencies at this point the next property \n\n\n\ns shape or type so by default with this equaliser bands two through six are set as peaking type so that just means that they look like this sort of bell curve type shape bands one and seven are set to shelves Oh banned one is a low shelf so as you can see it looks a little different from band four then four kind of sweeps down on both sides as I bring it down whereas band one sweeps down on one side and then stays down for the entire rest of the spectrum that's called a shelf and then band seven is the opposite of band one it's a high shelf so when I bring this down you'll see that it has the opposite effect of a low shelf it stays down to the right of the spectrum as it's going down and by no coincidence at all that I create a pair of breasts any of these bands can have their shape or type changed at any time and to do that you can right-click on the band and go to type and it will show you the list of all the available types let's look at some of these so right now by default band one is a low shelf if we change it to a high pass we'll see that it's a little different from a low shelf a high pass basically states that any frequencies above where this band is are allowed to pass hence the name high pass the opposite of a high pass which we're going to set to number seven is a low pass any frequencies lower than where the band is set are allowed to pass so basically again one and seven are opposite in that one is a high pass seven is now a low pass so what's different from a high pass and a low shelf is that a low shelf goes down and then stays at a certain value a high pass cuts off completely at a certain value so a high pass which band one is set to currently will allow less frequencies to come through because it's completely cutting off the ones that fall to the left of this band feel free to go through and play with all the other shapes there's not too many other ones but you'll see how they affect the shape of your EQ curve and you can also play with them with audio obviously to see the kind of effect they have in your sound the next property that each band has has like three names but they all mean the same thing bandwidths resonance or cue literally the letter Q this determines how wide or narrow your band is affecting the sound in this equalizer there are two ways of affecting this value if you come down here to the speed W knob and move it up and down you can see it changing the width of this band my preferred method is to come over to the band itself and mouse over and just use the mouse wheel so something like this is a much narrower band and will affect only a certain limited number of frequencies versus something like this which is a much wider band this will affect a lot more surrounding frequencies at a exponentially less rate as it moves further away from this band another parameter that this equalizer gives you per band is how steep you want each slope to be so for example with band number seven I'm going to come down and go to order and you'll see that it's on two by default two is the gentlest slope that you can have in this equalizer so if I change it to something like steep eight you'll see that it creates a very steep slope and basically any treble that comes to this point is really not going to pass this equalizer band so this band is going to sharply cut anything right at the 5000 Hertz range if I change it to something like gentle 4 you'll see that it's a much gentler slope closer to 2 but not quite as gentle and this is just one of the many ways you can sort of shape each of these bands and of course in conjunction with that steep setting you can play with the bandwidth as well to really hone in on a customized slope for your liking now just to quickly recap we've got shape or type which can be set up here as well we've got a mount and this is in decibels again lower means you're cutting higher means you're boosting we've got frequency so this is where along the spectrum you want the and to affect and then you have bandwidth aka cue or resonance the narrowness or width of the band and then finally if you right-click and come to order you also have the Steep option using these five parameters across up to seven bands can really help you shape and carve sounds to your liking now just remember that EQ e is absolutely an art there is no right or wrong way to EQ a sound everything you do in an equalizer similar to how it's done in a compressor is done to taste it all depends on what you're trying to accomplish or what sound you're going for now before I have done in this equalizer to the unaltered state so let's do thatevery single sound has its own special requirements or needs of Equalization depending on the situation or project that you're working in so there's really no way that I or anyone else can tell you how to equalize every single sound so what I recommend you do is you get comfortable with Equalization get good at using the tools that I've shown you and the techniques and before you know it equal izing will become second nature to you and you'll start equalizing things exactly to your liking combined with compression it's a very powerful way of processing sounds and making them sound really good in the mix.\n\n",
"json_metadata": "{\"tags\":[\"daw\",\"tutorial\",\"equalizer\",\"audio\",\"plugins\"],\"image\":[\"https://cdn.steemitimages.com/DQmcuiYouiW6SrDJYR7bs1asyQ4uC3JuPGN6XUPFMKRqLSP/Schermata%202018-06-15%20alle%2011.43.04.png\",\"https://cdn.steemitimages.com/DQmVeDuUfoncDiBfA6Y1uJWBbbocmyiT3HL5QVBaemS3jio/Schermata%202018-06-15%20alle%2011.43.23.png\",\"https://cdn.steemitimages.com/DQmcacxC1CHByj22Cx2sJwQdirKEgmDT9QyKHE3n472e54S/Schermata%202018-06-15%20alle%2011.43.12.png\",\"https://cdn.steemitimages.com/DQmXPow16UjtRkcf7j1RQGzApRqAwRhpGGqDD3g3oCein2a/Schermata%202018-06-15%20alle%2011.43.34.png\"],\"app\":\"steemit/0.1\",\"format\":\"markdown\"}"
}
]
}faderstudiopublished a new post: external-hard-drives-and-your-daw2018/06/15 09:17:06
faderstudiopublished a new post: external-hard-drives-and-your-daw
2018/06/15 09:17:06
| parent author | |
| parent permlink | daw |
| author | faderstudio |
| permlink | external-hard-drives-and-your-daw |
| title | Tutorial DAW # 1 - External Hard Drives and DAW ( Digital Audio Workstation ) |
| body | @@ -47,17 +47,17 @@ how they -%0A + can be e @@ -123,17 +123,17 @@ e studio -%0A + with aud @@ -201,17 +201,17 @@ anything -%0A + that you @@ -351,17 +351,17 @@ and more -%0A + efficien @@ -428,17 +428,17 @@ re gonna -%0A + minimize @@ -505,17 +505,17 @@ kup that -%0A + you can @@ -656,17 +656,17 @@ nal hard -%0A + drives i @@ -896,17 +896,17 @@ that are -%0A + clones o @@ -970,17 +970,17 @@ ll of my -%0A + session @@ -1042,17 +1042,17 @@ sessions -%0A + producti @@ -1120,17 +1120,17 @@ nt wrong -%0A + with the @@ -2958,17 +2958,17 @@ t better -%0A + performa @@ -3035,17 +3035,17 @@ rives is -%0A + going wi @@ -3110,17 +3110,17 @@ n SSD at -%0A + this tim @@ -3187,17 +3187,17 @@ sons for -%0A + it being @@ -3264,17 +3264,17 @@ pects of -%0A + them the |
| json metadata | {"tags":["daw","ssd","audio","hard","disk"],"image":["https://cdn.steemitimages.com/DQmZM1JPKxyJeN4mRw196ivVf6haCkurh4D6NNjCvMjXPQZ/Schermata%202018-06-15%20alle%2010.22.15.png","https://cdn.steemitimages.com/DQmeNkSsfaVoxrwJxW5oVayNadCT7qF1kVg5DnQmWRz7iRE/Schermata%202018-06-15%20alle%2010.22.05.png","https://cdn.steemitimages.com/DQmPuwzz3dFX2YNXiBYfght4m2xuCc46dn3vDvGNZyAuB35/Schermata%202018-06-15%20alle%2010.22.50.png"],"app":"steemit/0.1","format":"markdown"} |
| Transaction Info | Block #23339504/Trx 4974079a1af386fd9dc0840c8bd670cba06bcc06 |
View Raw JSON Data
{
  "trx_id": "4974079a1af386fd9dc0840c8bd670cba06bcc06",
  "block": 23339504,
  "trx_in_block": 37,
  "op_in_trx": 0,
  "virtual_op": 0,
  "timestamp": "2018-06-15T09:17:06",
  "op": [
    "comment",
    {
      "parent_author": "",
      "parent_permlink": "daw",
      "author": "faderstudio",
      "permlink": "external-hard-drives-and-your-daw",
      "title": "Tutorial DAW # 1 - External Hard Drives and DAW ( Digital Audio Workstation )",
      "body": "@@ -47,17 +47,17 @@\n how they\n-%0A\n+ \n can be e\n@@ -123,17 +123,17 @@\n e studio\n-%0A\n+ \n with aud\n@@ -201,17 +201,17 @@\n anything\n-%0A\n+ \n that you\n@@ -351,17 +351,17 @@\n and more\n-%0A\n+ \n efficien\n@@ -428,17 +428,17 @@\n re gonna\n-%0A\n+ \n minimize\n@@ -505,17 +505,17 @@\n kup that\n-%0A\n+ \n you can \n@@ -656,17 +656,17 @@\n nal hard\n-%0A\n+ \n drives i\n@@ -896,17 +896,17 @@\n that are\n-%0A\n+ \n clones o\n@@ -970,17 +970,17 @@\n ll of my\n-%0A\n+ \n session \n@@ -1042,17 +1042,17 @@\n sessions\n-%0A\n+ \n producti\n@@ -1120,17 +1120,17 @@\n nt wrong\n-%0A\n+ \n with the\n@@ -2958,17 +2958,17 @@\n t better\n-%0A\n+ \n performa\n@@ -3035,17 +3035,17 @@\n rives is\n-%0A\n+ \n going wi\n@@ -3110,17 +3110,17 @@\n n SSD at\n-%0A\n+ \n this tim\n@@ -3187,17 +3187,17 @@\n sons for\n-%0A\n+ \n it being\n@@ -3264,17 +3264,17 @@\n pects of\n-%0A\n+ \n them the\n",
      "json_metadata": "{\"tags\":[\"daw\",\"ssd\",\"audio\",\"hard\",\"disk\"],\"image\":[\"https://cdn.steemitimages.com/DQmZM1JPKxyJeN4mRw196ivVf6haCkurh4D6NNjCvMjXPQZ/Schermata%202018-06-15%20alle%2010.22.15.png\",\"https://cdn.steemitimages.com/DQmeNkSsfaVoxrwJxW5oVayNadCT7qF1kVg5DnQmWRz7iRE/Schermata%202018-06-15%20alle%2010.22.05.png\",\"https://cdn.steemitimages.com/DQmPuwzz3dFX2YNXiBYfght4m2xuCc46dn3vDvGNZyAuB35/Schermata%202018-06-15%20alle%2010.22.50.png\"],\"app\":\"steemit/0.1\",\"format\":\"markdown\"}"
    }
  ]
}faderstudiopublished a new post: basic-setup-hard-drives-for-audio-production-daw2018/06/15 09:01:00
faderstudiopublished a new post: basic-setup-hard-drives-for-audio-production-daw
2018/06/15 09:01:00
| parent author | |
| parent permlink | daw |
| author | faderstudio |
| permlink | basic-setup-hard-drives-for-audio-production-daw |
| title | Tutorial DAW # 2 - Basic Setup Hard Drives for Audio Production ( Digital Audio Workstation ) |
| body | Today we're going to be looking at something a little bit different we'll be talking about basic hard drive setup for your audio production workstation so if you if you want to learn about raid array setups how to set up backup mirrors or even more advanced things like vienna ensemble pro master slave setup then i'd suggest looking elsewhere on youtube for these because as loads of videos already out there which people have done which provide you enough information on those topics we're just going to be looking at the basic principles behind how you should be installed in your software way should be installing it to where you should be saving your files and projects to and how you should be setting up your sample libraries for audio production things that you tend to install to your operating system driver your C Drive is generally speaking all of your programs so anything like a da w e music software such as Cubase Pro Tools Logic Presonus Studio One whatever you use in that will be installed to your C Drive seems like VST plugins' eq's compresses effects all that C Drive and then when it comes to VST instruments the software side of things the program the VST instruments program will also get installed to the C Drive the reason why we don't do things like save our files to receive drive our pictures and videos or samples from our VST instruments to C Drive is there's a couple of important reasons the first major reason is that if anything ever goes wrong with your main OS Drive and it crashes and dies a horrible death or you need to clean format because you've somehow got a virus then you're going to lose all of this information and you're going to have to reinstall all your software and your sample content but the other thing is that you're going to lose all your project files your pictures in the videos and stuff so it's never a good idea to install everything to one drive. 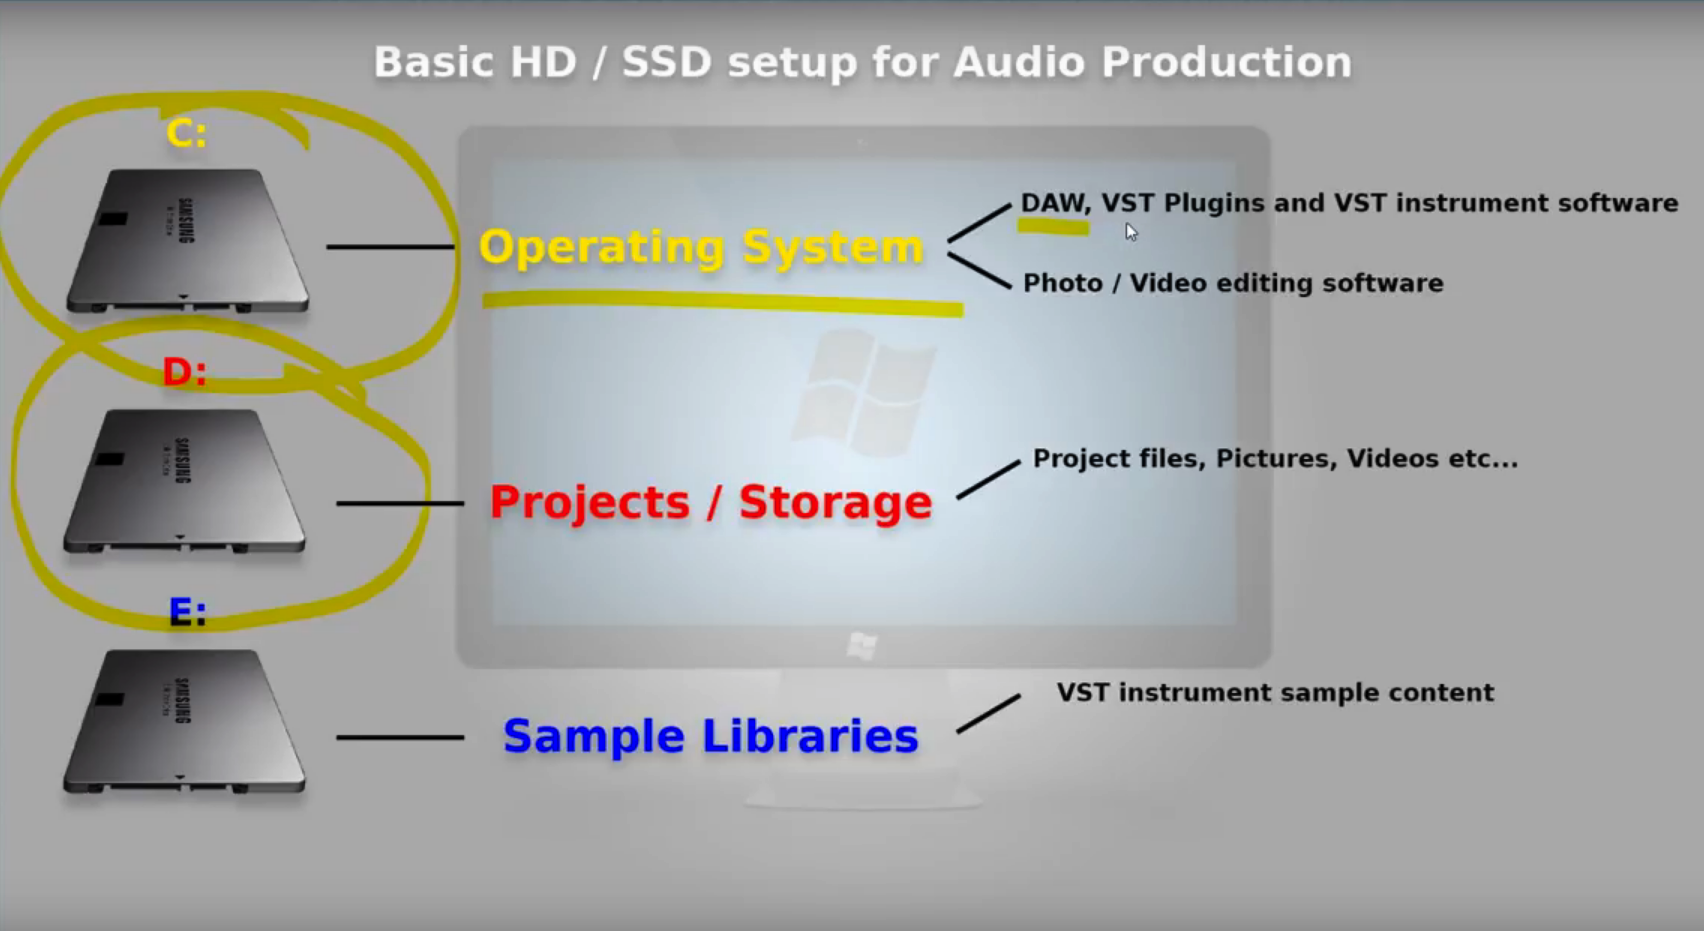 Another reason being is that with hard drives you have they have this thing called read and write so depending on the performance of your hard drive if it's an SSD or if it's a mechanical hard drive there is a to how much data it can access at any given moment if you have too many things on one hard drive and it's trying to access all this different information here in one go you get this thing called a bottleneck now think of it as a tunnel and this is the big blob of everything trying to fit through that tunnel it's going to hit the sizing is just going to drip through a bit by a bit so the performance of your hard drive is going to be dead slow so if you have it all methodical with things and you install them separately across different hard drives when it comes to this tunnel this stuff is just going to work it's going to get loaded into Ram and it's just going to work nice and easy no no qualms no traffic no no it's just to be nice and quick so with your operating system you see drive it's just mainly all the software side of things that you're going to be installing or anything like your personal files your videos your pictures your projects and all that that's going to get installed to a separate drive which most of you will have if you've bought an entry-level PC they tend to be mechanical hard drives for this you can use SSDs if you want SSDs are always quicker much more efficient but for you know storage mechanical hard drives are fine the good thing about is that they're cheap so you'll probably have something like a one terabyte heart keep it up at t6 it not only have like a one terabyte two terabyte something mother it's always a good idea to have very 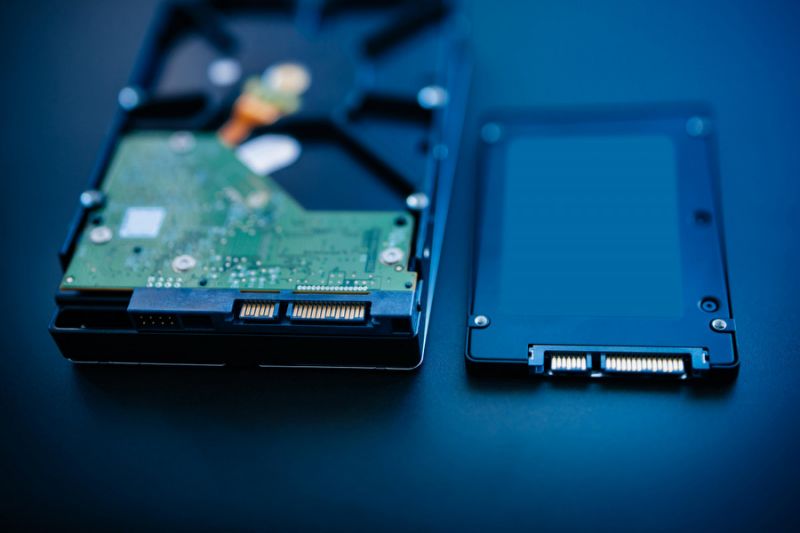 large storage drives if you know you're going to be storing a lot of things on there so with mechanical hard drives are a lot cheaper than SSD so you get more storage capacity for the price so it's pretty self-explanatory really anything that's not software related so audio files for your projects or pictures or videos anything you can store them to install them save them to a projects drive now if you're a little bit more kind of anal about it for lack of a better word you can have a separate drive so I have a separate Drive and I have another mechanical hard drive which I store all my project files on and then the rest of Italy pictures and videos in that I store on a separate drive so I have two drives for storage and just because of how I work I do a bit of video editing software my setup a little bit different now when it comes to sample libraries to a different story altogether with sample libraries I always recommend getting an SSD Drive just because the sheer amount of samples which have been shifted across the hard drive when you're screaming them from the disk in your da W is ridiculous it's mind-boggling like one note of an instrument could be like a thousand samples so when you think about having lots of instruments loaded up in a session and you playing all these different samples especially high-end sample libraries and you're going to need a very quick hard drive which it's got a decent sized capacity to handle all these things on or you can get multiple smaller versions of hard drives and break them down that way across the hard drive so when you're installing a VST instrument like an orchestral library or an O guitar library something matter you'll find that there's three different stages to install it on the first one is the software so it will ask you about installed software you'll tell it your C Drive wherever you want in your C Drive the second thing it'll ask you is where it would like to install with DDL files or dll files that's one or two which is the sort of like the same file as a VST plug-in uses so when you've got your da W open it'll ask you where this file is so it knows where to load the instrument from so it's always a good idea to also install that to your C Drive as well and then the final thing is the sample content which is the large portion of the software this is what you want to be installing onto a separate drive completely so I have a dedicated hard drive just for sample library content now there's a good reason why obviously does do good reasons a it reduces a bottleneck and B if if you do meter you know this dies and you need to reinstall everything then you're not going to be spending days and days installing sample content to your hard drive because you're got it on a separate drive and the beauty of this is when I come to reinstall things if anything went fatally wrong which it hasn't done yet touchwood for many years and then all you need to do is install the software which takes seconds and then you just point the software to where you've got the the sample content installed and it'll just work so that's that's another bonus to splitting things across your hard drives so in terms of the basics it's always a good idea to have at least three hard drives in your computer and as this will improve the performance reduce the bottlenecks and you know things will be running a lot more smoothly for when you're creating your chains so that's pretty much it for this video guys it's just a very brief basic overview of how you should be installing things and where they should be installed to and now you should be saving your projects. |
| json metadata | {"tags":["daw","ssd","hard","disk","tutorial"],"image":["https://cdn.steemitimages.com/DQma8va29ff7TDUBYWoLrDnjFtBnUW3WP6zZtLpgjZ5YwLN/Schermata%202018-06-15%20alle%2010.47.28.png","https://cdn.steemitimages.com/DQmbQ8ai6EJdtNh6LnxnPAJkPP5dGcaeUHX5jhYuqzLb6iU/3d04ad.jpg"],"app":"steemit/0.1","format":"markdown"} |
| Transaction Info | Block #23339182/Trx c2c1f7a82f3c830b3b436216b0978021d6880410 |
View Raw JSON Data
{
"trx_id": "c2c1f7a82f3c830b3b436216b0978021d6880410",
"block": 23339182,
"trx_in_block": 19,
"op_in_trx": 0,
"virtual_op": 0,
"timestamp": "2018-06-15T09:01:00",
"op": [
"comment",
{
"parent_author": "",
"parent_permlink": "daw",
"author": "faderstudio",
"permlink": "basic-setup-hard-drives-for-audio-production-daw",
"title": "Tutorial DAW # 2 - Basic Setup Hard Drives for Audio Production ( Digital Audio Workstation )",
"body": "Today we're going to be looking at something a little bit different we'll be talking about basic hard drive setup for your audio production workstation so if you if you want to learn about raid array setups how to set up backup mirrors or even more advanced things like vienna ensemble pro master slave setup then i'd suggest looking elsewhere on youtube for these because as loads of videos already out there which people have done which provide you enough information on those topics we're just going to be looking at the basic principles behind how you should be installed in your software way should be installing it to where you should be saving your files and projects to and how you should be setting up your sample libraries for audio production things that you tend to install to your operating system driver your C Drive is generally speaking all of your programs so anything like a da w e music software such as Cubase Pro Tools Logic Presonus Studio One whatever you use in that will be installed to your C Drive seems like VST plugins' eq's compresses effects all that C Drive and then when it comes to VST instruments the software side of things the program the VST instruments program will also get installed to the C Drive the reason why we don't do things like save our files to receive drive our pictures and videos or samples from our VST instruments to C Drive is there's a couple of important reasons the first major reason is that if anything ever goes wrong with your main OS Drive and it crashes and dies a horrible death or you need to clean format because you've somehow got a virus then you're going to lose all of this information and you're going to have to reinstall all your software and your sample content but the other thing is that you're going to lose all your project files your pictures in the videos and stuff so it's never a good idea to install everything to one drive.\n\n\n\nAnother reason being is that with hard drives you have they have this thing called read and write so depending on the performance of your hard drive if it's an SSD or if it's a mechanical hard drive there is a to how much data it can access at any given moment if you have too many things on one hard drive and it's trying to access all this different information here in one go you get this thing called a bottleneck now think of it as a tunnel and this is the big blob of everything trying to fit through that tunnel it's going to hit the sizing is just going to drip through a bit by a bit so the performance of your hard drive is going to be dead slow so if you have it all methodical with things and you install them separately across different hard drives when it comes to this tunnel this stuff is just going to work it's going to get loaded into Ram and it's just going to work nice and easy no no qualms no traffic no no it's just to be nice and quick so with your operating system you see drive it's just mainly all the software side of things that you're going to be installing or anything like your personal files your videos your pictures your projects and all that that's going to get installed to a separate drive which most of you will have if you've bought an entry-level PC they tend to be mechanical hard drives for this you can use SSDs if you want SSDs are always quicker much more efficient but for you know storage mechanical hard drives are fine the good thing about is that they're cheap so you'll probably have something like a one terabyte heart keep it up at t6 it not only have like a one terabyte two terabyte something mother it's always a good idea to have very\n\n\nlarge storage drives if you know you're going to be storing a lot of things on there so with mechanical hard drives are a lot cheaper than SSD so you get more storage capacity for the price so it's pretty self-explanatory really anything that's not software related so audio files for your projects or pictures or videos anything you can store them to install them save them to a projects drive now if you're a little bit more kind of anal about it for lack of a better word you can have a separate drive so I have a separate Drive and I have another mechanical hard drive which I store all my project files on and then the rest of Italy pictures and videos in that I store on a separate drive so I have two drives for storage and just because of how I work I do a bit of video editing software my setup a little bit different now when it comes to sample libraries to a different story altogether with sample libraries I always recommend getting an SSD Drive just because the sheer amount of samples which have been shifted across the hard drive when you're screaming them from the disk in your da W is ridiculous it's mind-boggling like one note of an instrument could be like a thousand samples so when you think about having lots of instruments loaded up in a session and you playing all these different samples especially high-end sample libraries and you're going to need a very quick hard drive which it's got a decent sized capacity to handle all these things on or you can get multiple smaller versions of hard drives and break them down that way across the hard drive so when you're installing a VST instrument like an orchestral library or an O guitar library something matter you'll find that there's three different stages to install it on the first one is the software so it will ask you about installed software you'll tell it your C Drive wherever you want in your C Drive the second thing it'll ask you is where it would like to install with DDL files or dll files that's one or two which is the sort of like the same file as a VST plug-in uses so when you've got your da W open it'll ask you where this file is so it knows where to load the instrument from so it's always a good idea to also install that to your C Drive as well and then the final thing is the sample content which is the large portion of the software this is what you want to be installing onto a separate drive completely so I have a dedicated hard drive just for sample library content now there's a good reason why obviously does do good reasons a it reduces a bottleneck and B if if you do meter you know this dies and you need to reinstall everything then you're not going to be spending days and days installing sample content to your hard drive because you're got it on a separate drive and the beauty of this is when I come to reinstall things if anything went fatally wrong which it hasn't done yet touchwood for many years and then all you need to do is install the software which takes seconds and then you just point the software to where you've got the the sample content installed and it'll just work so that's that's another bonus to splitting things across your hard drives so in terms of the basics it's always a good idea to have at least three hard drives in your computer and as this will improve the performance reduce the bottlenecks and you know things will be running a lot more smoothly for when you're creating your chains so that's pretty much it for this video guys it's just a very brief basic overview of how you should be installing things and where they should be installed to and now you should be saving your projects.",
"json_metadata": "{\"tags\":[\"daw\",\"ssd\",\"hard\",\"disk\",\"tutorial\"],\"image\":[\"https://cdn.steemitimages.com/DQma8va29ff7TDUBYWoLrDnjFtBnUW3WP6zZtLpgjZ5YwLN/Schermata%202018-06-15%20alle%2010.47.28.png\",\"https://cdn.steemitimages.com/DQmbQ8ai6EJdtNh6LnxnPAJkPP5dGcaeUHX5jhYuqzLb6iU/3d04ad.jpg\"],\"app\":\"steemit/0.1\",\"format\":\"markdown\"}"
}
]
}faderstudiopublished a new post: basic-setup-hard-drives-for-audio-production-daw2018/06/15 09:00:48
faderstudiopublished a new post: basic-setup-hard-drives-for-audio-production-daw
2018/06/15 09:00:48
| parent author | |
| parent permlink | daw |
| author | faderstudio |
| permlink | basic-setup-hard-drives-for-audio-production-daw |
| title | Tutorial DAW # 2 - Basic Setup Hard Drives for Audio Production ( Digital Audio Workstation ) |
| body | Today we're going to be looking at something a little bit different we'll be talking about basic hard drive setup for your audio production workstation so if you if you want to learn about raid array setups how to set up backup mirrors or even more advanced things like vienna ensemble pro master slave setup then i'd suggest looking elsewhere on youtube for these because as loads of videos already out there which people have done which provide you enough information on those topics we're just going to be looking at the basic principles behind how you should be installed in your software way should be installing it to where you should be saving your files and projects to and how you should be setting up your sample libraries for audio production things that you tend to install to your operating system driver your C Drive is generally speaking all of your programs so anything like a da w e music software such as Cubase Pro Tools Logic Presonus Studio One whatever you use in that will be installed to your C Drive seems like VST plugins' eq's compresses effects all that C Drive and then when it comes to VST instruments the software side of things the program the VST instruments program will also get installed to the C Drive the reason why we don't do things like save our files to receive drive our pictures and videos or samples from our VST instruments to C Drive is there's a couple of important reasons the first major reason is that if anything ever goes wrong with your main OS Drive and it crashes and dies a horrible death or you need to clean format because you've somehow got a virus then you're going to lose all of this information and you're going to have to reinstall all your software and your sample content but the other thing is that you're going to lose all your project files your pictures in the videos and stuff so it's never a good idea to install everything to one drive.  Another reason being is that with hard drives you have they have this thing called read and write so depending on the performance of your hard drive if it's an SSD or if it's a mechanical hard drive there is a to how much data it can access at any given moment if you have too many things on one hard drive and it's trying to access all this different information here in one go you get this thing called a bottleneck now think of it as a tunnel and this is the big blob of everything trying to fit through that tunnel it's going to hit the sizing is just going to drip through a bit by a bit so the performance of your hard drive is going to be dead slow so if you have it all methodical with things and you install them separately across different hard drives when it comes to this tunnel this stuff is just going to work it's going to get loaded into Ram and it's just going to work nice and easy no no qualms no traffic no no it's just to be nice and quick so with your operating system you see drive it's just mainly all the software side of things that you're going to be installing or anything like your personal files your videos your pictures your projects and all that that's going to get installed to a separate drive which most of you will have if you've bought an entry-level PC they tend to be mechanical hard drives for this you can use SSDs if you want SSDs are always quicker much more efficient but for you know storage mechanical hard drives are fine the good thing about is that they're cheap so you'll probably have something like a one terabyte heart keep it up at t6 it not only have like a one terabyte two terabyte something mother it's always a good idea to have very  large storage drives if you know you're going to be storing a lot of things on there so with mechanical hard drives are a lot cheaper than SSD so you get more storage capacity for the price so it's pretty self-explanatory really anything that's not software related so audio files for your projects or pictures or videos anything you can store them to install them save them to a projects drive now if you're a little bit more kind of anal about it for lack of a better word you can have a separate drive so I have a separate Drive and I have another mechanical hard drive which I store all my project files on and then the rest of Italy pictures and videos in that I store on a separate drive so I have two drives for storage and just because of how I work I do a bit of video editing software my setup a little bit different now when it comes to sample libraries to a different story altogether with sample libraries I always recommend getting an SSD Drive just because the sheer amount of samples which have been shifted across the hard drive when you're screaming them from the disk in your da W is ridiculous it's mind-boggling like one note of an instrument could be like a thousand samples so when you think about having lots of instruments loaded up in a session and you playing all these different samples especially high-end sample libraries and you're going to need a very quick hard drive which it's got a decent sized capacity to handle all these things on or you can get multiple smaller versions of hard drives and break them down that way across the hard drive so when you're installing a VST instrument like an orchestral library or an O guitar library something matter you'll find that there's three different stages to install it on the first one is the software so it will ask you about installed software you'll tell it your C Drive wherever you want in your C Drive the second thing it'll ask you is where it would like to install with DDL files or dll files that's one or two which is the sort of like the same file as a VST plug-in uses so when you've got your da W open it'll ask you where this file is so it knows where to load the instrument from so it's always a good idea to also install that to your C Drive as well and then the final thing is the sample content which is the large portion of the software this is what you want to be installing onto a separate drive completely so I have a dedicated hard drive just for sample library content now there's a good reason why obviously does do good reasons a it reduces a bottleneck and B if if you do meter you know this dies and you need to reinstall everything then you're not going to be spending days and days installing sample content to your hard drive because you're got it on a separate drive and the beauty of this is when I come to reinstall things if anything went fatally wrong which it hasn't done yet touchwood for many years and then all you need to do is install the software which takes seconds and then you just point the software to where you've got the the sample content installed and it'll just work so that's that's another bonus to splitting things across your hard drives so in terms of the basics it's always a good idea to have at least three hard drives in your computer and as this will improve the performance reduce the bottlenecks and you know things will be running a lot more smoothly for when you're creating your chains so that's pretty much it for this video guys it's just a very brief basic overview of how you should be installing things and where they should be installed to and now you should be saving your projects. |
| json metadata | {"tags":["daw","ssd","hard","disk","audio"],"image":["https://cdn.steemitimages.com/DQma8va29ff7TDUBYWoLrDnjFtBnUW3WP6zZtLpgjZ5YwLN/Schermata%202018-06-15%20alle%2010.47.28.png","https://cdn.steemitimages.com/DQmbQ8ai6EJdtNh6LnxnPAJkPP5dGcaeUHX5jhYuqzLb6iU/3d04ad.jpg"],"app":"steemit/0.1","format":"markdown"} |
| Transaction Info | Block #23339178/Trx f568a96f95a47a98ba976325d2f238f109dc7f01 |
View Raw JSON Data
{
"trx_id": "f568a96f95a47a98ba976325d2f238f109dc7f01",
"block": 23339178,
"trx_in_block": 25,
"op_in_trx": 0,
"virtual_op": 0,
"timestamp": "2018-06-15T09:00:48",
"op": [
"comment",
{
"parent_author": "",
"parent_permlink": "daw",
"author": "faderstudio",
"permlink": "basic-setup-hard-drives-for-audio-production-daw",
"title": "Tutorial DAW # 2 - Basic Setup Hard Drives for Audio Production ( Digital Audio Workstation )",
"body": "Today we're going to be looking at something a little bit different we'll be talking about basic hard drive setup for your audio production workstation so if you if you want to learn about raid array setups how to set up backup mirrors or even more advanced things like vienna ensemble pro master slave setup then i'd suggest looking elsewhere on youtube for these because as loads of videos already out there which people have done which provide you enough information on those topics we're just going to be looking at the basic principles behind how you should be installed in your software way should be installing it to where you should be saving your files and projects to and how you should be setting up your sample libraries for audio production things that you tend to install to your operating system driver your C Drive is generally speaking all of your programs so anything like a da w e music software such as Cubase Pro Tools Logic Presonus Studio One whatever you use in that will be installed to your C Drive seems like VST plugins' eq's compresses effects all that C Drive and then when it comes to VST instruments the software side of things the program the VST instruments program will also get installed to the C Drive the reason why we don't do things like save our files to receive drive our pictures and videos or samples from our VST instruments to C Drive is there's a couple of important reasons the first major reason is that if anything ever goes wrong with your main OS Drive and it crashes and dies a horrible death or you need to clean format because you've somehow got a virus then you're going to lose all of this information and you're going to have to reinstall all your software and your sample content but the other thing is that you're going to lose all your project files your pictures in the videos and stuff so it's never a good idea to install everything to one drive.\n\n\n\nAnother reason being is that with hard drives you have they have this thing called read and write so depending on the performance of your hard drive if it's an SSD or if it's a mechanical hard drive there is a to how much data it can access at any given moment if you have too many things on one hard drive and it's trying to access all this different information here in one go you get this thing called a bottleneck now think of it as a tunnel and this is the big blob of everything trying to fit through that tunnel it's going to hit the sizing is just going to drip through a bit by a bit so the performance of your hard drive is going to be dead slow so if you have it all methodical with things and you install them separately across different hard drives when it comes to this tunnel this stuff is just going to work it's going to get loaded into Ram and it's just going to work nice and easy no no qualms no traffic no no it's just to be nice and quick so with your operating system you see drive it's just mainly all the software side of things that you're going to be installing or anything like your personal files your videos your pictures your projects and all that that's going to get installed to a separate drive which most of you will have if you've bought an entry-level PC they tend to be mechanical hard drives for this you can use SSDs if you want SSDs are always quicker much more efficient but for you know storage mechanical hard drives are fine the good thing about is that they're cheap so you'll probably have something like a one terabyte heart keep it up at t6 it not only have like a one terabyte two terabyte something mother it's always a good idea to have very\n\n\nlarge storage drives if you know you're going to be storing a lot of things on there so with mechanical hard drives are a lot cheaper than SSD so you get more storage capacity for the price so it's pretty self-explanatory really anything that's not software related so audio files for your projects or pictures or videos anything you can store them to install them save them to a projects drive now if you're a little bit more kind of anal about it for lack of a better word you can have a separate drive so I have a separate Drive and I have another mechanical hard drive which I store all my project files on and then the rest of Italy pictures and videos in that I store on a separate drive so I have two drives for storage and just because of how I work I do a bit of video editing software my setup a little bit different now when it comes to sample libraries to a different story altogether with sample libraries I always recommend getting an SSD Drive just because the sheer amount of samples which have been shifted across the hard drive when you're screaming them from the disk in your da W is ridiculous it's mind-boggling like one note of an instrument could be like a thousand samples so when you think about having lots of instruments loaded up in a session and you playing all these different samples especially high-end sample libraries and you're going to need a very quick hard drive which it's got a decent sized capacity to handle all these things on or you can get multiple smaller versions of hard drives and break them down that way across the hard drive so when you're installing a VST instrument like an orchestral library or an O guitar library something matter you'll find that there's three different stages to install it on the first one is the software so it will ask you about installed software you'll tell it your C Drive wherever you want in your C Drive the second thing it'll ask you is where it would like to install with DDL files or dll files that's one or two which is the sort of like the same file as a VST plug-in uses so when you've got your da W open it'll ask you where this file is so it knows where to load the instrument from so it's always a good idea to also install that to your C Drive as well and then the final thing is the sample content which is the large portion of the software this is what you want to be installing onto a separate drive completely so I have a dedicated hard drive just for sample library content now there's a good reason why obviously does do good reasons a it reduces a bottleneck and B if if you do meter you know this dies and you need to reinstall everything then you're not going to be spending days and days installing sample content to your hard drive because you're got it on a separate drive and the beauty of this is when I come to reinstall things if anything went fatally wrong which it hasn't done yet touchwood for many years and then all you need to do is install the software which takes seconds and then you just point the software to where you've got the the sample content installed and it'll just work so that's that's another bonus to splitting things across your hard drives so in terms of the basics it's always a good idea to have at least three hard drives in your computer and as this will improve the performance reduce the bottlenecks and you know things will be running a lot more smoothly for when you're creating your chains so that's pretty much it for this video guys it's just a very brief basic overview of how you should be installing things and where they should be installed to and now you should be saving your projects.",
"json_metadata": "{\"tags\":[\"daw\",\"ssd\",\"hard\",\"disk\",\"audio\"],\"image\":[\"https://cdn.steemitimages.com/DQma8va29ff7TDUBYWoLrDnjFtBnUW3WP6zZtLpgjZ5YwLN/Schermata%202018-06-15%20alle%2010.47.28.png\",\"https://cdn.steemitimages.com/DQmbQ8ai6EJdtNh6LnxnPAJkPP5dGcaeUHX5jhYuqzLb6iU/3d04ad.jpg\"],\"app\":\"steemit/0.1\",\"format\":\"markdown\"}"
}
]
}faderstudiopublished a new post: basic-setup-hard-drives-for-audio-production-daw2018/06/15 09:00:27
faderstudiopublished a new post: basic-setup-hard-drives-for-audio-production-daw
2018/06/15 09:00:27
| parent author | |
| parent permlink | daw |
| author | faderstudio |
| permlink | basic-setup-hard-drives-for-audio-production-daw |
| title | Tutorial DAW # 2 - Basic Setup Hard Drives for Audio Production DAW ( Digital Audio Workstation ) |
| body | Today we're going to be looking at something a little bit different we'll be talking about basic hard drive setup for your audio production workstation so if you if you want to learn about raid array setups how to set up backup mirrors or even more advanced things like vienna ensemble pro master slave setup then i'd suggest looking elsewhere on youtube for these because as loads of videos already out there which people have done which provide you enough information on those topics we're just going to be looking at the basic principles behind how you should be installed in your software way should be installing it to where you should be saving your files and projects to and how you should be setting up your sample libraries for audio production things that you tend to install to your operating system driver your C Drive is generally speaking all of your programs so anything like a da w e music software such as Cubase Pro Tools Logic Presonus Studio One whatever you use in that will be installed to your C Drive seems like VST plugins' eq's compresses effects all that C Drive and then when it comes to VST instruments the software side of things the program the VST instruments program will also get installed to the C Drive the reason why we don't do things like save our files to receive drive our pictures and videos or samples from our VST instruments to C Drive is there's a couple of important reasons the first major reason is that if anything ever goes wrong with your main OS Drive and it crashes and dies a horrible death or you need to clean format because you've somehow got a virus then you're going to lose all of this information and you're going to have to reinstall all your software and your sample content but the other thing is that you're going to lose all your project files your pictures in the videos and stuff so it's never a good idea to install everything to one drive.  Another reason being is that with hard drives you have they have this thing called read and write so depending on the performance of your hard drive if it's an SSD or if it's a mechanical hard drive there is a to how much data it can access at any given moment if you have too many things on one hard drive and it's trying to access all this different information here in one go you get this thing called a bottleneck now think of it as a tunnel and this is the big blob of everything trying to fit through that tunnel it's going to hit the sizing is just going to drip through a bit by a bit so the performance of your hard drive is going to be dead slow so if you have it all methodical with things and you install them separately across different hard drives when it comes to this tunnel this stuff is just going to work it's going to get loaded into Ram and it's just going to work nice and easy no no qualms no traffic no no it's just to be nice and quick so with your operating system you see drive it's just mainly all the software side of things that you're going to be installing or anything like your personal files your videos your pictures your projects and all that that's going to get installed to a separate drive which most of you will have if you've bought an entry-level PC they tend to be mechanical hard drives for this you can use SSDs if you want SSDs are always quicker much more efficient but for you know storage mechanical hard drives are fine the good thing about is that they're cheap so you'll probably have something like a one terabyte heart keep it up at t6 it not only have like a one terabyte two terabyte something mother it's always a good idea to have very  large storage drives if you know you're going to be storing a lot of things on there so with mechanical hard drives are a lot cheaper than SSD so you get more storage capacity for the price so it's pretty self-explanatory really anything that's not software related so audio files for your projects or pictures or videos anything you can store them to install them save them to a projects drive now if you're a little bit more kind of anal about it for lack of a better word you can have a separate drive so I have a separate Drive and I have another mechanical hard drive which I store all my project files on and then the rest of Italy pictures and videos in that I store on a separate drive so I have two drives for storage and just because of how I work I do a bit of video editing software my setup a little bit different now when it comes to sample libraries to a different story altogether with sample libraries I always recommend getting an SSD Drive just because the sheer amount of samples which have been shifted across the hard drive when you're screaming them from the disk in your da W is ridiculous it's mind-boggling like one note of an instrument could be like a thousand samples so when you think about having lots of instruments loaded up in a session and you playing all these different samples especially high-end sample libraries and you're going to need a very quick hard drive which it's got a decent sized capacity to handle all these things on or you can get multiple smaller versions of hard drives and break them down that way across the hard drive so when you're installing a VST instrument like an orchestral library or an O guitar library something matter you'll find that there's three different stages to install it on the first one is the software so it will ask you about installed software you'll tell it your C Drive wherever you want in your C Drive the second thing it'll ask you is where it would like to install with DDL files or dll files that's one or two which is the sort of like the same file as a VST plug-in uses so when you've got your da W open it'll ask you where this file is so it knows where to load the instrument from so it's always a good idea to also install that to your C Drive as well and then the final thing is the sample content which is the large portion of the software this is what you want to be installing onto a separate drive completely so I have a dedicated hard drive just for sample library content now there's a good reason why obviously does do good reasons a it reduces a bottleneck and B if if you do meter you know this dies and you need to reinstall everything then you're not going to be spending days and days installing sample content to your hard drive because you're got it on a separate drive and the beauty of this is when I come to reinstall things if anything went fatally wrong which it hasn't done yet touchwood for many years and then all you need to do is install the software which takes seconds and then you just point the software to where you've got the the sample content installed and it'll just work so that's that's another bonus to splitting things across your hard drives so in terms of the basics it's always a good idea to have at least three hard drives in your computer and as this will improve the performance reduce the bottlenecks and you know things will be running a lot more smoothly for when you're creating your chains so that's pretty much it for this video guys it's just a very brief basic overview of how you should be installing things and where they should be installed to and now you should be saving your projects. |
| json metadata | {"tags":["daw","ssd","hard","disk","audio"],"image":["https://cdn.steemitimages.com/DQma8va29ff7TDUBYWoLrDnjFtBnUW3WP6zZtLpgjZ5YwLN/Schermata%202018-06-15%20alle%2010.47.28.png","https://cdn.steemitimages.com/DQmbQ8ai6EJdtNh6LnxnPAJkPP5dGcaeUHX5jhYuqzLb6iU/3d04ad.jpg"],"app":"steemit/0.1","format":"markdown"} |
| Transaction Info | Block #23339171/Trx e1bd85e1ecb706b0490951adb67316d36faf7fa0 |
View Raw JSON Data
{
"trx_id": "e1bd85e1ecb706b0490951adb67316d36faf7fa0",
"block": 23339171,
"trx_in_block": 18,
"op_in_trx": 0,
"virtual_op": 0,
"timestamp": "2018-06-15T09:00:27",
"op": [
"comment",
{
"parent_author": "",
"parent_permlink": "daw",
"author": "faderstudio",
"permlink": "basic-setup-hard-drives-for-audio-production-daw",
"title": "Tutorial DAW # 2 - Basic Setup Hard Drives for Audio Production DAW ( Digital Audio Workstation )",
"body": "Today we're going to be looking at something a little bit different we'll be talking about basic hard drive setup for your audio production workstation so if you if you want to learn about raid array setups how to set up backup mirrors or even more advanced things like vienna ensemble pro master slave setup then i'd suggest looking elsewhere on youtube for these because as loads of videos already out there which people have done which provide you enough information on those topics we're just going to be looking at the basic principles behind how you should be installed in your software way should be installing it to where you should be saving your files and projects to and how you should be setting up your sample libraries for audio production things that you tend to install to your operating system driver your C Drive is generally speaking all of your programs so anything like a da w e music software such as Cubase Pro Tools Logic Presonus Studio One whatever you use in that will be installed to your C Drive seems like VST plugins' eq's compresses effects all that C Drive and then when it comes to VST instruments the software side of things the program the VST instruments program will also get installed to the C Drive the reason why we don't do things like save our files to receive drive our pictures and videos or samples from our VST instruments to C Drive is there's a couple of important reasons the first major reason is that if anything ever goes wrong with your main OS Drive and it crashes and dies a horrible death or you need to clean format because you've somehow got a virus then you're going to lose all of this information and you're going to have to reinstall all your software and your sample content but the other thing is that you're going to lose all your project files your pictures in the videos and stuff so it's never a good idea to install everything to one drive.\n\n\n\nAnother reason being is that with hard drives you have they have this thing called read and write so depending on the performance of your hard drive if it's an SSD or if it's a mechanical hard drive there is a to how much data it can access at any given moment if you have too many things on one hard drive and it's trying to access all this different information here in one go you get this thing called a bottleneck now think of it as a tunnel and this is the big blob of everything trying to fit through that tunnel it's going to hit the sizing is just going to drip through a bit by a bit so the performance of your hard drive is going to be dead slow so if you have it all methodical with things and you install them separately across different hard drives when it comes to this tunnel this stuff is just going to work it's going to get loaded into Ram and it's just going to work nice and easy no no qualms no traffic no no it's just to be nice and quick so with your operating system you see drive it's just mainly all the software side of things that you're going to be installing or anything like your personal files your videos your pictures your projects and all that that's going to get installed to a separate drive which most of you will have if you've bought an entry-level PC they tend to be mechanical hard drives for this you can use SSDs if you want SSDs are always quicker much more efficient but for you know storage mechanical hard drives are fine the good thing about is that they're cheap so you'll probably have something like a one terabyte heart keep it up at t6 it not only have like a one terabyte two terabyte something mother it's always a good idea to have very\n\n\nlarge storage drives if you know you're going to be storing a lot of things on there so with mechanical hard drives are a lot cheaper than SSD so you get more storage capacity for the price so it's pretty self-explanatory really anything that's not software related so audio files for your projects or pictures or videos anything you can store them to install them save them to a projects drive now if you're a little bit more kind of anal about it for lack of a better word you can have a separate drive so I have a separate Drive and I have another mechanical hard drive which I store all my project files on and then the rest of Italy pictures and videos in that I store on a separate drive so I have two drives for storage and just because of how I work I do a bit of video editing software my setup a little bit different now when it comes to sample libraries to a different story altogether with sample libraries I always recommend getting an SSD Drive just because the sheer amount of samples which have been shifted across the hard drive when you're screaming them from the disk in your da W is ridiculous it's mind-boggling like one note of an instrument could be like a thousand samples so when you think about having lots of instruments loaded up in a session and you playing all these different samples especially high-end sample libraries and you're going to need a very quick hard drive which it's got a decent sized capacity to handle all these things on or you can get multiple smaller versions of hard drives and break them down that way across the hard drive so when you're installing a VST instrument like an orchestral library or an O guitar library something matter you'll find that there's three different stages to install it on the first one is the software so it will ask you about installed software you'll tell it your C Drive wherever you want in your C Drive the second thing it'll ask you is where it would like to install with DDL files or dll files that's one or two which is the sort of like the same file as a VST plug-in uses so when you've got your da W open it'll ask you where this file is so it knows where to load the instrument from so it's always a good idea to also install that to your C Drive as well and then the final thing is the sample content which is the large portion of the software this is what you want to be installing onto a separate drive completely so I have a dedicated hard drive just for sample library content now there's a good reason why obviously does do good reasons a it reduces a bottleneck and B if if you do meter you know this dies and you need to reinstall everything then you're not going to be spending days and days installing sample content to your hard drive because you're got it on a separate drive and the beauty of this is when I come to reinstall things if anything went fatally wrong which it hasn't done yet touchwood for many years and then all you need to do is install the software which takes seconds and then you just point the software to where you've got the the sample content installed and it'll just work so that's that's another bonus to splitting things across your hard drives so in terms of the basics it's always a good idea to have at least three hard drives in your computer and as this will improve the performance reduce the bottlenecks and you know things will be running a lot more smoothly for when you're creating your chains so that's pretty much it for this video guys it's just a very brief basic overview of how you should be installing things and where they should be installed to and now you should be saving your projects.",
"json_metadata": "{\"tags\":[\"daw\",\"ssd\",\"hard\",\"disk\",\"audio\"],\"image\":[\"https://cdn.steemitimages.com/DQma8va29ff7TDUBYWoLrDnjFtBnUW3WP6zZtLpgjZ5YwLN/Schermata%202018-06-15%20alle%2010.47.28.png\",\"https://cdn.steemitimages.com/DQmbQ8ai6EJdtNh6LnxnPAJkPP5dGcaeUHX5jhYuqzLb6iU/3d04ad.jpg\"],\"app\":\"steemit/0.1\",\"format\":\"markdown\"}"
}
]
}faderstudiopublished a new post: external-hard-drives-and-your-daw2018/06/15 09:00:09
faderstudiopublished a new post: external-hard-drives-and-your-daw
2018/06/15 09:00:09
| parent author | |
| parent permlink | daw |
| author | faderstudio |
| permlink | external-hard-drives-and-your-daw |
| title | Tutorial DAW # 1 - External Hard Drives and DAW ( Digital Audio Workstation ) |
| body | I want to talk about external hard drives and how they can be extremely advantageous to those of you who are working in the studio with audio whether you're a producer a mix engineer a sound designer anything that you do that has a demanding da W you want to have external hard drives in your setup they're going to make your workflow a lot smoother and more efficient they will make your DAW have much better performance they're gonna minimize recording latency and they're going to give you a solid backup that you can rely on in case something goes wrong with one of your drives so let me tell you a little bit about my own personal setup with my external hard drives in the studio. 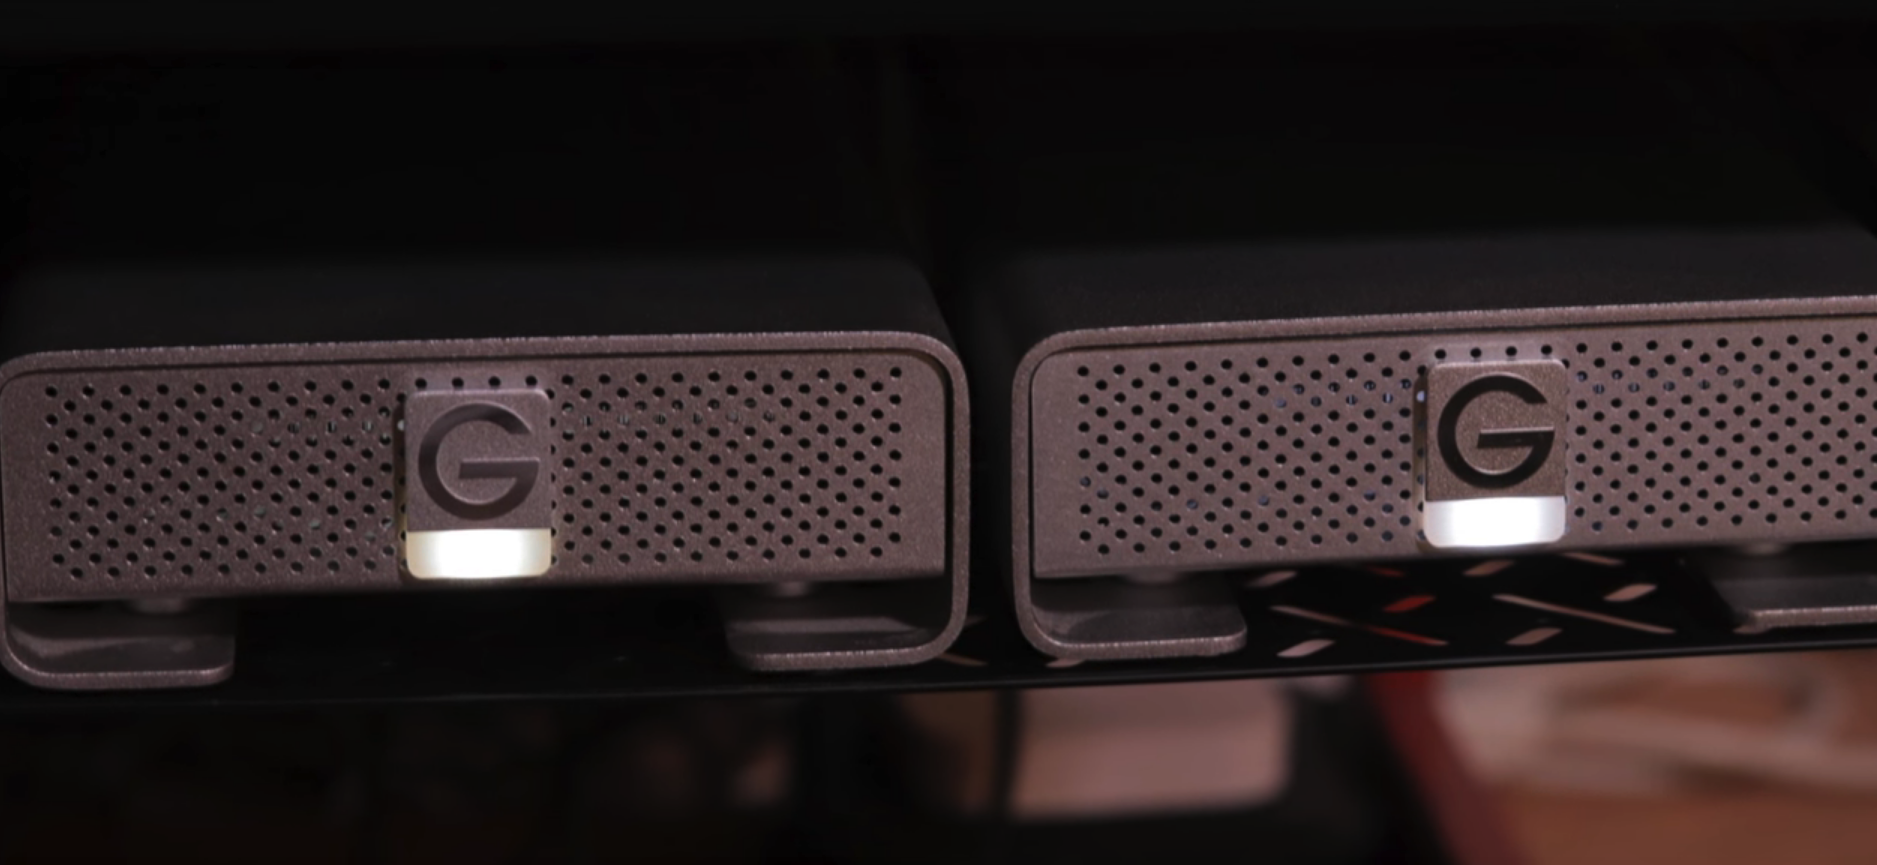 I have two identical two terabyte drives that are clones of each other in terms of the information on them I have all of my session files all of my sample libraries all that stuff mixing sessions production sessions they are stored on the external so if anything went wrong with the internal drive of my computer the only thing on there is the software it self so that and the plugins which I have a backup for that I'll tell you about that in just a second but I want that to rely on just running the OS keeping the DAW going smoothly I don't want to fill that up with a lot of files and make that one really slow and bogged down so if you've got a backup like this or a clone of your main drive with all your data on it if one of those drives fails I'm immediately able to work and pick up right where I left off no matter what so while the other one I'm getting that replaced or I'm getting it fixed I have all the data on another drive to where I'm not stuck not working so the third external drive I have is a one terabyte USB drive and it's not particularly fast or high-performance like these others are but it is just used for a time machine back up or a complete machine back up of my system computer so if something happened with that drive I have a copy that I could at least back up to my laptop and have the setup with all my software all my plugins saved to this and I back this up daily now as far as connectivity I do not have a newer machine I'm using an older iMac so I don't actually have Thunderbolt or even USB 3.0 on this computer the drives 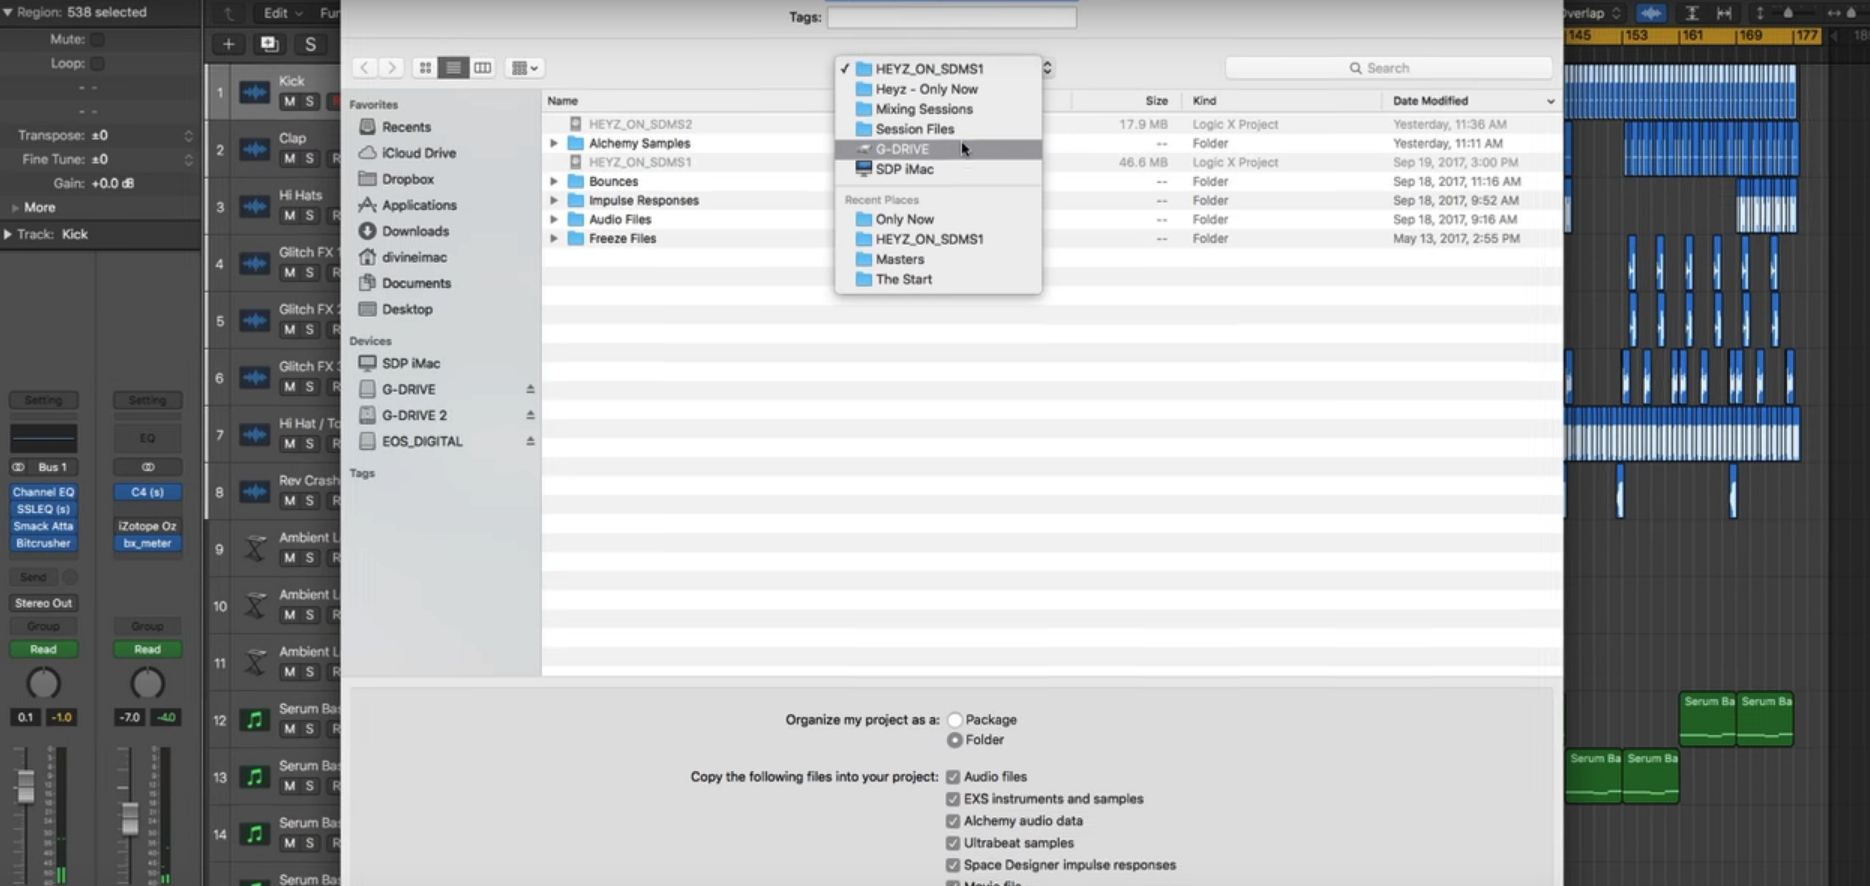 I have utilized USB 2.0 I think they could use 3.0 if I had it but right now I'mn using that older technology I would recommend if you have a computer with Thunderbolt or USB 3.0 absolutely take advantage of an external drive that has his connectivity that's going to give you even faster read and write times from your DAW and with your samples so you're gonna get a lot better performance one other thing you may want to consider with external drives is going with a solid-state drive or SSD external now I do not have an SSD at this time but it's something that I'm definitely considering the reasons for it being number one these drives with the the mechanical physical aspects of them they are a little bit loud there's fans in these and so I'm recording next to my computer that's always a concern and so sometimes I have to turn those off just to keep things nice and quiet also the SSDs are going to give you much better performance again they're going to be very fast especially if you have that newer connectivity technology like thunderbolt like USB 3.0 they are quite a bit more expensive than the older technology however moving forward they are going to be the way to go in terms of performance alright so that's a couple of quick thoughts on using external hard drives with your DAW. I can promise you if you're not utilizing this right now as soon as you start saving your sessions and saving a lot of your audio content onto the external it's going to make your DAW run so much better and keep your workflow a lot smoother and also keep your backups more consistent and have you better organized.  |
| json metadata | {"tags":["daw","ssd","audio","hard","disk"],"image":["https://cdn.steemitimages.com/DQmZM1JPKxyJeN4mRw196ivVf6haCkurh4D6NNjCvMjXPQZ/Schermata%202018-06-15%20alle%2010.22.15.png","https://cdn.steemitimages.com/DQmeNkSsfaVoxrwJxW5oVayNadCT7qF1kVg5DnQmWRz7iRE/Schermata%202018-06-15%20alle%2010.22.05.png","https://cdn.steemitimages.com/DQmPuwzz3dFX2YNXiBYfght4m2xuCc46dn3vDvGNZyAuB35/Schermata%202018-06-15%20alle%2010.22.50.png"],"app":"steemit/0.1","format":"markdown"} |
| Transaction Info | Block #23339165/Trx acbb68a06c379a76a363385e21d3ea854ece2ece |
View Raw JSON Data
{
"trx_id": "acbb68a06c379a76a363385e21d3ea854ece2ece",
"block": 23339165,
"trx_in_block": 40,
"op_in_trx": 0,
"virtual_op": 0,
"timestamp": "2018-06-15T09:00:09",
"op": [
"comment",
{
"parent_author": "",
"parent_permlink": "daw",
"author": "faderstudio",
"permlink": "external-hard-drives-and-your-daw",
"title": "Tutorial DAW # 1 - External Hard Drives and DAW ( Digital Audio Workstation )",
"body": "I want to talk about external hard drives and how they\ncan be extremely advantageous to those of you who are working in the studio\nwith audio whether you're a producer a mix engineer a sound designer anything\nthat you do that has a demanding da W you want to have external hard drives in your setup they're going to make your workflow a lot smoother and more\nefficient they will make your DAW have much better performance they're gonna\nminimize recording latency and they're going to give you a solid backup that\nyou can rely on in case something goes wrong with one of your drives so let me tell you a little bit about my own personal setup with my external hard\ndrives in the studio.\n\n\n\nI have two identical two terabyte drives that are\nclones of each other in terms of the information on them I have all of my\nsession files all of my sample libraries all that stuff mixing sessions\nproduction sessions they are stored on the external so if anything went wrong\nwith the internal drive of my computer the only thing on there is the software it self so that and the plugins which I have a backup for that I'll tell you about that in just a second but I want that to rely on just running the OS keeping the DAW going smoothly I don't want to fill that up with a lot of files and make that one really slow and bogged down so if you've got a backup like this or a clone of your main drive with all your data on it if one of those drives fails I'm immediately able to work and pick up right where I left off no matter what so while the other one I'm getting that replaced or I'm getting it fixed I have all the data on another drive to where I'm not stuck not working so the third external drive I have is a one terabyte USB drive and it's not particularly fast or high-performance like these others are but it is just used for a time machine back up or a complete machine back up of my system computer so if something happened with that drive I have a copy that I could at least back up to my laptop and have the setup with all my software all my plugins saved to this and I back this up daily now as far as connectivity I do not have a newer machine I'm using an older iMac so I don't actually have Thunderbolt or even USB 3.0 on this computer the drives \n\n\n\nI have utilized USB 2.0 I think they could use 3.0 if I had it but right now I'mn using that older technology I would recommend if you have a computer with Thunderbolt or USB 3.0 absolutely take advantage of an external drive that has his connectivity that's going to give you even faster read and write times from your DAW and with your samples so you're gonna get a lot better\nperformance one other thing you may want to consider with external drives is\ngoing with a solid-state drive or SSD external now I do not have an SSD at\nthis time but it's something that I'm definitely considering the reasons for\nit being number one these drives with the the mechanical physical aspects of\nthem they are a little bit loud there's fans in these and so I'm recording next to my computer that's always a concern and so sometimes I have to turn those off just to keep things nice and quiet also the SSDs are going to give you much better performance again they're going to be very fast especially if you have that newer connectivity technology like thunderbolt like USB 3.0 they are quite a bit more expensive than the older technology however moving forward they are going to be the way to go in terms of performance alright so that's a couple of quick thoughts on using external hard drives with your DAW. I can promise you if you're not utilizing this right now as soon as you start saving your sessions and saving a lot of your audio content onto the external it's going to make your DAW run so much better and keep your workflow a lot smoother and also keep your backups more consistent and have you better organized.\n\n",
"json_metadata": "{\"tags\":[\"daw\",\"ssd\",\"audio\",\"hard\",\"disk\"],\"image\":[\"https://cdn.steemitimages.com/DQmZM1JPKxyJeN4mRw196ivVf6haCkurh4D6NNjCvMjXPQZ/Schermata%202018-06-15%20alle%2010.22.15.png\",\"https://cdn.steemitimages.com/DQmeNkSsfaVoxrwJxW5oVayNadCT7qF1kVg5DnQmWRz7iRE/Schermata%202018-06-15%20alle%2010.22.05.png\",\"https://cdn.steemitimages.com/DQmPuwzz3dFX2YNXiBYfght4m2xuCc46dn3vDvGNZyAuB35/Schermata%202018-06-15%20alle%2010.22.50.png\"],\"app\":\"steemit/0.1\",\"format\":\"markdown\"}"
}
]
}faderstudiopublished a new post: basic-setup-hard-drives-for-audio-production-daw2018/06/15 08:55:00
faderstudiopublished a new post: basic-setup-hard-drives-for-audio-production-daw
2018/06/15 08:55:00
| parent author | |
| parent permlink | daw |
| author | faderstudio |
| permlink | basic-setup-hard-drives-for-audio-production-daw |
| title | Basic Setup Hard Drives for Audio Production DAW ( Digital Audio Workstation ) |
| body | Today we're going to be looking at something a little bit different we'll be talking about basic hard drive setup for your audio production workstation so if you if you want to learn about raid array setups how to set up backup mirrors or even more advanced things like vienna ensemble pro master slave setup then i'd suggest looking elsewhere on youtube for these because as loads of videos already out there which people have done which provide you enough information on those topics we're just going to be looking at the basic principles behind how you should be installed in your software way should be installing it to where you should be saving your files and projects to and how you should be setting up your sample libraries for audio production things that you tend to install to your operating system driver your C Drive is generally speaking all of your programs so anything like a da w e music software such as Cubase Pro Tools Logic Presonus Studio One whatever you use in that will be installed to your C Drive seems like VST plugins' eq's compresses effects all that C Drive and then when it comes to VST instruments the software side of things the program the VST instruments program will also get installed to the C Drive the reason why we don't do things like save our files to receive drive our pictures and videos or samples from our VST instruments to C Drive is there's a couple of important reasons the first major reason is that if anything ever goes wrong with your main OS Drive and it crashes and dies a horrible death or you need to clean format because you've somehow got a virus then you're going to lose all of this information and you're going to have to reinstall all your software and your sample content but the other thing is that you're going to lose all your project files your pictures in the videos and stuff so it's never a good idea to install everything to one drive.  Another reason being is that with hard drives you have they have this thing called read and write so depending on the performance of your hard drive if it's an SSD or if it's a mechanical hard drive there is a to how much data it can access at any given moment if you have too many things on one hard drive and it's trying to access all this different information here in one go you get this thing called a bottleneck now think of it as a tunnel and this is the big blob of everything trying to fit through that tunnel it's going to hit the sizing is just going to drip through a bit by a bit so the performance of your hard drive is going to be dead slow so if you have it all methodical with things and you install them separately across different hard drives when it comes to this tunnel this stuff is just going to work it's going to get loaded into Ram and it's just going to work nice and easy no no qualms no traffic no no it's just to be nice and quick so with your operating system you see drive it's just mainly all the software side of things that you're going to be installing or anything like your personal files your videos your pictures your projects and all that that's going to get installed to a separate drive which most of you will have if you've bought an entry-level PC they tend to be mechanical hard drives for this you can use SSDs if you want SSDs are always quicker much more efficient but for you know storage mechanical hard drives are fine the good thing about is that they're cheap so you'll probably have something like a one terabyte heart keep it up at t6 it not only have like a one terabyte two terabyte something mother it's always a good idea to have very  large storage drives if you know you're going to be storing a lot of things on there so with mechanical hard drives are a lot cheaper than SSD so you get more storage capacity for the price so it's pretty self-explanatory really anything that's not software related so audio files for your projects or pictures or videos anything you can store them to install them save them to a projects drive now if you're a little bit more kind of anal about it for lack of a better word you can have a separate drive so I have a separate Drive and I have another mechanical hard drive which I store all my project files on and then the rest of Italy pictures and videos in that I store on a separate drive so I have two drives for storage and just because of how I work I do a bit of video editing software my setup a little bit different now when it comes to sample libraries to a different story altogether with sample libraries I always recommend getting an SSD Drive just because the sheer amount of samples which have been shifted across the hard drive when you're screaming them from the disk in your da W is ridiculous it's mind-boggling like one note of an instrument could be like a thousand samples so when you think about having lots of instruments loaded up in a session and you playing all these different samples especially high-end sample libraries and you're going to need a very quick hard drive which it's got a decent sized capacity to handle all these things on or you can get multiple smaller versions of hard drives and break them down that way across the hard drive so when you're installing a VST instrument like an orchestral library or an O guitar library something matter you'll find that there's three different stages to install it on the first one is the software so it will ask you about installed software you'll tell it your C Drive wherever you want in your C Drive the second thing it'll ask you is where it would like to install with DDL files or dll files that's one or two which is the sort of like the same file as a VST plug-in uses so when you've got your da W open it'll ask you where this file is so it knows where to load the instrument from so it's always a good idea to also install that to your C Drive as well and then the final thing is the sample content which is the large portion of the software this is what you want to be installing onto a separate drive completely so I have a dedicated hard drive just for sample library content now there's a good reason why obviously does do good reasons a it reduces a bottleneck and B if if you do meter you know this dies and you need to reinstall everything then you're not going to be spending days and days installing sample content to your hard drive because you're got it on a separate drive and the beauty of this is when I come to reinstall things if anything went fatally wrong which it hasn't done yet touchwood for many years and then all you need to do is install the software which takes seconds and then you just point the software to where you've got the the sample content installed and it'll just work so that's that's another bonus to splitting things across your hard drives so in terms of the basics it's always a good idea to have at least three hard drives in your computer and as this will improve the performance reduce the bottlenecks and you know things will be running a lot more smoothly for when you're creating your chains so that's pretty much it for this video guys it's just a very brief basic overview of how you should be installing things and where they should be installed to and now you should be saving your projects. |
| json metadata | {"tags":["daw","ssd","hard","disk","audio"],"image":["https://cdn.steemitimages.com/DQma8va29ff7TDUBYWoLrDnjFtBnUW3WP6zZtLpgjZ5YwLN/Schermata%202018-06-15%20alle%2010.47.28.png","https://cdn.steemitimages.com/DQmbQ8ai6EJdtNh6LnxnPAJkPP5dGcaeUHX5jhYuqzLb6iU/3d04ad.jpg"],"app":"steemit/0.1","format":"markdown"} |
| Transaction Info | Block #23339062/Trx 82f431d9e29e67438e0cf1f1a7ac0a467f4ae197 |
View Raw JSON Data
{
"trx_id": "82f431d9e29e67438e0cf1f1a7ac0a467f4ae197",
"block": 23339062,
"trx_in_block": 7,
"op_in_trx": 0,
"virtual_op": 0,
"timestamp": "2018-06-15T08:55:00",
"op": [
"comment",
{
"parent_author": "",
"parent_permlink": "daw",
"author": "faderstudio",
"permlink": "basic-setup-hard-drives-for-audio-production-daw",
"title": "Basic Setup Hard Drives for Audio Production DAW ( Digital Audio Workstation )",
"body": "Today we're going to be looking at something a little bit different we'll be talking about basic hard drive setup for your audio production workstation so if you if you want to learn about raid array setups how to set up backup mirrors or even more advanced things like vienna ensemble pro master slave setup then i'd suggest looking elsewhere on youtube for these because as loads of videos already out there which people have done which provide you enough information on those topics we're just going to be looking at the basic principles behind how you should be installed in your software way should be installing it to where you should be saving your files and projects to and how you should be setting up your sample libraries for audio production things that you tend to install to your operating system driver your C Drive is generally speaking all of your programs so anything like a da w e music software such as Cubase Pro Tools Logic Presonus Studio One whatever you use in that will be installed to your C Drive seems like VST plugins' eq's compresses effects all that C Drive and then when it comes to VST instruments the software side of things the program the VST instruments program will also get installed to the C Drive the reason why we don't do things like save our files to receive drive our pictures and videos or samples from our VST instruments to C Drive is there's a couple of important reasons the first major reason is that if anything ever goes wrong with your main OS Drive and it crashes and dies a horrible death or you need to clean format because you've somehow got a virus then you're going to lose all of this information and you're going to have to reinstall all your software and your sample content but the other thing is that you're going to lose all your project files your pictures in the videos and stuff so it's never a good idea to install everything to one drive.\n\n\n\nAnother reason being is that with hard drives you have they have this thing called read and write so depending on the performance of your hard drive if it's an SSD or if it's a mechanical hard drive there is a to how much data it can access at any given moment if you have too many things on one hard drive and it's trying to access all this different information here in one go you get this thing called a bottleneck now think of it as a tunnel and this is the big blob of everything trying to fit through that tunnel it's going to hit the sizing is just going to drip through a bit by a bit so the performance of your hard drive is going to be dead slow so if you have it all methodical with things and you install them separately across different hard drives when it comes to this tunnel this stuff is just going to work it's going to get loaded into Ram and it's just going to work nice and easy no no qualms no traffic no no it's just to be nice and quick so with your operating system you see drive it's just mainly all the software side of things that you're going to be installing or anything like your personal files your videos your pictures your projects and all that that's going to get installed to a separate drive which most of you will have if you've bought an entry-level PC they tend to be mechanical hard drives for this you can use SSDs if you want SSDs are always quicker much more efficient but for you know storage mechanical hard drives are fine the good thing about is that they're cheap so you'll probably have something like a one terabyte heart keep it up at t6 it not only have like a one terabyte two terabyte something mother it's always a good idea to have very\n\n\nlarge storage drives if you know you're going to be storing a lot of things on there so with mechanical hard drives are a lot cheaper than SSD so you get more storage capacity for the price so it's pretty self-explanatory really anything that's not software related so audio files for your projects or pictures or videos anything you can store them to install them save them to a projects drive now if you're a little bit more kind of anal about it for lack of a better word you can have a separate drive so I have a separate Drive and I have another mechanical hard drive which I store all my project files on and then the rest of Italy pictures and videos in that I store on a separate drive so I have two drives for storage and just because of how I work I do a bit of video editing software my setup a little bit different now when it comes to sample libraries to a different story altogether with sample libraries I always recommend getting an SSD Drive just because the sheer amount of samples which have been shifted across the hard drive when you're screaming them from the disk in your da W is ridiculous it's mind-boggling like one note of an instrument could be like a thousand samples so when you think about having lots of instruments loaded up in a session and you playing all these different samples especially high-end sample libraries and you're going to need a very quick hard drive which it's got a decent sized capacity to handle all these things on or you can get multiple smaller versions of hard drives and break them down that way across the hard drive so when you're installing a VST instrument like an orchestral library or an O guitar library something matter you'll find that there's three different stages to install it on the first one is the software so it will ask you about installed software you'll tell it your C Drive wherever you want in your C Drive the second thing it'll ask you is where it would like to install with DDL files or dll files that's one or two which is the sort of like the same file as a VST plug-in uses so when you've got your da W open it'll ask you where this file is so it knows where to load the instrument from so it's always a good idea to also install that to your C Drive as well and then the final thing is the sample content which is the large portion of the software this is what you want to be installing onto a separate drive completely so I have a dedicated hard drive just for sample library content now there's a good reason why obviously does do good reasons a it reduces a bottleneck and B if if you do meter you know this dies and you need to reinstall everything then you're not going to be spending days and days installing sample content to your hard drive because you're got it on a separate drive and the beauty of this is when I come to reinstall things if anything went fatally wrong which it hasn't done yet touchwood for many years and then all you need to do is install the software which takes seconds and then you just point the software to where you've got the the sample content installed and it'll just work so that's that's another bonus to splitting things across your hard drives so in terms of the basics it's always a good idea to have at least three hard drives in your computer and as this will improve the performance reduce the bottlenecks and you know things will be running a lot more smoothly for when you're creating your chains so that's pretty much it for this video guys it's just a very brief basic overview of how you should be installing things and where they should be installed to and now you should be saving your projects.",
"json_metadata": "{\"tags\":[\"daw\",\"ssd\",\"hard\",\"disk\",\"audio\"],\"image\":[\"https://cdn.steemitimages.com/DQma8va29ff7TDUBYWoLrDnjFtBnUW3WP6zZtLpgjZ5YwLN/Schermata%202018-06-15%20alle%2010.47.28.png\",\"https://cdn.steemitimages.com/DQmbQ8ai6EJdtNh6LnxnPAJkPP5dGcaeUHX5jhYuqzLb6iU/3d04ad.jpg\"],\"app\":\"steemit/0.1\",\"format\":\"markdown\"}"
}
]
}faderstudiopublished a new post: basic-setup-hard-drives-for-audio-production-daw2018/06/15 08:54:12
faderstudiopublished a new post: basic-setup-hard-drives-for-audio-production-daw
2018/06/15 08:54:12
| parent author | |
| parent permlink | daw |
| author | faderstudio |
| permlink | basic-setup-hard-drives-for-audio-production-daw |
| title | Basic Setup Hard Drives for Audio Production DAW |
| body | Today we're going to be looking at something a little bit different we'll be talking about basic hard drive setup for your audio production workstation so if you if you want to learn about raid array setups how to set up backup mirrors or even more advanced things like vienna ensemble pro master slave setup then i'd suggest looking elsewhere on youtube for these because as loads of videos already out there which people have done which provide you enough information on those topics we're just going to be looking at the basic principles behind how you should be installed in your software way should be installing it to where you should be saving your files and projects to and how you should be setting up your sample libraries for audio production things that you tend to install to your operating system driver your C Drive is generally speaking all of your programs so anything like a da w e music software such as Cubase Pro Tools Logic Presonus Studio One whatever you use in that will be installed to your C Drive seems like VST plugins' eq's compresses effects all that C Drive and then when it comes to VST instruments the software side of things the program the VST instruments program will also get installed to the C Drive the reason why we don't do things like save our files to receive drive our pictures and videos or samples from our VST instruments to C Drive is there's a couple of important reasons the first major reason is that if anything ever goes wrong with your main OS Drive and it crashes and dies a horrible death or you need to clean format because you've somehow got a virus then you're going to lose all of this information and you're going to have to reinstall all your software and your sample content but the other thing is that you're going to lose all your project files your pictures in the videos and stuff so it's never a good idea to install everything to one drive.  Another reason being is that with hard drives you have they have this thing called read and write so depending on the performance of your hard drive if it's an SSD or if it's a mechanical hard drive there is a to how much data it can access at any given moment if you have too many things on one hard drive and it's trying to access all this different information here in one go you get this thing called a bottleneck now think of it as a tunnel and this is the big blob of everything trying to fit through that tunnel it's going to hit the sizing is just going to drip through a bit by a bit so the performance of your hard drive is going to be dead slow so if you have it all methodical with things and you install them separately across different hard drives when it comes to this tunnel this stuff is just going to work it's going to get loaded into Ram and it's just going to work nice and easy no no qualms no traffic no no it's just to be nice and quick so with your operating system you see drive it's just mainly all the software side of things that you're going to be installing or anything like your personal files your videos your pictures your projects and all that that's going to get installed to a separate drive which most of you will have if you've bought an entry-level PC they tend to be mechanical hard drives for this you can use SSDs if you want SSDs are always quicker much more efficient but for you know storage mechanical hard drives are fine the good thing about is that they're cheap so you'll probably have something like a one terabyte heart keep it up at t6 it not only have like a one terabyte two terabyte something mother it's always a good idea to have very  large storage drives if you know you're going to be storing a lot of things on there so with mechanical hard drives are a lot cheaper than SSD so you get more storage capacity for the price so it's pretty self-explanatory really anything that's not software related so audio files for your projects or pictures or videos anything you can store them to install them save them to a projects drive now if you're a little bit more kind of anal about it for lack of a better word you can have a separate drive so I have a separate Drive and I have another mechanical hard drive which I store all my project files on and then the rest of Italy pictures and videos in that I store on a separate drive so I have two drives for storage and just because of how I work I do a bit of video editing software my setup a little bit different now when it comes to sample libraries to a different story altogether with sample libraries I always recommend getting an SSD Drive just because the sheer amount of samples which have been shifted across the hard drive when you're screaming them from the disk in your da W is ridiculous it's mind-boggling like one note of an instrument could be like a thousand samples so when you think about having lots of instruments loaded up in a session and you playing all these different samples especially high-end sample libraries and you're going to need a very quick hard drive which it's got a decent sized capacity to handle all these things on or you can get multiple smaller versions of hard drives and break them down that way across the hard drive so when you're installing a VST instrument like an orchestral library or an O guitar library something matter you'll find that there's three different stages to install it on the first one is the software so it will ask you about installed software you'll tell it your C Drive wherever you want in your C Drive the second thing it'll ask you is where it would like to install with DDL files or dll files that's one or two which is the sort of like the same file as a VST plug-in uses so when you've got your da W open it'll ask you where this file is so it knows where to load the instrument from so it's always a good idea to also install that to your C Drive as well and then the final thing is the sample content which is the large portion of the software this is what you want to be installing onto a separate drive completely so I have a dedicated hard drive just for sample library content now there's a good reason why obviously does do good reasons a it reduces a bottleneck and B if if you do meter you know this dies and you need to reinstall everything then you're not going to be spending days and days installing sample content to your hard drive because you're got it on a separate drive and the beauty of this is when I come to reinstall things if anything went fatally wrong which it hasn't done yet touchwood for many years and then all you need to do is install the software which takes seconds and then you just point the software to where you've got the the sample content installed and it'll just work so that's that's another bonus to splitting things across your hard drives so in terms of the basics it's always a good idea to have at least three hard drives in your computer and as this will improve the performance reduce the bottlenecks and you know things will be running a lot more smoothly for when you're creating your chains so that's pretty much it for this video guys it's just a very brief basic overview of how you should be installing things and where they should be installed to and now you should be saving your projects. |
| json metadata | {"tags":["daw","ssd","hard","disk","audio"],"image":["https://cdn.steemitimages.com/DQma8va29ff7TDUBYWoLrDnjFtBnUW3WP6zZtLpgjZ5YwLN/Schermata%202018-06-15%20alle%2010.47.28.png","https://cdn.steemitimages.com/DQmbQ8ai6EJdtNh6LnxnPAJkPP5dGcaeUHX5jhYuqzLb6iU/3d04ad.jpg"],"app":"steemit/0.1","format":"markdown"} |
| Transaction Info | Block #23339046/Trx 8939e9b2f2f7e87ff5db44f5c38e047c92779d5a |
View Raw JSON Data
{
"trx_id": "8939e9b2f2f7e87ff5db44f5c38e047c92779d5a",
"block": 23339046,
"trx_in_block": 36,
"op_in_trx": 0,
"virtual_op": 0,
"timestamp": "2018-06-15T08:54:12",
"op": [
"comment",
{
"parent_author": "",
"parent_permlink": "daw",
"author": "faderstudio",
"permlink": "basic-setup-hard-drives-for-audio-production-daw",
"title": "Basic Setup Hard Drives for Audio Production DAW",
"body": "Today we're going to be looking at something a little bit different we'll be talking about basic hard drive setup for your audio production workstation so if you if you want to learn about raid array setups how to set up backup mirrors or even more advanced things like vienna ensemble pro master slave setup then i'd suggest looking elsewhere on youtube for these because as loads of videos already out there which people have done which provide you enough information on those topics we're just going to be looking at the basic principles behind how you should be installed in your software way should be installing it to where you should be saving your files and projects to and how you should be setting up your sample libraries for audio production things that you tend to install to your operating system driver your C Drive is generally speaking all of your programs so anything like a da w e music software such as Cubase Pro Tools Logic Presonus Studio One whatever you use in that will be installed to your C Drive seems like VST plugins' eq's compresses effects all that C Drive and then when it comes to VST instruments the software side of things the program the VST instruments program will also get installed to the C Drive the reason why we don't do things like save our files to receive drive our pictures and videos or samples from our VST instruments to C Drive is there's a couple of important reasons the first major reason is that if anything ever goes wrong with your main OS Drive and it crashes and dies a horrible death or you need to clean format because you've somehow got a virus then you're going to lose all of this information and you're going to have to reinstall all your software and your sample content but the other thing is that you're going to lose all your project files your pictures in the videos and stuff so it's never a good idea to install everything to one drive.\n\n\n\nAnother reason being is that with hard drives you have they have this thing called read and write so depending on the performance of your hard drive if it's an SSD or if it's a mechanical hard drive there is a to how much data it can access at any given moment if you have too many things on one hard drive and it's trying to access all this different information here in one go you get this thing called a bottleneck now think of it as a tunnel and this is the big blob of everything trying to fit through that tunnel it's going to hit the sizing is just going to drip through a bit by a bit so the performance of your hard drive is going to be dead slow so if you have it all methodical with things and you install them separately across different hard drives when it comes to this tunnel this stuff is just going to work it's going to get loaded into Ram and it's just going to work nice and easy no no qualms no traffic no no it's just to be nice and quick so with your operating system you see drive it's just mainly all the software side of things that you're going to be installing or anything like your personal files your videos your pictures your projects and all that that's going to get installed to a separate drive which most of you will have if you've bought an entry-level PC they tend to be mechanical hard drives for this you can use SSDs if you want SSDs are always quicker much more efficient but for you know storage mechanical hard drives are fine the good thing about is that they're cheap so you'll probably have something like a one terabyte heart keep it up at t6 it not only have like a one terabyte two terabyte something mother it's always a good idea to have very\n\n\nlarge storage drives if you know you're going to be storing a lot of things on there so with mechanical hard drives are a lot cheaper than SSD so you get more storage capacity for the price so it's pretty self-explanatory really anything that's not software related so audio files for your projects or pictures or videos anything you can store them to install them save them to a projects drive now if you're a little bit more kind of anal about it for lack of a better word you can have a separate drive so I have a separate Drive and I have another mechanical hard drive which I store all my project files on and then the rest of Italy pictures and videos in that I store on a separate drive so I have two drives for storage and just because of how I work I do a bit of video editing software my setup a little bit different now when it comes to sample libraries to a different story altogether with sample libraries I always recommend getting an SSD Drive just because the sheer amount of samples which have been shifted across the hard drive when you're screaming them from the disk in your da W is ridiculous it's mind-boggling like one note of an instrument could be like a thousand samples so when you think about having lots of instruments loaded up in a session and you playing all these different samples especially high-end sample libraries and you're going to need a very quick hard drive which it's got a decent sized capacity to handle all these things on or you can get multiple smaller versions of hard drives and break them down that way across the hard drive so when you're installing a VST instrument like an orchestral library or an O guitar library something matter you'll find that there's three different stages to install it on the first one is the software so it will ask you about installed software you'll tell it your C Drive wherever you want in your C Drive the second thing it'll ask you is where it would like to install with DDL files or dll files that's one or two which is the sort of like the same file as a VST plug-in uses so when you've got your da W open it'll ask you where this file is so it knows where to load the instrument from so it's always a good idea to also install that to your C Drive as well and then the final thing is the sample content which is the large portion of the software this is what you want to be installing onto a separate drive completely so I have a dedicated hard drive just for sample library content now there's a good reason why obviously does do good reasons a it reduces a bottleneck and B if if you do meter you know this dies and you need to reinstall everything then you're not going to be spending days and days installing sample content to your hard drive because you're got it on a separate drive and the beauty of this is when I come to reinstall things if anything went fatally wrong which it hasn't done yet touchwood for many years and then all you need to do is install the software which takes seconds and then you just point the software to where you've got the the sample content installed and it'll just work so that's that's another bonus to splitting things across your hard drives so in terms of the basics it's always a good idea to have at least three hard drives in your computer and as this will improve the performance reduce the bottlenecks and you know things will be running a lot more smoothly for when you're creating your chains so that's pretty much it for this video guys it's just a very brief basic overview of how you should be installing things and where they should be installed to and now you should be saving your projects.",
"json_metadata": "{\"tags\":[\"daw\",\"ssd\",\"hard\",\"disk\",\"audio\"],\"image\":[\"https://cdn.steemitimages.com/DQma8va29ff7TDUBYWoLrDnjFtBnUW3WP6zZtLpgjZ5YwLN/Schermata%202018-06-15%20alle%2010.47.28.png\",\"https://cdn.steemitimages.com/DQmbQ8ai6EJdtNh6LnxnPAJkPP5dGcaeUHX5jhYuqzLb6iU/3d04ad.jpg\"],\"app\":\"steemit/0.1\",\"format\":\"markdown\"}"
}
]
}faderstudiopublished a new post: external-hard-drives-and-your-daw2018/06/15 08:33:42
faderstudiopublished a new post: external-hard-drives-and-your-daw
2018/06/15 08:33:42
| parent author | |
| parent permlink | daw |
| author | faderstudio |
| permlink | external-hard-drives-and-your-daw |
| title | External Hard Drives and DAW ( Digital Audio Workstation ) |
| body | @@ -280,17 +280,17 @@ rives in -%0A + your set @@ -584,17 +584,17 @@ o let me -%0A + tell you @@ -1199,19 +1199,20 @@ software -%0A + it + self so @@ -1276,17 +1276,17 @@ tell you -%0A + about th @@ -1351,17 +1351,17 @@ g the OS -%0A + keeping @@ -1431,17 +1431,17 @@ of files -%0A + and make @@ -1513,17 +1513,17 @@ ike this -%0A + or a clo @@ -1591,17 +1591,17 @@ e drives -%0A + fails I' @@ -1671,17 +1671,17 @@ o matter -%0A + what so @@ -1751,17 +1751,17 @@ fixed I -%0A + have all @@ -1828,17 +1828,17 @@ g so the -%0A + third ex @@ -1897,17 +1897,17 @@ it's not -%0A + particul @@ -1957,17 +1957,17 @@ hers are -%0A + but it i @@ -2037,17 +2037,17 @@ ck up of -%0A + my syste @@ -2111,17 +2111,17 @@ e a copy -%0A + that I c @@ -2185,17 +2185,17 @@ h all my -%0A + software @@ -2262,17 +2262,17 @@ s far as -%0A + connecti @@ -2334,17 +2334,17 @@ Mac so I -%0A + don't ac @@ -2660,17 +2660,18 @@ now I'm -%0A +n using th @@ -2735,17 +2735,17 @@ ter with -%0A + Thunderb @@ -2814,17 +2814,17 @@ that has -%0A + his conn @@ -2889,17 +2889,17 @@ te times -%0A + from you @@ -3344,17 +3344,17 @@ ing next -%0A + to my co @@ -3421,17 +3421,17 @@ rn those -%0A + off just @@ -3501,17 +3501,17 @@ you much -%0A + better p @@ -3579,17 +3579,17 @@ you have -%0A + that new @@ -3659,17 +3659,17 @@ re quite -%0A + a bit mo @@ -3734,17 +3734,17 @@ ard they -%0A + are goin @@ -3808,17 +3808,17 @@ that's a -%0A + couple o @@ -3878,17 +3878,17 @@ our DAW. -%0A + I can pr @@ -3956,17 +3956,17 @@ ou start -%0A + saving y @@ -4034,17 +4034,17 @@ external -%0A + it's goi @@ -4110,17 +4110,17 @@ ow a lot -%0A + smoother |
| json metadata | {"tags":["daw","ssd","audio","hard","disk"],"image":["https://cdn.steemitimages.com/DQmZM1JPKxyJeN4mRw196ivVf6haCkurh4D6NNjCvMjXPQZ/Schermata%202018-06-15%20alle%2010.22.15.png","https://cdn.steemitimages.com/DQmeNkSsfaVoxrwJxW5oVayNadCT7qF1kVg5DnQmWRz7iRE/Schermata%202018-06-15%20alle%2010.22.05.png","https://cdn.steemitimages.com/DQmPuwzz3dFX2YNXiBYfght4m2xuCc46dn3vDvGNZyAuB35/Schermata%202018-06-15%20alle%2010.22.50.png"],"app":"steemit/0.1","format":"markdown"} |
| Transaction Info | Block #23338636/Trx 57555c2b9ca990f368d009bcd0d3913da1729330 |
View Raw JSON Data
{
  "trx_id": "57555c2b9ca990f368d009bcd0d3913da1729330",
  "block": 23338636,
  "trx_in_block": 1,
  "op_in_trx": 0,
  "virtual_op": 0,
  "timestamp": "2018-06-15T08:33:42",
  "op": [
    "comment",
    {
      "parent_author": "",
      "parent_permlink": "daw",
      "author": "faderstudio",
      "permlink": "external-hard-drives-and-your-daw",
      "title": "External Hard Drives and DAW ( Digital Audio Workstation )",
      "body": "@@ -280,17 +280,17 @@\n rives in\n-%0A\n+ \n your set\n@@ -584,17 +584,17 @@\n o let me\n-%0A\n+ \n tell you\n@@ -1199,19 +1199,20 @@\n software\n-%0A\n+ \n it\n+ \n self so \n@@ -1276,17 +1276,17 @@\n tell you\n-%0A\n+ \n about th\n@@ -1351,17 +1351,17 @@\n g the OS\n-%0A\n+ \n keeping \n@@ -1431,17 +1431,17 @@\n of files\n-%0A\n+ \n and make\n@@ -1513,17 +1513,17 @@\n ike this\n-%0A\n+ \n or a clo\n@@ -1591,17 +1591,17 @@\n e drives\n-%0A\n+ \n fails I'\n@@ -1671,17 +1671,17 @@\n o matter\n-%0A\n+ \n what so \n@@ -1751,17 +1751,17 @@\n  fixed I\n-%0A\n+ \n have all\n@@ -1828,17 +1828,17 @@\n g so the\n-%0A\n+ \n third ex\n@@ -1897,17 +1897,17 @@\n it's not\n-%0A\n+ \n particul\n@@ -1957,17 +1957,17 @@\n hers are\n-%0A\n+ \n but it i\n@@ -2037,17 +2037,17 @@\n ck up of\n-%0A\n+ \n my syste\n@@ -2111,17 +2111,17 @@\n e a copy\n-%0A\n+ \n that I c\n@@ -2185,17 +2185,17 @@\n h all my\n-%0A\n+ \n software\n@@ -2262,17 +2262,17 @@\n s far as\n-%0A\n+ \n connecti\n@@ -2334,17 +2334,17 @@\n Mac so I\n-%0A\n+ \n don't ac\n@@ -2660,17 +2660,18 @@\n  now I'm\n-%0A\n+n \n using th\n@@ -2735,17 +2735,17 @@\n ter with\n-%0A\n+ \n Thunderb\n@@ -2814,17 +2814,17 @@\n that has\n-%0A\n+ \n his conn\n@@ -2889,17 +2889,17 @@\n te times\n-%0A\n+ \n from you\n@@ -3344,17 +3344,17 @@\n ing next\n-%0A\n+ \n to my co\n@@ -3421,17 +3421,17 @@\n rn those\n-%0A\n+ \n off just\n@@ -3501,17 +3501,17 @@\n you much\n-%0A\n+ \n better p\n@@ -3579,17 +3579,17 @@\n you have\n-%0A\n+ \n that new\n@@ -3659,17 +3659,17 @@\n re quite\n-%0A\n+ \n a bit mo\n@@ -3734,17 +3734,17 @@\n ard they\n-%0A\n+ \n are goin\n@@ -3808,17 +3808,17 @@\n that's a\n-%0A\n+ \n couple o\n@@ -3878,17 +3878,17 @@\n our DAW.\n-%0A\n+ \n I can pr\n@@ -3956,17 +3956,17 @@\n ou start\n-%0A\n+ \n saving y\n@@ -4034,17 +4034,17 @@\n external\n-%0A\n+ \n it's goi\n@@ -4110,17 +4110,17 @@\n ow a lot\n-%0A\n+ \n smoother\n",
      "json_metadata": "{\"tags\":[\"daw\",\"ssd\",\"audio\",\"hard\",\"disk\"],\"image\":[\"https://cdn.steemitimages.com/DQmZM1JPKxyJeN4mRw196ivVf6haCkurh4D6NNjCvMjXPQZ/Schermata%202018-06-15%20alle%2010.22.15.png\",\"https://cdn.steemitimages.com/DQmeNkSsfaVoxrwJxW5oVayNadCT7qF1kVg5DnQmWRz7iRE/Schermata%202018-06-15%20alle%2010.22.05.png\",\"https://cdn.steemitimages.com/DQmPuwzz3dFX2YNXiBYfght4m2xuCc46dn3vDvGNZyAuB35/Schermata%202018-06-15%20alle%2010.22.50.png\"],\"app\":\"steemit/0.1\",\"format\":\"markdown\"}"
    }
  ]
}faderstudiopublished a new post: external-hard-drives-and-your-daw2018/06/15 08:30:42
faderstudiopublished a new post: external-hard-drives-and-your-daw
2018/06/15 08:30:42
| parent author | |
| parent permlink | daw |
| author | faderstudio |
| permlink | external-hard-drives-and-your-daw |
| title | External Hard Drives and DAW ( Digital Audio Workstation ) |
| body | @@ -2410,18 +2410,187 @@ drives -I %0A +%0A!%5BSchermata 2018-06-15 alle 10.22.05.png%5D(https://cdn.steemitimages.com/DQmeNkSsfaVoxrwJxW5oVayNadCT7qF1kVg5DnQmWRz7iRE/Schermata%25202018-06-15%2520alle%252010.22.05.png)%0A%0AI have uti @@ -3881,176 +3881,8 @@ AW.%0A -%0A!%5BSchermata 2018-06-15 alle 10.22.05.png%5D(https://cdn.steemitimages.com/DQmeNkSsfaVoxrwJxW5oVayNadCT7qF1kVg5DnQmWRz7iRE/Schermata%25202018-06-15%2520alle%252010.22.05.png)%0A%0A I ca @@ -4194,481 +4194,10 @@ ized +. %0A -that way so if you have any questions or comments about external hard drives feel%0Afree to leave them below if you learned anything in this video please like and%0Asubscribe and we'll talk to you soon... its money over people not%0Athe people over power about time we start speaking our generations turning%0Aback the hours they think we're apathetic, might be sympathetic if they%0Arealized we're on a new page or we stay silent and a futures fade away... gone don't let%0Athis life %0A!%5BS |
| json metadata | {"tags":["daw","ssd","audio","hard","disk"],"image":["https://cdn.steemitimages.com/DQmZM1JPKxyJeN4mRw196ivVf6haCkurh4D6NNjCvMjXPQZ/Schermata%202018-06-15%20alle%2010.22.15.png","https://cdn.steemitimages.com/DQmeNkSsfaVoxrwJxW5oVayNadCT7qF1kVg5DnQmWRz7iRE/Schermata%202018-06-15%20alle%2010.22.05.png","https://cdn.steemitimages.com/DQmPuwzz3dFX2YNXiBYfght4m2xuCc46dn3vDvGNZyAuB35/Schermata%202018-06-15%20alle%2010.22.50.png"],"app":"steemit/0.1","format":"markdown"} |
| Transaction Info | Block #23338576/Trx c1d03fe0535364062beb6cc0831b2ee20e889d2f |
View Raw JSON Data
{
  "trx_id": "c1d03fe0535364062beb6cc0831b2ee20e889d2f",
  "block": 23338576,
  "trx_in_block": 5,
  "op_in_trx": 0,
  "virtual_op": 0,
  "timestamp": "2018-06-15T08:30:42",
  "op": [
    "comment",
    {
      "parent_author": "",
      "parent_permlink": "daw",
      "author": "faderstudio",
      "permlink": "external-hard-drives-and-your-daw",
      "title": "External Hard Drives and DAW ( Digital Audio Workstation )",
      "body": "@@ -2410,18 +2410,187 @@\n  drives \n-I\n %0A\n+%0A!%5BSchermata 2018-06-15 alle 10.22.05.png%5D(https://cdn.steemitimages.com/DQmeNkSsfaVoxrwJxW5oVayNadCT7qF1kVg5DnQmWRz7iRE/Schermata%25202018-06-15%2520alle%252010.22.05.png)%0A%0AI \n have uti\n@@ -3881,176 +3881,8 @@\n AW.%0A\n-%0A!%5BSchermata 2018-06-15 alle 10.22.05.png%5D(https://cdn.steemitimages.com/DQmeNkSsfaVoxrwJxW5oVayNadCT7qF1kVg5DnQmWRz7iRE/Schermata%25202018-06-15%2520alle%252010.22.05.png)%0A%0A\n I ca\n@@ -4194,481 +4194,10 @@\n ized\n+.\n %0A\n-that way so if you have any questions or comments about external hard drives feel%0Afree to leave them below if you learned anything in this video please like and%0Asubscribe and we'll talk to you soon... its money over people not%0Athe people over power about time we start speaking our generations turning%0Aback the hours they think we're apathetic, might be sympathetic if they%0Arealized we're on a new page or we stay silent and a futures fade away... gone don't let%0Athis life\n %0A!%5BS\n",
      "json_metadata": "{\"tags\":[\"daw\",\"ssd\",\"audio\",\"hard\",\"disk\"],\"image\":[\"https://cdn.steemitimages.com/DQmZM1JPKxyJeN4mRw196ivVf6haCkurh4D6NNjCvMjXPQZ/Schermata%202018-06-15%20alle%2010.22.15.png\",\"https://cdn.steemitimages.com/DQmeNkSsfaVoxrwJxW5oVayNadCT7qF1kVg5DnQmWRz7iRE/Schermata%202018-06-15%20alle%2010.22.05.png\",\"https://cdn.steemitimages.com/DQmPuwzz3dFX2YNXiBYfght4m2xuCc46dn3vDvGNZyAuB35/Schermata%202018-06-15%20alle%2010.22.50.png\"],\"app\":\"steemit/0.1\",\"format\":\"markdown\"}"
    }
  ]
}faderstudiopublished a new post: external-hard-drives-and-your-daw2018/06/15 08:27:03
faderstudiopublished a new post: external-hard-drives-and-your-daw
2018/06/15 08:27:03
| parent author | |
| parent permlink | daw |
| author | faderstudio |
| permlink | external-hard-drives-and-your-daw |
| title | External Hard Drives and DAW ( Digital Audio Workstation ) |
| body | I want to talk about external hard drives and how they can be extremely advantageous to those of you who are working in the studio with audio whether you're a producer a mix engineer a sound designer anything that you do that has a demanding da W you want to have external hard drives in your setup they're going to make your workflow a lot smoother and more efficient they will make your DAW have much better performance they're gonna minimize recording latency and they're going to give you a solid backup that you can rely on in case something goes wrong with one of your drives so let me tell you a little bit about my own personal setup with my external hard drives in the studio.  I have two identical two terabyte drives that are clones of each other in terms of the information on them I have all of my session files all of my sample libraries all that stuff mixing sessions production sessions they are stored on the external so if anything went wrong with the internal drive of my computer the only thing on there is the software itself so that and the plugins which I have a backup for that I'll tell you about that in just a second but I want that to rely on just running the OS keeping the DAW going smoothly I don't want to fill that up with a lot of files and make that one really slow and bogged down so if you've got a backup like this or a clone of your main drive with all your data on it if one of those drives fails I'm immediately able to work and pick up right where I left off no matter what so while the other one I'm getting that replaced or I'm getting it fixed I have all the data on another drive to where I'm not stuck not working so the third external drive I have is a one terabyte USB drive and it's not particularly fast or high-performance like these others are but it is just used for a time machine back up or a complete machine back up of my system computer so if something happened with that drive I have a copy that I could at least back up to my laptop and have the setup with all my software all my plugins saved to this and I back this up daily now as far as connectivity I do not have a newer machine I'm using an older iMac so I don't actually have Thunderbolt or even USB 3.0 on this computer the drives I have utilized USB 2.0 I think they could use 3.0 if I had it but right now I'm using that older technology I would recommend if you have a computer with Thunderbolt or USB 3.0 absolutely take advantage of an external drive that has his connectivity that's going to give you even faster read and write times from your DAW and with your samples so you're gonna get a lot better performance one other thing you may want to consider with external drives is going with a solid-state drive or SSD external now I do not have an SSD at this time but it's something that I'm definitely considering the reasons for it being number one these drives with the the mechanical physical aspects of them they are a little bit loud there's fans in these and so I'm recording next to my computer that's always a concern and so sometimes I have to turn those off just to keep things nice and quiet also the SSDs are going to give you much better performance again they're going to be very fast especially if you have that newer connectivity technology like thunderbolt like USB 3.0 they are quite a bit more expensive than the older technology however moving forward they are going to be the way to go in terms of performance alright so that's a couple of quick thoughts on using external hard drives with your DAW.  I can promise you if you're not utilizing this right now as soon as you start saving your sessions and saving a lot of your audio content onto the external it's going to make your DAW run so much better and keep your workflow a lot smoother and also keep your backups more consistent and have you better organized that way so if you have any questions or comments about external hard drives feel free to leave them below if you learned anything in this video please like and subscribe and we'll talk to you soon... its money over people not the people over power about time we start speaking our generations turning back the hours they think we're apathetic, might be sympathetic if they realized we're on a new page or we stay silent and a futures fade away... gone don't let this life  |
| json metadata | {"tags":["daw","ssd","audio","hard","disk"],"image":["https://cdn.steemitimages.com/DQmZM1JPKxyJeN4mRw196ivVf6haCkurh4D6NNjCvMjXPQZ/Schermata%202018-06-15%20alle%2010.22.15.png","https://cdn.steemitimages.com/DQmeNkSsfaVoxrwJxW5oVayNadCT7qF1kVg5DnQmWRz7iRE/Schermata%202018-06-15%20alle%2010.22.05.png","https://cdn.steemitimages.com/DQmPuwzz3dFX2YNXiBYfght4m2xuCc46dn3vDvGNZyAuB35/Schermata%202018-06-15%20alle%2010.22.50.png"],"app":"steemit/0.1","format":"markdown"} |
| Transaction Info | Block #23338503/Trx d24a3054f117e531dfd3daf1622cb0da90d05065 |
View Raw JSON Data
{
"trx_id": "d24a3054f117e531dfd3daf1622cb0da90d05065",
"block": 23338503,
"trx_in_block": 17,
"op_in_trx": 0,
"virtual_op": 0,
"timestamp": "2018-06-15T08:27:03",
"op": [
"comment",
{
"parent_author": "",
"parent_permlink": "daw",
"author": "faderstudio",
"permlink": "external-hard-drives-and-your-daw",
"title": "External Hard Drives and DAW ( Digital Audio Workstation )",
"body": "I want to talk about external hard drives and how they\ncan be extremely advantageous to those of you who are working in the studio\nwith audio whether you're a producer a mix engineer a sound designer anything\nthat you do that has a demanding da W you want to have external hard drives in\nyour setup they're going to make your workflow a lot smoother and more\nefficient they will make your DAW have much better performance they're gonna\nminimize recording latency and they're going to give you a solid backup that\nyou can rely on in case something goes wrong with one of your drives so let me\ntell you a little bit about my own personal setup with my external hard\ndrives in the studio.\n\n\n\nI have two identical two terabyte drives that are\nclones of each other in terms of the information on them I have all of my\nsession files all of my sample libraries all that stuff mixing sessions\nproduction sessions they are stored on the external so if anything went wrong\nwith the internal drive of my computer the only thing on there is the software\nitself so that and the plugins which I have a backup for that I'll tell you\nabout that in just a second but I want that to rely on just running the OS\nkeeping the DAW going smoothly I don't want to fill that up with a lot of files\nand make that one really slow and bogged down so if you've got a backup like this\nor a clone of your main drive with all your data on it if one of those drives\nfails I'm immediately able to work and pick up right where I left off no matter\nwhat so while the other one I'm getting that replaced or I'm getting it fixed I\nhave all the data on another drive to where I'm not stuck not working so the\nthird external drive I have is a one terabyte USB drive and it's not\nparticularly fast or high-performance like these others are\nbut it is just used for a time machine back up or a complete machine back up of\nmy system computer so if something happened with that drive I have a copy\nthat I could at least back up to my laptop and have the setup with all my\nsoftware all my plugins saved to this and I back this up daily now as far as\nconnectivity I do not have a newer machine I'm using an older iMac so I\ndon't actually have Thunderbolt or even USB 3.0 on this computer the drives I\nhave utilized USB 2.0 I think they could use 3.0 if I had it but right now I'm\nusing that older technology I would recommend if you have a computer with\nThunderbolt or USB 3.0 absolutely take advantage of an external drive that has\nhis connectivity that's going to give you even faster read and write times\nfrom your DAW and with your samples so you're gonna get a lot better\nperformance one other thing you may want to consider with external drives is\ngoing with a solid-state drive or SSD external now I do not have an SSD at\nthis time but it's something that I'm definitely considering the reasons for\nit being number one these drives with the the mechanical physical aspects of\nthem they are a little bit loud there's fans in these and so I'm recording next\nto my computer that's always a concern and so sometimes I have to turn those\noff just to keep things nice and quiet also the SSDs are going to give you much\nbetter performance again they're going to be very fast especially if you have\nthat newer connectivity technology like thunderbolt like USB 3.0 they are quite\na bit more expensive than the older technology however moving forward they\nare going to be the way to go in terms of performance alright so that's a\ncouple of quick thoughts on using external hard drives with your DAW.\n\n\n\nI can promise you if you're not utilizing this right now as soon as you start\nsaving your sessions and saving a lot of your audio content onto the external\nit's going to make your DAW run so much better and keep your workflow a lot\nsmoother and also keep your backups more consistent and have you better organized\nthat way so if you have any questions or comments about external hard drives feel\nfree to leave them below if you learned anything in this video please like and\nsubscribe and we'll talk to you soon... its money over people not\nthe people over power about time we start speaking our generations turning\nback the hours they think we're apathetic, might be sympathetic if they\nrealized we're on a new page or we stay silent and a futures fade away... gone don't let\nthis life\n",
"json_metadata": "{\"tags\":[\"daw\",\"ssd\",\"audio\",\"hard\",\"disk\"],\"image\":[\"https://cdn.steemitimages.com/DQmZM1JPKxyJeN4mRw196ivVf6haCkurh4D6NNjCvMjXPQZ/Schermata%202018-06-15%20alle%2010.22.15.png\",\"https://cdn.steemitimages.com/DQmeNkSsfaVoxrwJxW5oVayNadCT7qF1kVg5DnQmWRz7iRE/Schermata%202018-06-15%20alle%2010.22.05.png\",\"https://cdn.steemitimages.com/DQmPuwzz3dFX2YNXiBYfght4m2xuCc46dn3vDvGNZyAuB35/Schermata%202018-06-15%20alle%2010.22.50.png\"],\"app\":\"steemit/0.1\",\"format\":\"markdown\"}"
}
]
}faderstudiopublished a new post: external-hard-drives-and-your-daw2018/06/15 08:26:27
faderstudiopublished a new post: external-hard-drives-and-your-daw
2018/06/15 08:26:27
| parent author | |
| parent permlink | daw |
| author | faderstudio |
| permlink | external-hard-drives-and-your-daw |
| title | External Hard Drives and Your DAW |
| body | I want to talk about external hard drives and how they can be extremely advantageous to those of you who are working in the studio with audio whether you're a producer a mix engineer a sound designer anything that you do that has a demanding da W you want to have external hard drives in your setup they're going to make your workflow a lot smoother and more efficient they will make your DAW have much better performance they're gonna minimize recording latency and they're going to give you a solid backup that you can rely on in case something goes wrong with one of your drives so let me tell you a little bit about my own personal setup with my external hard drives in the studio.  I have two identical two terabyte drives that are clones of each other in terms of the information on them I have all of my session files all of my sample libraries all that stuff mixing sessions production sessions they are stored on the external so if anything went wrong with the internal drive of my computer the only thing on there is the software itself so that and the plugins which I have a backup for that I'll tell you about that in just a second but I want that to rely on just running the OS keeping the DAW going smoothly I don't want to fill that up with a lot of files and make that one really slow and bogged down so if you've got a backup like this or a clone of your main drive with all your data on it if one of those drives fails I'm immediately able to work and pick up right where I left off no matter what so while the other one I'm getting that replaced or I'm getting it fixed I have all the data on another drive to where I'm not stuck not working so the third external drive I have is a one terabyte USB drive and it's not particularly fast or high-performance like these others are but it is just used for a time machine back up or a complete machine back up of my system computer so if something happened with that drive I have a copy that I could at least back up to my laptop and have the setup with all my software all my plugins saved to this and I back this up daily now as far as connectivity I do not have a newer machine I'm using an older iMac so I don't actually have Thunderbolt or even USB 3.0 on this computer the drives I have utilized USB 2.0 I think they could use 3.0 if I had it but right now I'm using that older technology I would recommend if you have a computer with Thunderbolt or USB 3.0 absolutely take advantage of an external drive that has his connectivity that's going to give you even faster read and write times from your DAW and with your samples so you're gonna get a lot better performance one other thing you may want to consider with external drives is going with a solid-state drive or SSD external now I do not have an SSD at this time but it's something that I'm definitely considering the reasons for it being number one these drives with the the mechanical physical aspects of them they are a little bit loud there's fans in these and so I'm recording next to my computer that's always a concern and so sometimes I have to turn those off just to keep things nice and quiet also the SSDs are going to give you much better performance again they're going to be very fast especially if you have that newer connectivity technology like thunderbolt like USB 3.0 they are quite a bit more expensive than the older technology however moving forward they are going to be the way to go in terms of performance alright so that's a couple of quick thoughts on using external hard drives with your DAW.  I can promise you if you're not utilizing this right now as soon as you start saving your sessions and saving a lot of your audio content onto the external it's going to make your DAW run so much better and keep your workflow a lot smoother and also keep your backups more consistent and have you better organized that way so if you have any questions or comments about external hard drives feel free to leave them below if you learned anything in this video please like and subscribe and we'll talk to you soon... its money over people not the people over power about time we start speaking our generations turning back the hours they think we're apathetic, might be sympathetic if they realized we're on a new page or we stay silent and a futures fade away... gone don't let this life  |
| json metadata | {"tags":["daw","ssd","audio","hard","disk"],"image":["https://cdn.steemitimages.com/DQmZM1JPKxyJeN4mRw196ivVf6haCkurh4D6NNjCvMjXPQZ/Schermata%202018-06-15%20alle%2010.22.15.png","https://cdn.steemitimages.com/DQmeNkSsfaVoxrwJxW5oVayNadCT7qF1kVg5DnQmWRz7iRE/Schermata%202018-06-15%20alle%2010.22.05.png","https://cdn.steemitimages.com/DQmPuwzz3dFX2YNXiBYfght4m2xuCc46dn3vDvGNZyAuB35/Schermata%202018-06-15%20alle%2010.22.50.png"],"app":"steemit/0.1","format":"markdown"} |
| Transaction Info | Block #23338491/Trx 3b16589cbe1a2173d91e4cdc7c2f456cb39e5e4d |
View Raw JSON Data
{
"trx_id": "3b16589cbe1a2173d91e4cdc7c2f456cb39e5e4d",
"block": 23338491,
"trx_in_block": 4,
"op_in_trx": 0,
"virtual_op": 0,
"timestamp": "2018-06-15T08:26:27",
"op": [
"comment",
{
"parent_author": "",
"parent_permlink": "daw",
"author": "faderstudio",
"permlink": "external-hard-drives-and-your-daw",
"title": "External Hard Drives and Your DAW",
"body": "I want to talk about external hard drives and how they\ncan be extremely advantageous to those of you who are working in the studio\nwith audio whether you're a producer a mix engineer a sound designer anything\nthat you do that has a demanding da W you want to have external hard drives in\nyour setup they're going to make your workflow a lot smoother and more\nefficient they will make your DAW have much better performance they're gonna\nminimize recording latency and they're going to give you a solid backup that\nyou can rely on in case something goes wrong with one of your drives so let me\ntell you a little bit about my own personal setup with my external hard\ndrives in the studio.\n\n\n\nI have two identical two terabyte drives that are\nclones of each other in terms of the information on them I have all of my\nsession files all of my sample libraries all that stuff mixing sessions\nproduction sessions they are stored on the external so if anything went wrong\nwith the internal drive of my computer the only thing on there is the software\nitself so that and the plugins which I have a backup for that I'll tell you\nabout that in just a second but I want that to rely on just running the OS\nkeeping the DAW going smoothly I don't want to fill that up with a lot of files\nand make that one really slow and bogged down so if you've got a backup like this\nor a clone of your main drive with all your data on it if one of those drives\nfails I'm immediately able to work and pick up right where I left off no matter\nwhat so while the other one I'm getting that replaced or I'm getting it fixed I\nhave all the data on another drive to where I'm not stuck not working so the\nthird external drive I have is a one terabyte USB drive and it's not\nparticularly fast or high-performance like these others are\nbut it is just used for a time machine back up or a complete machine back up of\nmy system computer so if something happened with that drive I have a copy\nthat I could at least back up to my laptop and have the setup with all my\nsoftware all my plugins saved to this and I back this up daily now as far as\nconnectivity I do not have a newer machine I'm using an older iMac so I\ndon't actually have Thunderbolt or even USB 3.0 on this computer the drives I\nhave utilized USB 2.0 I think they could use 3.0 if I had it but right now I'm\nusing that older technology I would recommend if you have a computer with\nThunderbolt or USB 3.0 absolutely take advantage of an external drive that has\nhis connectivity that's going to give you even faster read and write times\nfrom your DAW and with your samples so you're gonna get a lot better\nperformance one other thing you may want to consider with external drives is\ngoing with a solid-state drive or SSD external now I do not have an SSD at\nthis time but it's something that I'm definitely considering the reasons for\nit being number one these drives with the the mechanical physical aspects of\nthem they are a little bit loud there's fans in these and so I'm recording next\nto my computer that's always a concern and so sometimes I have to turn those\noff just to keep things nice and quiet also the SSDs are going to give you much\nbetter performance again they're going to be very fast especially if you have\nthat newer connectivity technology like thunderbolt like USB 3.0 they are quite\na bit more expensive than the older technology however moving forward they\nare going to be the way to go in terms of performance alright so that's a\ncouple of quick thoughts on using external hard drives with your DAW.\n\n\n\nI can promise you if you're not utilizing this right now as soon as you start\nsaving your sessions and saving a lot of your audio content onto the external\nit's going to make your DAW run so much better and keep your workflow a lot\nsmoother and also keep your backups more consistent and have you better organized\nthat way so if you have any questions or comments about external hard drives feel\nfree to leave them below if you learned anything in this video please like and\nsubscribe and we'll talk to you soon... its money over people not\nthe people over power about time we start speaking our generations turning\nback the hours they think we're apathetic, might be sympathetic if they\nrealized we're on a new page or we stay silent and a futures fade away... gone don't let\nthis life\n",
"json_metadata": "{\"tags\":[\"daw\",\"ssd\",\"audio\",\"hard\",\"disk\"],\"image\":[\"https://cdn.steemitimages.com/DQmZM1JPKxyJeN4mRw196ivVf6haCkurh4D6NNjCvMjXPQZ/Schermata%202018-06-15%20alle%2010.22.15.png\",\"https://cdn.steemitimages.com/DQmeNkSsfaVoxrwJxW5oVayNadCT7qF1kVg5DnQmWRz7iRE/Schermata%202018-06-15%20alle%2010.22.05.png\",\"https://cdn.steemitimages.com/DQmPuwzz3dFX2YNXiBYfght4m2xuCc46dn3vDvGNZyAuB35/Schermata%202018-06-15%20alle%2010.22.50.png\"],\"app\":\"steemit/0.1\",\"format\":\"markdown\"}"
}
]
}steemdelegated 18.112 SP to @faderstudio2018/06/14 23:02:33
steemdelegated 18.112 SP to @faderstudio
2018/06/14 23:02:33
| delegator | steem |
| delegatee | faderstudio |
| vesting shares | 29451.834153 VESTS |
| Transaction Info | Block #23327215/Trx 9ec4da20d5490b5263d039f1fd0a842fe017fbee |
View Raw JSON Data
{
  "trx_id": "9ec4da20d5490b5263d039f1fd0a842fe017fbee",
  "block": 23327215,
  "trx_in_block": 22,
  "op_in_trx": 0,
  "virtual_op": 0,
  "timestamp": "2018-06-14T23:02:33",
  "op": [
    "delegate_vesting_shares",
    {
      "delegator": "steem",
      "delegatee": "faderstudio",
      "vesting_shares": "29451.834153 VESTS"
    }
  ]
}ubgupvoted (1.00%) @faderstudio / fader-podcast-or-025-dj-alessandro-enne2018/06/14 22:06:12
ubgupvoted (1.00%) @faderstudio / fader-podcast-or-025-dj-alessandro-enne
2018/06/14 22:06:12
| voter | ubg |
| author | faderstudio |
| permlink | fader-podcast-or-025-dj-alessandro-enne |
| weight | 100 (1.00%) |
| Transaction Info | Block #23326088/Trx 70e1560718cd6ee4e877916a3a25823bee90b44e |
View Raw JSON Data
{
  "trx_id": "70e1560718cd6ee4e877916a3a25823bee90b44e",
  "block": 23326088,
  "trx_in_block": 10,
  "op_in_trx": 0,
  "virtual_op": 0,
  "timestamp": "2018-06-14T22:06:12",
  "op": [
    "vote",
    {
      "voter": "ubg",
      "author": "faderstudio",
      "permlink": "fader-podcast-or-025-dj-alessandro-enne",
      "weight": 100
    }
  ]
}ax3upvoted (1.00%) @faderstudio / fader-podcast-or-025-dj-alessandro-enne2018/06/14 22:05:24
ax3upvoted (1.00%) @faderstudio / fader-podcast-or-025-dj-alessandro-enne
2018/06/14 22:05:24
| voter | ax3 |
| author | faderstudio |
| permlink | fader-podcast-or-025-dj-alessandro-enne |
| weight | 100 (1.00%) |
| Transaction Info | Block #23326072/Trx eef6ae31879844d7715e482683db993ac595045a |
View Raw JSON Data
{
  "trx_id": "eef6ae31879844d7715e482683db993ac595045a",
  "block": 23326072,
  "trx_in_block": 8,
  "op_in_trx": 0,
  "virtual_op": 0,
  "timestamp": "2018-06-14T22:05:24",
  "op": [
    "vote",
    {
      "voter": "ax3",
      "author": "faderstudio",
      "permlink": "fader-podcast-or-025-dj-alessandro-enne",
      "weight": 100
    }
  ]
}faderstudiopublished a new post: fader-podcast-or-025-dj-alessandro-enne2018/06/14 22:05:12
faderstudiopublished a new post: fader-podcast-or-025-dj-alessandro-enne
2018/06/14 22:05:12
| parent author | |
| parent permlink | techno |
| author | faderstudio |
| permlink | fader-podcast-or-025-dj-alessandro-enne |
| title | Fader Podcast | 025 - DJ Alessandro Enne |
| body | Fader Podcast | 025 - DJ Alessandro Enne Techno live set mix from Italian DJ Apple iTunes Podcast: http://ow.ly/ySgz30kvs1e Mixcloud: http://ow.ly/fQR530kvrZj  |
| json metadata | {"tags":["techno","live","mix","set","dj"],"image":["https://cdn.steemitimages.com/DQmZypwhvBXhUPcqtc91tq68vny39v85o6NtzngmNqsy5Gk/fader_podcast_025.jpg"],"links":["http://ow.ly/ySgz30kvs1e","http://ow.ly/fQR530kvrZj"],"app":"steemit/0.1","format":"markdown"} |
| Transaction Info | Block #23326068/Trx 569be5cfa83980afacf574c1415278b31ac097d1 |
View Raw JSON Data
{
"trx_id": "569be5cfa83980afacf574c1415278b31ac097d1",
"block": 23326068,
"trx_in_block": 26,
"op_in_trx": 0,
"virtual_op": 0,
"timestamp": "2018-06-14T22:05:12",
"op": [
"comment",
{
"parent_author": "",
"parent_permlink": "techno",
"author": "faderstudio",
"permlink": "fader-podcast-or-025-dj-alessandro-enne",
"title": "Fader Podcast | 025 - DJ Alessandro Enne",
"body": "Fader Podcast | 025 - DJ Alessandro Enne\nTechno live set mix from Italian DJ\n\nApple iTunes Podcast: http://ow.ly/ySgz30kvs1e\n\nMixcloud: http://ow.ly/fQR530kvrZj\n\n",
"json_metadata": "{\"tags\":[\"techno\",\"live\",\"mix\",\"set\",\"dj\"],\"image\":[\"https://cdn.steemitimages.com/DQmZypwhvBXhUPcqtc91tq68vny39v85o6NtzngmNqsy5Gk/fader_podcast_025.jpg\"],\"links\":[\"http://ow.ly/ySgz30kvs1e\",\"http://ow.ly/fQR530kvrZj\"],\"app\":\"steemit/0.1\",\"format\":\"markdown\"}"
}
]
}steemdelegated 5.627 SP to @faderstudio2018/05/16 20:16:48
steemdelegated 5.627 SP to @faderstudio
2018/05/16 20:16:48
| delegator | steem |
| delegatee | faderstudio |
| vesting shares | 9149.790630 VESTS |
| Transaction Info | Block #22489837/Trx b0dafe2b72e0c78378dab32df8a52c3d24c0622c |
View Raw JSON Data
{
  "trx_id": "b0dafe2b72e0c78378dab32df8a52c3d24c0622c",
  "block": 22489837,
  "trx_in_block": 2,
  "op_in_trx": 0,
  "virtual_op": 0,
  "timestamp": "2018-05-16T20:16:48",
  "op": [
    "delegate_vesting_shares",
    {
      "delegator": "steem",
      "delegatee": "faderstudio",
      "vesting_shares": "9149.790630 VESTS"
    }
  ]
}leonardbaboiupvoted (50.00%) @faderstudio / come-produrre-musica-hip-hop-rap-consigli-base2018/02/10 23:06:51
leonardbaboiupvoted (50.00%) @faderstudio / come-produrre-musica-hip-hop-rap-consigli-base
2018/02/10 23:06:51
| voter | leonardbaboi |
| author | faderstudio |
| permlink | come-produrre-musica-hip-hop-rap-consigli-base |
| weight | 5000 (50.00%) |
| Transaction Info | Block #19759976/Trx 7ced9da195326938b56f9017b37af65e46a7b066 |
View Raw JSON Data
{
  "trx_id": "7ced9da195326938b56f9017b37af65e46a7b066",
  "block": 19759976,
  "trx_in_block": 18,
  "op_in_trx": 0,
  "virtual_op": 0,
  "timestamp": "2018-02-10T23:06:51",
  "op": [
    "vote",
    {
      "voter": "leonardbaboi",
      "author": "faderstudio",
      "permlink": "come-produrre-musica-hip-hop-rap-consigli-base",
      "weight": 5000
    }
  ]
}faderstudiofollowed @koinsquare2018/01/13 17:24:54
faderstudiofollowed @koinsquare
2018/01/13 17:24:54
| required auths | [] |
| required posting auths | ["faderstudio"] |
| id | follow |
| json | ["follow",{"follower":"faderstudio","following":"koinsquare","what":["blog"]}] |
| Transaction Info | Block #18947573/Trx cf1ed33486ff6723aa08aeedd655831c7b858998 |
View Raw JSON Data
{
  "trx_id": "cf1ed33486ff6723aa08aeedd655831c7b858998",
  "block": 18947573,
  "trx_in_block": 42,
  "op_in_trx": 0,
  "virtual_op": 0,
  "timestamp": "2018-01-13T17:24:54",
  "op": [
    "custom_json",
    {
      "required_auths": [],
      "required_posting_auths": [
        "faderstudio"
      ],
      "id": "follow",
      "json": "[\"follow\",{\"follower\":\"faderstudio\",\"following\":\"koinsquare\",\"what\":[\"blog\"]}]"
    }
  ]
}faderstudiopublished a new post: come-produrre-musica-hip-hop-rap-consigli-base2018/01/10 21:40:48
faderstudiopublished a new post: come-produrre-musica-hip-hop-rap-consigli-base
2018/01/10 21:40:48
| parent author | |
| parent permlink | tutorial |
| author | faderstudio |
| permlink | come-produrre-musica-hip-hop-rap-consigli-base |
| title | Come produrre musica Hip Hop Rap corso tutorial ( consigli base ) |
| body | Quello del Rap, è un business molto lucroso, ma i producer di musica hip hop lavorano dietro le quinte, creando tracce strumentali per un’etichetta discografica, o semplicemente per divertimento. Ci sono molti tipi di producer, ma tutti seguono gli stessi passaggi di base. Serve tecnica ma sopratutto far esprimere la propria fantasia al meglio.  1 - Devi amare l’hip hop e la musica in generale. L’industria musicale è dura e spietata, e senza una profonda passione per la musica hip hop non potrai mai diventare bravo o famoso, credici sempre ! Devi anche amare tutti i tipi di musica, poiché così potrai più facilmente stimolare la tua creatività, dato che questo genere musicale prende il meglio e le tendenze da gli altri e ne esprime l' essenza.  2 - Studia la musica. Questa è una fase che non dovrai mai smettere di tener presente, e non potrai mai pensare di conoscere tutto sulla musica, a nessun punto della tua carriera. Studia tutti i differenti stili di musica, non soltanto l’hip hop moderno. Studia le origini di qualsiasi genere musicale, la teoria e i grandi musicisti. Nessun genere musicale va' tralasciato, neanche il piu' lontano dai tuoi gusti personali. !https://steemitimages.com/DQmW3LU5pJApaceLLkULZ19FfwW4PGtvvQ1rL4v55SruCzk/Yamaha_RS7000_Music_Production_Studio.jpg 3 - Scegli l’attrezzatura di cui ti servirai. Questa è una fase molto complicata, poiché ci sono infinite combinazioni di hardware e software. Potresti provare le versioni demo dei software per la creazione di musica, per poi creare contenuti con delle soluzioni a pagamento piu' professionali. Se sei tu stesso a creare i tuoi campionamenti, considera la maniera con cui averne accesso (da giradischi, dal computer, etc.). Se sei interessato nella composizione tramite l’ausilio di sintetizzatori e strumenti virtuali, una tastiera MIDI è un investimento eccellente. Per la parte vocale un buon microfono a condensatori e' la scelta piu' opportuna e duratura. 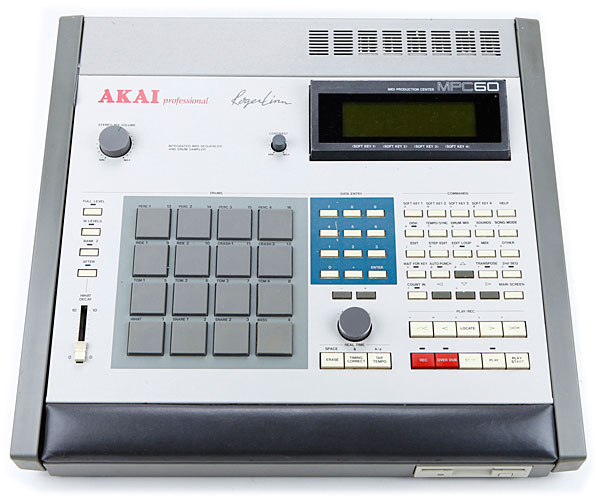 4 - Sperimenta. Crea una semplice traccia di batteria (es. Cassa – Charleston – rullante – Charleston) e gioca con le note inserendole nelle battute. Questo passaggio dovrebbe aiutarti ad avere familiarità con la tua attrezzatura, ti servirà del tempo per acquisire delle vere abilità con la tua attrezzatura, ma ne sarai ricompensato e soddisfatto, meglio poco ma che ben conosci; seleziona il superfluo ! 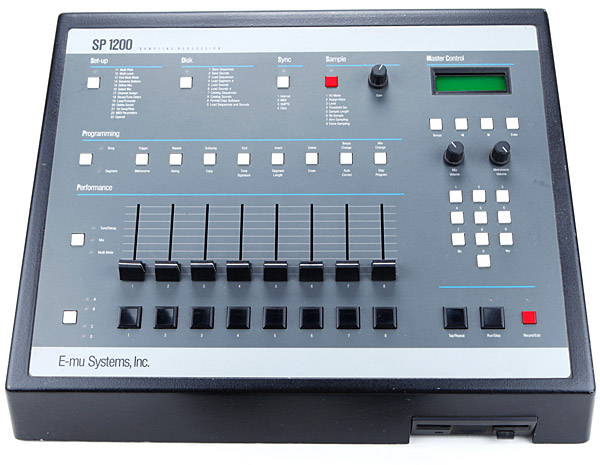 5 - Inizia a perfezionare i tuoi beat. Leggi manuali e libri specializzati, contatta chi gia' produce per carpirne informazioni e cerca collaborazioni con chi gia' produce in autonomia. Informati in merito all'uso di effetti, equalizzazione e quantizzazione, e inizia a smanettare; fai le cose piu' strane, anche assurde, spesso e' da li' che nascono ottime idee. 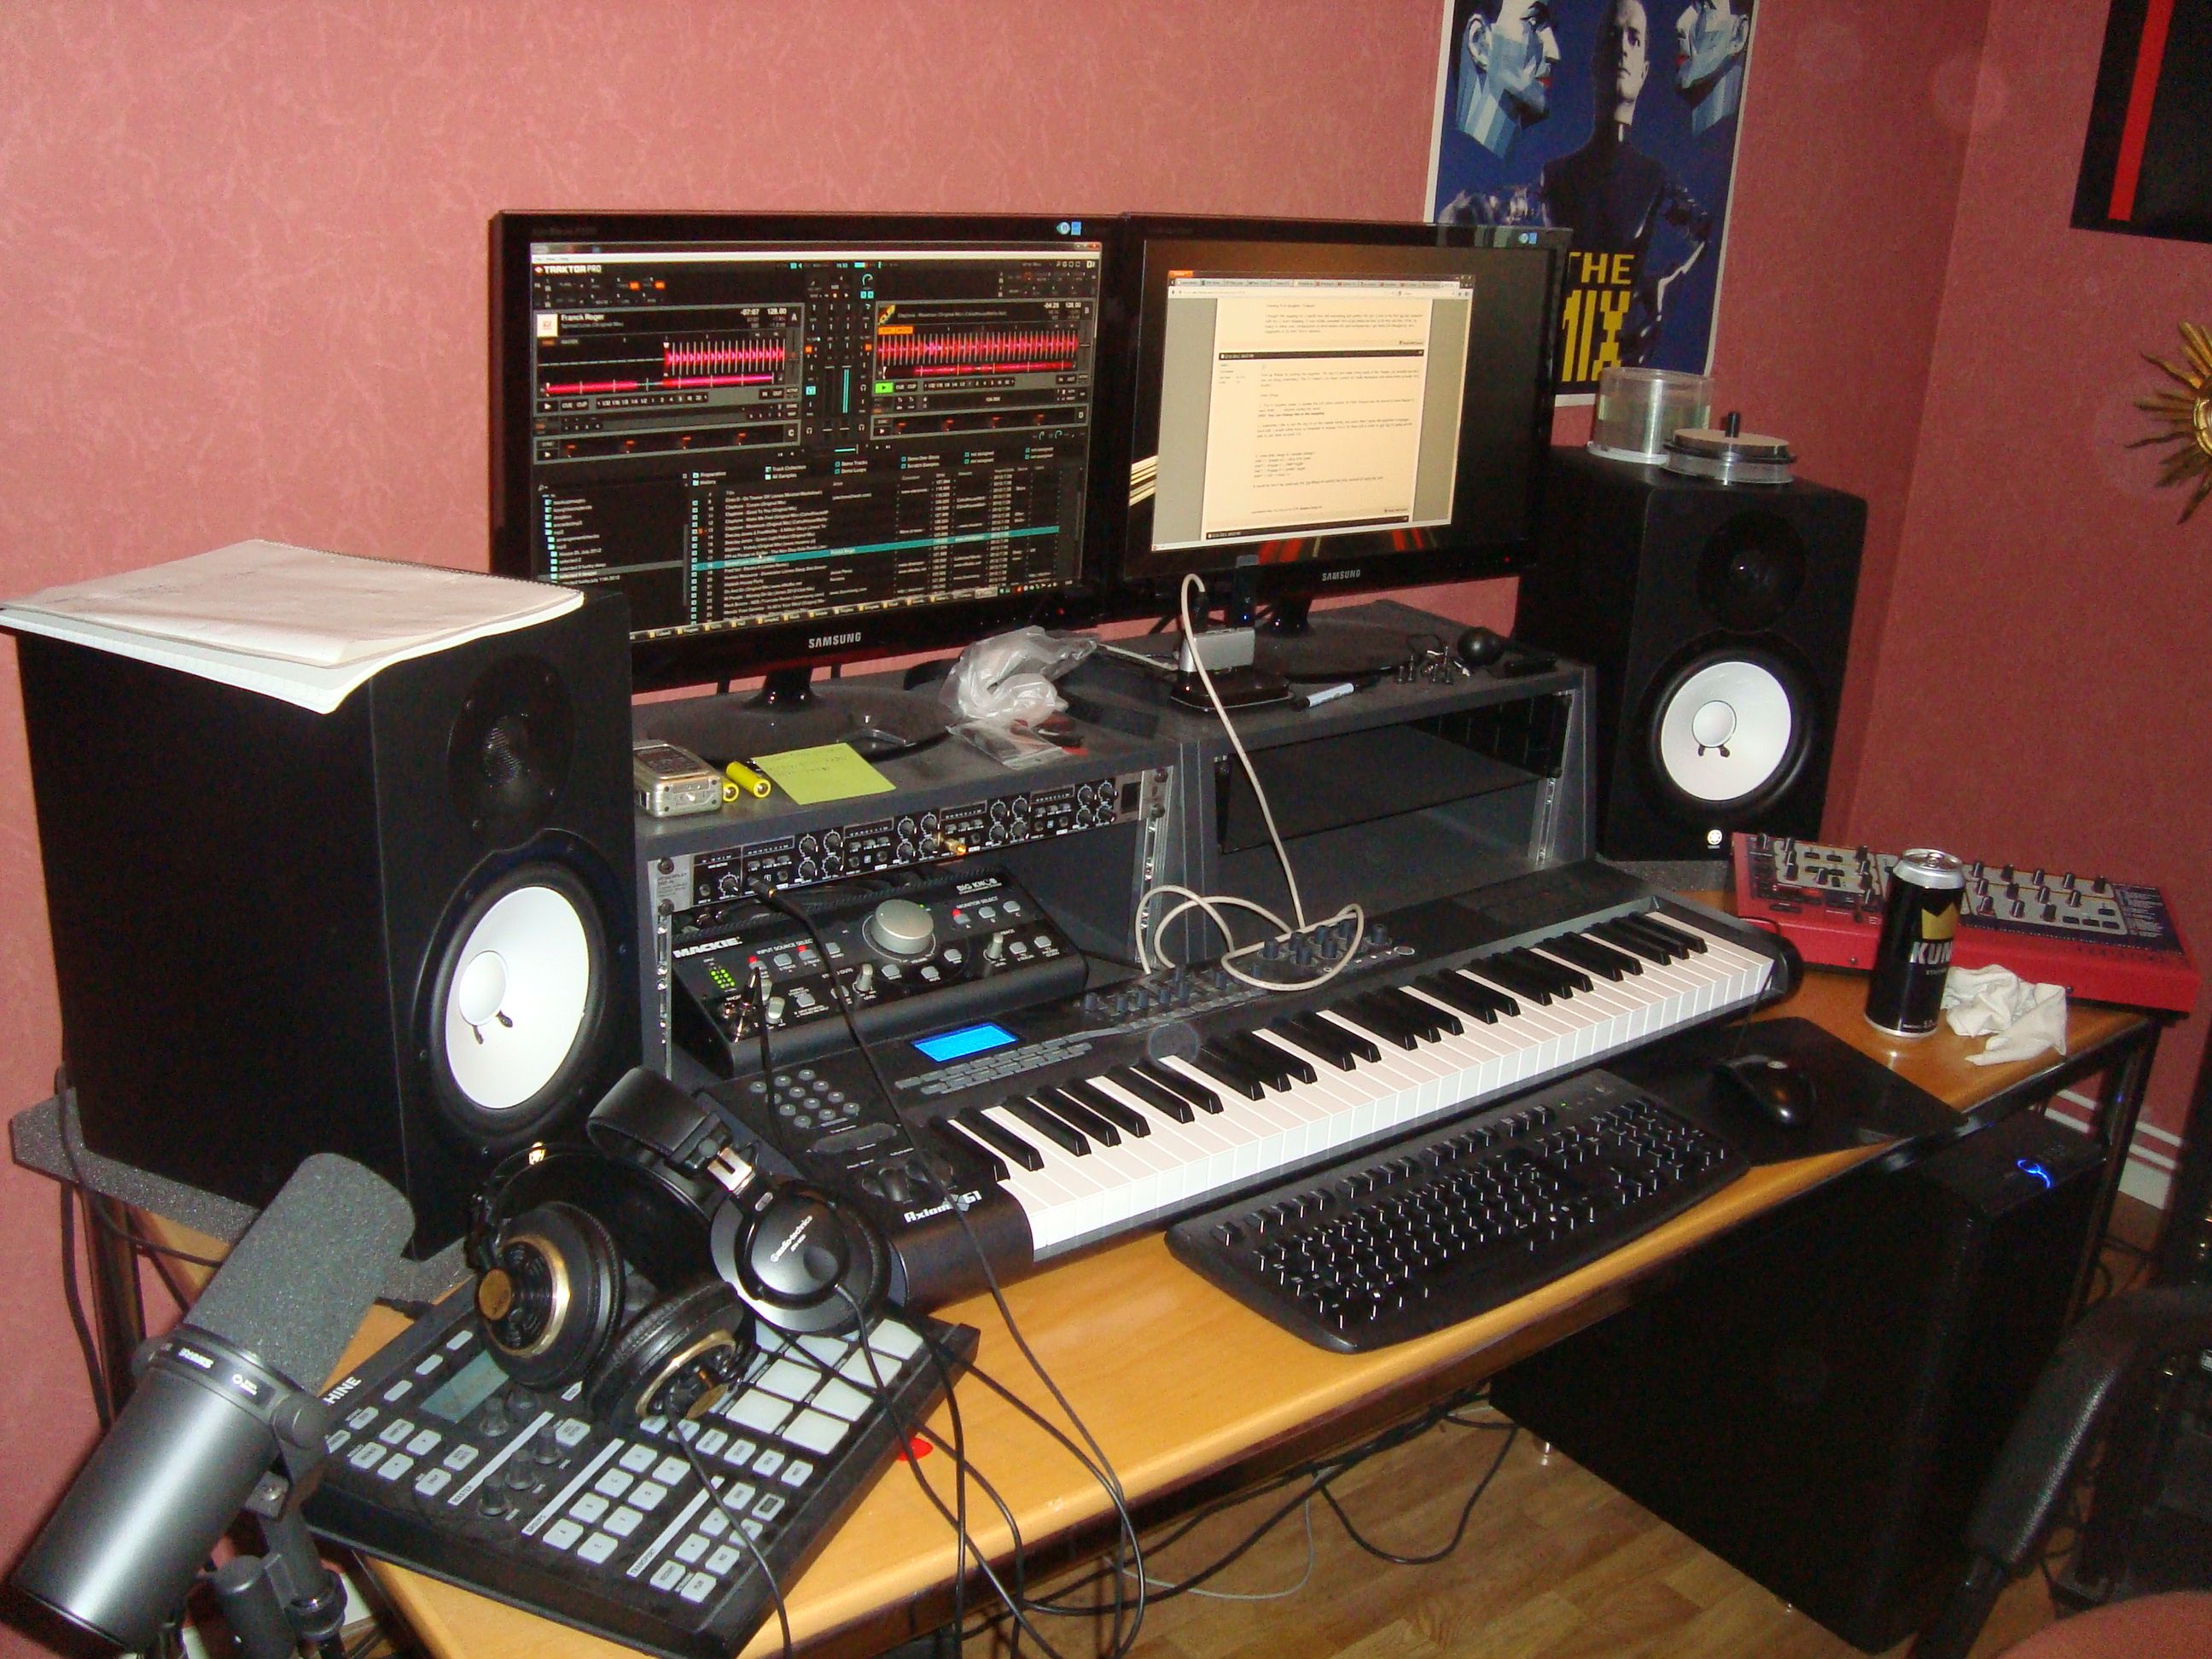.jpg) 6 - Non appena riuscirai a fare in modo che chi ascolta la tua musica segua quasi involontariamente il tempo muovendo la testa, inizia a promuoverti. Utilizza siti come rocbattle.com, soundclick.com, givemebeats.net e cdbaby.com a tuo vantaggio. Cerca dei rapper, locali o sul web, e prova a produrre qualche demo in collaborazione, l' unione fa' la forza ! Credici sempre ! 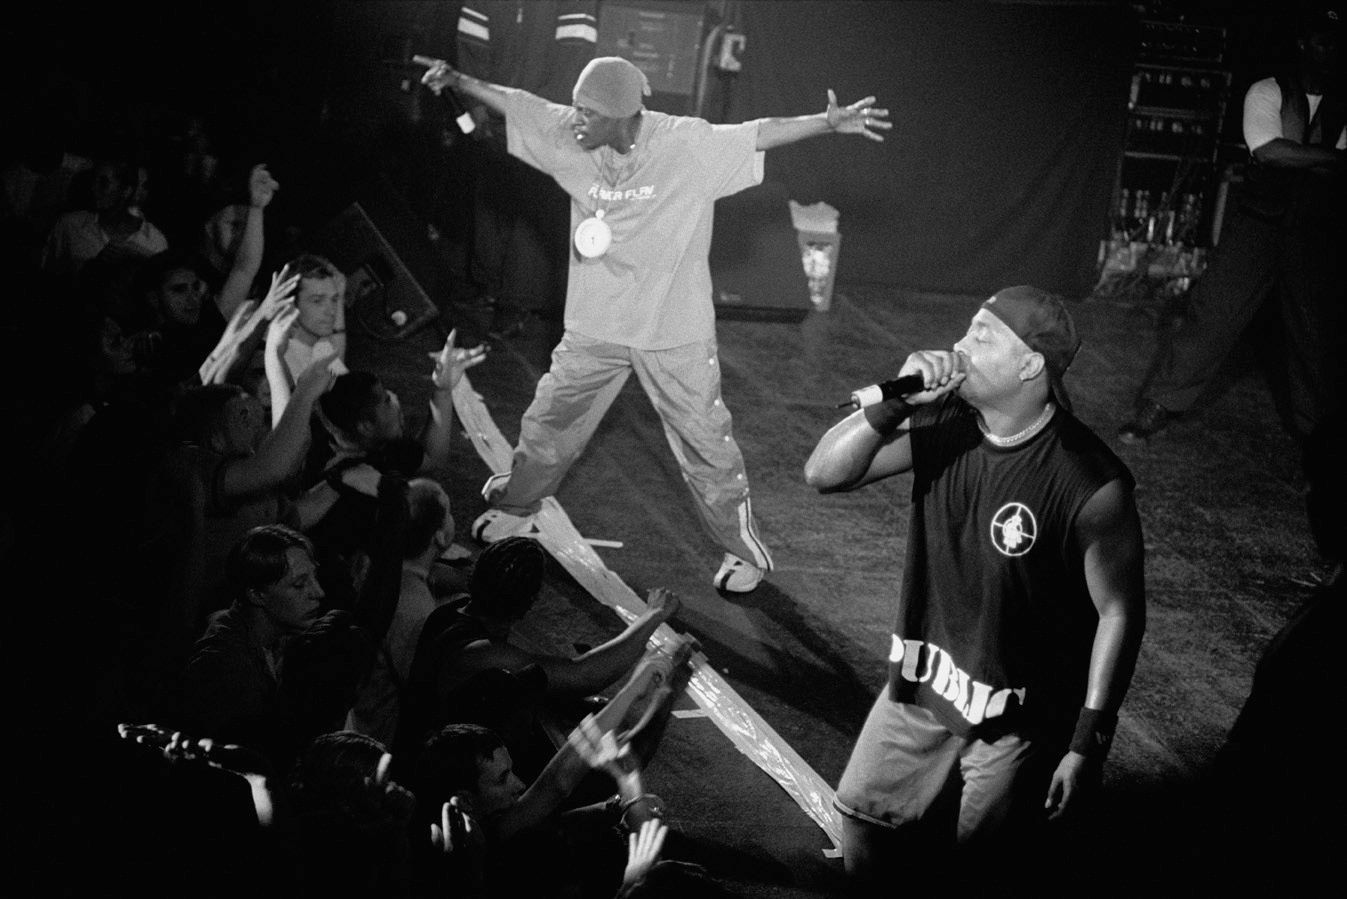 |
| json metadata | {"tags":["tutorial","hip","hop","rap","producer"],"image":["https://steemitimages.com/DQmdDRATWcAKSzysUpWHWBYTqvbZWxH3cubpvsMh91mtBW3/graffiti-393488_960_720.jpg","https://steemitimages.com/DQmf2o8zjfhHWixTBMzqnEAC5FiEBr3JURroru4GS745nkt/hip-hop-264396_960_720.jpg","https://steemitimages.com/DQmW3LU5pJApaceLLkULZ19FfwW4PGtvvQ1rL4v55SruCzk/Yamaha_RS7000_Music_Production_Studio.jpg","https://steemitimages.com/DQmSAWrKfmjGahmAGErqMVcztZvTfzcCee5xBRQZ7X25r3A/akai_mpc60.jpg","https://steemitimages.com/DQmTHvXxoiKijspnUnDjAR6n8GG4DFkqLvL1Fm3YUoxMeDR/emu_sp1200.jpg","https://steemitimages.com/DQmbbuyWuw2knNXXorg8HYyRmfpsbq8gfSiMab4WctuHNjh/Friend's_home_studio_(by_David_J).jpg","https://steemitimages.com/DQmSEgRGAtnkZvjWE6TgXbh65VCqftq7PEQDsHxtmDXixgB/Public_Enemy-01-mika.jpg"],"app":"steemit/0.1","format":"markdown"} |
| Transaction Info | Block #18866391/Trx a06dd6ea19a2f2b071bfd47f15668145bc2d4297 |
View Raw JSON Data
{
"trx_id": "a06dd6ea19a2f2b071bfd47f15668145bc2d4297",
"block": 18866391,
"trx_in_block": 6,
"op_in_trx": 0,
"virtual_op": 0,
"timestamp": "2018-01-10T21:40:48",
"op": [
"comment",
{
"parent_author": "",
"parent_permlink": "tutorial",
"author": "faderstudio",
"permlink": "come-produrre-musica-hip-hop-rap-consigli-base",
"title": "Come produrre musica Hip Hop Rap corso tutorial ( consigli base )",
"body": "Quello del Rap, è un business molto lucroso, ma i producer di musica hip hop lavorano dietro le quinte, creando tracce strumentali per un’etichetta discografica, o semplicemente per divertimento. Ci sono molti tipi di producer, ma tutti seguono gli stessi passaggi di base. Serve tecnica ma sopratutto far esprimere la propria fantasia al meglio.\n\n\n\n1 - Devi amare l’hip hop e la musica in generale. L’industria musicale è dura e spietata, e senza una profonda passione per la musica hip hop non potrai mai diventare bravo o famoso, credici sempre ! Devi anche amare tutti i tipi di musica, poiché così potrai più facilmente stimolare la tua creatività, dato che questo genere musicale prende il meglio e le tendenze da gli altri e ne esprime l' essenza.\n\n\n\n2 - Studia la musica. Questa è una fase che non dovrai mai smettere di tener presente, e non potrai mai pensare di conoscere tutto sulla musica, a nessun punto della tua carriera. Studia tutti i differenti stili di musica, non soltanto l’hip hop moderno. Studia le origini di qualsiasi genere musicale, la teoria e i grandi musicisti. Nessun genere musicale va' tralasciato, neanche il piu' lontano dai tuoi gusti personali.\n\n!https://steemitimages.com/DQmW3LU5pJApaceLLkULZ19FfwW4PGtvvQ1rL4v55SruCzk/Yamaha_RS7000_Music_Production_Studio.jpg\n\n3 - Scegli l’attrezzatura di cui ti servirai. Questa è una fase molto complicata, poiché ci sono infinite combinazioni di hardware e software. Potresti provare le versioni demo dei software per la creazione di musica, per poi creare contenuti con delle soluzioni a pagamento piu' professionali. Se sei tu stesso a creare i tuoi campionamenti, considera la maniera con cui averne accesso (da giradischi, dal computer, etc.). Se sei interessato nella composizione tramite l’ausilio di sintetizzatori e strumenti virtuali, una tastiera MIDI è un investimento eccellente. Per la parte vocale un buon microfono a condensatori e' la scelta piu' opportuna e duratura.\n\n\n\n4 - Sperimenta. Crea una semplice traccia di batteria (es. Cassa – Charleston – rullante – Charleston) e gioca con le note inserendole nelle battute. Questo passaggio dovrebbe aiutarti ad avere familiarità con la tua attrezzatura, ti servirà del tempo per acquisire delle vere abilità con la tua attrezzatura, ma ne sarai ricompensato e soddisfatto, meglio poco ma che ben conosci; seleziona il superfluo !\n\n\n\n5 - Inizia a perfezionare i tuoi beat. Leggi manuali e libri specializzati, contatta chi gia' produce per carpirne informazioni e cerca collaborazioni con chi gia' produce in autonomia. Informati in merito all'uso di effetti, equalizzazione e quantizzazione, e inizia a smanettare; fai le cose piu' strane, anche assurde, spesso e' da li' che nascono ottime idee.\n\n.jpg)\n\n6 - Non appena riuscirai a fare in modo che chi ascolta la tua musica segua quasi involontariamente il tempo muovendo la testa, inizia a promuoverti. Utilizza siti come rocbattle.com, soundclick.com, givemebeats.net e cdbaby.com a tuo vantaggio. Cerca dei rapper, locali o sul web, e prova a produrre qualche demo in collaborazione, l' unione fa' la forza ! Credici sempre !\n\n",
"json_metadata": "{\"tags\":[\"tutorial\",\"hip\",\"hop\",\"rap\",\"producer\"],\"image\":[\"https://steemitimages.com/DQmdDRATWcAKSzysUpWHWBYTqvbZWxH3cubpvsMh91mtBW3/graffiti-393488_960_720.jpg\",\"https://steemitimages.com/DQmf2o8zjfhHWixTBMzqnEAC5FiEBr3JURroru4GS745nkt/hip-hop-264396_960_720.jpg\",\"https://steemitimages.com/DQmW3LU5pJApaceLLkULZ19FfwW4PGtvvQ1rL4v55SruCzk/Yamaha_RS7000_Music_Production_Studio.jpg\",\"https://steemitimages.com/DQmSAWrKfmjGahmAGErqMVcztZvTfzcCee5xBRQZ7X25r3A/akai_mpc60.jpg\",\"https://steemitimages.com/DQmTHvXxoiKijspnUnDjAR6n8GG4DFkqLvL1Fm3YUoxMeDR/emu_sp1200.jpg\",\"https://steemitimages.com/DQmbbuyWuw2knNXXorg8HYyRmfpsbq8gfSiMab4WctuHNjh/Friend's_home_studio_(by_David_J).jpg\",\"https://steemitimages.com/DQmSEgRGAtnkZvjWE6TgXbh65VCqftq7PEQDsHxtmDXixgB/Public_Enemy-01-mika.jpg\"],\"app\":\"steemit/0.1\",\"format\":\"markdown\"}"
}
]
}faderstudiopublished a new post: come-produrre-musica-hip-hop-rap-consigli-base2018/01/10 21:40:09
faderstudiopublished a new post: come-produrre-musica-hip-hop-rap-consigli-base
2018/01/10 21:40:09
| parent author | |
| parent permlink | tutorial |
| author | faderstudio |
| permlink | come-produrre-musica-hip-hop-rap-consigli-base |
| title | Come produrre musica Hip Hop Rap consigli base |
| body | Quello del Rap, è un business molto lucroso, ma i producer di musica hip hop lavorano dietro le quinte, creando tracce strumentali per un’etichetta discografica, o semplicemente per divertimento. Ci sono molti tipi di producer, ma tutti seguono gli stessi passaggi di base. Serve tecnica ma sopratutto far esprimere la propria fantasia al meglio.  1 - Devi amare l’hip hop e la musica in generale. L’industria musicale è dura e spietata, e senza una profonda passione per la musica hip hop non potrai mai diventare bravo o famoso, credici sempre ! Devi anche amare tutti i tipi di musica, poiché così potrai più facilmente stimolare la tua creatività, dato che questo genere musicale prende il meglio e le tendenze da gli altri e ne esprime l' essenza.  2 - Studia la musica. Questa è una fase che non dovrai mai smettere di tener presente, e non potrai mai pensare di conoscere tutto sulla musica, a nessun punto della tua carriera. Studia tutti i differenti stili di musica, non soltanto l’hip hop moderno. Studia le origini di qualsiasi genere musicale, la teoria e i grandi musicisti. Nessun genere musicale va' tralasciato, neanche il piu' lontano dai tuoi gusti personali. !https://steemitimages.com/DQmW3LU5pJApaceLLkULZ19FfwW4PGtvvQ1rL4v55SruCzk/Yamaha_RS7000_Music_Production_Studio.jpg 3 - Scegli l’attrezzatura di cui ti servirai. Questa è una fase molto complicata, poiché ci sono infinite combinazioni di hardware e software. Potresti provare le versioni demo dei software per la creazione di musica, per poi creare contenuti con delle soluzioni a pagamento piu' professionali. Se sei tu stesso a creare i tuoi campionamenti, considera la maniera con cui averne accesso (da giradischi, dal computer, etc.). Se sei interessato nella composizione tramite l’ausilio di sintetizzatori e strumenti virtuali, una tastiera MIDI è un investimento eccellente. Per la parte vocale un buon microfono a condensatori e' la scelta piu' opportuna e duratura.  4 - Sperimenta. Crea una semplice traccia di batteria (es. Cassa – Charleston – rullante – Charleston) e gioca con le note inserendole nelle battute. Questo passaggio dovrebbe aiutarti ad avere familiarità con la tua attrezzatura, ti servirà del tempo per acquisire delle vere abilità con la tua attrezzatura, ma ne sarai ricompensato e soddisfatto, meglio poco ma che ben conosci; seleziona il superfluo !  5 - Inizia a perfezionare i tuoi beat. Leggi manuali e libri specializzati, contatta chi gia' produce per carpirne informazioni e cerca collaborazioni con chi gia' produce in autonomia. Informati in merito all'uso di effetti, equalizzazione e quantizzazione, e inizia a smanettare; fai le cose piu' strane, anche assurde, spesso e' da li' che nascono ottime idee. .jpg) 6 - Non appena riuscirai a fare in modo che chi ascolta la tua musica segua quasi involontariamente il tempo muovendo la testa, inizia a promuoverti. Utilizza siti come rocbattle.com, soundclick.com, givemebeats.net e cdbaby.com a tuo vantaggio. Cerca dei rapper, locali o sul web, e prova a produrre qualche demo in collaborazione, l' unione fa' la forza ! Credici sempre !  |
| json metadata | {"tags":["tutorial","hip","hop","rap","producer"],"image":["https://steemitimages.com/DQmdDRATWcAKSzysUpWHWBYTqvbZWxH3cubpvsMh91mtBW3/graffiti-393488_960_720.jpg","https://steemitimages.com/DQmf2o8zjfhHWixTBMzqnEAC5FiEBr3JURroru4GS745nkt/hip-hop-264396_960_720.jpg","https://steemitimages.com/DQmW3LU5pJApaceLLkULZ19FfwW4PGtvvQ1rL4v55SruCzk/Yamaha_RS7000_Music_Production_Studio.jpg","https://steemitimages.com/DQmSAWrKfmjGahmAGErqMVcztZvTfzcCee5xBRQZ7X25r3A/akai_mpc60.jpg","https://steemitimages.com/DQmTHvXxoiKijspnUnDjAR6n8GG4DFkqLvL1Fm3YUoxMeDR/emu_sp1200.jpg","https://steemitimages.com/DQmbbuyWuw2knNXXorg8HYyRmfpsbq8gfSiMab4WctuHNjh/Friend's_home_studio_(by_David_J).jpg","https://steemitimages.com/DQmSEgRGAtnkZvjWE6TgXbh65VCqftq7PEQDsHxtmDXixgB/Public_Enemy-01-mika.jpg"],"app":"steemit/0.1","format":"markdown"} |
| Transaction Info | Block #18866378/Trx 8e255b4b869fb7ddc4c922b9a7cf09678fee12f6 |
View Raw JSON Data
{
"trx_id": "8e255b4b869fb7ddc4c922b9a7cf09678fee12f6",
"block": 18866378,
"trx_in_block": 34,
"op_in_trx": 0,
"virtual_op": 0,
"timestamp": "2018-01-10T21:40:09",
"op": [
"comment",
{
"parent_author": "",
"parent_permlink": "tutorial",
"author": "faderstudio",
"permlink": "come-produrre-musica-hip-hop-rap-consigli-base",
"title": "Come produrre musica Hip Hop Rap consigli base",
"body": "Quello del Rap, è un business molto lucroso, ma i producer di musica hip hop lavorano dietro le quinte, creando tracce strumentali per un’etichetta discografica, o semplicemente per divertimento. Ci sono molti tipi di producer, ma tutti seguono gli stessi passaggi di base. Serve tecnica ma sopratutto far esprimere la propria fantasia al meglio.\n\n\n\n1 - Devi amare l’hip hop e la musica in generale. L’industria musicale è dura e spietata, e senza una profonda passione per la musica hip hop non potrai mai diventare bravo o famoso, credici sempre ! Devi anche amare tutti i tipi di musica, poiché così potrai più facilmente stimolare la tua creatività, dato che questo genere musicale prende il meglio e le tendenze da gli altri e ne esprime l' essenza.\n\n\n\n2 - Studia la musica. Questa è una fase che non dovrai mai smettere di tener presente, e non potrai mai pensare di conoscere tutto sulla musica, a nessun punto della tua carriera. Studia tutti i differenti stili di musica, non soltanto l’hip hop moderno. Studia le origini di qualsiasi genere musicale, la teoria e i grandi musicisti. Nessun genere musicale va' tralasciato, neanche il piu' lontano dai tuoi gusti personali.\n\n!https://steemitimages.com/DQmW3LU5pJApaceLLkULZ19FfwW4PGtvvQ1rL4v55SruCzk/Yamaha_RS7000_Music_Production_Studio.jpg\n\n3 - Scegli l’attrezzatura di cui ti servirai. Questa è una fase molto complicata, poiché ci sono infinite combinazioni di hardware e software. Potresti provare le versioni demo dei software per la creazione di musica, per poi creare contenuti con delle soluzioni a pagamento piu' professionali. Se sei tu stesso a creare i tuoi campionamenti, considera la maniera con cui averne accesso (da giradischi, dal computer, etc.). Se sei interessato nella composizione tramite l’ausilio di sintetizzatori e strumenti virtuali, una tastiera MIDI è un investimento eccellente. Per la parte vocale un buon microfono a condensatori e' la scelta piu' opportuna e duratura.\n\n\n\n4 - Sperimenta. Crea una semplice traccia di batteria (es. Cassa – Charleston – rullante – Charleston) e gioca con le note inserendole nelle battute. Questo passaggio dovrebbe aiutarti ad avere familiarità con la tua attrezzatura, ti servirà del tempo per acquisire delle vere abilità con la tua attrezzatura, ma ne sarai ricompensato e soddisfatto, meglio poco ma che ben conosci; seleziona il superfluo !\n\n\n\n5 - Inizia a perfezionare i tuoi beat. Leggi manuali e libri specializzati, contatta chi gia' produce per carpirne informazioni e cerca collaborazioni con chi gia' produce in autonomia. Informati in merito all'uso di effetti, equalizzazione e quantizzazione, e inizia a smanettare; fai le cose piu' strane, anche assurde, spesso e' da li' che nascono ottime idee.\n\n.jpg)\n\n6 - Non appena riuscirai a fare in modo che chi ascolta la tua musica segua quasi involontariamente il tempo muovendo la testa, inizia a promuoverti. Utilizza siti come rocbattle.com, soundclick.com, givemebeats.net e cdbaby.com a tuo vantaggio. Cerca dei rapper, locali o sul web, e prova a produrre qualche demo in collaborazione, l' unione fa' la forza ! Credici sempre !\n\n",
"json_metadata": "{\"tags\":[\"tutorial\",\"hip\",\"hop\",\"rap\",\"producer\"],\"image\":[\"https://steemitimages.com/DQmdDRATWcAKSzysUpWHWBYTqvbZWxH3cubpvsMh91mtBW3/graffiti-393488_960_720.jpg\",\"https://steemitimages.com/DQmf2o8zjfhHWixTBMzqnEAC5FiEBr3JURroru4GS745nkt/hip-hop-264396_960_720.jpg\",\"https://steemitimages.com/DQmW3LU5pJApaceLLkULZ19FfwW4PGtvvQ1rL4v55SruCzk/Yamaha_RS7000_Music_Production_Studio.jpg\",\"https://steemitimages.com/DQmSAWrKfmjGahmAGErqMVcztZvTfzcCee5xBRQZ7X25r3A/akai_mpc60.jpg\",\"https://steemitimages.com/DQmTHvXxoiKijspnUnDjAR6n8GG4DFkqLvL1Fm3YUoxMeDR/emu_sp1200.jpg\",\"https://steemitimages.com/DQmbbuyWuw2knNXXorg8HYyRmfpsbq8gfSiMab4WctuHNjh/Friend's_home_studio_(by_David_J).jpg\",\"https://steemitimages.com/DQmSEgRGAtnkZvjWE6TgXbh65VCqftq7PEQDsHxtmDXixgB/Public_Enemy-01-mika.jpg\"],\"app\":\"steemit/0.1\",\"format\":\"markdown\"}"
}
]
}faderstudiopublished a new post: tutorial-audio-21-viola2018/01/09 11:41:09
faderstudiopublished a new post: tutorial-audio-21-viola
2018/01/09 11:41:09
| parent author | |
| parent permlink | tutorial |
| author | faderstudio |
| permlink | tutorial-audio-21-viola |
| title | Tutorial Audio # 21 Viola |
| body | Questo tutorial e' dedicato alla registrazione in Studio di Registrazione della Viola; saranno affrontati tanti temi ed alcuni piccoli segreti. Vi aspettiamo presso il nostro Studio di Produzione Musicale. <iframe width="560" height="315" src="https://www.youtube.com/embed/DyOndzA2Hjc" frameborder="0" gesture="media" allow="encrypted-media" allowfullscreen></iframe> Contact: Youtube: http://ow.ly/pPP030hA2VW Twitter: http://ow.ly/TjmV30hA2XF Facebook: http://ow.ly/TqE630hA2ZL Google + : http://ow.ly/Y2fq30hA339 Apple iTunes Podcast: http://ow.ly/6BIU30hA35i |
| json metadata | {"tags":["tutorial","viola","corso","studio","registrazione"],"image":["https://img.youtube.com/vi/DyOndzA2Hjc/0.jpg"],"links":["https://www.youtube.com/embed/DyOndzA2Hjc","http://ow.ly/pPP030hA2VW","http://ow.ly/TjmV30hA2XF","http://ow.ly/TqE630hA2ZL","http://ow.ly/Y2fq30hA339","http://ow.ly/6BIU30hA35i"],"app":"steemit/0.1","format":"markdown"} |
| Transaction Info | Block #18825615/Trx 9f4bace1e27af7f6b2cca487b59154f425cd80fa |
View Raw JSON Data
{
  "trx_id": "9f4bace1e27af7f6b2cca487b59154f425cd80fa",
  "block": 18825615,
  "trx_in_block": 36,
  "op_in_trx": 0,
  "virtual_op": 0,
  "timestamp": "2018-01-09T11:41:09",
  "op": [
    "comment",
    {
      "parent_author": "",
      "parent_permlink": "tutorial",
      "author": "faderstudio",
      "permlink": "tutorial-audio-21-viola",
      "title": "Tutorial Audio # 21 Viola",
      "body": "Questo tutorial e' dedicato alla registrazione in Studio di Registrazione della Viola; saranno affrontati tanti temi ed alcuni piccoli segreti. Vi aspettiamo presso il nostro Studio di Produzione Musicale.\n\n<iframe width=\"560\" height=\"315\" src=\"https://www.youtube.com/embed/DyOndzA2Hjc\" frameborder=\"0\" gesture=\"media\" allow=\"encrypted-media\" allowfullscreen></iframe>\n\nContact:\n\nYoutube: http://ow.ly/pPP030hA2VW\nTwitter: http://ow.ly/TjmV30hA2XF\nFacebook: http://ow.ly/TqE630hA2ZL\nGoogle + : http://ow.ly/Y2fq30hA339\nApple iTunes Podcast: http://ow.ly/6BIU30hA35i",
      "json_metadata": "{\"tags\":[\"tutorial\",\"viola\",\"corso\",\"studio\",\"registrazione\"],\"image\":[\"https://img.youtube.com/vi/DyOndzA2Hjc/0.jpg\"],\"links\":[\"https://www.youtube.com/embed/DyOndzA2Hjc\",\"http://ow.ly/pPP030hA2VW\",\"http://ow.ly/TjmV30hA2XF\",\"http://ow.ly/TqE630hA2ZL\",\"http://ow.ly/Y2fq30hA339\",\"http://ow.ly/6BIU30hA35i\"],\"app\":\"steemit/0.1\",\"format\":\"markdown\"}"
    }
  ]
}faderstudiopublished a new post: tutorial-audio-20-analizzatore-di-spettro2018/01/09 11:16:12
faderstudiopublished a new post: tutorial-audio-20-analizzatore-di-spettro
2018/01/09 11:16:12
| parent author | |
| parent permlink | tutorial |
| author | faderstudio |
| permlink | tutorial-audio-20-analizzatore-di-spettro |
| title | Tutorial Audio # 20 Analizzatore di spettro |
| body | Questo tutorial e' dedicato a capire l' utilizzo ed alle funzioni di un Analizzatore di Spettro; saranno affrontati tanti temi ed alcuni piccoli segreti. Vi aspettiamo presso il nostro Studio di Produzione Musicale. <iframe width="560" height="315" src="https://www.youtube.com/embed/7BwQLHNjmtM" frameborder="0" gesture="media" allow="encrypted-media" allowfullscreen></iframe> Contact: Youtube: http://ow.ly/pPP030hA2VW Twitter: http://ow.ly/TjmV30hA2XF Facebook: http://ow.ly/TqE630hA2ZL Google + : http://ow.ly/Y2fq30hA339 Apple iTunes Podcast: http://ow.ly/6BIU30hA35i |
| json metadata | {"tags":["tutorial","analizzatore","spettro","studio","registrazione"],"image":["https://img.youtube.com/vi/7BwQLHNjmtM/0.jpg"],"links":["https://www.youtube.com/embed/7BwQLHNjmtM","http://ow.ly/pPP030hA2VW","http://ow.ly/TjmV30hA2XF","http://ow.ly/TqE630hA2ZL","http://ow.ly/Y2fq30hA339","http://ow.ly/6BIU30hA35i"],"app":"steemit/0.1","format":"markdown"} |
| Transaction Info | Block #18825116/Trx 219d88784e0dbe7a16f8736d3afe27b447dcc12d |
View Raw JSON Data
{
  "trx_id": "219d88784e0dbe7a16f8736d3afe27b447dcc12d",
  "block": 18825116,
  "trx_in_block": 16,
  "op_in_trx": 0,
  "virtual_op": 0,
  "timestamp": "2018-01-09T11:16:12",
  "op": [
    "comment",
    {
      "parent_author": "",
      "parent_permlink": "tutorial",
      "author": "faderstudio",
      "permlink": "tutorial-audio-20-analizzatore-di-spettro",
      "title": "Tutorial Audio # 20 Analizzatore di spettro",
      "body": "Questo tutorial e' dedicato a capire l' utilizzo ed alle funzioni di un Analizzatore di Spettro; saranno affrontati tanti temi ed alcuni piccoli segreti. Vi aspettiamo presso il nostro Studio di Produzione Musicale.\n\n<iframe width=\"560\" height=\"315\" src=\"https://www.youtube.com/embed/7BwQLHNjmtM\" frameborder=\"0\" gesture=\"media\" allow=\"encrypted-media\" allowfullscreen></iframe>\n\nContact:\n\nYoutube: http://ow.ly/pPP030hA2VW\nTwitter: http://ow.ly/TjmV30hA2XF\nFacebook: http://ow.ly/TqE630hA2ZL\nGoogle + : http://ow.ly/Y2fq30hA339\nApple iTunes Podcast: http://ow.ly/6BIU30hA35i",
      "json_metadata": "{\"tags\":[\"tutorial\",\"analizzatore\",\"spettro\",\"studio\",\"registrazione\"],\"image\":[\"https://img.youtube.com/vi/7BwQLHNjmtM/0.jpg\"],\"links\":[\"https://www.youtube.com/embed/7BwQLHNjmtM\",\"http://ow.ly/pPP030hA2VW\",\"http://ow.ly/TjmV30hA2XF\",\"http://ow.ly/TqE630hA2ZL\",\"http://ow.ly/Y2fq30hA339\",\"http://ow.ly/6BIU30hA35i\"],\"app\":\"steemit/0.1\",\"format\":\"markdown\"}"
    }
  ]
}faderstudiopublished a new post: tutorial-audio-19-violino2018/01/09 11:02:39
faderstudiopublished a new post: tutorial-audio-19-violino
2018/01/09 11:02:39
| parent author | |
| parent permlink | tutorial |
| author | faderstudio |
| permlink | tutorial-audio-19-violino |
| title | Tutorial Audio # 19 Violino |
| body | Questo tutorial e' dedicato alla registrazione in Studio di Registrazione del Violino; saranno affrontati tanti temi ed alcuni piccoli segreti. Vi aspettiamo presso il nostro Studio di Produzione Musicale. <iframe width="560" height="315" src="https://www.youtube.com/embed/urAkHYgCrNI" frameborder="0" gesture="media" allow="encrypted-media" allowfullscreen></iframe> Contact: Youtube: http://ow.ly/pPP030hA2VW Twitter: http://ow.ly/TjmV30hA2XF Facebook: http://ow.ly/TqE630hA2ZL Google + : http://ow.ly/Y2fq30hA339 Apple iTunes Podcast: http://ow.ly/6BIU30hA35i |
| json metadata | {"tags":["tutorial","violino","corso","studio","registrazione"],"image":["https://img.youtube.com/vi/urAkHYgCrNI/0.jpg"],"links":["https://www.youtube.com/embed/urAkHYgCrNI","http://ow.ly/pPP030hA2VW","http://ow.ly/TjmV30hA2XF","http://ow.ly/TqE630hA2ZL","http://ow.ly/Y2fq30hA339","http://ow.ly/6BIU30hA35i"],"app":"steemit/0.1","format":"markdown"} |
| Transaction Info | Block #18824845/Trx 51a4742d7a1ea1fef84bbc0f9a759e54629abdb4 |
View Raw JSON Data
{
  "trx_id": "51a4742d7a1ea1fef84bbc0f9a759e54629abdb4",
  "block": 18824845,
  "trx_in_block": 9,
  "op_in_trx": 0,
  "virtual_op": 0,
  "timestamp": "2018-01-09T11:02:39",
  "op": [
    "comment",
    {
      "parent_author": "",
      "parent_permlink": "tutorial",
      "author": "faderstudio",
      "permlink": "tutorial-audio-19-violino",
      "title": "Tutorial Audio # 19 Violino",
      "body": "Questo tutorial e' dedicato alla registrazione in Studio di Registrazione del Violino; saranno affrontati tanti temi ed alcuni piccoli segreti. Vi aspettiamo presso il nostro Studio di Produzione Musicale.\n\n<iframe width=\"560\" height=\"315\" src=\"https://www.youtube.com/embed/urAkHYgCrNI\" frameborder=\"0\" gesture=\"media\" allow=\"encrypted-media\" allowfullscreen></iframe>\n\nContact:\n\nYoutube: http://ow.ly/pPP030hA2VW\nTwitter: http://ow.ly/TjmV30hA2XF\nFacebook: http://ow.ly/TqE630hA2ZL\nGoogle + : http://ow.ly/Y2fq30hA339\nApple iTunes Podcast: http://ow.ly/6BIU30hA35i",
      "json_metadata": "{\"tags\":[\"tutorial\",\"violino\",\"corso\",\"studio\",\"registrazione\"],\"image\":[\"https://img.youtube.com/vi/urAkHYgCrNI/0.jpg\"],\"links\":[\"https://www.youtube.com/embed/urAkHYgCrNI\",\"http://ow.ly/pPP030hA2VW\",\"http://ow.ly/TjmV30hA2XF\",\"http://ow.ly/TqE630hA2ZL\",\"http://ow.ly/Y2fq30hA339\",\"http://ow.ly/6BIU30hA35i\"],\"app\":\"steemit/0.1\",\"format\":\"markdown\"}"
    }
  ]
}faderstudiopublished a new post: tutorial-audio-18-percussioni-parte-22018/01/09 10:45:30
faderstudiopublished a new post: tutorial-audio-18-percussioni-parte-2
2018/01/09 10:45:30
| parent author | |
| parent permlink | tutorial |
| author | faderstudio |
| permlink | tutorial-audio-18-percussioni-parte-2 |
| title | Tutorial Audio # 18 Percussioni Parte 2 |
| body | Questo tutorial e' dedicato alla registrazione in Studio di Registrazione delle Percussioni (2a parte); saranno affrontati tanti temi ed alcuni piccoli segreti. Vi aspettiamo presso il nostro Studio di Produzione Musicale. <iframe width="560" height="315" src="https://www.youtube.com/embed/1UAyZnI7_pA" frameborder="0" gesture="media" allow="encrypted-media" allowfullscreen></iframe> Contact: Youtube: http://ow.ly/pPP030hA2VW Twitter: http://ow.ly/TjmV30hA2XF Facebook: http://ow.ly/TqE630hA2ZL Google + : http://ow.ly/Y2fq30hA339 Apple iTunes Podcast: http://ow.ly/6BIU30hA35i |
| json metadata | {"tags":["tutorial","percussioni","corso","studio","registrazione"],"image":["https://img.youtube.com/vi/1UAyZnI7_pA/0.jpg"],"links":["https://www.youtube.com/embed/1UAyZnI7_pA","http://ow.ly/pPP030hA2VW","http://ow.ly/TjmV30hA2XF","http://ow.ly/TqE630hA2ZL","http://ow.ly/Y2fq30hA339","http://ow.ly/6BIU30hA35i"],"app":"steemit/0.1","format":"markdown"} |
| Transaction Info | Block #18824502/Trx 66e71e0e5ca1845e21473e64b2d827d11dfbf817 |
View Raw JSON Data
{
  "trx_id": "66e71e0e5ca1845e21473e64b2d827d11dfbf817",
  "block": 18824502,
  "trx_in_block": 24,
  "op_in_trx": 0,
  "virtual_op": 0,
  "timestamp": "2018-01-09T10:45:30",
  "op": [
    "comment",
    {
      "parent_author": "",
      "parent_permlink": "tutorial",
      "author": "faderstudio",
      "permlink": "tutorial-audio-18-percussioni-parte-2",
      "title": "Tutorial Audio # 18 Percussioni Parte 2",
      "body": "Questo tutorial e' dedicato alla registrazione in Studio di Registrazione delle Percussioni (2a parte); saranno affrontati tanti temi ed alcuni piccoli segreti. Vi aspettiamo presso il nostro Studio di Produzione Musicale.\n\n<iframe width=\"560\" height=\"315\" src=\"https://www.youtube.com/embed/1UAyZnI7_pA\" frameborder=\"0\" gesture=\"media\" allow=\"encrypted-media\" allowfullscreen></iframe>\n\nContact:\n\nYoutube: http://ow.ly/pPP030hA2VW\nTwitter: http://ow.ly/TjmV30hA2XF\nFacebook: http://ow.ly/TqE630hA2ZL\nGoogle + : http://ow.ly/Y2fq30hA339\nApple iTunes Podcast: http://ow.ly/6BIU30hA35i",
      "json_metadata": "{\"tags\":[\"tutorial\",\"percussioni\",\"corso\",\"studio\",\"registrazione\"],\"image\":[\"https://img.youtube.com/vi/1UAyZnI7_pA/0.jpg\"],\"links\":[\"https://www.youtube.com/embed/1UAyZnI7_pA\",\"http://ow.ly/pPP030hA2VW\",\"http://ow.ly/TjmV30hA2XF\",\"http://ow.ly/TqE630hA2ZL\",\"http://ow.ly/Y2fq30hA339\",\"http://ow.ly/6BIU30hA35i\"],\"app\":\"steemit/0.1\",\"format\":\"markdown\"}"
    }
  ]
}2018/01/09 10:32:15
2018/01/09 10:32:15
| parent author | faderstudio |
| parent permlink | tutorial-audio-17-percussioni-parte-1 |
| author | allnatural |
| permlink | re-faderstudio-tutorial-audio-17-percussioni-parte-1-20180109t103214865z |
| title | |
| body | Get Paid For Your Comments 💰 🤑 https://steemit.com/steemit/@a-a-a/get-paid-for-your-comments |
| json metadata | {"tags":["tutorial"],"links":["https://steemit.com/steemit/@a-a-a/get-paid-for-your-comments"],"app":"steemit/0.1"} |
| Transaction Info | Block #18824238/Trx 8631c9a328f41820bfbbeded30c9e70af54d3883 |
View Raw JSON Data
{
  "trx_id": "8631c9a328f41820bfbbeded30c9e70af54d3883",
  "block": 18824238,
  "trx_in_block": 4,
  "op_in_trx": 0,
  "virtual_op": 0,
  "timestamp": "2018-01-09T10:32:15",
  "op": [
    "comment",
    {
      "parent_author": "faderstudio",
      "parent_permlink": "tutorial-audio-17-percussioni-parte-1",
      "author": "allnatural",
      "permlink": "re-faderstudio-tutorial-audio-17-percussioni-parte-1-20180109t103214865z",
      "title": "",
      "body": "Get Paid For Your Comments 💰 🤑 https://steemit.com/steemit/@a-a-a/get-paid-for-your-comments",
      "json_metadata": "{\"tags\":[\"tutorial\"],\"links\":[\"https://steemit.com/steemit/@a-a-a/get-paid-for-your-comments\"],\"app\":\"steemit/0.1\"}"
    }
  ]
}faderstudiopublished a new post: tutorial-audio-17-percussioni-parte-12018/01/09 10:31:57
faderstudiopublished a new post: tutorial-audio-17-percussioni-parte-1
2018/01/09 10:31:57
| parent author | |
| parent permlink | tutorial |
| author | faderstudio |
| permlink | tutorial-audio-17-percussioni-parte-1 |
| title | Tutorial Audio # 17 Percussioni Parte 1 |
| body | Questo tutorial e' dedicato alla registrazione in Studio di Registrazione delle Percussioni (1a parte); saranno affrontati tanti temi ed alcuni piccoli segreti. Vi aspettiamo presso il nostro Studio di Produzione Musicale. <iframe width="560" height="315" src="https://www.youtube.com/embed/VYA9oJeQRWM" frameborder="0" gesture="media" allow="encrypted-media" allowfullscreen></iframe> Contact: Youtube: http://ow.ly/pPP030hA2VW Twitter: http://ow.ly/TjmV30hA2XF Facebook: http://ow.ly/TqE630hA2ZL Google + : http://ow.ly/Y2fq30hA339 Apple iTunes Podcast: http://ow.ly/6BIU30hA35i |
| json metadata | {"tags":["tutorial","percussioni","studio","corso","registrazione"],"image":["https://img.youtube.com/vi/VYA9oJeQRWM/0.jpg"],"links":["https://www.youtube.com/embed/VYA9oJeQRWM","http://ow.ly/pPP030hA2VW","http://ow.ly/TjmV30hA2XF","http://ow.ly/TqE630hA2ZL","http://ow.ly/Y2fq30hA339","http://ow.ly/6BIU30hA35i"],"app":"steemit/0.1","format":"markdown"} |
| Transaction Info | Block #18824232/Trx da8eba44a29fd74799ecc3be91889dde3159c2f2 |
View Raw JSON Data
{
  "trx_id": "da8eba44a29fd74799ecc3be91889dde3159c2f2",
  "block": 18824232,
  "trx_in_block": 38,
  "op_in_trx": 0,
  "virtual_op": 0,
  "timestamp": "2018-01-09T10:31:57",
  "op": [
    "comment",
    {
      "parent_author": "",
      "parent_permlink": "tutorial",
      "author": "faderstudio",
      "permlink": "tutorial-audio-17-percussioni-parte-1",
      "title": "Tutorial Audio # 17 Percussioni Parte 1",
      "body": "Questo tutorial e' dedicato alla registrazione in Studio di Registrazione delle Percussioni (1a parte); saranno affrontati tanti temi ed alcuni piccoli segreti. Vi aspettiamo presso il nostro Studio di Produzione Musicale.\n\n<iframe width=\"560\" height=\"315\" src=\"https://www.youtube.com/embed/VYA9oJeQRWM\" frameborder=\"0\" gesture=\"media\" allow=\"encrypted-media\" allowfullscreen></iframe>\n\nContact:\n\nYoutube: http://ow.ly/pPP030hA2VW\nTwitter: http://ow.ly/TjmV30hA2XF\nFacebook: http://ow.ly/TqE630hA2ZL\nGoogle + : http://ow.ly/Y2fq30hA339\nApple iTunes Podcast: http://ow.ly/6BIU30hA35i",
      "json_metadata": "{\"tags\":[\"tutorial\",\"percussioni\",\"studio\",\"corso\",\"registrazione\"],\"image\":[\"https://img.youtube.com/vi/VYA9oJeQRWM/0.jpg\"],\"links\":[\"https://www.youtube.com/embed/VYA9oJeQRWM\",\"http://ow.ly/pPP030hA2VW\",\"http://ow.ly/TjmV30hA2XF\",\"http://ow.ly/TqE630hA2ZL\",\"http://ow.ly/Y2fq30hA339\",\"http://ow.ly/6BIU30hA35i\"],\"app\":\"steemit/0.1\",\"format\":\"markdown\"}"
    }
  ]
}faderstudiopublished a new post: tutorial-audio-16-batteria-parte-32018/01/09 10:24:24
faderstudiopublished a new post: tutorial-audio-16-batteria-parte-3
2018/01/09 10:24:24
| parent author | |
| parent permlink | tutorial |
| author | faderstudio |
| permlink | tutorial-audio-16-batteria-parte-3 |
| title | Tutorial Audio # 16 Batteria parte 3 |
| body | Questo tutorial e' dedicato alla registrazione in Studio di Registrazione della Batteria (3a parte); saranno affrontati tanti temi ed alcuni piccoli segreti. Vi aspettiamo presso il nostro Studio di Produzione Musicale. <iframe width="560" height="315" src="https://www.youtube.com/embed/6NmGmxWlfAM" frameborder="0" gesture="media" allow="encrypted-media" allowfullscreen></iframe> Contact: Youtube: http://ow.ly/pPP030hA2VW Twitter: http://ow.ly/TjmV30hA2XF Facebook: http://ow.ly/TqE630hA2ZL Google + : http://ow.ly/Y2fq30hA339 Apple iTunes Podcast: http://ow.ly/6BIU30hA35i |
| json metadata | {"tags":["tutorial","batteria","corso","studio","registrazione"],"image":["https://img.youtube.com/vi/6NmGmxWlfAM/0.jpg"],"links":["https://www.youtube.com/embed/6NmGmxWlfAM","http://ow.ly/pPP030hA2VW","http://ow.ly/TjmV30hA2XF","http://ow.ly/TqE630hA2ZL","http://ow.ly/Y2fq30hA339","http://ow.ly/6BIU30hA35i"],"app":"steemit/0.1","format":"markdown"} |
| Transaction Info | Block #18824081/Trx dd39c77c706ed106d1bf73145d0a4de3238a0165 |
View Raw JSON Data
{
  "trx_id": "dd39c77c706ed106d1bf73145d0a4de3238a0165",
  "block": 18824081,
  "trx_in_block": 30,
  "op_in_trx": 0,
  "virtual_op": 0,
  "timestamp": "2018-01-09T10:24:24",
  "op": [
    "comment",
    {
      "parent_author": "",
      "parent_permlink": "tutorial",
      "author": "faderstudio",
      "permlink": "tutorial-audio-16-batteria-parte-3",
      "title": "Tutorial Audio # 16 Batteria parte 3",
      "body": "Questo tutorial e' dedicato alla registrazione in Studio di Registrazione della Batteria (3a parte); saranno affrontati tanti temi ed alcuni piccoli segreti. Vi aspettiamo presso il nostro Studio di Produzione Musicale.\n\n<iframe width=\"560\" height=\"315\" src=\"https://www.youtube.com/embed/6NmGmxWlfAM\" frameborder=\"0\" gesture=\"media\" allow=\"encrypted-media\" allowfullscreen></iframe>\n\nContact:\n\nYoutube: http://ow.ly/pPP030hA2VW\nTwitter: http://ow.ly/TjmV30hA2XF\nFacebook: http://ow.ly/TqE630hA2ZL\nGoogle + : http://ow.ly/Y2fq30hA339\nApple iTunes Podcast: http://ow.ly/6BIU30hA35i",
      "json_metadata": "{\"tags\":[\"tutorial\",\"batteria\",\"corso\",\"studio\",\"registrazione\"],\"image\":[\"https://img.youtube.com/vi/6NmGmxWlfAM/0.jpg\"],\"links\":[\"https://www.youtube.com/embed/6NmGmxWlfAM\",\"http://ow.ly/pPP030hA2VW\",\"http://ow.ly/TjmV30hA2XF\",\"http://ow.ly/TqE630hA2ZL\",\"http://ow.ly/Y2fq30hA339\",\"http://ow.ly/6BIU30hA35i\"],\"app\":\"steemit/0.1\",\"format\":\"markdown\"}"
    }
  ]
}faderstudiopublished a new post: tutorial-audio-15-batteria-parte-22018/01/09 10:15:57
faderstudiopublished a new post: tutorial-audio-15-batteria-parte-2
2018/01/09 10:15:57
| parent author | |
| parent permlink | tutorial |
| author | faderstudio |
| permlink | tutorial-audio-15-batteria-parte-2 |
| title | Tutorial Audio # 15 Batteria parte 2 |
| body | Questo tutorial e' dedicato alla registrazione in Studio di Registrazione della Batteria (2a parte); saranno affrontati tanti temi ed alcuni piccoli segreti. Vi aspettiamo presso il nostro Studio di Produzione Musicale. <iframe width="560" height="315" src="https://www.youtube.com/embed/XuEpdxHQBkE" frameborder="0" gesture="media" allow="encrypted-media" allowfullscreen></iframe> Contact: Youtube: http://ow.ly/pPP030hA2VW Twitter: http://ow.ly/TjmV30hA2XF Facebook: http://ow.ly/TqE630hA2ZL Google + : http://ow.ly/Y2fq30hA339 Apple iTunes Podcast: http://ow.ly/6BIU30hA35i |
| json metadata | {"tags":["tutorial","batteria","corso","studio","registrazione"],"image":["https://img.youtube.com/vi/XuEpdxHQBkE/0.jpg"],"links":["https://www.youtube.com/embed/XuEpdxHQBkE","http://ow.ly/pPP030hA2VW","http://ow.ly/TjmV30hA2XF","http://ow.ly/TqE630hA2ZL","http://ow.ly/Y2fq30hA339","http://ow.ly/6BIU30hA35i"],"app":"steemit/0.1","format":"markdown"} |
| Transaction Info | Block #18823912/Trx a3557020bd1785155caede0d71705b6ed772288b |
View Raw JSON Data
{
  "trx_id": "a3557020bd1785155caede0d71705b6ed772288b",
  "block": 18823912,
  "trx_in_block": 22,
  "op_in_trx": 0,
  "virtual_op": 0,
  "timestamp": "2018-01-09T10:15:57",
  "op": [
    "comment",
    {
      "parent_author": "",
      "parent_permlink": "tutorial",
      "author": "faderstudio",
      "permlink": "tutorial-audio-15-batteria-parte-2",
      "title": "Tutorial Audio # 15 Batteria parte 2",
      "body": "Questo tutorial e' dedicato alla registrazione in Studio di Registrazione della Batteria (2a parte); saranno affrontati tanti temi ed alcuni piccoli segreti. Vi aspettiamo presso il nostro Studio di Produzione Musicale.\n\n<iframe width=\"560\" height=\"315\" src=\"https://www.youtube.com/embed/XuEpdxHQBkE\" frameborder=\"0\" gesture=\"media\" allow=\"encrypted-media\" allowfullscreen></iframe>\n\nContact:\n\nYoutube: http://ow.ly/pPP030hA2VW\nTwitter: http://ow.ly/TjmV30hA2XF\nFacebook: http://ow.ly/TqE630hA2ZL\nGoogle + : http://ow.ly/Y2fq30hA339\nApple iTunes Podcast: http://ow.ly/6BIU30hA35i",
      "json_metadata": "{\"tags\":[\"tutorial\",\"batteria\",\"corso\",\"studio\",\"registrazione\"],\"image\":[\"https://img.youtube.com/vi/XuEpdxHQBkE/0.jpg\"],\"links\":[\"https://www.youtube.com/embed/XuEpdxHQBkE\",\"http://ow.ly/pPP030hA2VW\",\"http://ow.ly/TjmV30hA2XF\",\"http://ow.ly/TqE630hA2ZL\",\"http://ow.ly/Y2fq30hA339\",\"http://ow.ly/6BIU30hA35i\"],\"app\":\"steemit/0.1\",\"format\":\"markdown\"}"
    }
  ]
}faderstudiopublished a new post: tutorial-audio-14-batteria-parte-12018/01/09 10:01:21
faderstudiopublished a new post: tutorial-audio-14-batteria-parte-1
2018/01/09 10:01:21
| parent author | |
| parent permlink | tutorial |
| author | faderstudio |
| permlink | tutorial-audio-14-batteria-parte-1 |
| title | Tutorial Audio # 14 Batteria parte 1 |
| body | Questo tutorial e' dedicato alla registrazione in Studio di Registrazione della Batteria (1a parte); saranno affrontati tanti temi ed alcuni piccoli segreti. Vi aspettiamo presso il nostro Studio di Produzione Musicale. <iframe width="560" height="315" src="https://www.youtube.com/embed/U63X8ngOW_s" frameborder="0" gesture="media" allow="encrypted-media" allowfullscreen></iframe> Contact: Youtube: http://ow.ly/pPP030hA2VW Twitter: http://ow.ly/TjmV30hA2XF Facebook: http://ow.ly/TqE630hA2ZL Google + : http://ow.ly/Y2fq30hA339 Apple iTunes Podcast: http://ow.ly/6BIU30hA35i |
| json metadata | {"tags":["tutorial","batteria","corso","studio","registrazione"],"image":["https://img.youtube.com/vi/U63X8ngOW_s/0.jpg"],"links":["https://www.youtube.com/embed/U63X8ngOW_s","http://ow.ly/pPP030hA2VW","http://ow.ly/TjmV30hA2XF","http://ow.ly/TqE630hA2ZL","http://ow.ly/Y2fq30hA339","http://ow.ly/6BIU30hA35i"],"app":"steemit/0.1","format":"markdown"} |
| Transaction Info | Block #18823621/Trx df733020bd6340cf24c5fff999937c29d51a5c7d |
View Raw JSON Data
{
  "trx_id": "df733020bd6340cf24c5fff999937c29d51a5c7d",
  "block": 18823621,
  "trx_in_block": 29,
  "op_in_trx": 0,
  "virtual_op": 0,
  "timestamp": "2018-01-09T10:01:21",
  "op": [
    "comment",
    {
      "parent_author": "",
      "parent_permlink": "tutorial",
      "author": "faderstudio",
      "permlink": "tutorial-audio-14-batteria-parte-1",
      "title": "Tutorial Audio # 14 Batteria parte 1",
      "body": "Questo tutorial e' dedicato alla registrazione in Studio di Registrazione della Batteria (1a parte); saranno affrontati tanti temi ed alcuni piccoli segreti. Vi aspettiamo presso il nostro Studio di Produzione Musicale.\n\n<iframe width=\"560\" height=\"315\" src=\"https://www.youtube.com/embed/U63X8ngOW_s\" frameborder=\"0\" gesture=\"media\" allow=\"encrypted-media\" allowfullscreen></iframe>\n\nContact:\n\nYoutube: http://ow.ly/pPP030hA2VW\nTwitter: http://ow.ly/TjmV30hA2XF\nFacebook: http://ow.ly/TqE630hA2ZL\nGoogle + : http://ow.ly/Y2fq30hA339\nApple iTunes Podcast: http://ow.ly/6BIU30hA35i",
      "json_metadata": "{\"tags\":[\"tutorial\",\"batteria\",\"corso\",\"studio\",\"registrazione\"],\"image\":[\"https://img.youtube.com/vi/U63X8ngOW_s/0.jpg\"],\"links\":[\"https://www.youtube.com/embed/U63X8ngOW_s\",\"http://ow.ly/pPP030hA2VW\",\"http://ow.ly/TjmV30hA2XF\",\"http://ow.ly/TqE630hA2ZL\",\"http://ow.ly/Y2fq30hA339\",\"http://ow.ly/6BIU30hA35i\"],\"app\":\"steemit/0.1\",\"format\":\"markdown\"}"
    }
  ]
}faderstudiopublished a new post: tutorial-audio-13-pianoforte2018/01/09 09:39:00
faderstudiopublished a new post: tutorial-audio-13-pianoforte
2018/01/09 09:39:00
| parent author | |
| parent permlink | tutorial |
| author | faderstudio |
| permlink | tutorial-audio-13-pianoforte |
| title | Tutorial Audio # 13 Pianoforte |
| body | Questo tutorial e' dedicato alla registrazione in Studio di Registrazione dei Pianoforte; saranno affrontati tanti temi ed alcuni piccoli segreti. Vi aspettiamo presso il nostro Studio di Produzione Musicale. <iframe width="560" height="315" src="https://www.youtube.com/embed/L6FX5zl2Hz0" frameborder="0" gesture="media" allow="encrypted-media" allowfullscreen></iframe> Contact: Youtube: http://ow.ly/pPP030hA2VW Twitter: http://ow.ly/TjmV30hA2XF Facebook: http://ow.ly/TqE630hA2ZL Google + : http://ow.ly/Y2fq30hA339 Apple iTunes Podcast: http://ow.ly/6BIU30hA35i |
| json metadata | {"tags":["tutorial","pianoforte","corso","studio","registrazione"],"image":["https://img.youtube.com/vi/L6FX5zl2Hz0/0.jpg"],"links":["https://www.youtube.com/embed/L6FX5zl2Hz0","http://ow.ly/pPP030hA2VW","http://ow.ly/TjmV30hA2XF","http://ow.ly/TqE630hA2ZL","http://ow.ly/Y2fq30hA339","http://ow.ly/6BIU30hA35i"],"app":"steemit/0.1","format":"markdown"} |
| Transaction Info | Block #18823174/Trx 3152e134bdd0c65f383e84fb0cf195ef1fe6bfc8 |
View Raw JSON Data
{
  "trx_id": "3152e134bdd0c65f383e84fb0cf195ef1fe6bfc8",
  "block": 18823174,
  "trx_in_block": 41,
  "op_in_trx": 0,
  "virtual_op": 0,
  "timestamp": "2018-01-09T09:39:00",
  "op": [
    "comment",
    {
      "parent_author": "",
      "parent_permlink": "tutorial",
      "author": "faderstudio",
      "permlink": "tutorial-audio-13-pianoforte",
      "title": "Tutorial Audio # 13 Pianoforte",
      "body": "Questo tutorial e' dedicato alla registrazione in Studio di Registrazione dei Pianoforte; saranno affrontati tanti temi ed alcuni piccoli segreti. Vi aspettiamo presso il nostro Studio di Produzione Musicale.\n\n<iframe width=\"560\" height=\"315\" src=\"https://www.youtube.com/embed/L6FX5zl2Hz0\" frameborder=\"0\" gesture=\"media\" allow=\"encrypted-media\" allowfullscreen></iframe>\n\nContact:\n\nYoutube: http://ow.ly/pPP030hA2VW\nTwitter: http://ow.ly/TjmV30hA2XF\nFacebook: http://ow.ly/TqE630hA2ZL\nGoogle + : http://ow.ly/Y2fq30hA339\nApple iTunes Podcast: http://ow.ly/6BIU30hA35i",
      "json_metadata": "{\"tags\":[\"tutorial\",\"pianoforte\",\"corso\",\"studio\",\"registrazione\"],\"image\":[\"https://img.youtube.com/vi/L6FX5zl2Hz0/0.jpg\"],\"links\":[\"https://www.youtube.com/embed/L6FX5zl2Hz0\",\"http://ow.ly/pPP030hA2VW\",\"http://ow.ly/TjmV30hA2XF\",\"http://ow.ly/TqE630hA2ZL\",\"http://ow.ly/Y2fq30hA339\",\"http://ow.ly/6BIU30hA35i\"],\"app\":\"steemit/0.1\",\"format\":\"markdown\"}"
    }
  ]
}faderstudiodeleted a comment or post2018/01/09 09:32:30
faderstudiodeleted a comment or post
2018/01/09 09:32:30
| author | faderstudio |
| permlink | tutorial-audio-13-pianoforte |
| Transaction Info | Block #18823044/Trx aff5f09553341c144957b97fdcac64bac6a321f4 |
View Raw JSON Data
{
  "trx_id": "aff5f09553341c144957b97fdcac64bac6a321f4",
  "block": 18823044,
  "trx_in_block": 21,
  "op_in_trx": 0,
  "virtual_op": 0,
  "timestamp": "2018-01-09T09:32:30",
  "op": [
    "delete_comment",
    {
      "author": "faderstudio",
      "permlink": "tutorial-audio-13-pianoforte"
    }
  ]
}faderstudioupdated options for tutorial-audio-13-pianoforte2018/01/09 09:31:48
faderstudioupdated options for tutorial-audio-13-pianoforte
2018/01/09 09:31:48
| author | faderstudio |
| permlink | tutorial-audio-13-pianoforte |
| max accepted payout | 1000000.000 SBD |
| percent steem dollars | 0 |
| allow votes | true |
| allow curation rewards | true |
| extensions | [] |
| Transaction Info | Block #18823030/Trx 44d953dfb14c7e4a33d176f2ca9fbf5f22abd759 |
View Raw JSON Data
{
  "trx_id": "44d953dfb14c7e4a33d176f2ca9fbf5f22abd759",
  "block": 18823030,
  "trx_in_block": 8,
  "op_in_trx": 0,
  "virtual_op": 0,
  "timestamp": "2018-01-09T09:31:48",
  "op": [
    "comment_options",
    {
      "author": "faderstudio",
      "permlink": "tutorial-audio-13-pianoforte",
      "max_accepted_payout": "1000000.000 SBD",
      "percent_steem_dollars": 0,
      "allow_votes": true,
      "allow_curation_rewards": true,
      "extensions": []
    }
  ]
}faderstudiopublished a new post: tutorial-audio-13-pianoforte2018/01/09 09:31:48
faderstudiopublished a new post: tutorial-audio-13-pianoforte
2018/01/09 09:31:48
| parent author | |
| parent permlink | tutorial |
| author | faderstudio |
| permlink | tutorial-audio-13-pianoforte |
| title | Tutorial Audio # 13 Pianoforte |
| body | Questo tutorial e' dedicato alla registrazione in Studio di Registrazione del Pianoforte; saranno affrontati tanti temi ed alcuni piccoli segreti. Vi aspettiamo presso il nostro Studio di Produzione Musicale. <iframe width="560" height="315" src="https://www.youtube.com/embed/L6FX5zl2Hz0" frameborder="0" gesture="media" allow="encrypted-media" allowfullscreen></iframe> Contact: Youtube: http://ow.ly/pPP030hA2VW Twitter: http://ow.ly/TjmV30hA2XF Facebook: http://ow.ly/TqE630hA2ZL Google + : http://ow.ly/Y2fq30hA339 Apple iTunes Podcast: http://ow.ly/6BIU30hA35i |
| json metadata | {"tags":["tutorial","pianoforte","audio","studio","registrazione"],"image":["https://img.youtube.com/vi/L6FX5zl2Hz0/0.jpg"],"links":["https://www.youtube.com/embed/L6FX5zl2Hz0","http://ow.ly/pPP030hA2VW","http://ow.ly/TjmV30hA2XF","http://ow.ly/TqE630hA2ZL","http://ow.ly/Y2fq30hA339","http://ow.ly/6BIU30hA35i"],"app":"steemit/0.1","format":"markdown"} |
| Transaction Info | Block #18823030/Trx 44d953dfb14c7e4a33d176f2ca9fbf5f22abd759 |
View Raw JSON Data
{
  "trx_id": "44d953dfb14c7e4a33d176f2ca9fbf5f22abd759",
  "block": 18823030,
  "trx_in_block": 8,
  "op_in_trx": 0,
  "virtual_op": 0,
  "timestamp": "2018-01-09T09:31:48",
  "op": [
    "comment",
    {
      "parent_author": "",
      "parent_permlink": "tutorial",
      "author": "faderstudio",
      "permlink": "tutorial-audio-13-pianoforte",
      "title": "Tutorial Audio # 13 Pianoforte",
      "body": "Questo tutorial e' dedicato alla registrazione in Studio di Registrazione del Pianoforte; saranno affrontati tanti temi ed alcuni piccoli segreti. Vi aspettiamo presso il nostro Studio di Produzione Musicale.\n\n<iframe width=\"560\" height=\"315\" src=\"https://www.youtube.com/embed/L6FX5zl2Hz0\" frameborder=\"0\" gesture=\"media\" allow=\"encrypted-media\" allowfullscreen></iframe>\n\nContact:\n\nYoutube: http://ow.ly/pPP030hA2VW\nTwitter: http://ow.ly/TjmV30hA2XF\nFacebook: http://ow.ly/TqE630hA2ZL\nGoogle + : http://ow.ly/Y2fq30hA339\nApple iTunes Podcast: http://ow.ly/6BIU30hA35i",
      "json_metadata": "{\"tags\":[\"tutorial\",\"pianoforte\",\"audio\",\"studio\",\"registrazione\"],\"image\":[\"https://img.youtube.com/vi/L6FX5zl2Hz0/0.jpg\"],\"links\":[\"https://www.youtube.com/embed/L6FX5zl2Hz0\",\"http://ow.ly/pPP030hA2VW\",\"http://ow.ly/TjmV30hA2XF\",\"http://ow.ly/TqE630hA2ZL\",\"http://ow.ly/Y2fq30hA339\",\"http://ow.ly/6BIU30hA35i\"],\"app\":\"steemit/0.1\",\"format\":\"markdown\"}"
    }
  ]
}steemdelegated 18.265 SP to @faderstudio2018/01/08 19:33:15
steemdelegated 18.265 SP to @faderstudio
2018/01/08 19:33:15
| delegator | steem |
| delegatee | faderstudio |
| vesting shares | 29700.591722 VESTS |
| Transaction Info | Block #18806287/Trx bc961a31c49584ed75d32a0ad2c342806f625434 |
View Raw JSON Data
{
  "trx_id": "bc961a31c49584ed75d32a0ad2c342806f625434",
  "block": 18806287,
  "trx_in_block": 37,
  "op_in_trx": 0,
  "virtual_op": 0,
  "timestamp": "2018-01-08T19:33:15",
  "op": [
    "delegate_vesting_shares",
    {
      "delegator": "steem",
      "delegatee": "faderstudio",
      "vesting_shares": "29700.591722 VESTS"
    }
  ]
}faderstudiopublished a new post: tutorial-audio-12-brass-fiati2018/01/08 10:27:45
faderstudiopublished a new post: tutorial-audio-12-brass-fiati
2018/01/08 10:27:45
| parent author | |
| parent permlink | tutorial |
| author | faderstudio |
| permlink | tutorial-audio-12-brass-fiati |
| title | Tutorial Audio # 12 Brass Fiati |
| body | Questo tutorial e' dedicato alla registrazione in Studio di Registrazione dei Brass e Fiati; saranno affrontati tanti temi ed alcuni piccoli segreti. Vi aspettiamo presso il nostro Studio di Produzione Musicale. <iframe width="560" height="315" src="https://www.youtube.com/embed/i7JLd4xsb0c" frameborder="0" gesture="media" allow="encrypted-media" allowfullscreen></iframe> Contact: Youtube: http://ow.ly/pPP030hA2VW Twitter: http://ow.ly/TjmV30hA2XF Facebook: http://ow.ly/TqE630hA2ZL Google + : http://ow.ly/Y2fq30hA339 Apple iTunes Podcast: http://ow.ly/6BIU30hA35i |
| json metadata | {"tags":["tutorial","audio","brass","fiati","studio"],"image":["https://img.youtube.com/vi/i7JLd4xsb0c/0.jpg"],"links":["https://www.youtube.com/embed/i7JLd4xsb0c","http://ow.ly/pPP030hA2VW","http://ow.ly/TjmV30hA2XF","http://ow.ly/TqE630hA2ZL","http://ow.ly/Y2fq30hA339","http://ow.ly/6BIU30hA35i"],"app":"steemit/0.1","format":"markdown"} |
| Transaction Info | Block #18795403/Trx fdf96adf08bc5795f5f451d4ab9756fba2847ba2 |
View Raw JSON Data
{
  "trx_id": "fdf96adf08bc5795f5f451d4ab9756fba2847ba2",
  "block": 18795403,
  "trx_in_block": 42,
  "op_in_trx": 0,
  "virtual_op": 0,
  "timestamp": "2018-01-08T10:27:45",
  "op": [
    "comment",
    {
      "parent_author": "",
      "parent_permlink": "tutorial",
      "author": "faderstudio",
      "permlink": "tutorial-audio-12-brass-fiati",
      "title": "Tutorial Audio # 12 Brass Fiati",
      "body": "Questo tutorial e' dedicato alla registrazione in Studio di Registrazione dei Brass e Fiati; saranno affrontati tanti temi ed alcuni piccoli segreti. Vi aspettiamo presso il nostro Studio di Produzione Musicale.\n\n<iframe width=\"560\" height=\"315\" src=\"https://www.youtube.com/embed/i7JLd4xsb0c\" frameborder=\"0\" gesture=\"media\" allow=\"encrypted-media\" allowfullscreen></iframe>\n\nContact:\n\nYoutube: http://ow.ly/pPP030hA2VW\nTwitter: http://ow.ly/TjmV30hA2XF\nFacebook: http://ow.ly/TqE630hA2ZL\nGoogle + : http://ow.ly/Y2fq30hA339\nApple iTunes Podcast: http://ow.ly/6BIU30hA35i",
      "json_metadata": "{\"tags\":[\"tutorial\",\"audio\",\"brass\",\"fiati\",\"studio\"],\"image\":[\"https://img.youtube.com/vi/i7JLd4xsb0c/0.jpg\"],\"links\":[\"https://www.youtube.com/embed/i7JLd4xsb0c\",\"http://ow.ly/pPP030hA2VW\",\"http://ow.ly/TjmV30hA2XF\",\"http://ow.ly/TqE630hA2ZL\",\"http://ow.ly/Y2fq30hA339\",\"http://ow.ly/6BIU30hA35i\"],\"app\":\"steemit/0.1\",\"format\":\"markdown\"}"
    }
  ]
}faderstudioupdated options for tutorial-audio-12-brass-fiati2018/01/08 10:27:15
faderstudioupdated options for tutorial-audio-12-brass-fiati
2018/01/08 10:27:15
| author | faderstudio |
| permlink | tutorial-audio-12-brass-fiati |
| max accepted payout | 1000000.000 SBD |
| percent steem dollars | 0 |
| allow votes | true |
| allow curation rewards | true |
| extensions | [] |
| Transaction Info | Block #18795393/Trx d73d4ccc190aa580bb3b88e02a4695d2bdbbb107 |
View Raw JSON Data
{
  "trx_id": "d73d4ccc190aa580bb3b88e02a4695d2bdbbb107",
  "block": 18795393,
  "trx_in_block": 6,
  "op_in_trx": 0,
  "virtual_op": 0,
  "timestamp": "2018-01-08T10:27:15",
  "op": [
    "comment_options",
    {
      "author": "faderstudio",
      "permlink": "tutorial-audio-12-brass-fiati",
      "max_accepted_payout": "1000000.000 SBD",
      "percent_steem_dollars": 0,
      "allow_votes": true,
      "allow_curation_rewards": true,
      "extensions": []
    }
  ]
}faderstudiopublished a new post: tutorial-audio-12-brass-fiati2018/01/08 10:27:15
faderstudiopublished a new post: tutorial-audio-12-brass-fiati
2018/01/08 10:27:15
| parent author | |
| parent permlink | tutorial |
| author | faderstudio |
| permlink | tutorial-audio-12-brass-fiati |
| title | Tutorial Audio # 12 Brass Fiati |
| body | Questo tutorial e' dedicato alla registrazione in Studio di Registrazione dei Brass e Fiati; saranno affrontati tanti temi ed alcuni piccoli segreti. Vi aspettiamo presso il nostro Studio di Produzione Musicale. <iframe width="560" height="315" src="https://www.youtube.com/embed/i7JLd4xsb0c" frameborder="0" gesture="media" allow="encrypted-media" allowfullscreen></iframe> Contact: Youtube: http://ow.ly/pPP030hA2VW Twitter: http://ow.ly/TjmV30hA2XF Facebook: http://ow.ly/TqE630hA2ZL Google + : http://ow.ly/Y2fq30hA339 Apple iTunes Podcast: http://ow.ly/6BIU30hA35i |
| json metadata | {"tags":["tutorial","audio","brass","fiati","studio"],"image":["https://img.youtube.com/vi/i7JLd4xsb0c/0.jpg"],"links":["https://www.youtube.com/embed/i7JLd4xsb0c","http://ow.ly/pPP030hA2VW","http://ow.ly/TjmV30hA2XF","http://ow.ly/TqE630hA2ZL","http://ow.ly/Y2fq30hA339","http://ow.ly/6BIU30hA35i"],"app":"steemit/0.1","format":"markdown"} |
| Transaction Info | Block #18795393/Trx d73d4ccc190aa580bb3b88e02a4695d2bdbbb107 |
View Raw JSON Data
{
  "trx_id": "d73d4ccc190aa580bb3b88e02a4695d2bdbbb107",
  "block": 18795393,
  "trx_in_block": 6,
  "op_in_trx": 0,
  "virtual_op": 0,
  "timestamp": "2018-01-08T10:27:15",
  "op": [
    "comment",
    {
      "parent_author": "",
      "parent_permlink": "tutorial",
      "author": "faderstudio",
      "permlink": "tutorial-audio-12-brass-fiati",
      "title": "Tutorial Audio # 12 Brass Fiati",
      "body": "Questo tutorial e' dedicato alla registrazione in Studio di Registrazione dei Brass e Fiati; saranno affrontati tanti temi ed alcuni piccoli segreti. Vi aspettiamo presso il nostro Studio di Produzione Musicale.\n\n<iframe width=\"560\" height=\"315\" src=\"https://www.youtube.com/embed/i7JLd4xsb0c\" frameborder=\"0\" gesture=\"media\" allow=\"encrypted-media\" allowfullscreen></iframe>\n\nContact:\n\nYoutube: http://ow.ly/pPP030hA2VW\nTwitter: http://ow.ly/TjmV30hA2XF\nFacebook: http://ow.ly/TqE630hA2ZL\nGoogle + : http://ow.ly/Y2fq30hA339\nApple iTunes Podcast: http://ow.ly/6BIU30hA35i",
      "json_metadata": "{\"tags\":[\"tutorial\",\"audio\",\"brass\",\"fiati\",\"studio\"],\"image\":[\"https://img.youtube.com/vi/i7JLd4xsb0c/0.jpg\"],\"links\":[\"https://www.youtube.com/embed/i7JLd4xsb0c\",\"http://ow.ly/pPP030hA2VW\",\"http://ow.ly/TjmV30hA2XF\",\"http://ow.ly/TqE630hA2ZL\",\"http://ow.ly/Y2fq30hA339\",\"http://ow.ly/6BIU30hA35i\"],\"app\":\"steemit/0.1\",\"format\":\"markdown\"}"
    }
  ]
}faderstudioupdated options for tutorial-audio-11-trombone2018/01/07 16:08:36
faderstudioupdated options for tutorial-audio-11-trombone
2018/01/07 16:08:36
| author | faderstudio |
| permlink | tutorial-audio-11-trombone |
| max accepted payout | 1000000.000 SBD |
| percent steem dollars | 0 |
| allow votes | true |
| allow curation rewards | true |
| extensions | [] |
| Transaction Info | Block #18773440/Trx 654632b09a62313e2b57a16a55171d5d9a7f72a6 |
View Raw JSON Data
{
  "trx_id": "654632b09a62313e2b57a16a55171d5d9a7f72a6",
  "block": 18773440,
  "trx_in_block": 45,
  "op_in_trx": 0,
  "virtual_op": 0,
  "timestamp": "2018-01-07T16:08:36",
  "op": [
    "comment_options",
    {
      "author": "faderstudio",
      "permlink": "tutorial-audio-11-trombone",
      "max_accepted_payout": "1000000.000 SBD",
      "percent_steem_dollars": 0,
      "allow_votes": true,
      "allow_curation_rewards": true,
      "extensions": []
    }
  ]
}faderstudiopublished a new post: tutorial-audio-11-trombone2018/01/07 16:08:36
faderstudiopublished a new post: tutorial-audio-11-trombone
2018/01/07 16:08:36
| parent author | |
| parent permlink | tutorial |
| author | faderstudio |
| permlink | tutorial-audio-11-trombone |
| title | Tutorial Audio # 11 Trombone |
| body | Questo tutorial e' dedicato alla registrazione in Studio di Registrazione del Trombone; saranno affrontati tanti temi ed alcuni piccoli segreti. Vi aspettiamo presso il nostro Studio di Produzione Musicale. <iframe width="560" height="315" src="https://www.youtube.com/embed/nOKWLvvgwa8" frameborder="0" gesture="media" allow="encrypted-media" allowfullscreen></iframe> Contact: Youtube: http://ow.ly/pPP030hA2VW Twitter: http://ow.ly/TjmV30hA2XF Facebook: http://ow.ly/TqE630hA2ZL Google + : http://ow.ly/Y2fq30hA339 Apple iTunes Podcast: http://ow.ly/6BIU30hA35i |
| json metadata | {"tags":["tutorial","audio","studio","trombone","corso"],"image":["https://img.youtube.com/vi/nOKWLvvgwa8/0.jpg"],"links":["https://www.youtube.com/embed/nOKWLvvgwa8","http://ow.ly/pPP030hA2VW","http://ow.ly/TjmV30hA2XF","http://ow.ly/TqE630hA2ZL","http://ow.ly/Y2fq30hA339","http://ow.ly/6BIU30hA35i"],"app":"steemit/0.1","format":"markdown"} |
| Transaction Info | Block #18773440/Trx 654632b09a62313e2b57a16a55171d5d9a7f72a6 |
View Raw JSON Data
{
  "trx_id": "654632b09a62313e2b57a16a55171d5d9a7f72a6",
  "block": 18773440,
  "trx_in_block": 45,
  "op_in_trx": 0,
  "virtual_op": 0,
  "timestamp": "2018-01-07T16:08:36",
  "op": [
    "comment",
    {
      "parent_author": "",
      "parent_permlink": "tutorial",
      "author": "faderstudio",
      "permlink": "tutorial-audio-11-trombone",
      "title": "Tutorial Audio # 11 Trombone",
      "body": "Questo tutorial e' dedicato alla registrazione in Studio di Registrazione del Trombone; saranno affrontati tanti temi ed alcuni piccoli segreti. Vi aspettiamo presso il nostro Studio di Produzione Musicale.\n\n<iframe width=\"560\" height=\"315\" src=\"https://www.youtube.com/embed/nOKWLvvgwa8\" frameborder=\"0\" gesture=\"media\" allow=\"encrypted-media\" allowfullscreen></iframe>\n\nContact:\n\nYoutube: http://ow.ly/pPP030hA2VW\nTwitter: http://ow.ly/TjmV30hA2XF\nFacebook: http://ow.ly/TqE630hA2ZL\nGoogle + : http://ow.ly/Y2fq30hA339\nApple iTunes Podcast: http://ow.ly/6BIU30hA35i",
      "json_metadata": "{\"tags\":[\"tutorial\",\"audio\",\"studio\",\"trombone\",\"corso\"],\"image\":[\"https://img.youtube.com/vi/nOKWLvvgwa8/0.jpg\"],\"links\":[\"https://www.youtube.com/embed/nOKWLvvgwa8\",\"http://ow.ly/pPP030hA2VW\",\"http://ow.ly/TjmV30hA2XF\",\"http://ow.ly/TqE630hA2ZL\",\"http://ow.ly/Y2fq30hA339\",\"http://ow.ly/6BIU30hA35i\"],\"app\":\"steemit/0.1\",\"format\":\"markdown\"}"
    }
  ]
}2018/01/06 18:36:54
2018/01/06 18:36:54
| voter | marcoielpo |
| author | faderstudio |
| permlink | 10-cose-da-controllare-prima-di-inviare-il-mix-allo-studio-mastering |
| weight | 10000 (100.00%) |
| Transaction Info | Block #18747643/Trx e7237d520f99a52a75af20614970a71641bc3ab9 |
View Raw JSON Data
{
  "trx_id": "e7237d520f99a52a75af20614970a71641bc3ab9",
  "block": 18747643,
  "trx_in_block": 1,
  "op_in_trx": 0,
  "virtual_op": 0,
  "timestamp": "2018-01-06T18:36:54",
  "op": [
    "vote",
    {
      "voter": "marcoielpo",
      "author": "faderstudio",
      "permlink": "10-cose-da-controllare-prima-di-inviare-il-mix-allo-studio-mastering",
      "weight": 10000
    }
  ]
}2018/01/06 18:35:06
2018/01/06 18:35:06
| voter | jabedalamjasha |
| author | faderstudio |
| permlink | 10-cose-da-controllare-prima-di-inviare-il-mix-allo-studio-mastering |
| weight | 10000 (100.00%) |
| Transaction Info | Block #18747607/Trx 76a951418fd772e052b38d12e910ab03c5b65351 |
View Raw JSON Data
{
  "trx_id": "76a951418fd772e052b38d12e910ab03c5b65351",
  "block": 18747607,
  "trx_in_block": 1,
  "op_in_trx": 0,
  "virtual_op": 0,
  "timestamp": "2018-01-06T18:35:06",
  "op": [
    "vote",
    {
      "voter": "jabedalamjasha",
      "author": "faderstudio",
      "permlink": "10-cose-da-controllare-prima-di-inviare-il-mix-allo-studio-mastering",
      "weight": 10000
    }
  ]
}faderstudioupdated options for 10-cose-da-controllare-prima-di-inviare-il-mix-allo-studio-mastering2018/01/06 18:31:48
faderstudioupdated options for 10-cose-da-controllare-prima-di-inviare-il-mix-allo-studio-mastering
2018/01/06 18:31:48
| author | faderstudio |
| permlink | 10-cose-da-controllare-prima-di-inviare-il-mix-allo-studio-mastering |
| max accepted payout | 1000000.000 SBD |
| percent steem dollars | 0 |
| allow votes | true |
| allow curation rewards | true |
| extensions | [] |
| Transaction Info | Block #18747541/Trx 1d6499e3acc5b3e4e2ab2e3de2bb890f7282d39b |
View Raw JSON Data
{
  "trx_id": "1d6499e3acc5b3e4e2ab2e3de2bb890f7282d39b",
  "block": 18747541,
  "trx_in_block": 35,
  "op_in_trx": 0,
  "virtual_op": 0,
  "timestamp": "2018-01-06T18:31:48",
  "op": [
    "comment_options",
    {
      "author": "faderstudio",
      "permlink": "10-cose-da-controllare-prima-di-inviare-il-mix-allo-studio-mastering",
      "max_accepted_payout": "1000000.000 SBD",
      "percent_steem_dollars": 0,
      "allow_votes": true,
      "allow_curation_rewards": true,
      "extensions": []
    }
  ]
}faderstudiopublished a new post: 10-cose-da-controllare-prima-di-inviare-il-mix-allo-studio-mastering2018/01/06 18:31:48
faderstudiopublished a new post: 10-cose-da-controllare-prima-di-inviare-il-mix-allo-studio-mastering
2018/01/06 18:31:48
| parent author | |
| parent permlink | mastering |
| author | faderstudio |
| permlink | 10-cose-da-controllare-prima-di-inviare-il-mix-allo-studio-mastering |
| title | 10 cose da controllare prima di inviare il Mix allo Studio Mastering |
| body | Hai registrato, arrangiato e mixato il progetto ... ma, non e’ ancora finito. Se si decide di inviare il vostro mix per essere masterizzato professionalmente, ecco 10 cose essenziali da controllare in primo luogo. 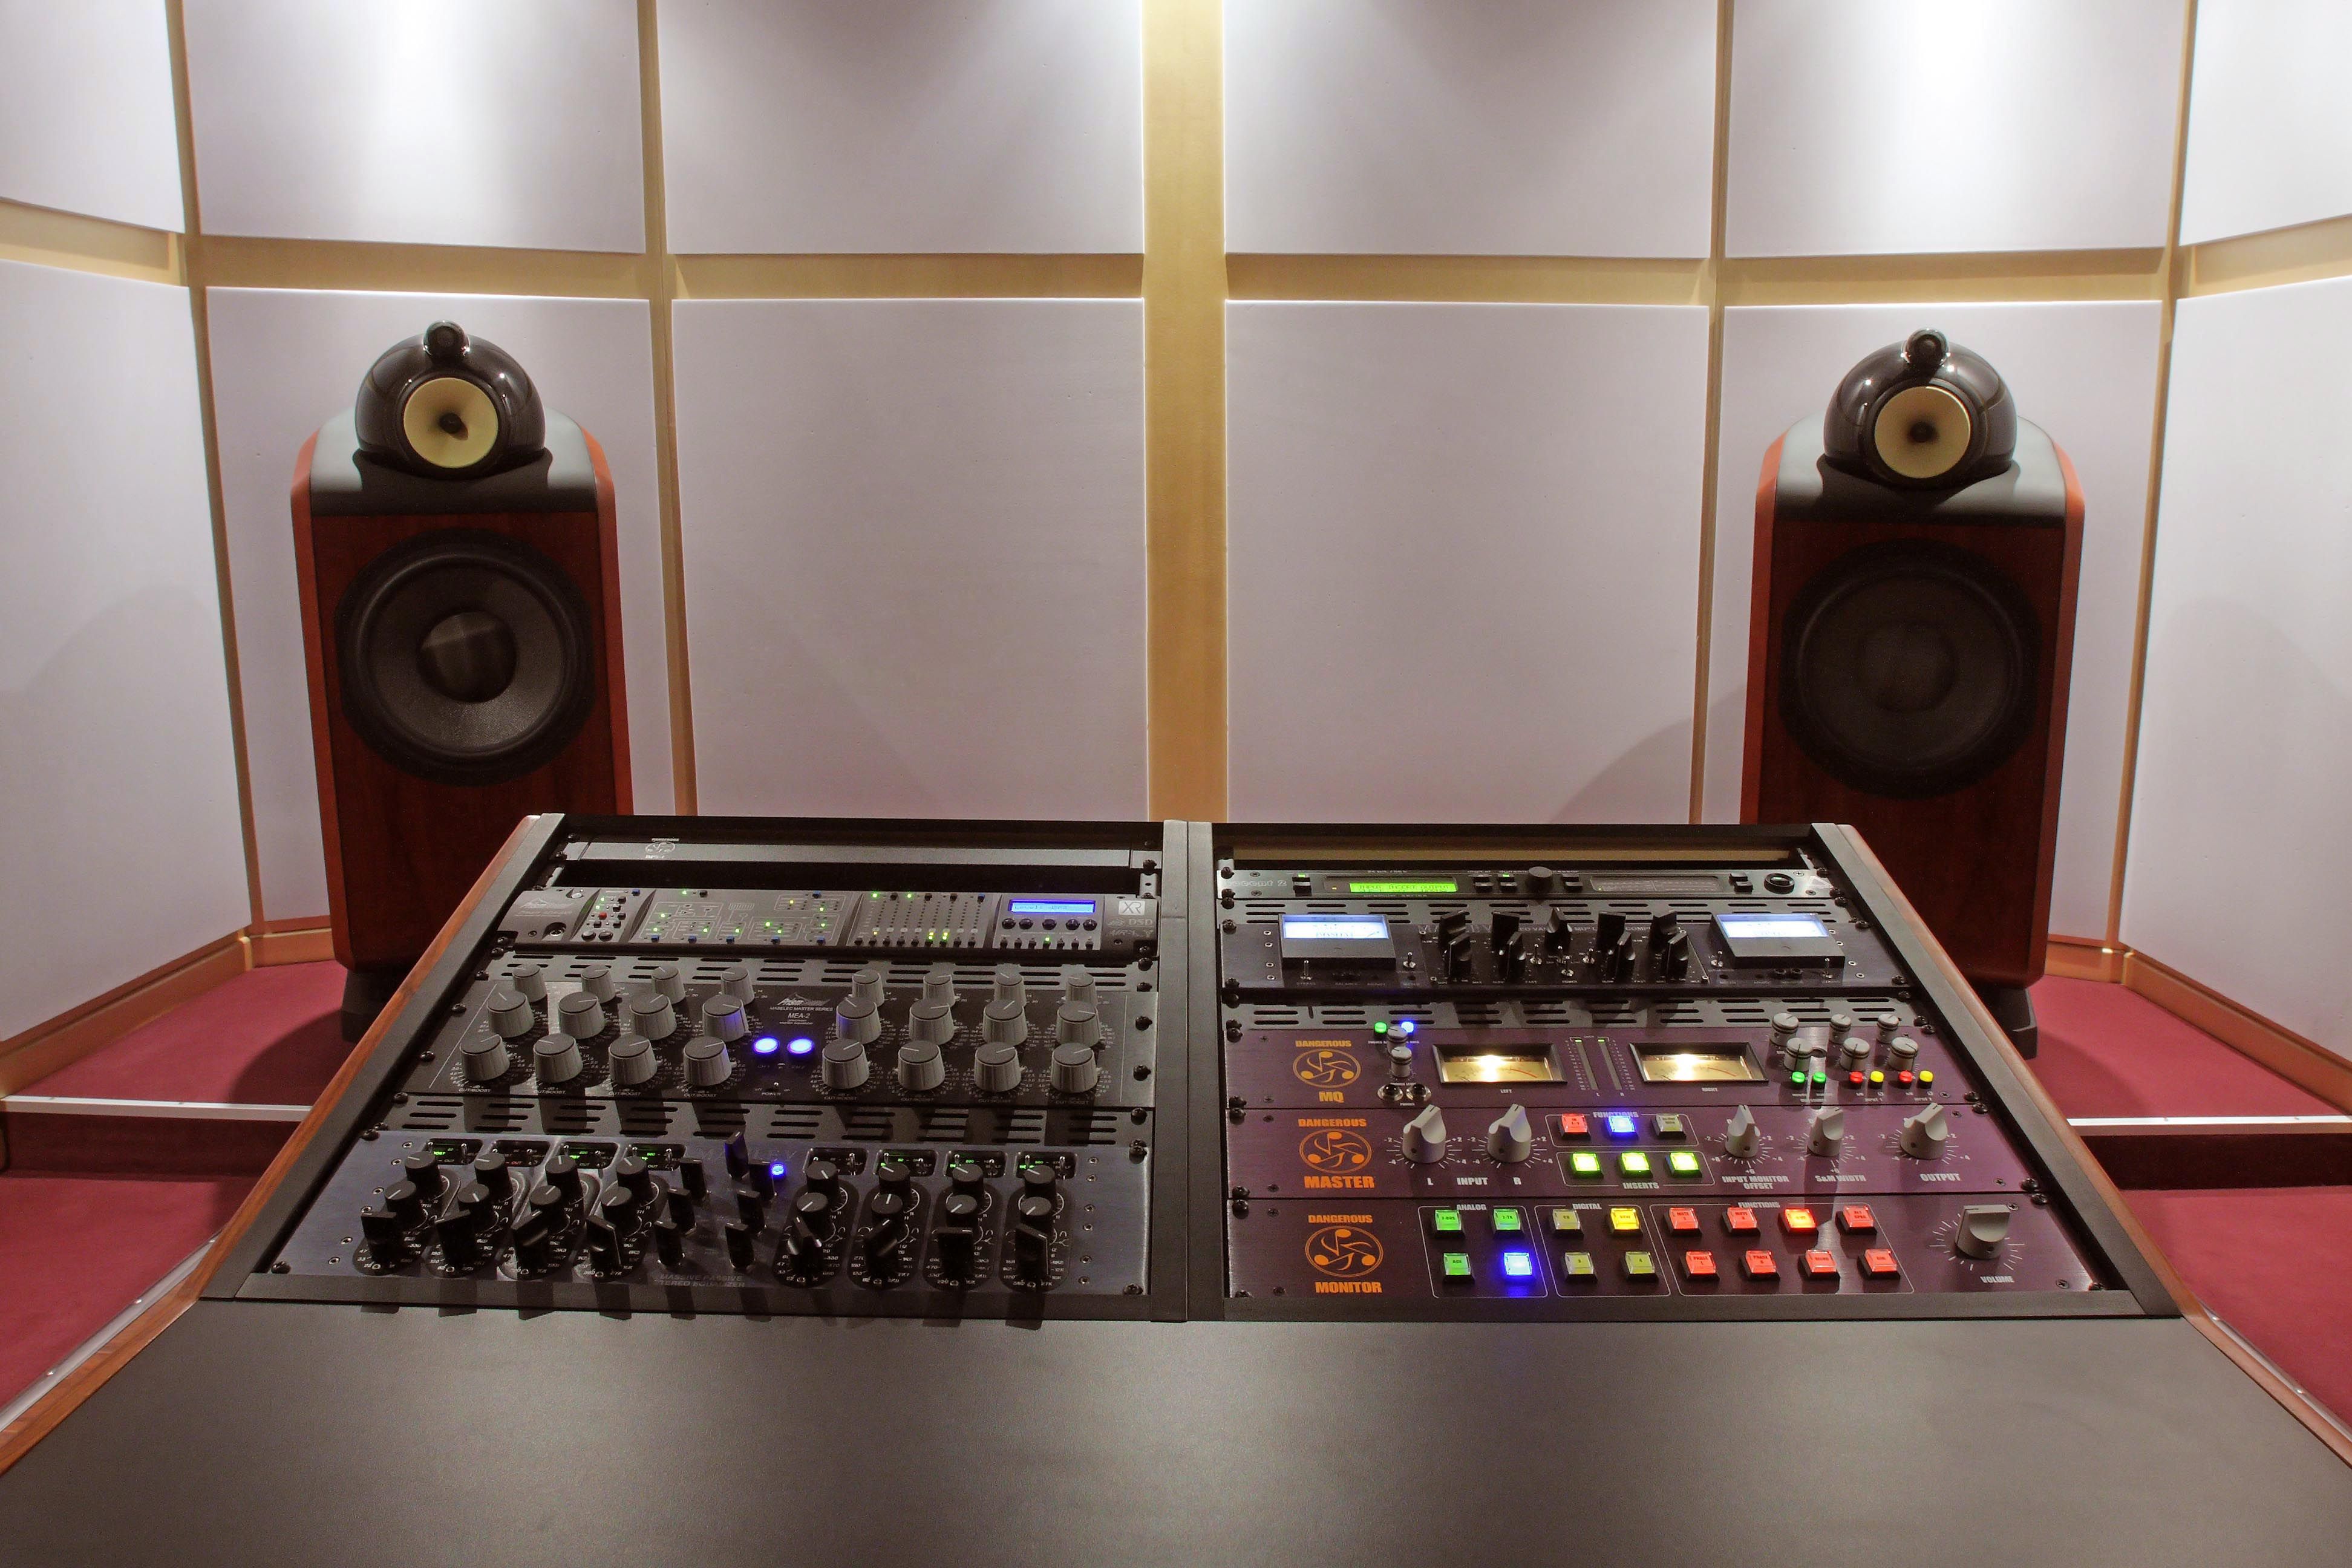 1 - Comprendere le limitazioni di Mastering Padroneggiare, aumentare o diminuire specifici aspetti sonori e punch-up come la densità e la compressione, può migliorare la fedeltà globale del brano. Tuttavia, come la maggior parte dei brani sono presentati come una traccia stereo, qualsiasi cambiamento positivo per un aspetto può avere un impatto negativo un altro. Cambiare l'EQ del mix cambierà pure l'equilibrio dei suoni. Al fine di presentare un mix più vicino al prodotto finito possibile ......segui la guida 2 - Confronta il tuo mix con quello fatto da professionisti Trova audio di qualità CD di lavori commerciali (non ascoltare mp3 o altri formati compressi) finiti che suonano vicino al tuo ideale. Ascolta il mix e il CD contemporaneamente e spostati avanti e indietro durante l'ascolto. Ascolta se il bilanciamento spettrale è più brillante nel mix, rimbombante o fangoso in confronto? Ascolta il suono di ogni strumento solista e confrontarlo con la registrazione PRO. Utilizza spesso un volume moderato che vi permette di portare avanti una conversazione con qualcuno seduto accanto a te senza alzare la voce e cerca di percepire ogni singolo suono del brano. 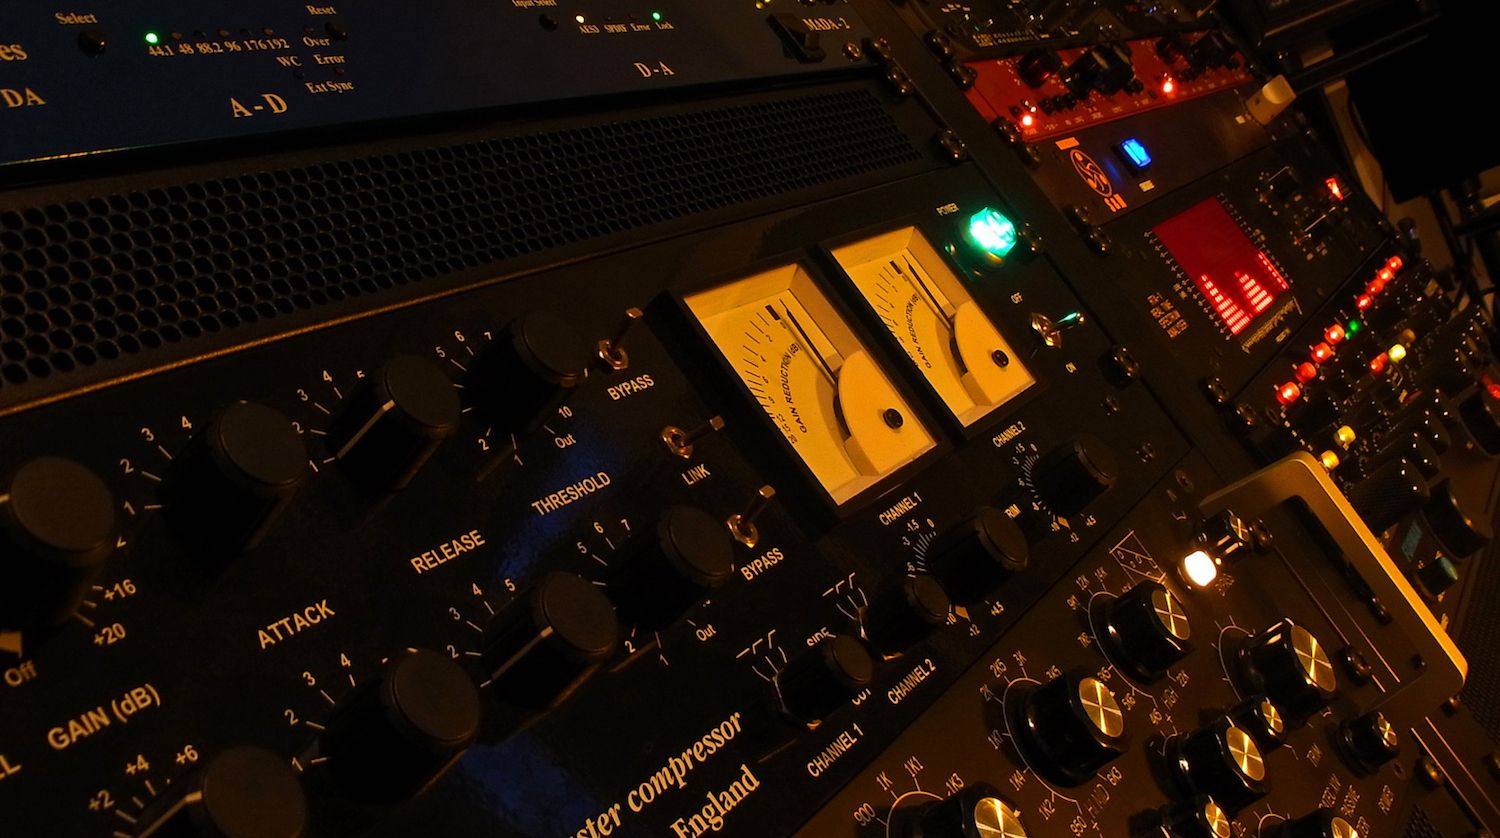 3 - Utilizzare una gamma completa, sistema di monitoraggio ben bilanciato Solo perché avete un paio di NS-10 monitor, questo non significa che si sente tutto. Avete bisogno di un paio di altoparlanti non-hyped con suono neutro, preferibilmente con un subwoofer per sentire tutto nel mix. Assicurarsi che siano posizionati ad almeno un metro dalle pareti e la vostra camera non "ring" (rimbombi) a determinate frequenze. Ascolta con attivo il plug-in Signal Generator per determinare se alcune frequenze suonano più forte di altri. Se c'è irregolarità, i mix probabilmente riflettono l'inverso delle anomalie acustiche. Se non potete permettervi altoparlanti di qualità professionale e l'acustica adeguata, ottenete un buon paio di cuffie con una estremità inferiore esteso (ma non pubblicizzate). Le cuffie sono particolarmente buone per controllare la vostra immagine stereo, come si dovrebbe essere in grado di individuare dove appare un suono nel campo stereo. 4 - Utilizzare un misuratore di fase sul bus stereo Stereo significa che state "utilizzando due microfoni” (le vostre orecchie). Dovresti essere in grado di individuare ogni suono nel campo stereo. Se non e’ presente nella stereofonia o suona come è dietro di voi, è probabile che sia fuori fase. Questo può essere un effetto “fresco” in cuffia, ma quando si ascolta in mono, il suono scompare. Ricordate che 1 + (-1) = 0. Se si dispone di un pianoforte o una chitarra acustica in stereo, microfonato largo, mettere i canali in solo, poi cerca la zona di fase. In questo modo si assicurano che il vostro mix ha lo stesso equilibrio in mono o stereo. Utilizzare plug-in FASE SCOPE di Pro- Tools (Inserisci questo plug-in Phasescope sul bus stereo, vedi immagine sotto) ; se utilizzi un altro sequencer usa un plugin analogo. Nel plugin FASE SCOPE Il cerchio rappresenta un oscilloscopio con modelli di Lissajous. Si deve verificare che il mix sia visualizzato attorno ad un asse verticale, il che significa che è ben centrato. Una sottile linea verticale è mono. Se vedete qualsiasi attività sull'asse orizzontale, qualcosa è fuori fase. Esso sarà conforme a eventi in audio, quindi è abbastanza facile da vedere e sentire che cosa sta causando. Se si ascolta un colpo di piatti e una nota stereo di pianoforte al tempo stesso, e l’ asse orizzontale vola in alto o la linea di fase a sinistra, probabilmente avete trovato il problema. Gioca la stessa sezione di nuovo con quel canale in Solo per confermarlo. Correggere la fase utilizzando una contro-fase o micro delay o restringere le impostazioni di pan.  5 - Inviare i file nella massima risoluzione utilizzata nella registrazione di origine Se la sessione multi-traccia è stata creata ad una risoluzione di WAV 24 bit / 48,000 kHz o superiore, esportare il file allo stesso formato ed etichettarlo come tale (indicare sempre il formato del file di origine Bit Rate e Sample Rate). Se andra’ su CD, sarà convertito dal file originale, usando diverse frequenze di campionamento; includere un avviso per questo o metterli in cartelle separate. Non inviare un MP3 a meno che non sia tutto quello che hai. 6 - Non utilizzare Maximizer o Peak Limiter sui file di origine Lasciare almeno da 3 a 6 dB di headroom sul file di rendering. Si può mixare con la compressione bus attiva, se si vuole sentire i suoi effetti, ma non lasciare la compressione finale sul master per il rendering. La Distorsione nel file di origine è un problema che non può essere risolto. Non diventare una vittima nelle guerre di loudness (suggerimento: tutti noi perdiamo). 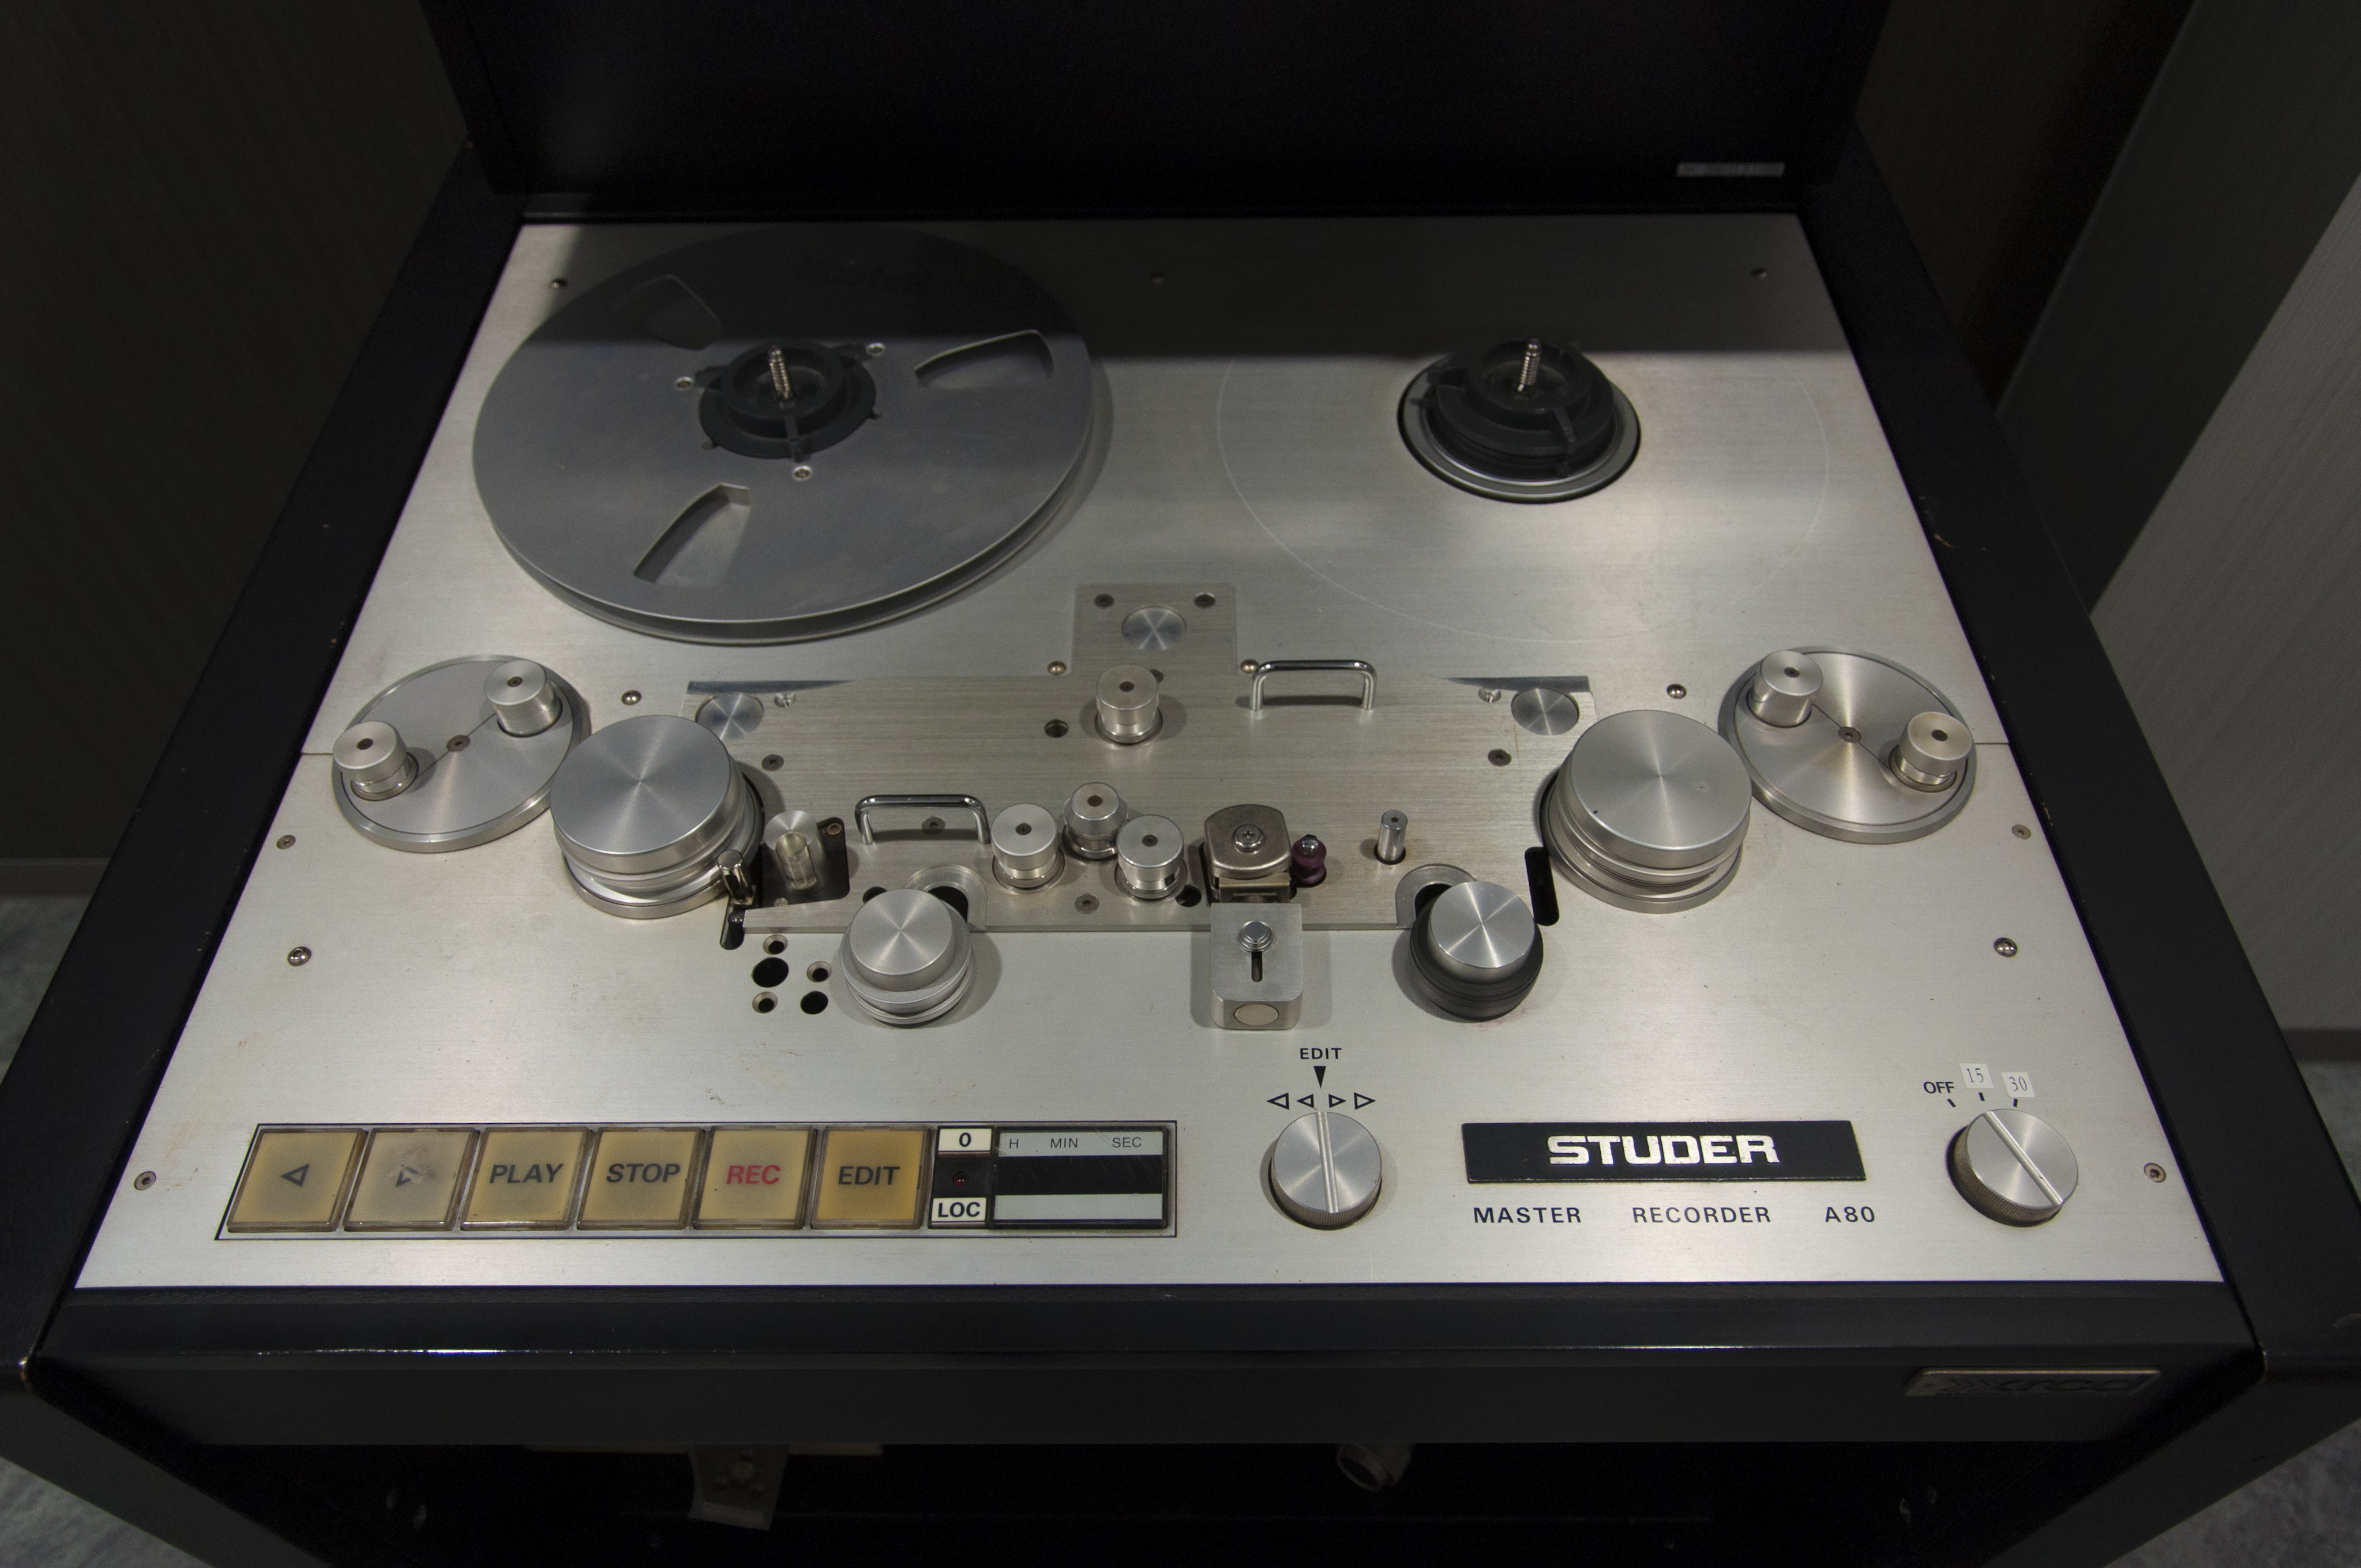 7 - Pulito, ma non agganciare la testa e la coda Lasciare almeno 250 ms di aria (silezio) prima della prima nota. E 'bello avere un po' l'atmosfera prima che inizi la canzone, rimuovere qualsiasi rumore o contare-off, se si può. Lascia un full ring alla fine (secondi di silezio), rimuovere qualsiasi rumore o ronzio se potete. Si otterrà un spazio per dissolvenza, se il mastering engineer fara’ la compressione, basta dirgli dove iniziare e terminare la dissolvenza. 8 - Allegare il testo insieme Abbiamo bisogno di questo per i metadati: il titolo del CD, profilo dell'artista, i titoli dei brani in ordine, codici UPC e ISRC, spaziatura, indice speciale ed esempi di crossfade pista. Informazioni di titolazione appaiono sul lettore CD con display alfanumerici, utile anche per le trasmissioni radiofoniche. I codici ISRC sono numeri di serie univoci assegnati a ciascun brano, che sono utilizzati per monitoraggio e la distribuzione digitale. Il codice UPC è il codice a barre sulla confezione del CD necessari per la maggior parte della distribuzione al dettaglio. Si prega di controllare tutta la tua ortografia e la grammatica, perché l'ingegnere di mastering non accetta reclami per errori di ortografia. Il testo non apparirà sul computer o iTunes a meno che il progetto è stato registrato presso gracenote.com  9 - Scegli la forma di erogazione Ci sono quattro forme comuni di consegna del MASTER: PMCD, DDP, WAV e masterizzato per iTunes. A PMCD (pre-master compact disc) è un CD riproducibile da cui una copia identica è trasformato dalla stamperia per la stampa su CD. Per l’uso multimediale di alta qualità, impostare una velocità di scrittura lenta sul masterizzatore CD ed eseguire un controllo degli errori sul disco finito. Fare due dischi identici in un unico pacchetto in modo che se c'è un difetto microscopico in un disco, è altamente improbabile che si verifichi nello stesso posto due volte. La confezione contiene anche i codici PQ (tabulato di mastering dati). Nel formato master DDP (Disk Description Protocol) il master e’ come una cartella di file digitali, un file stereo continuo lungo dell’ intero CD e quattro file più piccoli, che contengono testo, il tempo e le varie informazioni. E 'usato per mandare il masteriale presso Studi Mastering in tutto il mondo via Internet. I file WAV sono semplicemente 44,1 kHz / 16 file WAV da cui gli Mp3 sono creati da servizi di distribuzione come CD Baby . Il formato Mastering per iTunes utilizza il proprio codec (software di conversione) per il rendering di fedeltà superiore e la gamma dinamica per gli mp3. Vedi: http://www.apple.com/ itunes/mastered-for-itunes/ 10 - Lasciare tempo sufficiente per ottenere un disco di riferimento e/o il master Ascolta il prodotto finito prima del processo di stampa e conserva sempre una copia del master con te, perché le stamperie spesso non restituiscono al mittente i master ricevuti. <blockquote> Paul Wickliffe - Ingegnere di registrazione professionale dal 1976. Presidente, Ingegnere Capo e Fondatore di Skyline Studios, New York 1978 - 1994 e Skyline Productions 1995 - attualmente. Nominato per il 1986 Grammy per il Best Engineered Recording, Non- Classical. Registrato, mixato, masterizzato e o prodotto oltre mille progetti di CD / LP </blockquote>  Contact: Youtube: http://ow.ly/pPP030hA2VW Twitter: http://ow.ly/TjmV30hA2XF Facebook: http://ow.ly/TqE630hA2ZL Google + : http://ow.ly/Y2fq30hA339 Apple iTunes Podcast: http://ow.ly/6BIU30hA35i |
| json metadata | {"tags":["mastering","studio","audio","music","gears"],"image":["https://steemitimages.com/DQmWkK4nsZCXgsPcqDCMx9dPUARQ4c7toSJwKwZCTbyGBGF/001.jpg","https://steemitimages.com/DQmS34ePQEwztkQLjqKYSpjbNMHmLoNi6FhUKNQXXqRnzHG/006.jpg","https://steemitimages.com/DQmRj5CMEsqRiB4u6Rv8Rh2RvhaxfroiZZFdKHECdF2yGVw/002.jpg","https://steemitimages.com/DQme3BVuFhRiq2BZuV6kERDGVtCyfcjA9m3RpSyRbdSiQL5/004.jpg","https://steemitimages.com/DQmWdScayXeDfLjhZVcBqvJaMEgifTtxEbeGZphNZPPecuS/007.jpg","https://steemitimages.com/DQmc6nzYkzLY9igJVhBgcrn1PtbsFPf5AuDhLfQPTR2dvny/003.jpg"],"links":["http://www.apple.com/","http://ow.ly/pPP030hA2VW","http://ow.ly/TjmV30hA2XF","http://ow.ly/TqE630hA2ZL","http://ow.ly/Y2fq30hA339","http://ow.ly/6BIU30hA35i"],"app":"steemit/0.1","format":"markdown"} |
| Transaction Info | Block #18747541/Trx 1d6499e3acc5b3e4e2ab2e3de2bb890f7282d39b |
View Raw JSON Data
{
"trx_id": "1d6499e3acc5b3e4e2ab2e3de2bb890f7282d39b",
"block": 18747541,
"trx_in_block": 35,
"op_in_trx": 0,
"virtual_op": 0,
"timestamp": "2018-01-06T18:31:48",
"op": [
"comment",
{
"parent_author": "",
"parent_permlink": "mastering",
"author": "faderstudio",
"permlink": "10-cose-da-controllare-prima-di-inviare-il-mix-allo-studio-mastering",
"title": "10 cose da controllare prima di inviare il Mix allo Studio Mastering",
"body": "Hai registrato, arrangiato e mixato il progetto ... ma, non e’ ancora finito.\n\nSe si decide di inviare il vostro mix per essere masterizzato professionalmente, ecco 10 cose essenziali da controllare in primo luogo.\n\n\n\n1 - Comprendere le limitazioni di Mastering\n\nPadroneggiare, aumentare o diminuire specifici aspetti sonori e punch-up come la densità e la compressione, può migliorare la fedeltà globale del brano. Tuttavia, come la maggior parte dei brani sono presentati come una traccia stereo, qualsiasi cambiamento positivo per un aspetto può avere un impatto negativo un altro. Cambiare l'EQ del mix cambierà pure l'equilibrio dei suoni. Al fine di presentare un mix più vicino al prodotto finito possibile ......segui la guida\n\n2 - Confronta il tuo mix con quello fatto da professionisti\n\nTrova audio di qualità CD di lavori commerciali (non ascoltare mp3 o altri formati compressi) finiti che suonano vicino al tuo ideale. Ascolta il mix e il CD contemporaneamente e spostati avanti e indietro durante l'ascolto. Ascolta se il bilanciamento spettrale è più brillante nel mix, rimbombante o fangoso in confronto? Ascolta il suono di ogni strumento solista e confrontarlo con la registrazione PRO. Utilizza spesso un volume moderato che vi permette di portare avanti una conversazione con qualcuno seduto accanto a te senza alzare la voce e cerca di percepire ogni singolo suono del brano.\n\n\n\n3 - Utilizzare una gamma completa, sistema di monitoraggio ben bilanciato\n\nSolo perché avete un paio di NS-10 monitor, questo non significa che si sente tutto. Avete bisogno di un paio di altoparlanti non-hyped con suono neutro, preferibilmente con un subwoofer per sentire tutto nel mix. Assicurarsi che siano posizionati ad almeno un metro dalle pareti e la vostra camera non \"ring\" (rimbombi) a determinate frequenze. Ascolta con attivo il plug-in Signal Generator per determinare se alcune frequenze suonano più forte di altri. Se c'è irregolarità, i mix probabilmente riflettono l'inverso delle anomalie acustiche. Se non potete permettervi altoparlanti di qualità professionale e l'acustica adeguata, ottenete un buon paio di cuffie con una estremità inferiore esteso (ma non pubblicizzate). Le cuffie sono particolarmente buone per controllare la vostra immagine stereo, come si dovrebbe essere in grado di individuare dove appare un suono nel campo stereo.\n\n4 - Utilizzare un misuratore di fase sul bus stereo\n\nStereo significa che state \"utilizzando due microfoni” (le vostre orecchie). Dovresti essere in grado di individuare ogni suono nel campo stereo. Se non e’ presente nella stereofonia o suona come è dietro di voi, è probabile che sia fuori fase. Questo può essere un effetto “fresco” in cuffia, ma quando si ascolta in mono, il suono scompare. Ricordate che 1 + (-1) = 0. Se si dispone di un pianoforte o una chitarra acustica in stereo, microfonato largo, mettere i canali in solo, poi cerca la zona di fase. In questo modo si assicurano che il vostro mix ha lo stesso equilibrio in mono o stereo. Utilizzare plug-in FASE SCOPE di Pro- Tools (Inserisci questo plug-in Phasescope sul bus stereo, vedi immagine sotto) ; se utilizzi un altro sequencer usa un plugin analogo. Nel plugin FASE SCOPE Il cerchio rappresenta un oscilloscopio con modelli di Lissajous. Si deve verificare che il mix sia visualizzato attorno ad un asse verticale, il che significa che è ben centrato. Una sottile linea verticale è mono. Se vedete qualsiasi attività sull'asse orizzontale, qualcosa è fuori fase. Esso sarà conforme a eventi in audio, quindi è abbastanza facile da vedere e sentire che cosa sta causando. Se si ascolta un colpo di piatti e una nota stereo di pianoforte al tempo stesso, e l’ asse orizzontale vola in alto o la linea di fase a sinistra, probabilmente avete trovato il problema. Gioca la stessa sezione di nuovo con quel canale in Solo per confermarlo. Correggere la fase utilizzando una contro-fase o micro delay o restringere le impostazioni di pan.\n\n\n\n5 - Inviare i file nella massima risoluzione utilizzata nella registrazione di origine\n\nSe la sessione multi-traccia è stata creata ad una risoluzione di WAV 24 bit / 48,000 kHz o superiore, esportare il file allo stesso formato ed etichettarlo come tale (indicare sempre il formato del file di origine Bit Rate e Sample Rate). Se andra’ su CD, sarà convertito dal file originale, usando diverse frequenze di campionamento; includere un avviso per questo o metterli in cartelle separate. Non inviare un MP3 a meno che non sia tutto quello che hai.\n\n6 - Non utilizzare Maximizer o Peak Limiter sui file di origine\n\nLasciare almeno da 3 a 6 dB di headroom sul file di rendering. Si può mixare con la compressione bus attiva, se si vuole sentire i suoi effetti, ma non lasciare la compressione finale sul master per il rendering. La Distorsione nel file di origine è un problema che non può essere risolto. Non diventare una vittima nelle guerre di loudness (suggerimento: tutti noi perdiamo).\n\n\n\n7 - Pulito, ma non agganciare la testa e la coda\n\nLasciare almeno 250 ms di aria (silezio) prima della prima nota. E 'bello avere un po' l'atmosfera prima che inizi la canzone, rimuovere qualsiasi rumore o contare-off, se si può. Lascia un full ring alla fine (secondi di silezio), rimuovere qualsiasi rumore o ronzio se potete. Si otterrà un spazio per dissolvenza, se il mastering engineer fara’ la compressione, basta dirgli dove iniziare e terminare la dissolvenza.\n\n8 - Allegare il testo insieme\n\nAbbiamo bisogno di questo per i metadati: il titolo del CD, profilo dell'artista, i titoli dei brani in ordine, codici UPC e ISRC, spaziatura, indice speciale ed esempi di crossfade pista. Informazioni di titolazione appaiono sul lettore CD con display alfanumerici, utile anche per le trasmissioni radiofoniche. I codici ISRC sono numeri di serie univoci assegnati a ciascun brano, che sono utilizzati per monitoraggio e la distribuzione digitale. Il codice UPC è il codice a barre sulla confezione del CD necessari per la maggior parte della distribuzione al dettaglio. Si prega di controllare tutta la tua ortografia e la grammatica, perché l'ingegnere di mastering non accetta reclami per errori di ortografia. Il testo non apparirà sul computer o iTunes a meno che il progetto è stato registrato presso gracenote.com\n\n\n\n9 - Scegli la forma di erogazione\n\nCi sono quattro forme comuni di consegna del MASTER: PMCD, DDP, WAV e masterizzato per iTunes. A PMCD (pre-master compact disc) è un CD riproducibile da cui una copia identica è trasformato dalla stamperia per la stampa su CD. Per l’uso multimediale di alta qualità, impostare una velocità di scrittura lenta sul masterizzatore CD ed eseguire un controllo degli errori sul disco finito. Fare due dischi identici in un unico pacchetto in modo che se c'è un difetto microscopico in un disco, è altamente improbabile che si verifichi nello stesso posto due volte. La confezione contiene anche i codici PQ (tabulato di mastering dati). Nel formato master DDP (Disk Description Protocol) il master e’ come una cartella di file digitali, un file stereo continuo lungo dell’ intero CD e quattro file più piccoli, che contengono testo, il tempo e le varie informazioni. E 'usato per mandare il masteriale presso Studi Mastering in tutto il mondo via Internet. I file WAV sono semplicemente 44,1 kHz / 16 file WAV da cui gli Mp3 sono creati da servizi di distribuzione come CD Baby . Il formato Mastering per iTunes utilizza il proprio codec (software di conversione) per il rendering di fedeltà superiore e la gamma dinamica per gli mp3. Vedi: http://www.apple.com/ itunes/mastered-for-itunes/\n\n10 - Lasciare tempo sufficiente per ottenere un disco di riferimento e/o il master\n\nAscolta il prodotto finito prima del processo di stampa e conserva sempre una copia del master con te, perché le stamperie spesso non restituiscono al mittente i master ricevuti.\n\n<blockquote> Paul Wickliffe - Ingegnere di registrazione professionale dal 1976. Presidente, Ingegnere Capo e Fondatore di Skyline Studios, New York 1978 - 1994 e Skyline Productions 1995 - attualmente. Nominato per il 1986 Grammy per il Best Engineered Recording, Non- Classical. Registrato, mixato, masterizzato e o prodotto oltre mille progetti di CD / LP </blockquote>\n\n\n\nContact:\n\nYoutube: http://ow.ly/pPP030hA2VW\nTwitter: http://ow.ly/TjmV30hA2XF\nFacebook: http://ow.ly/TqE630hA2ZL\nGoogle + : http://ow.ly/Y2fq30hA339\nApple iTunes Podcast: http://ow.ly/6BIU30hA35i",
"json_metadata": "{\"tags\":[\"mastering\",\"studio\",\"audio\",\"music\",\"gears\"],\"image\":[\"https://steemitimages.com/DQmWkK4nsZCXgsPcqDCMx9dPUARQ4c7toSJwKwZCTbyGBGF/001.jpg\",\"https://steemitimages.com/DQmS34ePQEwztkQLjqKYSpjbNMHmLoNi6FhUKNQXXqRnzHG/006.jpg\",\"https://steemitimages.com/DQmRj5CMEsqRiB4u6Rv8Rh2RvhaxfroiZZFdKHECdF2yGVw/002.jpg\",\"https://steemitimages.com/DQme3BVuFhRiq2BZuV6kERDGVtCyfcjA9m3RpSyRbdSiQL5/004.jpg\",\"https://steemitimages.com/DQmWdScayXeDfLjhZVcBqvJaMEgifTtxEbeGZphNZPPecuS/007.jpg\",\"https://steemitimages.com/DQmc6nzYkzLY9igJVhBgcrn1PtbsFPf5AuDhLfQPTR2dvny/003.jpg\"],\"links\":[\"http://www.apple.com/\",\"http://ow.ly/pPP030hA2VW\",\"http://ow.ly/TjmV30hA2XF\",\"http://ow.ly/TqE630hA2ZL\",\"http://ow.ly/Y2fq30hA339\",\"http://ow.ly/6BIU30hA35i\"],\"app\":\"steemit/0.1\",\"format\":\"markdown\"}"
}
]
}2018/01/06 18:09:48
2018/01/06 18:09:48
| voter | faderstudio |
| author | thenightflier |
| permlink | coin-tick-un-app-per-mac-che-vi-fara-passare-il-torcicollo-da-crypto |
| weight | 10000 (100.00%) |
| Transaction Info | Block #18747101/Trx ddf70444a62a11c6ff937f422c4d81ec213809bc |
View Raw JSON Data
{
  "trx_id": "ddf70444a62a11c6ff937f422c4d81ec213809bc",
  "block": 18747101,
  "trx_in_block": 45,
  "op_in_trx": 0,
  "virtual_op": 0,
  "timestamp": "2018-01-06T18:09:48",
  "op": [
    "vote",
    {
      "voter": "faderstudio",
      "author": "thenightflier",
      "permlink": "coin-tick-un-app-per-mac-che-vi-fara-passare-il-torcicollo-da-crypto",
      "weight": 10000
    }
  ]
}faderstudioupvoted (100.00%) @thenightflier / il-market-interno-questo-sconosciuto2018/01/06 18:09:03
faderstudioupvoted (100.00%) @thenightflier / il-market-interno-questo-sconosciuto
2018/01/06 18:09:03
| voter | faderstudio |
| author | thenightflier |
| permlink | il-market-interno-questo-sconosciuto |
| weight | 10000 (100.00%) |
| Transaction Info | Block #18747086/Trx d9b54e1a7aa223cb3f06220ccb9f3bcbe30377f2 |
View Raw JSON Data
{
  "trx_id": "d9b54e1a7aa223cb3f06220ccb9f3bcbe30377f2",
  "block": 18747086,
  "trx_in_block": 33,
  "op_in_trx": 0,
  "virtual_op": 0,
  "timestamp": "2018-01-06T18:09:03",
  "op": [
    "vote",
    {
      "voter": "faderstudio",
      "author": "thenightflier",
      "permlink": "il-market-interno-questo-sconosciuto",
      "weight": 10000
    }
  ]
}Manabar
Voting Power100.00%
Downvote Power100.00%
Resource Credits100.00%
Reputation Progress0.00%
{
  "voting_manabar": {
    "current_mana": "8143659806",
    "last_update_time": 1779063018
  },
  "downvote_manabar": {
    "current_mana": 2035914951,
    "last_update_time": 1779063018
  },
  "rc_account": {
    "account": "faderstudio",
    "rc_manabar": {
      "current_mana": "10164408779",
      "last_update_time": 1779063018
    },
    "max_rc_creation_adjustment": {
      "amount": "2020748973",
      "precision": 6,
      "nai": "@@000000037"
    },
    "max_rc": "10164408779"
  }
}
Account Metadata
| POSTING JSON METADATA | |
| profile | {"location":"Reggio Emilia (Italy)","profile_image":"https://scontent-mxp1-1.xx.fbcdn.net/v/t1.0-9/25445974_1817390561666327_4337046672469838200_n.jpg?oh=7fb3581ff57c86321f0f7c1bb47778ab&oe=5ABC6DC9","cover_image":"https://scontent-mxp1-1.xx.fbcdn.net/v/t31.0-8/25586829_1817415348330515_8588053028680241690_o.jpg?oh=2adf7c51d1f2186cdd2b5827bfe1a8cf&oe=5AFEA162","website":"https://www.youtube.com/user/faderservizi","about":"Tecnology, Music, Audio and Video solutions","name":"Fader Studio"} |
| JSON METADATA | |
| profile | {"location":"Reggio Emilia (Italy)","profile_image":"https://scontent-mxp1-1.xx.fbcdn.net/v/t1.0-9/25445974_1817390561666327_4337046672469838200_n.jpg?oh=7fb3581ff57c86321f0f7c1bb47778ab&oe=5ABC6DC9","cover_image":"https://scontent-mxp1-1.xx.fbcdn.net/v/t31.0-8/25586829_1817415348330515_8588053028680241690_o.jpg?oh=2adf7c51d1f2186cdd2b5827bfe1a8cf&oe=5AFEA162","website":"https://www.youtube.com/user/faderservizi","about":"Tecnology, Music, Audio and Video solutions","name":"Fader Studio"} |
{
  "posting_json_metadata": {
    "profile": {
      "location": "Reggio Emilia (Italy)",
      "profile_image": "https://scontent-mxp1-1.xx.fbcdn.net/v/t1.0-9/25445974_1817390561666327_4337046672469838200_n.jpg?oh=7fb3581ff57c86321f0f7c1bb47778ab&oe=5ABC6DC9",
      "cover_image": "https://scontent-mxp1-1.xx.fbcdn.net/v/t31.0-8/25586829_1817415348330515_8588053028680241690_o.jpg?oh=2adf7c51d1f2186cdd2b5827bfe1a8cf&oe=5AFEA162",
      "website": "https://www.youtube.com/user/faderservizi",
      "about": "Tecnology, Music, Audio and Video solutions",
      "name": "Fader Studio"
    }
  },
  "json_metadata": {
    "profile": {
      "location": "Reggio Emilia (Italy)",
      "profile_image": "https://scontent-mxp1-1.xx.fbcdn.net/v/t1.0-9/25445974_1817390561666327_4337046672469838200_n.jpg?oh=7fb3581ff57c86321f0f7c1bb47778ab&oe=5ABC6DC9",
      "cover_image": "https://scontent-mxp1-1.xx.fbcdn.net/v/t31.0-8/25586829_1817415348330515_8588053028680241690_o.jpg?oh=2adf7c51d1f2186cdd2b5827bfe1a8cf&oe=5AFEA162",
      "website": "https://www.youtube.com/user/faderservizi",
      "about": "Tecnology, Music, Audio and Video solutions",
      "name": "Fader Studio"
    }
  }
}
Auth Keys
Owner
Single Signature
Public Keys
STM74Jag87S3iz2eAvj1D9M6LUX3JtHnpj2daR4KxMy8gyDn57Q5p1/1
Active
Single Signature
Public Keys
STM7gPY1WTYXq9NvGDatfVXzLwKqRn8AaioQ2hxTDgy97YnJz8iq61/1
Posting
Single Signature
Public Keys
STM7PYKjsTGs1Y3eHxQV99KGjh1LWUyHofuSrcdvccN124mWTZFQ41/1
Memo
STM7Za1SX4X9h1huDhP3X64E5HsGvg8tiPE5g5ELbhqrxfkkizwu7
{
  "owner": {
    "weight_threshold": 1,
    "account_auths": [],
    "key_auths": [
      [
        "STM74Jag87S3iz2eAvj1D9M6LUX3JtHnpj2daR4KxMy8gyDn57Q5p",
        1
      ]
    ]
  },
  "active": {
    "weight_threshold": 1,
    "account_auths": [],
    "key_auths": [
      [
        "STM7gPY1WTYXq9NvGDatfVXzLwKqRn8AaioQ2hxTDgy97YnJz8iq6",
        1
      ]
    ]
  },
  "posting": {
    "weight_threshold": 1,
    "account_auths": [],
    "key_auths": [
      [
        "STM7PYKjsTGs1Y3eHxQV99KGjh1LWUyHofuSrcdvccN124mWTZFQ4",
        1
      ]
    ]
  },
  "memo": "STM7Za1SX4X9h1huDhP3X64E5HsGvg8tiPE5g5ELbhqrxfkkizwu7"
}
Witness Votes
0 / 30
No active witness votes.
[]